Administration Module
Step 1: Add Role
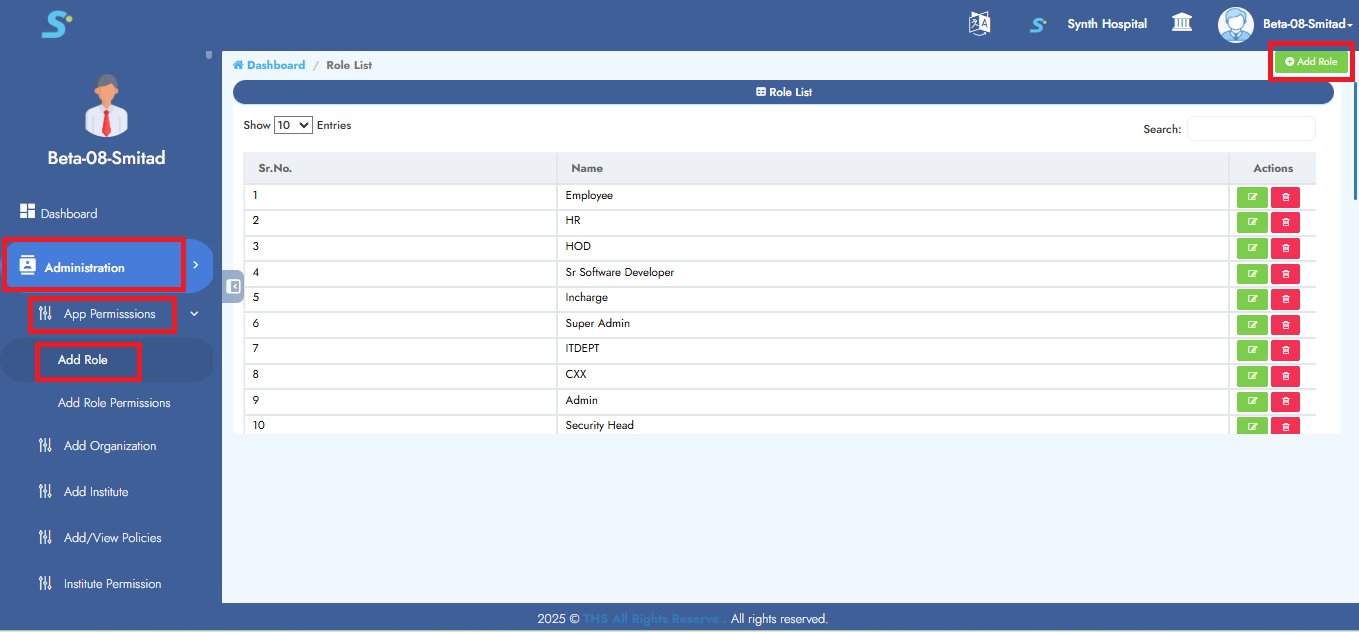
Go to Administration > App Permissions, then click on Add Role from the side menu.
Click the Add Role button located at the top right.
Step 2: Saving Role
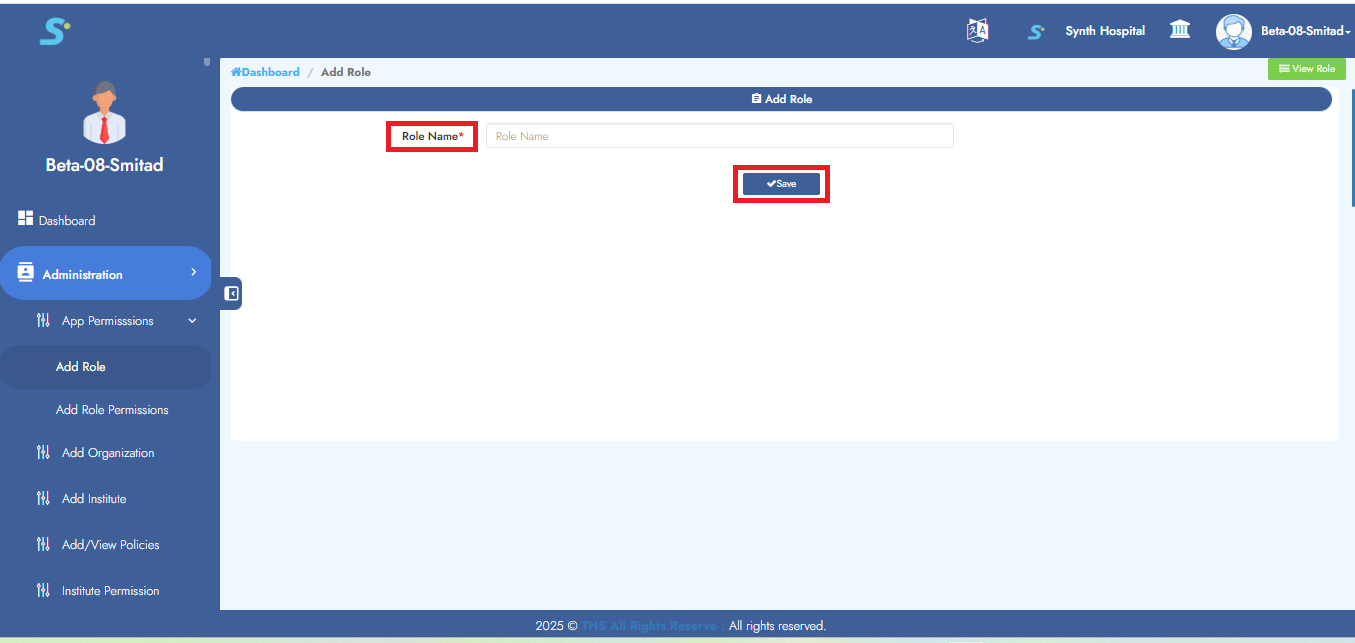
Enter the Role Name, then click on the Save button to successfully add the role.
Step 3: Adding Permissions
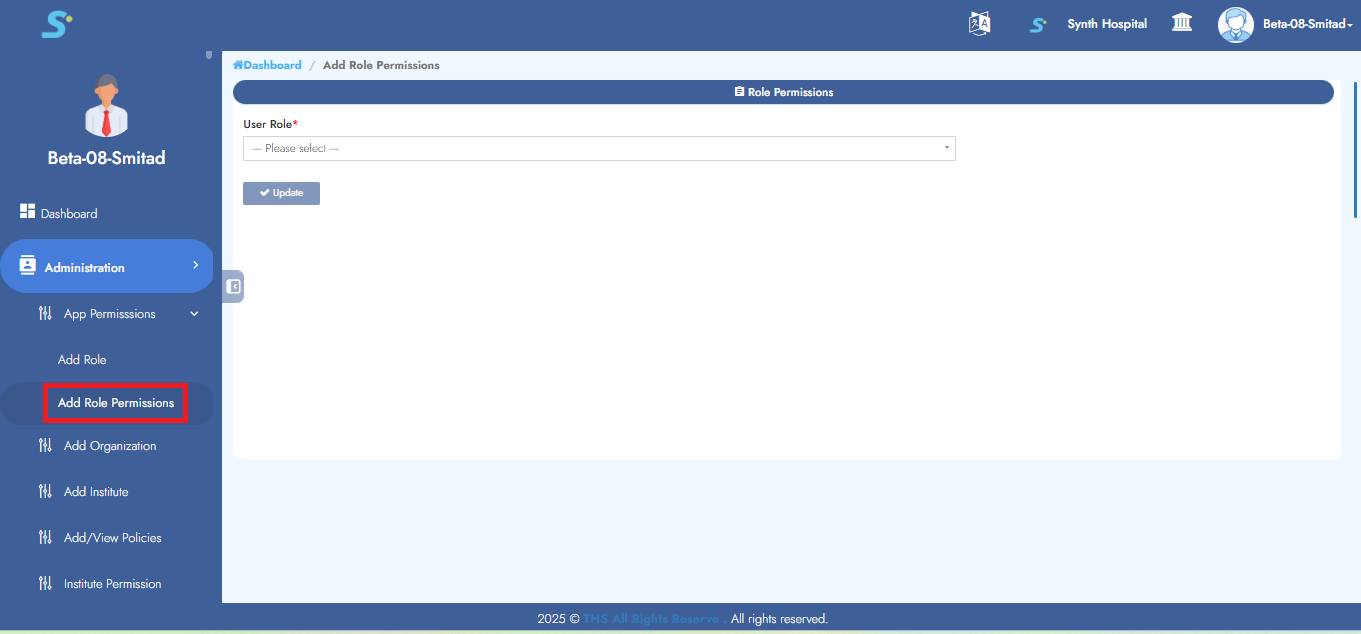
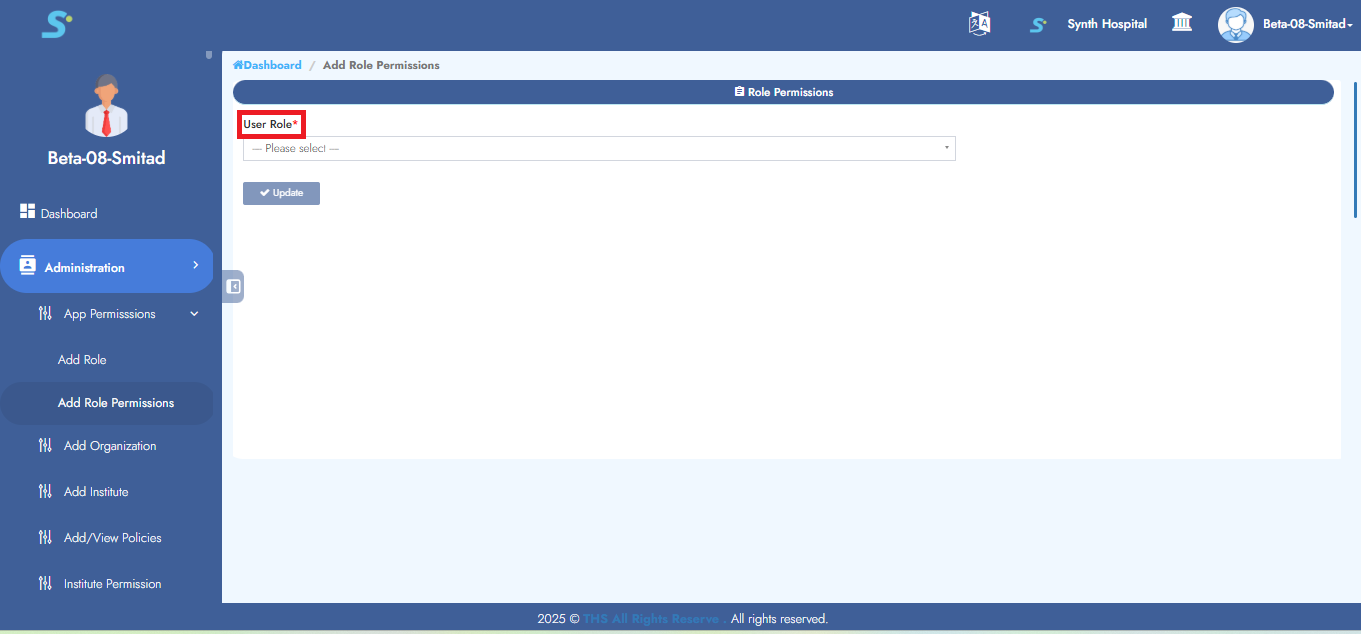
Go to Administration > App Permissions, then click on Add Role Permissions from the side menu.
Step 4: Select User Role
From the drop-down list, select the role for which you want to assign permissions.
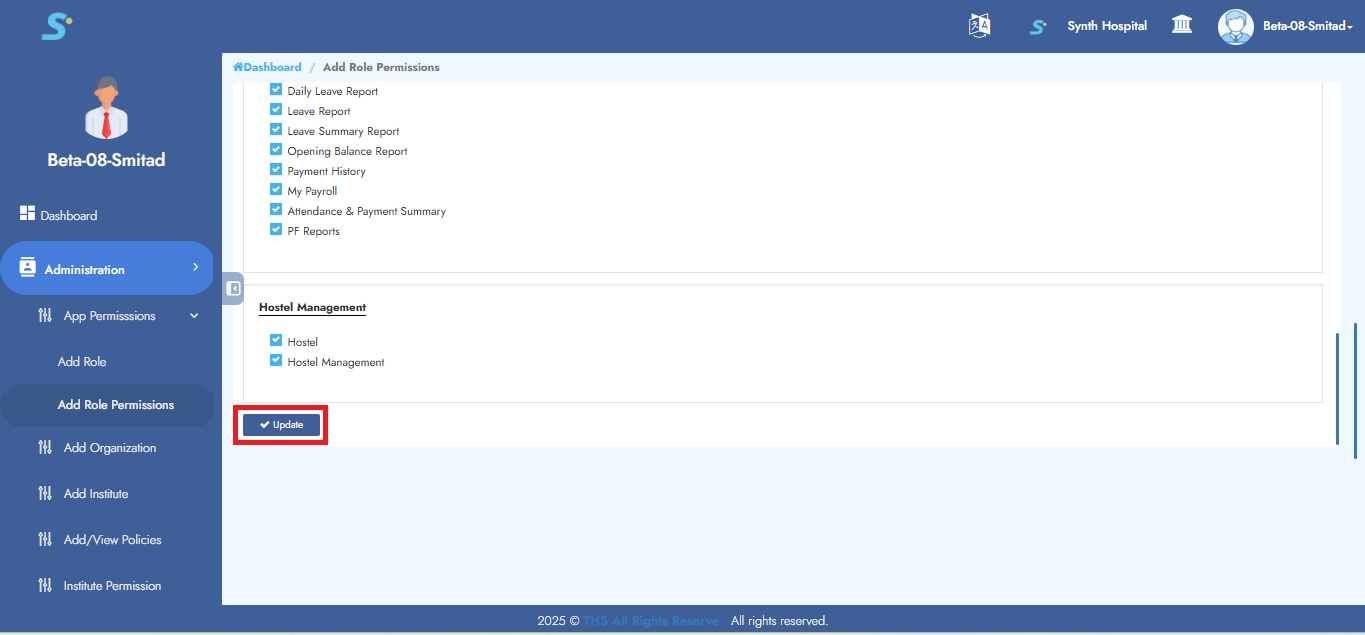
Step 5: Assign Permissions to Role
Tick the required checkboxes to assign permissions to the selected role.
Click the Update button to save the changes.
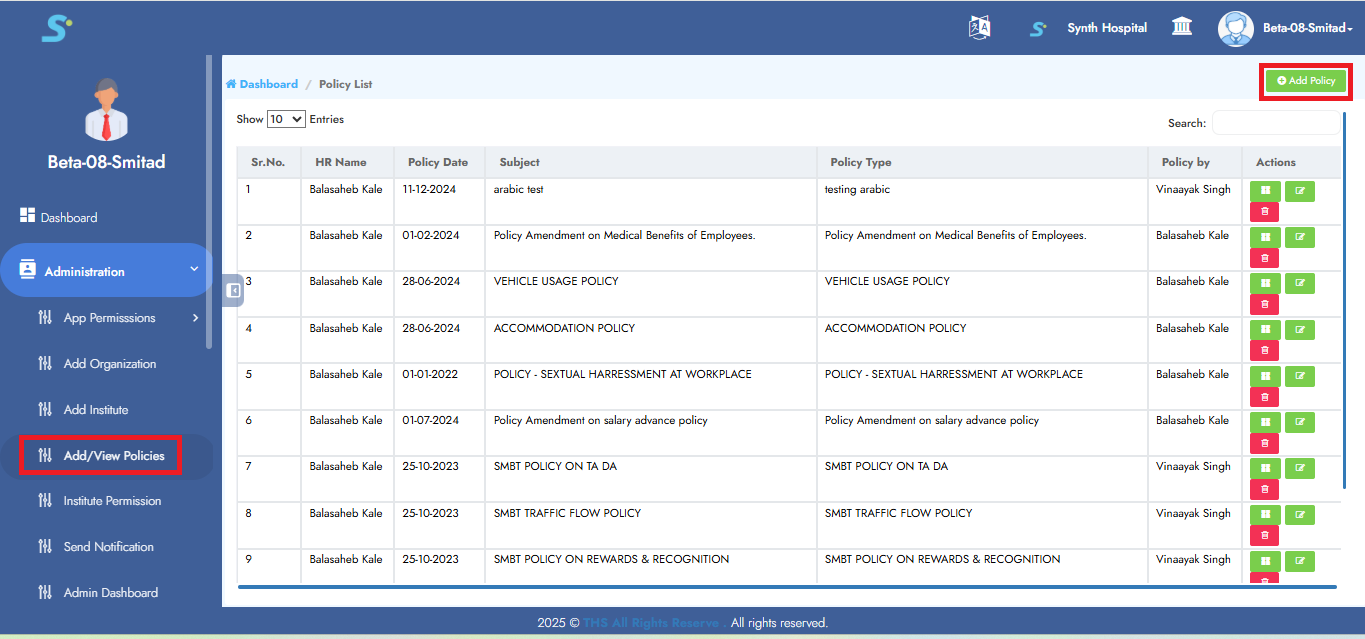
Step 6: Add/View Policies
Go to the Administration module, then click on Add/View Policies from the side menu.
Click the Add Policy button at the top right corner.
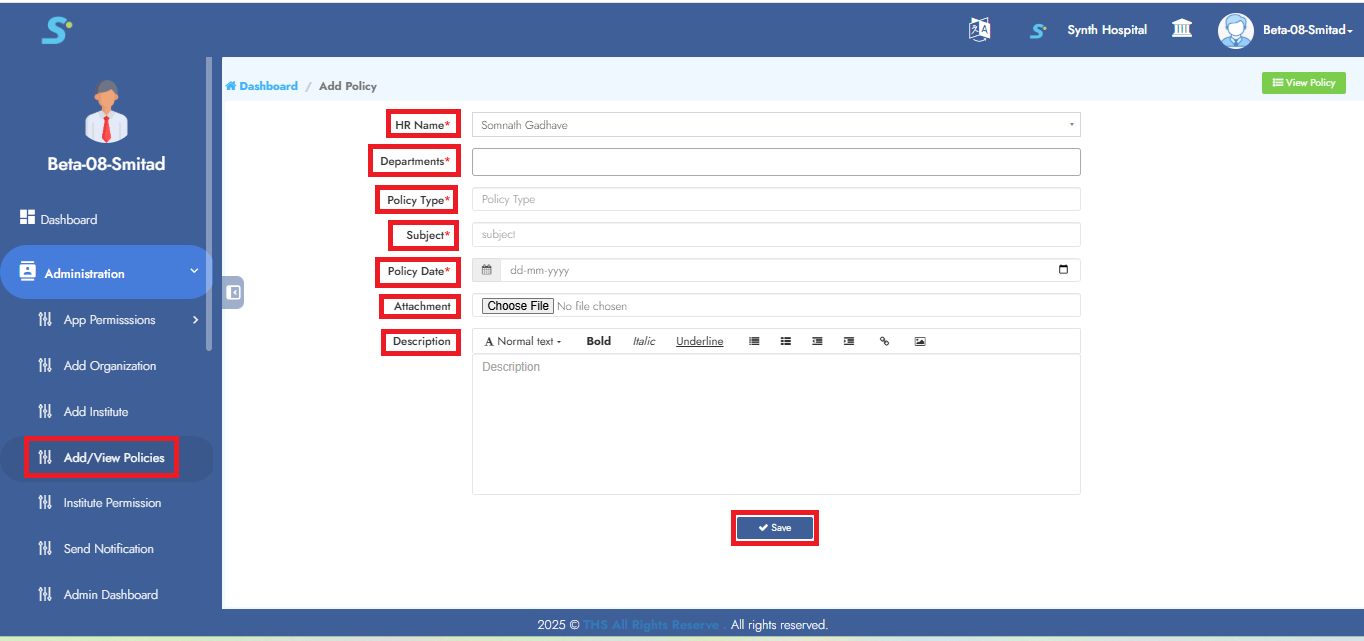
Step 7: Saving Policy
Enter the following fields:
- Select Department
- Policy Type
- Subject
- Policy Date
- Attachment
- Description
Click the Save button to successfully add the policy.
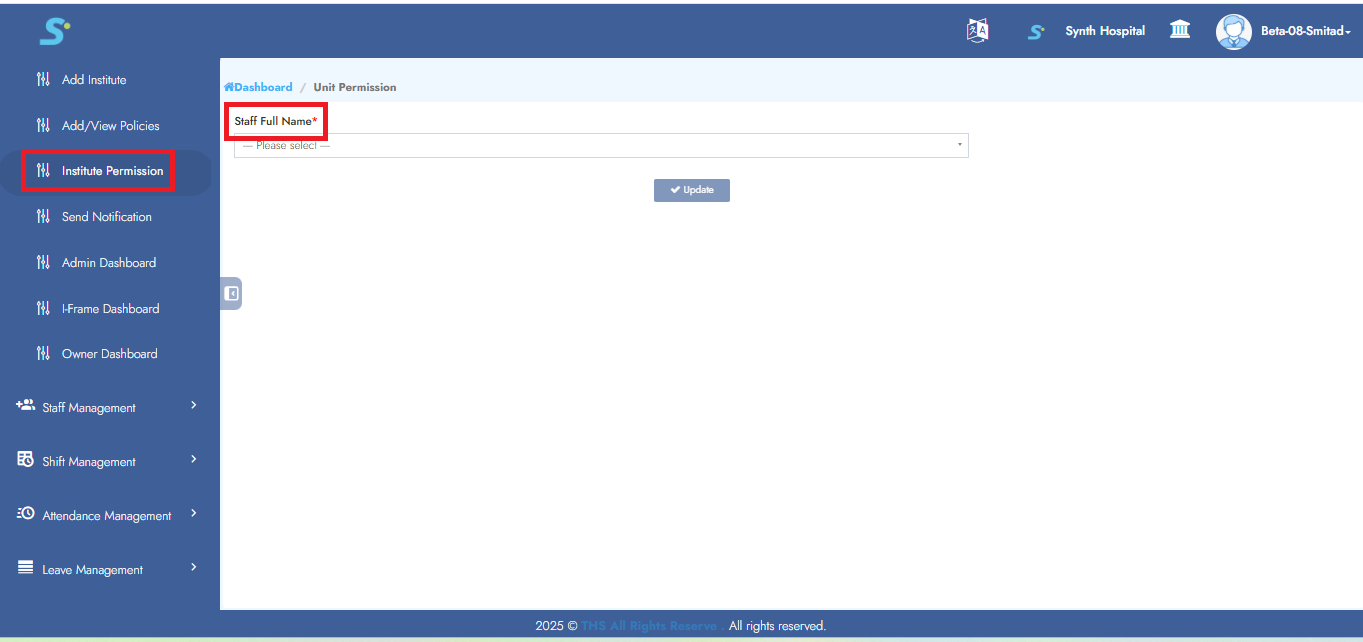
Step 8: Institute Permission
To allow an employee access to multiple institutes:
- Select the employee's name
- Tick the checkboxes for institutes to grant permission
Click the Update button to save the permissions.
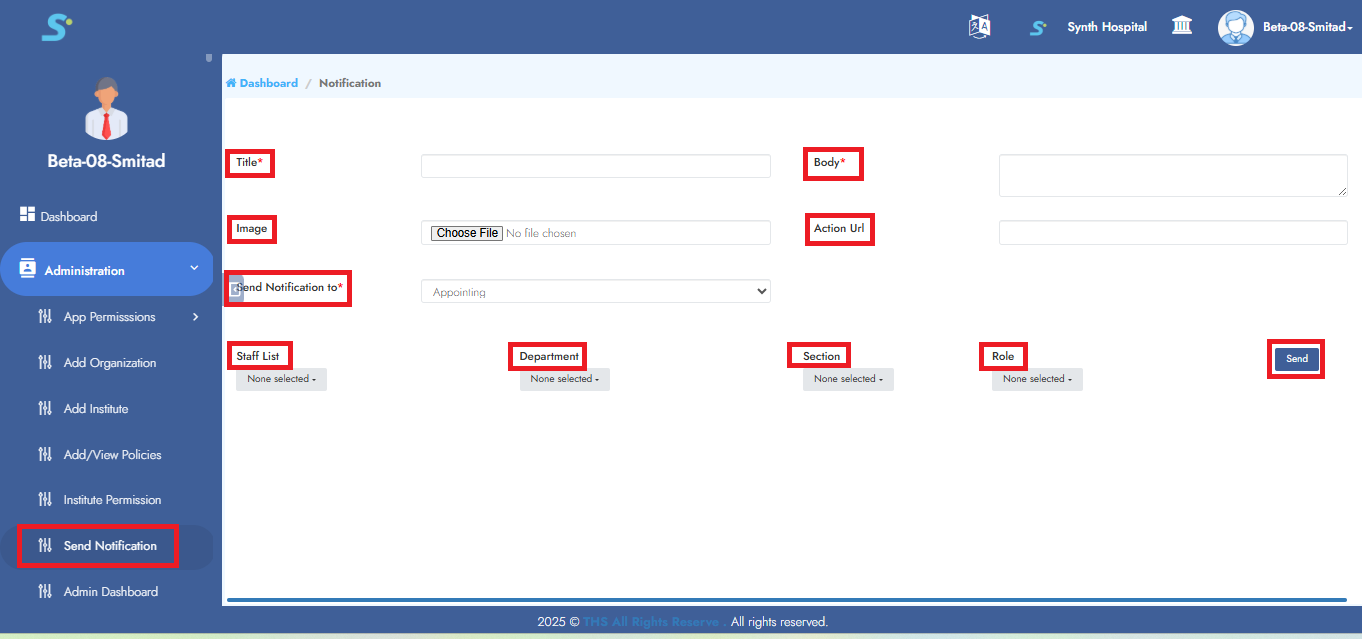
Step 9: Send Notification
Click the Create button shown on the right side of the page.
After creating and sending the notification, the notification list will be displayed on the same page.
Fill in the following fields:
- Title
- Body
- Image
- Action URL
- Send Notification To
- Staff List
- Department
- Section
- Role
Click the Send button to send the notification.
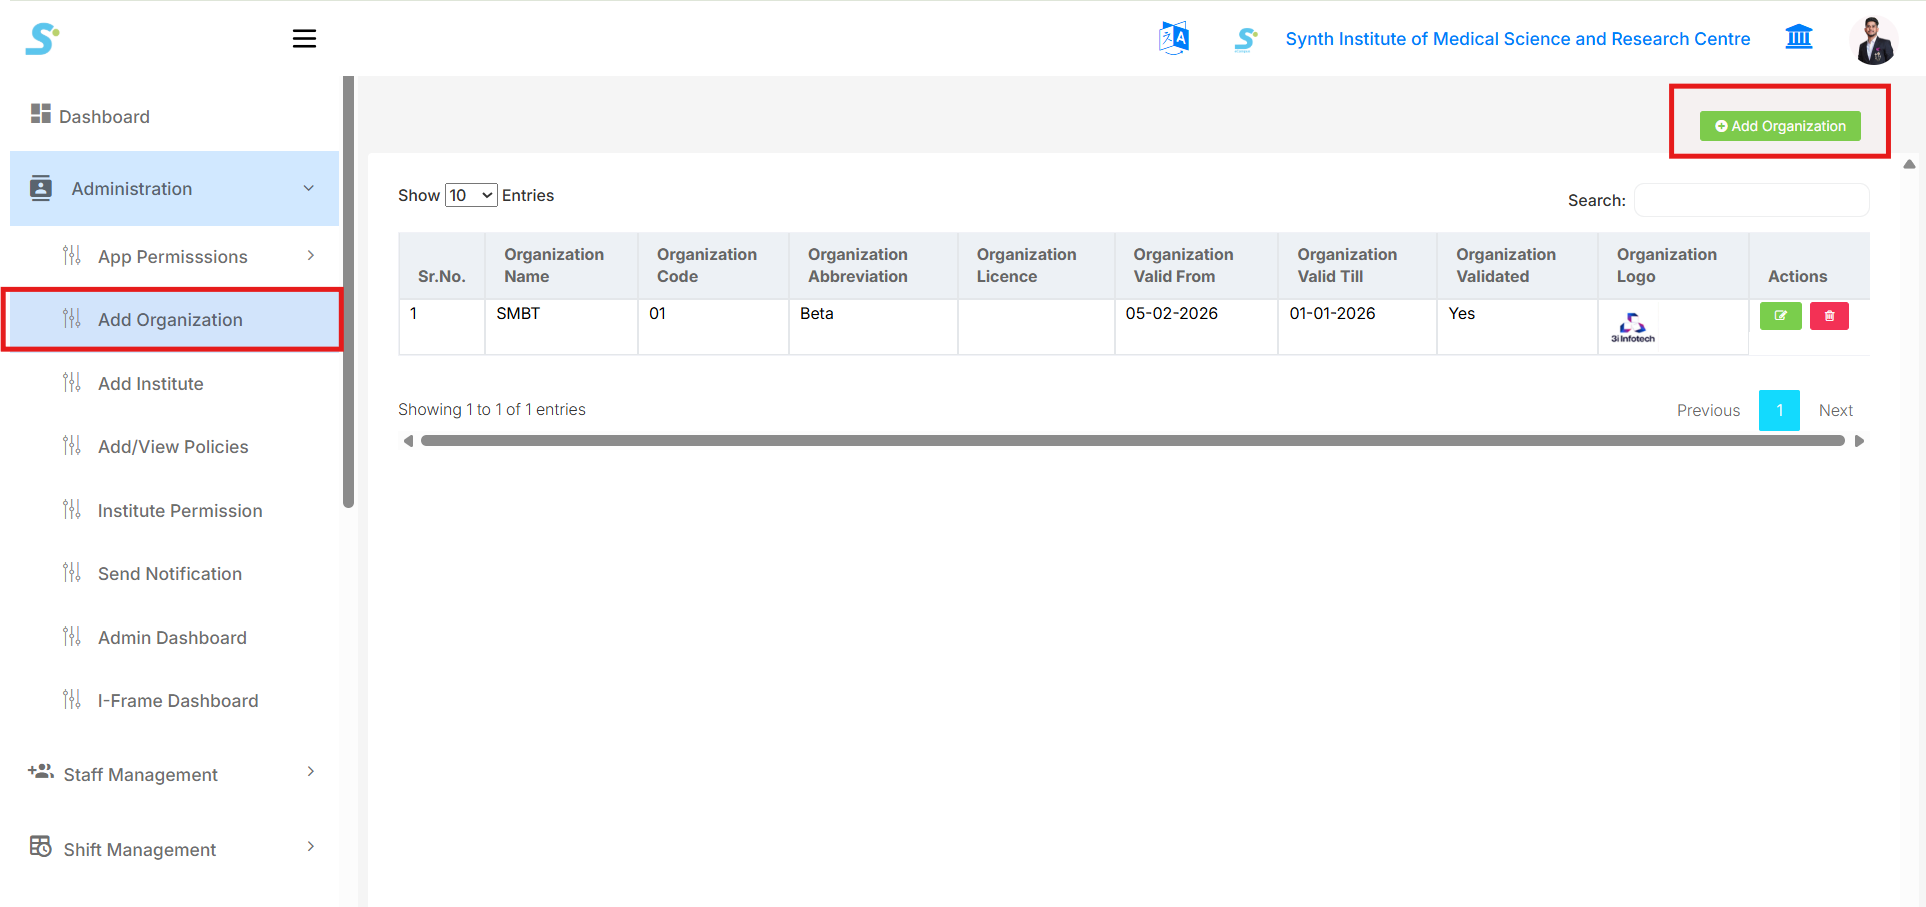
Step 10: View Organizations
Go to Administration > Add Organization from the side menu.
The organization list will be displayed with details such as Organization Name, Code, Abbreviation, Licence, Valid From, Valid Till, Validated status, Logo, and Actions.
Click the Add Organization button at the top right corner.
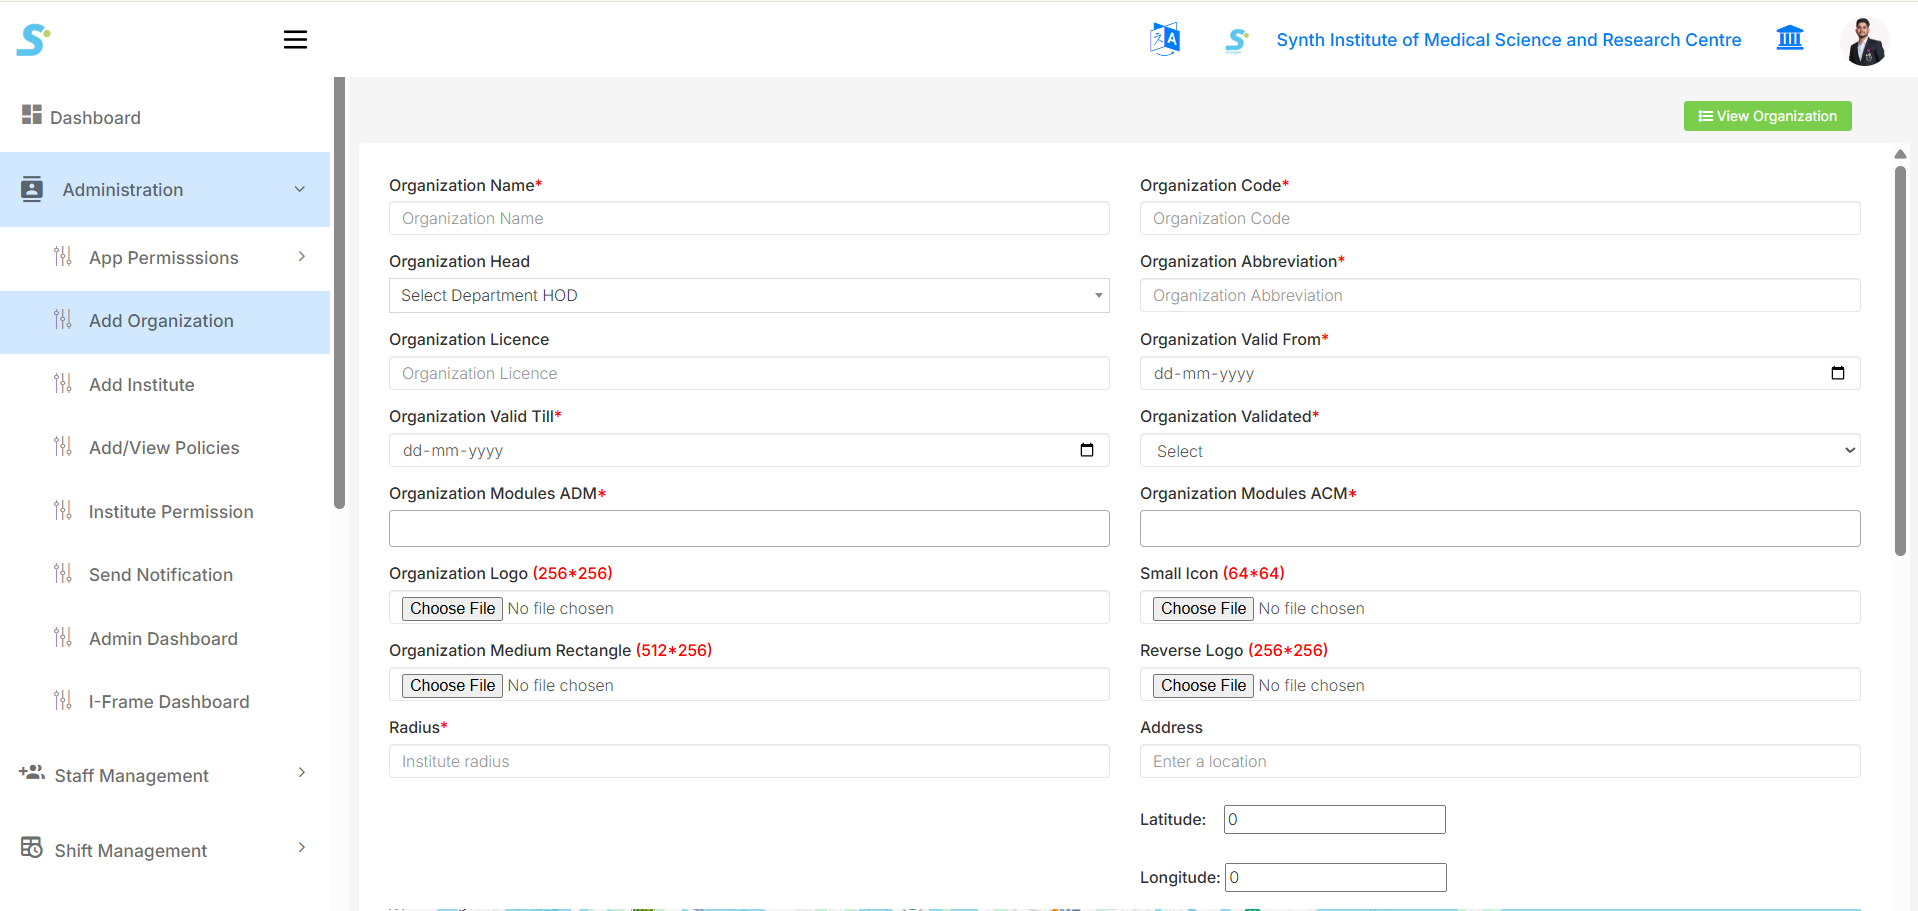
Step 11: Add Organization Details
Enter the required organization details:
- Organization Name
- Organization Code
- Organization Head
- Organization Abbreviation
- Organization Licence
- Organization Valid From
- Organization Valid Till
- Organization Validated
- Organization Modules ADM
- Organization Modules ACM
- Organization Logo
- Small Icon
- Organization Medium Rectangle
- Reverse Logo
- Radius
- Address
- Latitude
- Longitude
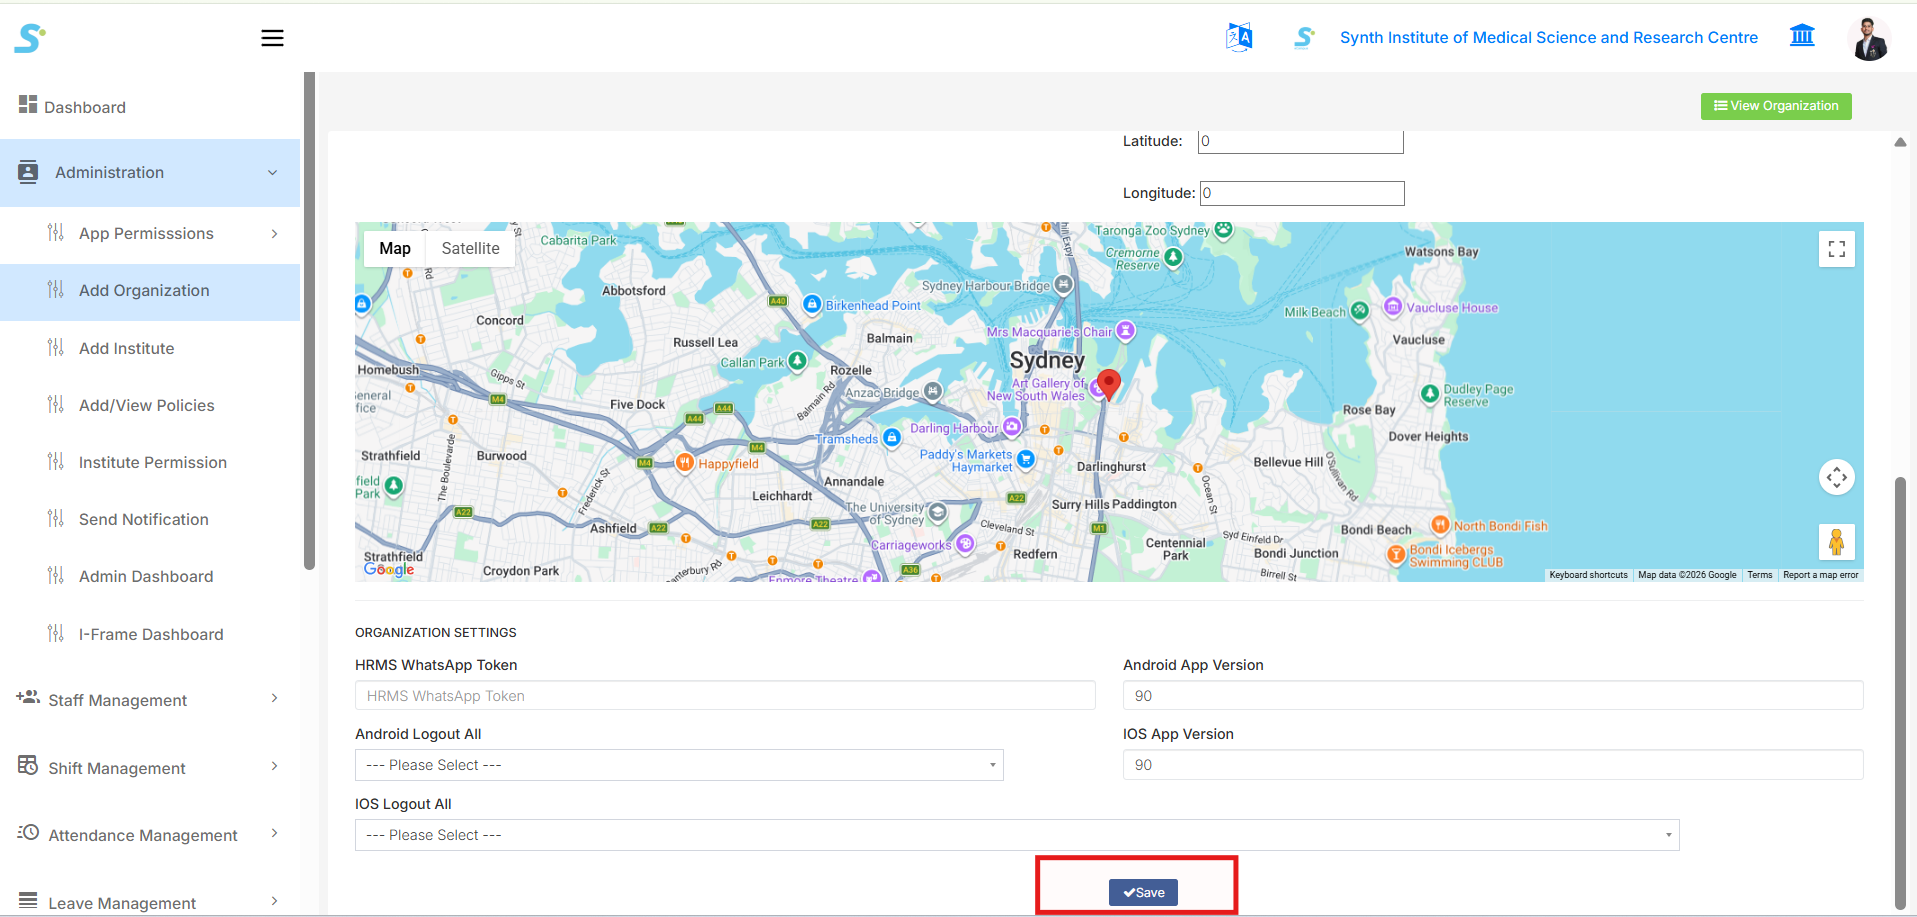
Step 12: Save Organization
After entering all required details, check the map/location details and organization settings.
Click the Save button to successfully add the organization.
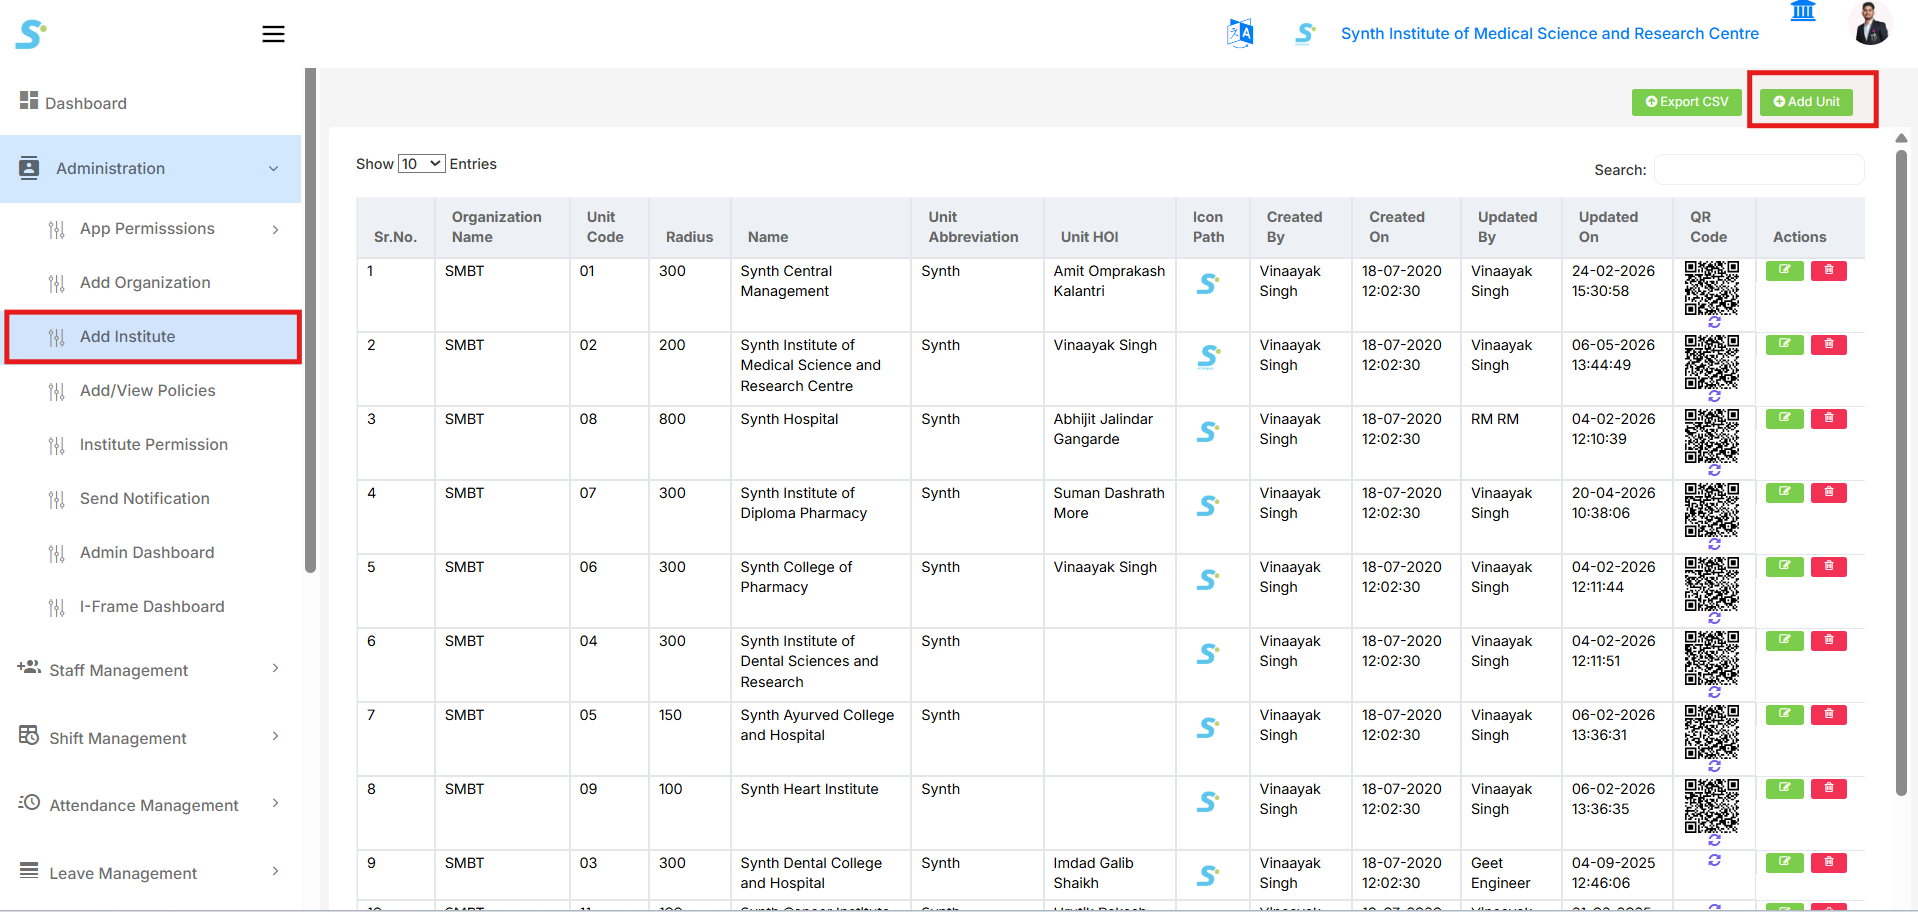
Step 13: View Units
Go to Administration > Add Institute from the side menu.
The unit list will be displayed with details such as Organization Name, Unit Code, Radius, Name, Unit Abbreviation, Unit HOI, Icon Path, Created By, Created On, Updated By, Updated On, QR Code, and Actions.
Click the Add Unit button at the top right corner.
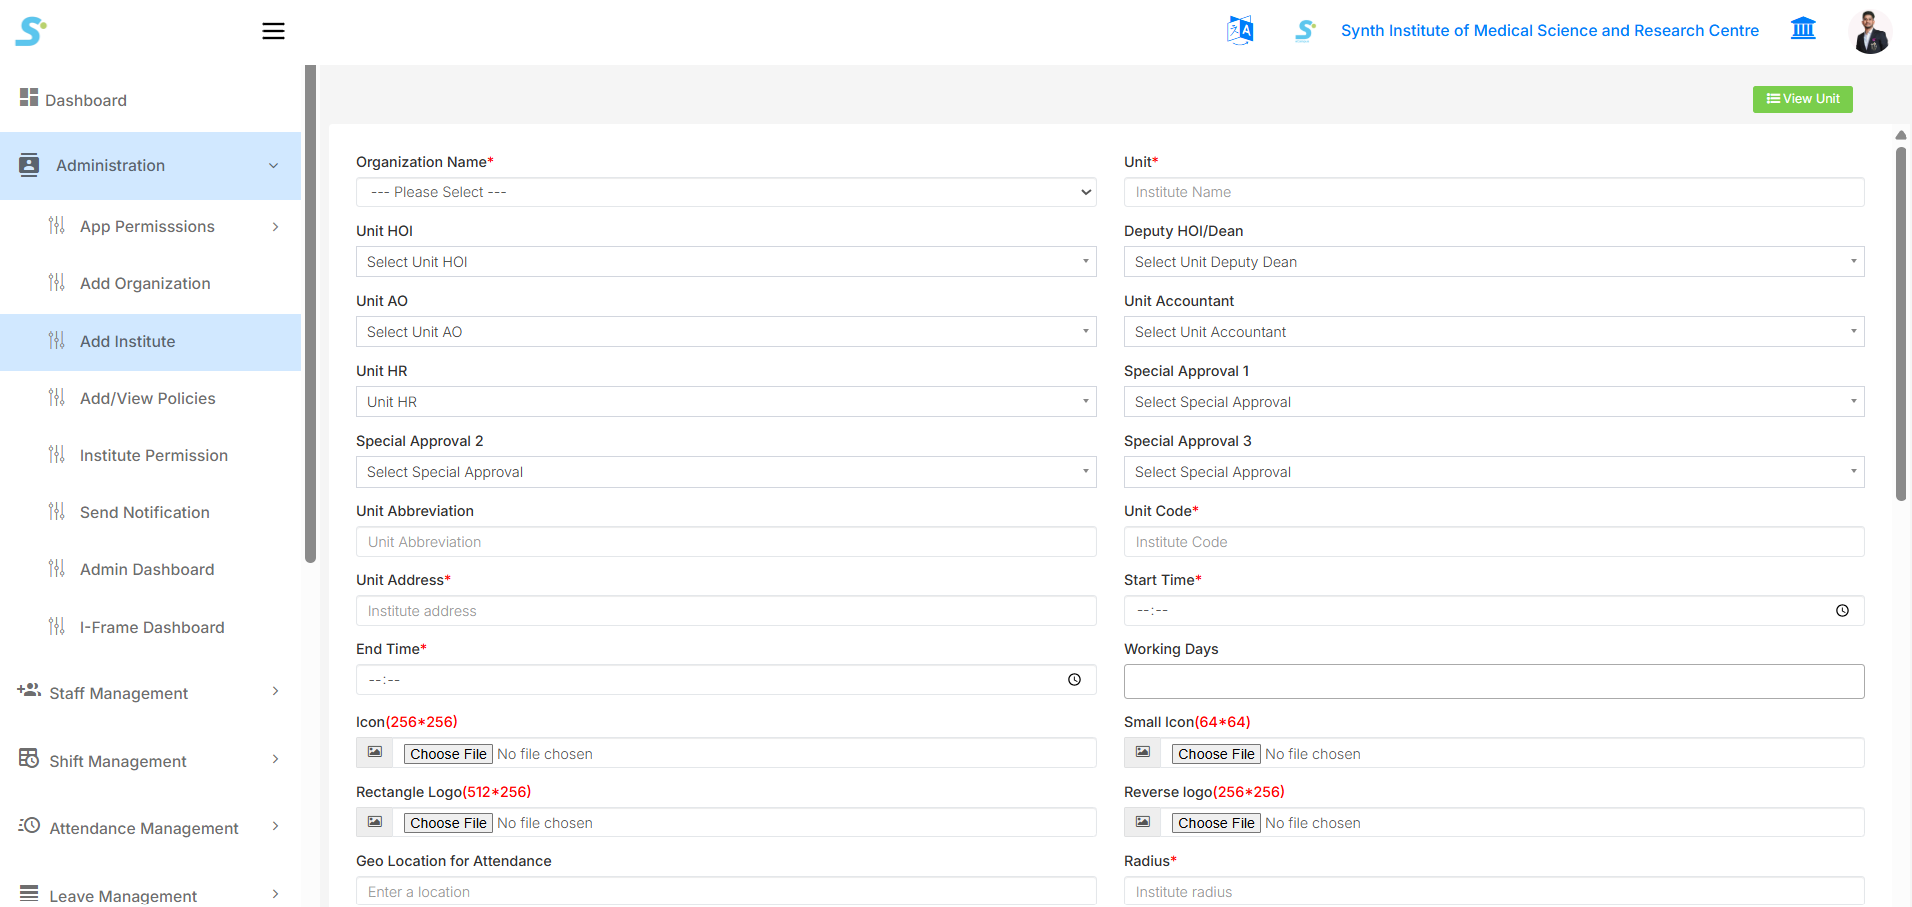
Step 14: Add Unit Details
Enter the required unit details:
- Organization Name
- Unit
- Unit HOI
- Deputy HOI/Dean
- Unit AO
- Unit Accountant
- Unit HR
- Special Approval 1
- Special Approval 2
- Special Approval 3
- Unit Abbreviation
- Unit Code
- Unit Address
- Start Time
- End Time
- Working Days
- Icon
- Small Icon
- Rectangle Logo
- Reverse Logo
- Geo Location for Attendance
- Radius
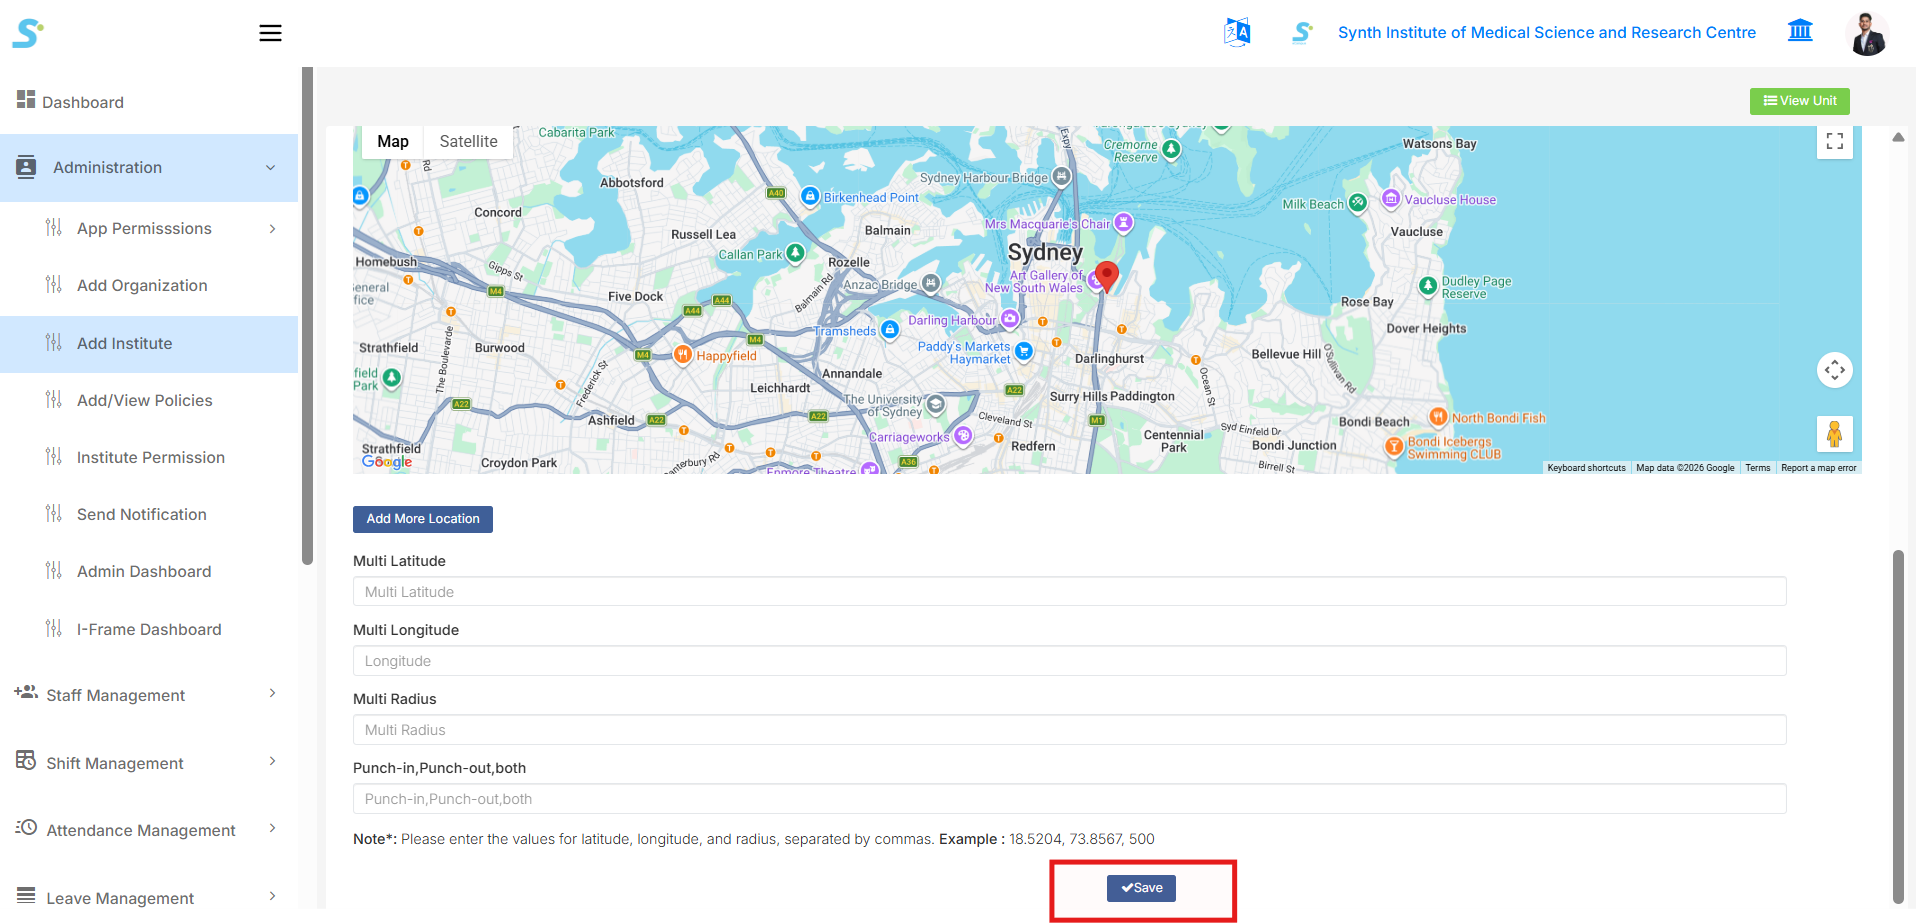
Step 15: Save Unit
After entering all required details, check the map/location details.
Fill in the multi-location details if required:
- Multi Latitude
- Multi Longitude
- Multi Radius
- Punch-in, Punch-out, both
Click the Save button to successfully add the unit.