Payroll Management Module
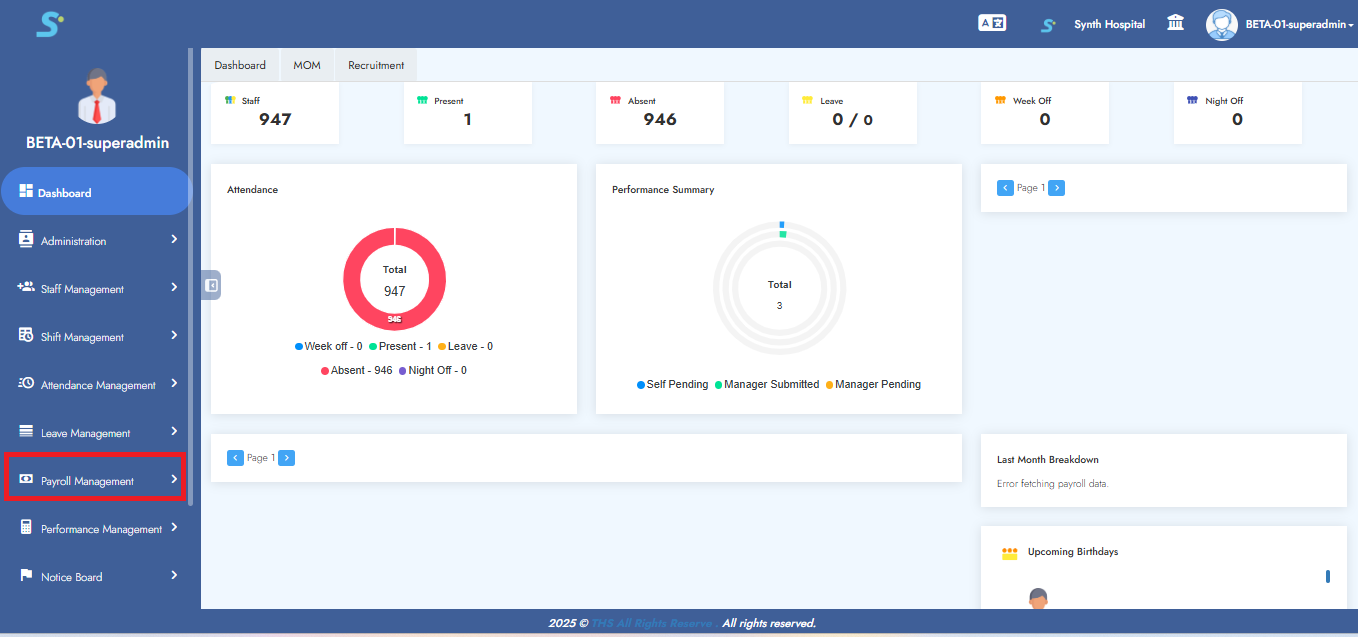
Step 1: Payroll Management – Getting Started
First, go to the Payroll Management module as shown in the image.
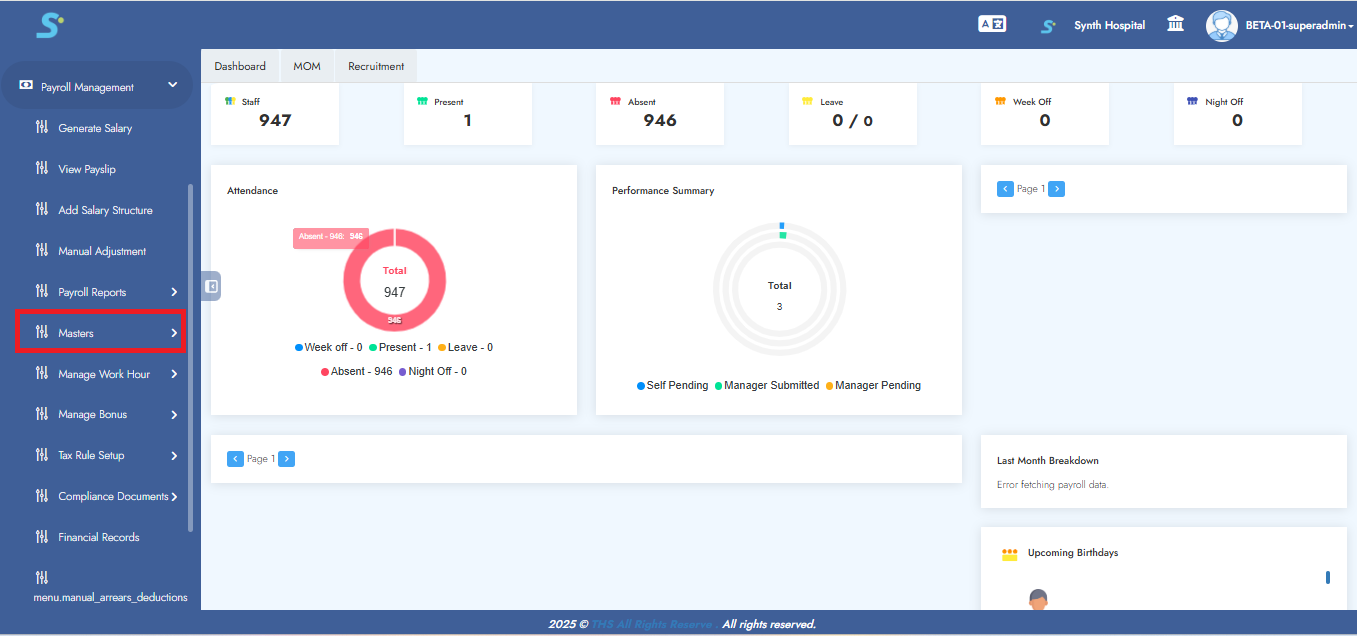
Step 2: Accessing Masters Section
Click on the Masters sub-module as shown in the image.
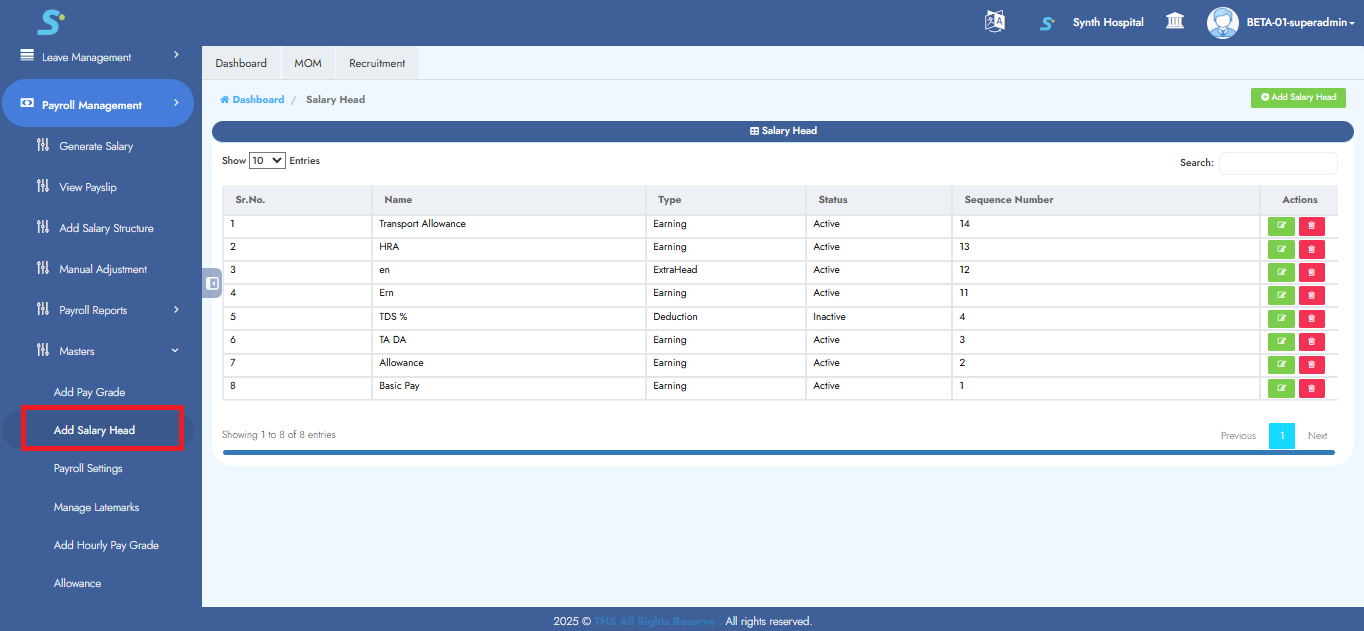
Step 3: Accessing Add Salary Head
Click on the Add Salary Head sub-module of Masters as shown in the image.
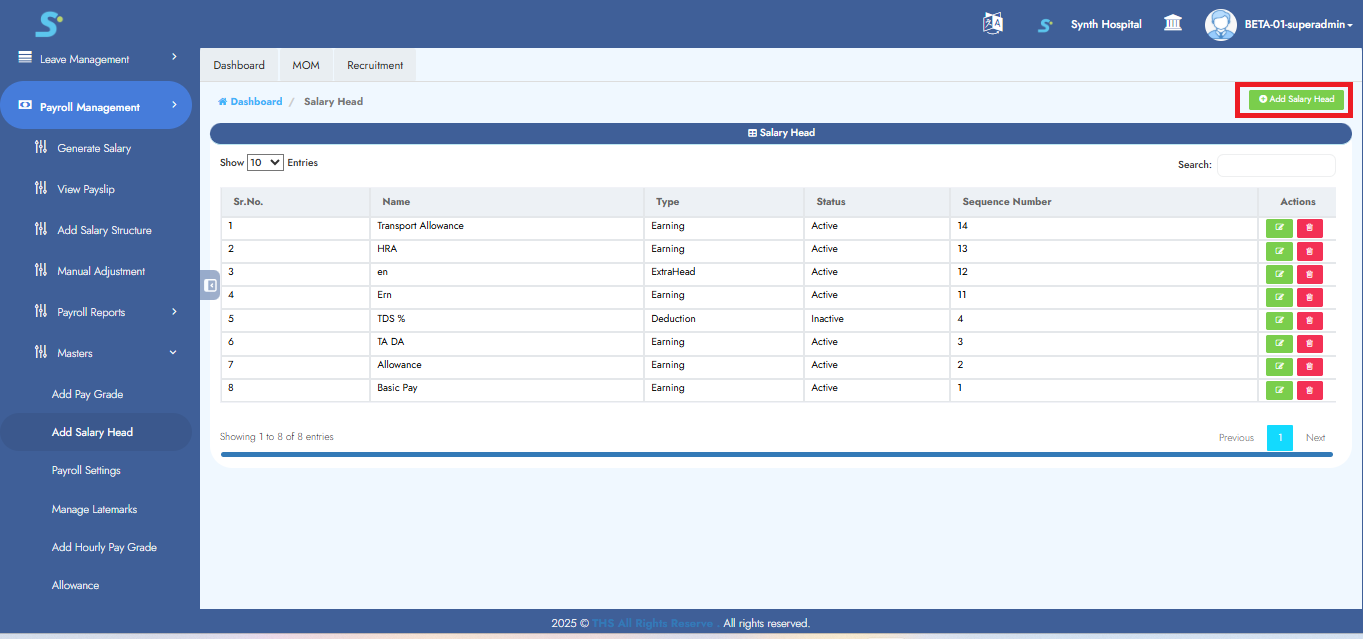
Step 4: Adding a New Salary Head
Click on the Add Salary Head button as shown in the image.
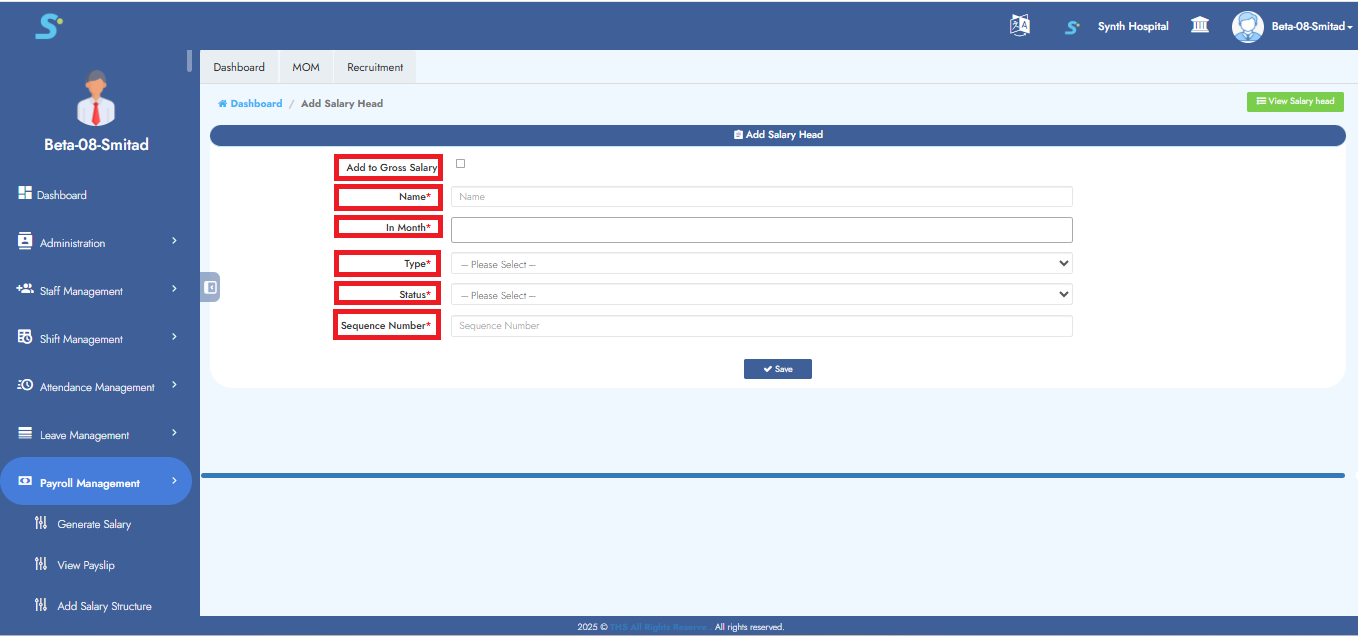
Step 5: Salary Head Creation
Enter the following details in the Add Salary Structure form:
1. Add to Gross Salary (optional)
2. Name of the salary head
3. In month
4. Type
5. Status
6. Sequence Number
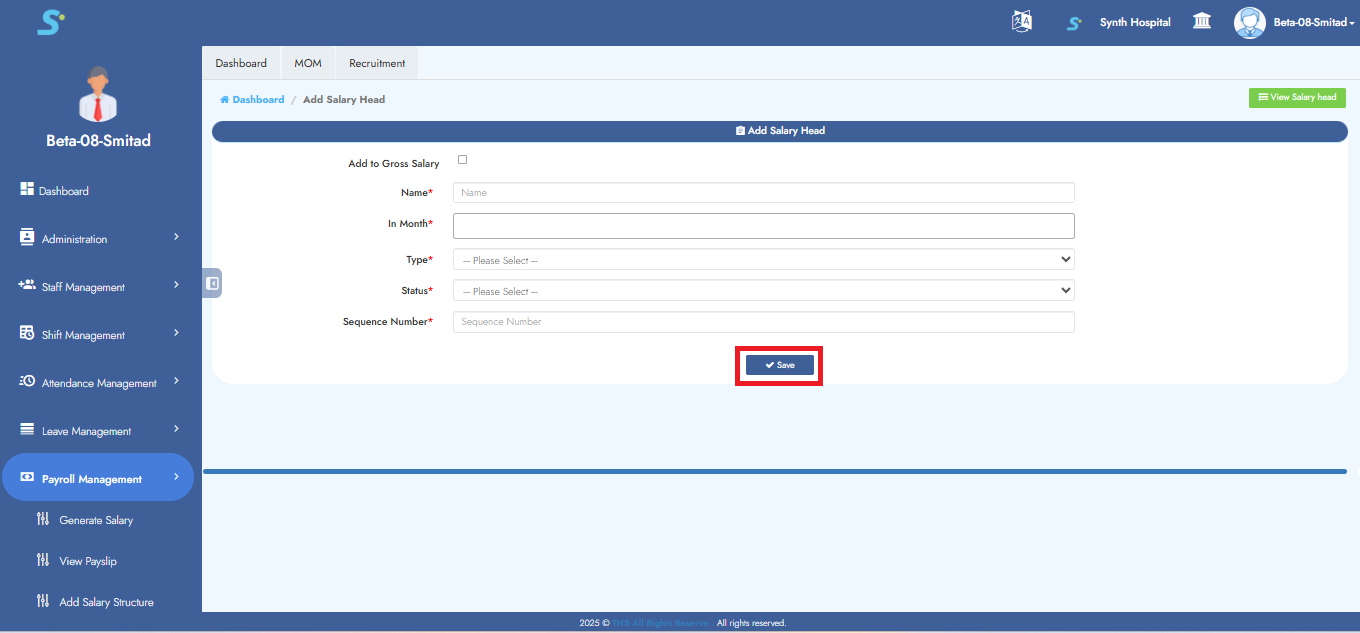
Step 6: Saving Salary Head
Once all details are filled in the Salary Head form, click on the Save button to save the entry.
A success message will confirm that the record has been saved.
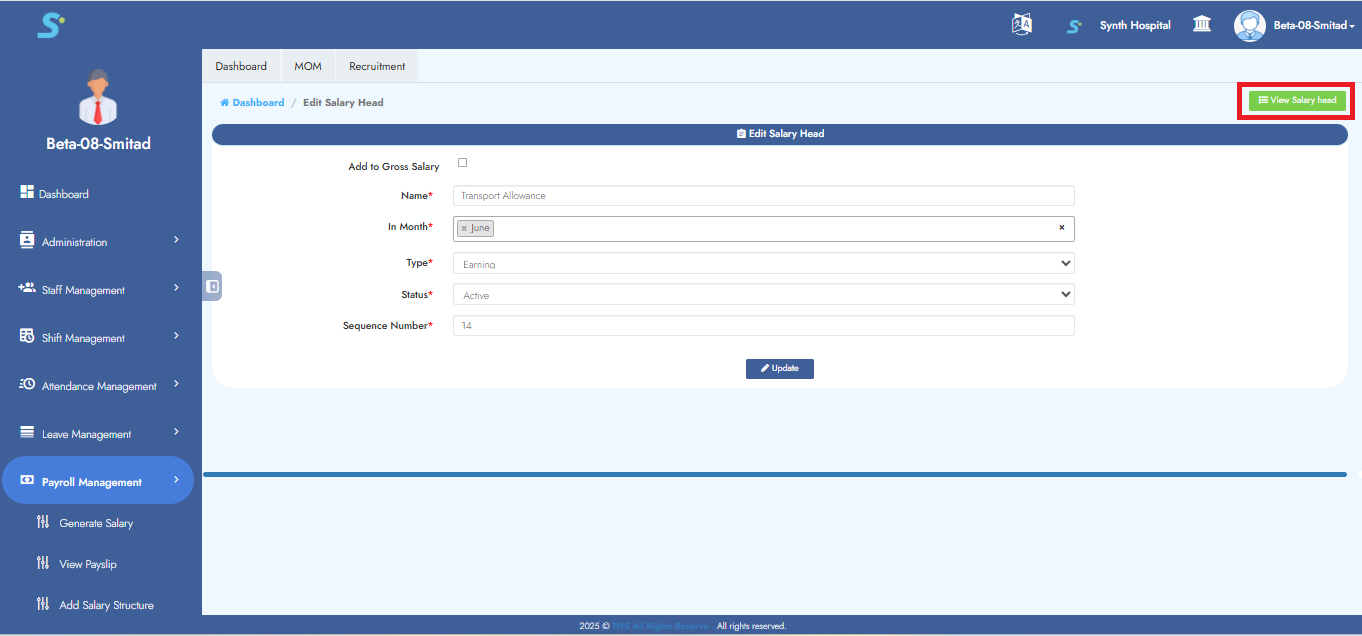
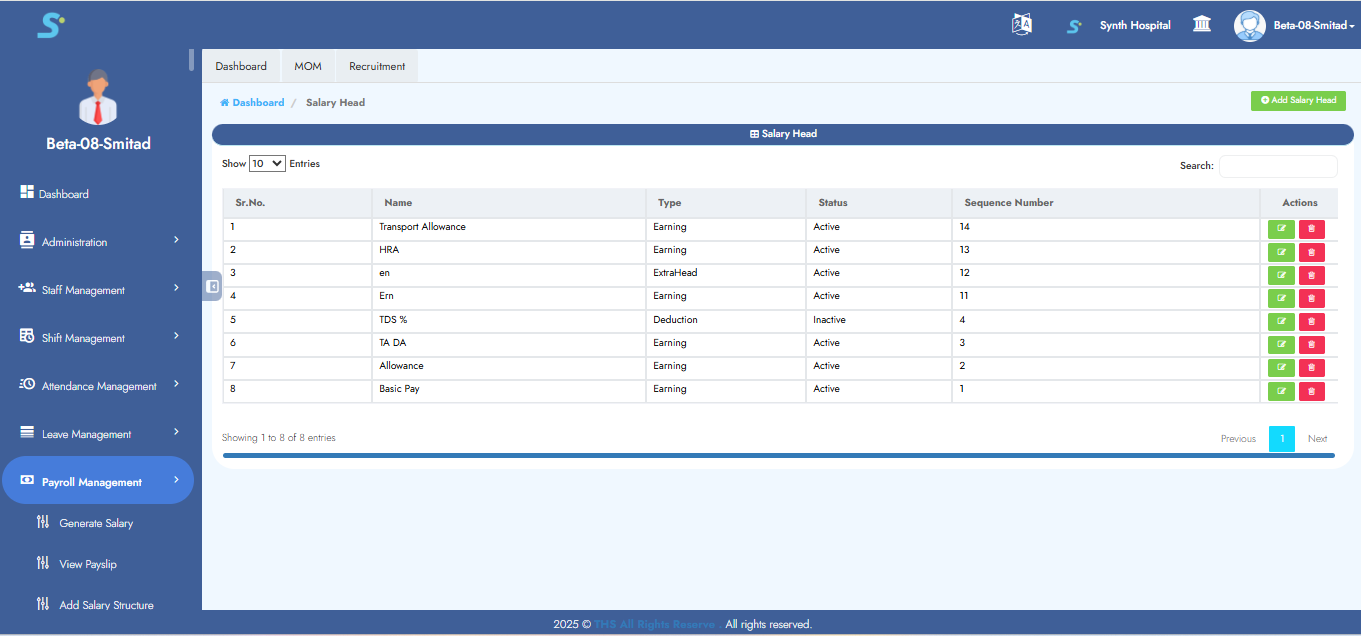
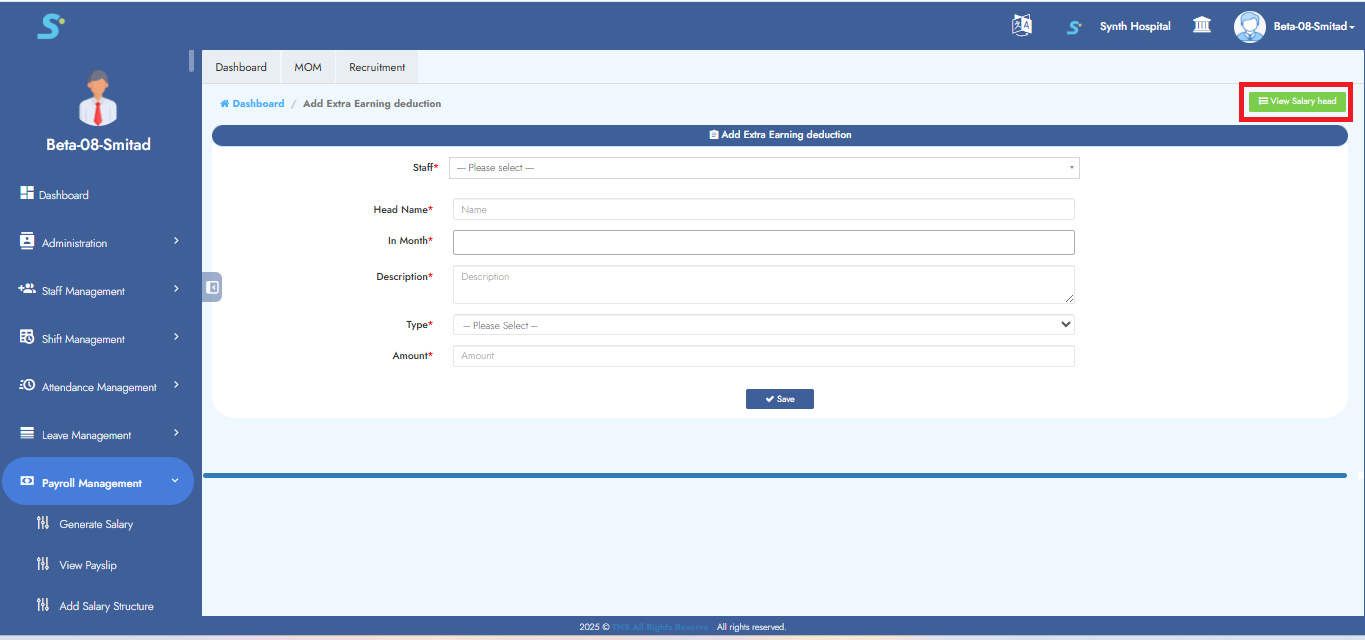
Step 7: View Salary Head
To view the list of existing salary heads, click on the View Salary Head option.
Step 8: Go to Payroll Settings
Navigate to the Payroll Settings sub-module under Masters.
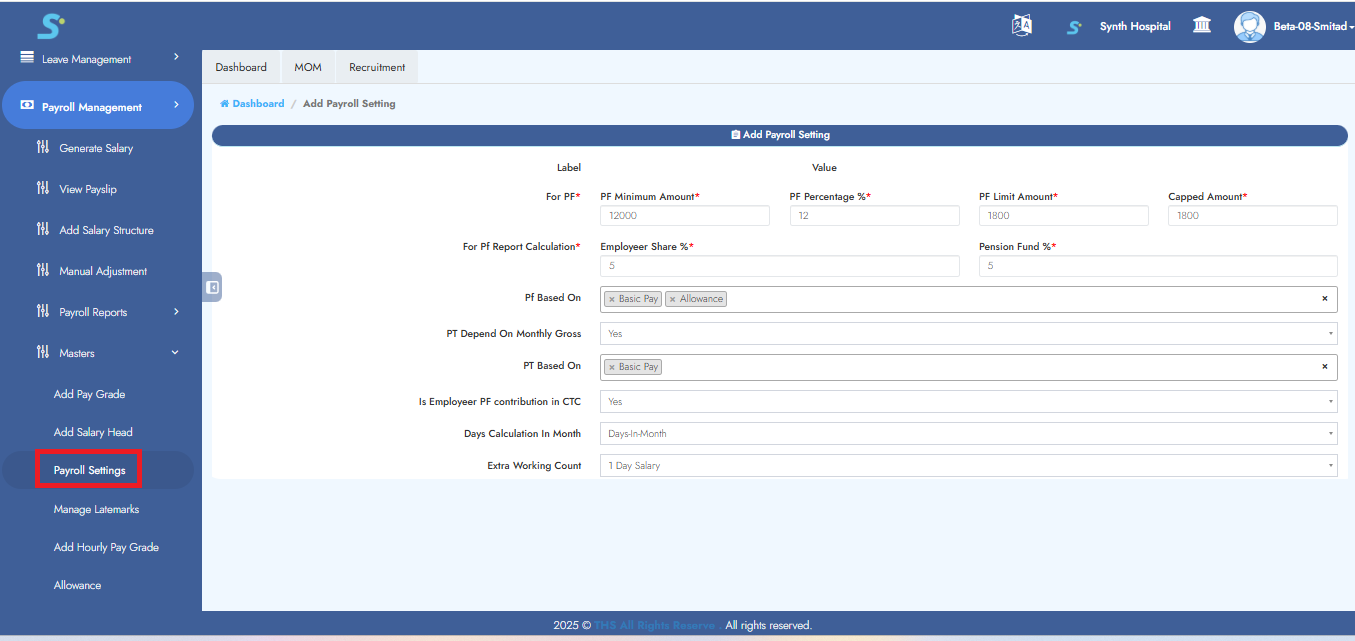
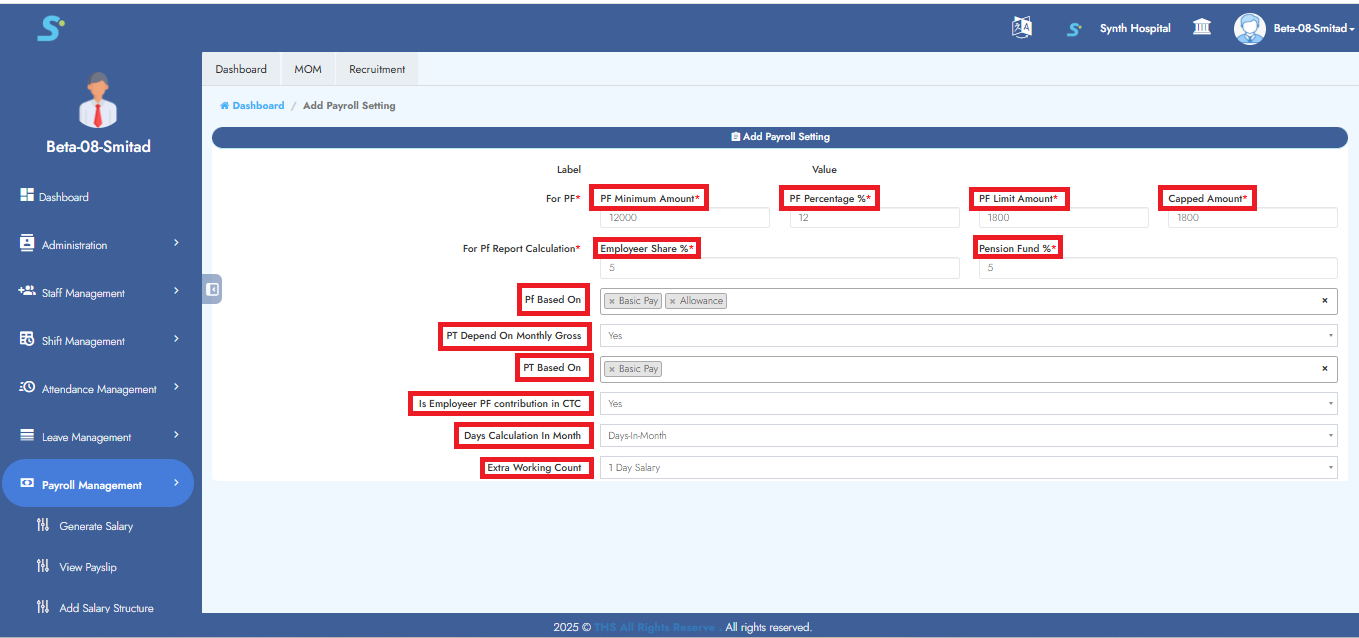
Step 9: Configure Payroll Settings
Enter the following details in the form:
For PF:
- PF Minimum Amount*
- PF Percentage %*
- PF Limit Amount*
- Capped Amount*
For PF Report Calculation:
- Employer Share %*
- Pension Fund %*
- PF Based On (Dropdown)
- PT Depend On Monthly Gross (Yes/No)
- PT Based On (Dropdown)
- Is Employer PF contribution in CTC (Yes/No)
- Days Calculation In Month (Dropdown)
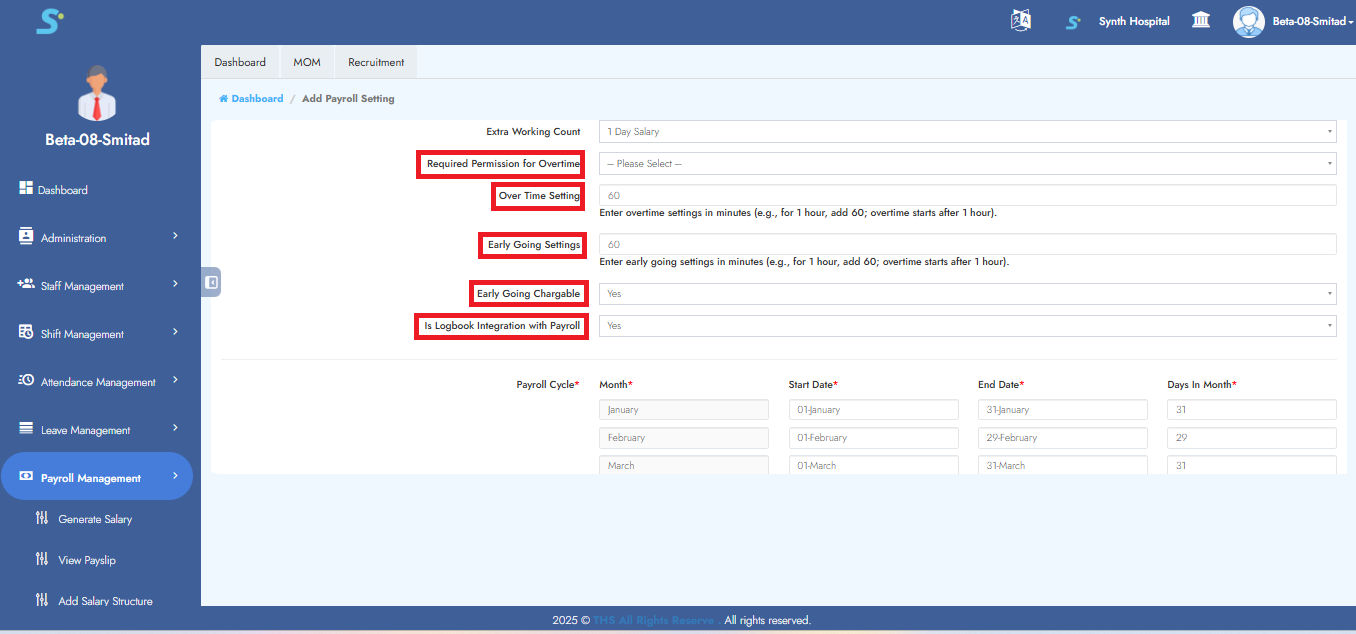
- Extra Working Count (Dropdown)
- Required Permission for Overtime (Dropdown)
- Over Time Setting (in minutes)
- Early Going Settings (in minutes)
- Early Going Chargeable (Yes/No)
- Is Logbook Integration with Payroll (Yes/No)
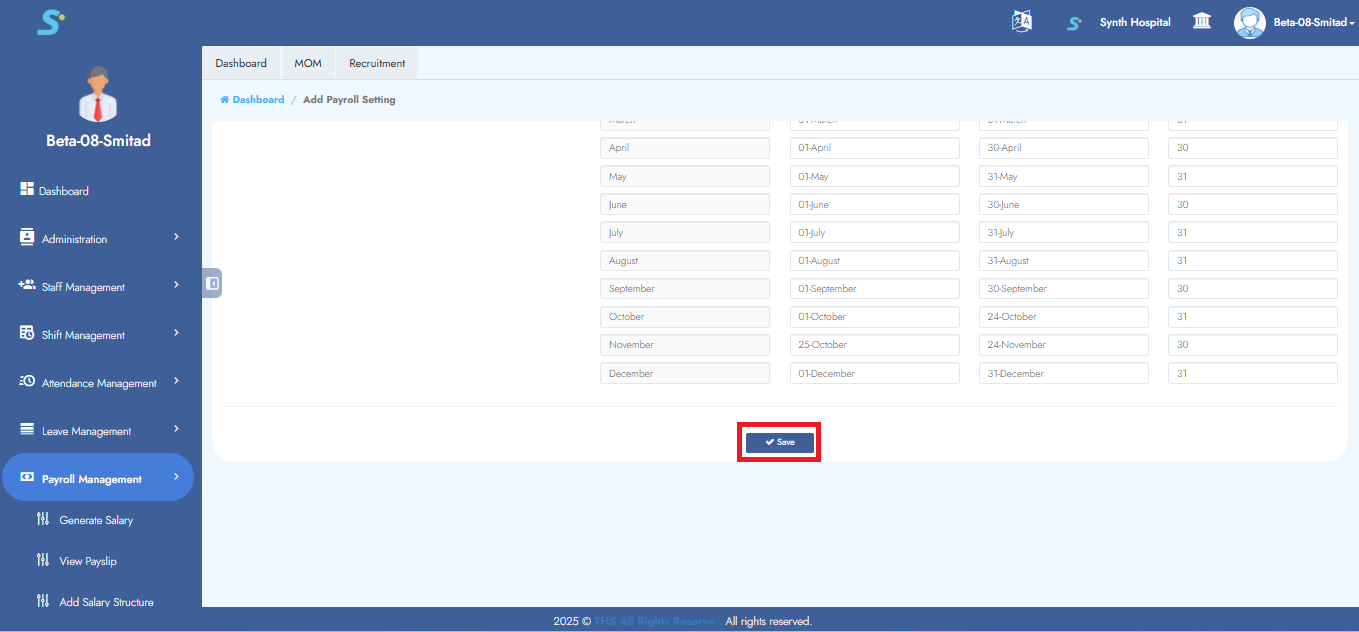
Step 10: Save Payroll Settings
Click the Save button to submit the details.
A confirmation message saying "Record saved successfully" will appear.
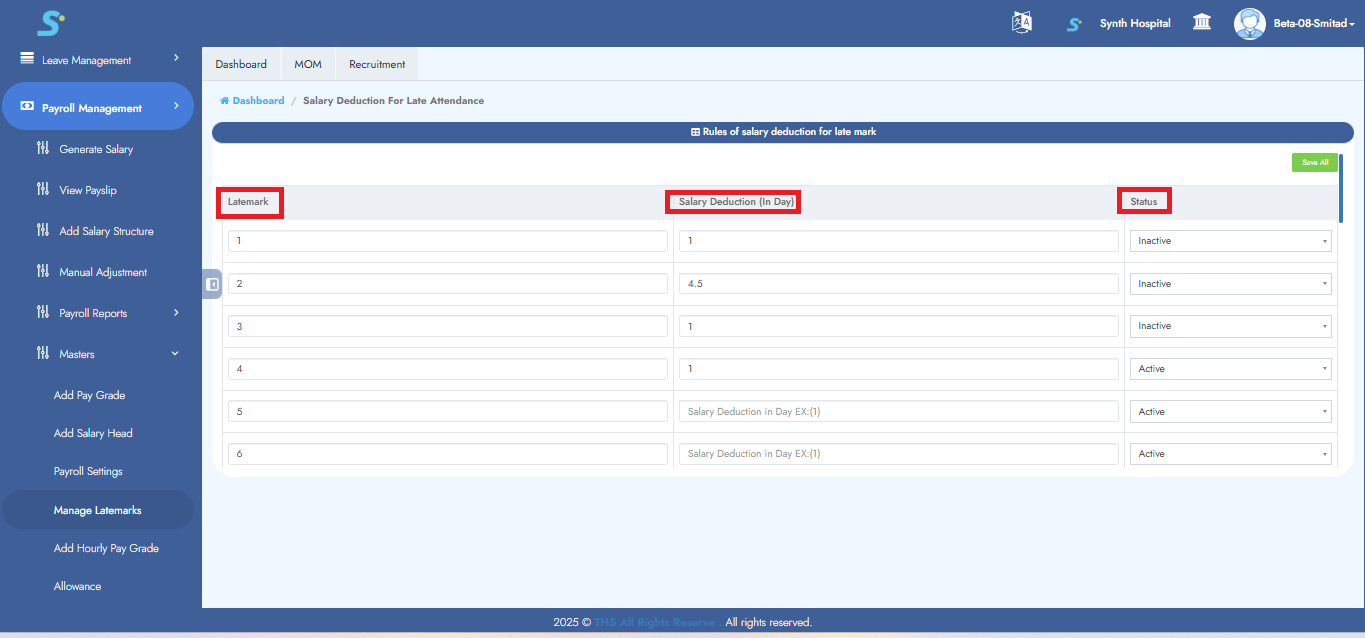
Step 11: Salary Deduction for Late Attendance
Set deduction values (in days) and status.
Example:
- After 3rd late mark → 0.5, Status: Active
- After 4th late mark → 0.5, Status: Active
Step 12: Salary Deduction for Early Going
Set deduction values (in days) and status.
Example:
- After 3rd early going → 0.5, Status: Active
- After 4th early going → 0.5, Status: Active

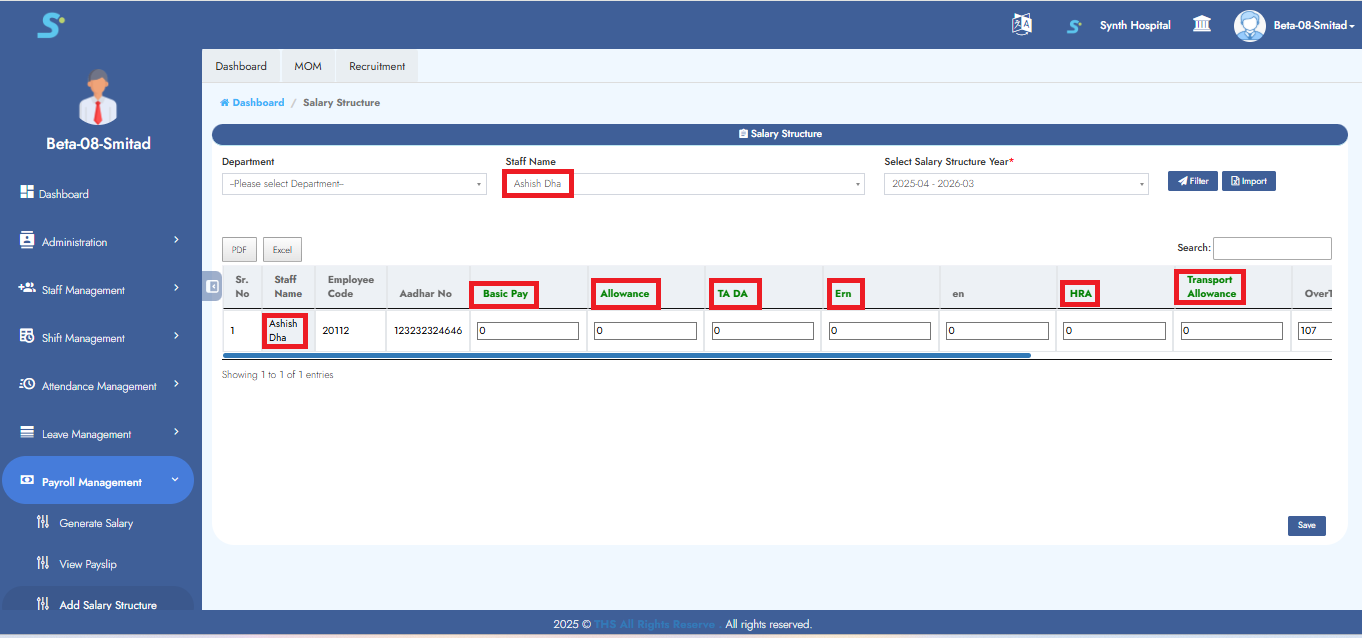
Step 13: Configure Salary Structure with Salary Heads
Click on the Add Salary Structure sub-module.
Select:
- Department (Dropdown)
- Staff Name (Dropdown)
- Salary Structure Year (Dropdown)
Click Filter.

Step 14: Enter Salary Head Details
The salary heads you created will appear in green.
Enter appropriate values for each head as shown in the image.
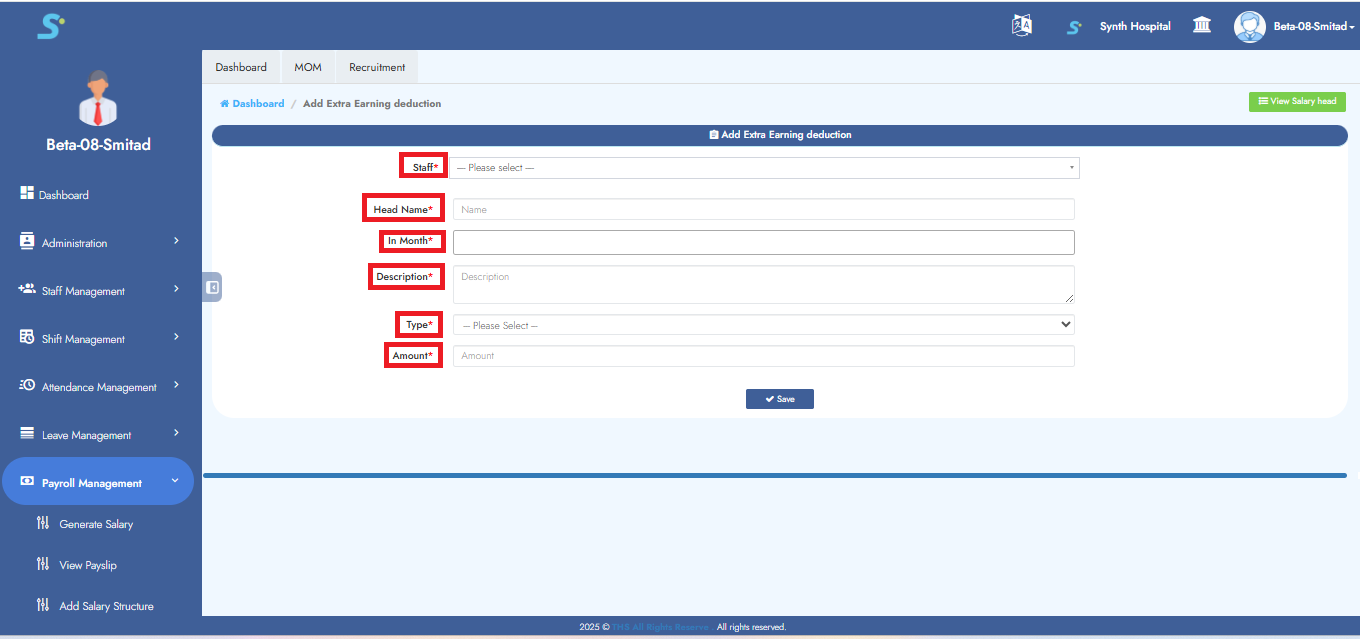
Step 15: Add Earnings or Deductions
To adjust salary:
- Select Staff Name
- Choose Salary Head
- Select Month
- Specify Type (Earning/Deduction)
- Enter Amount
Example: For EMI/Loan deduction, use this method for recurring amounts.
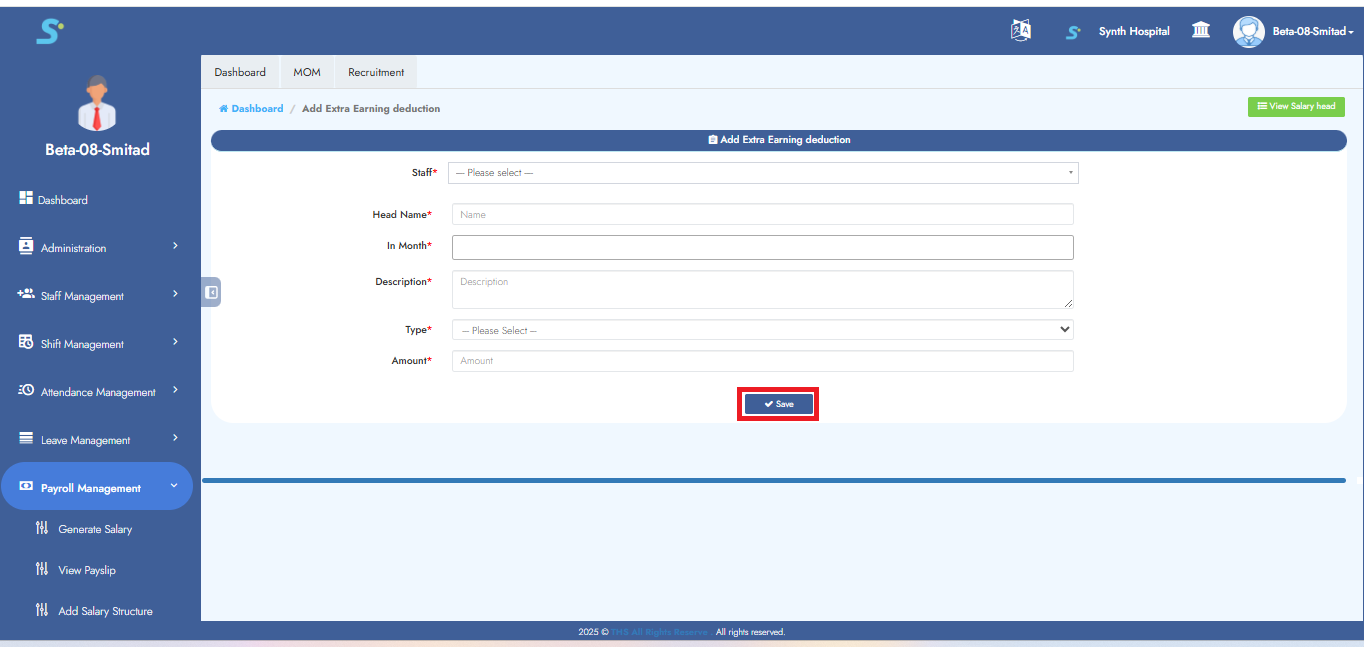
Step 16: Save Salary Structure Record
Click the Save button.
A message will confirm: "Record saved successfully."
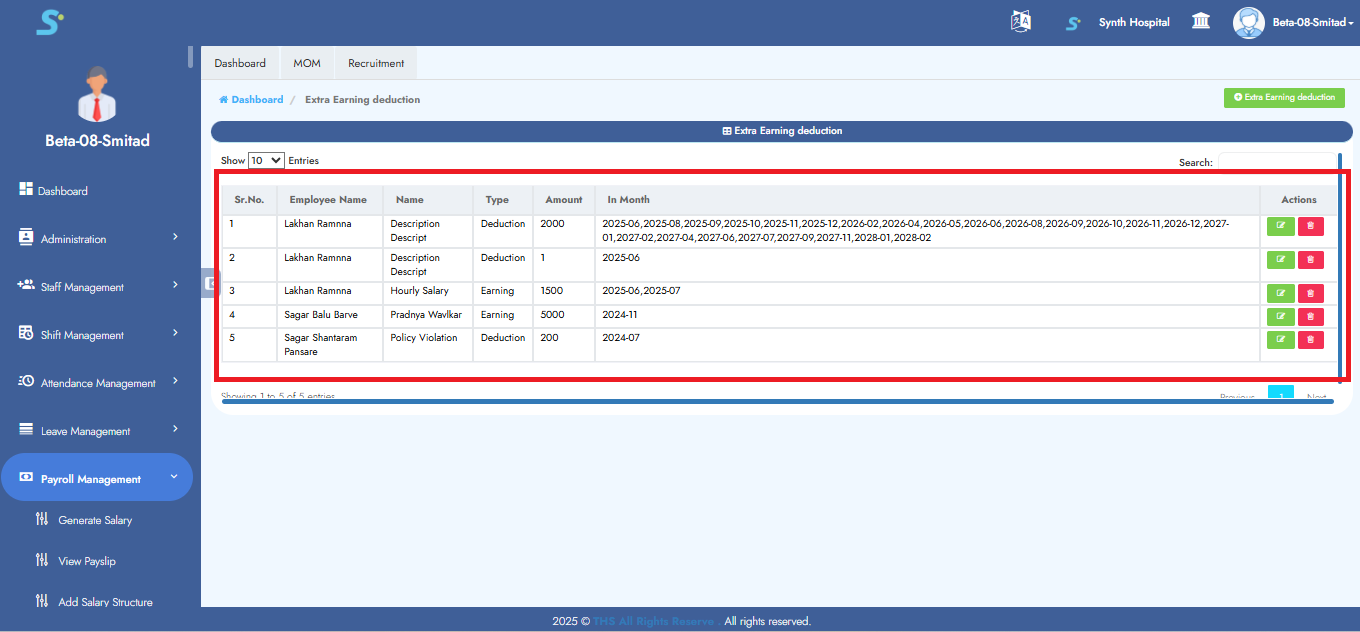
Step 17: View Manual Adjustments
To view saved earnings/deductions, click on View Salary Head.
Step 18: Edit Manual Adjustments
To edit any manual record, use the edit option shown in the image.
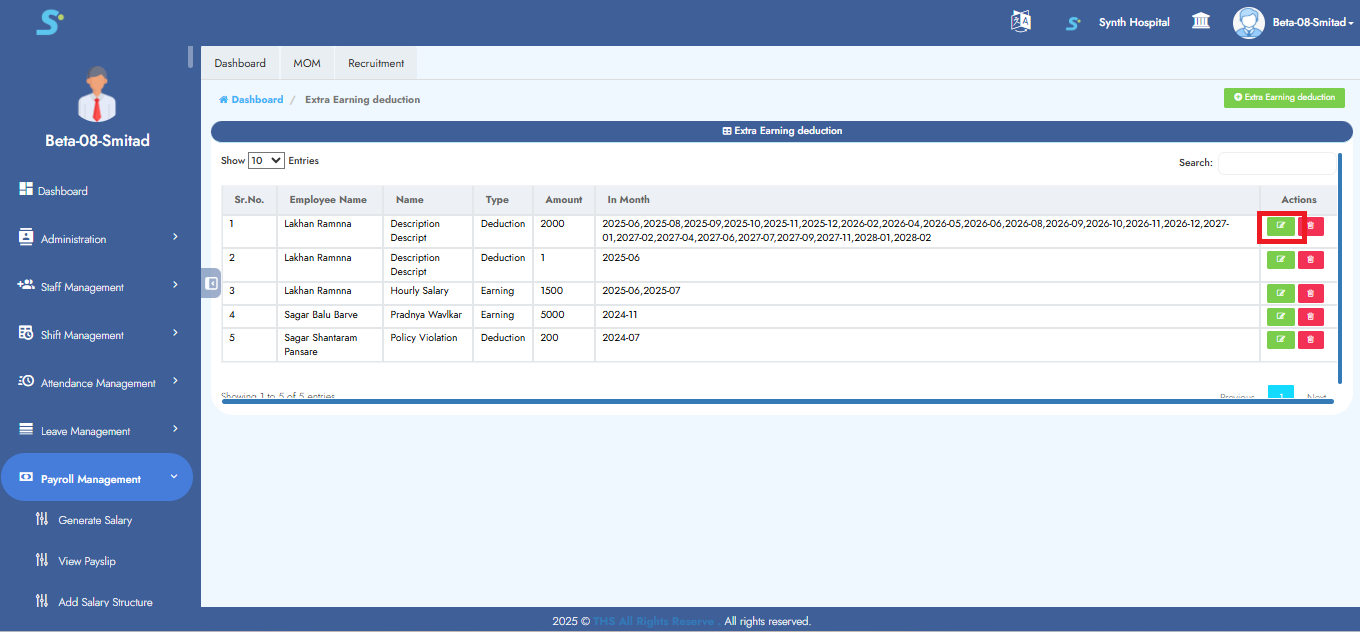
Step 19: Delete Manual Adjustments
To delete any manual record, use the delete option as shown in the image.

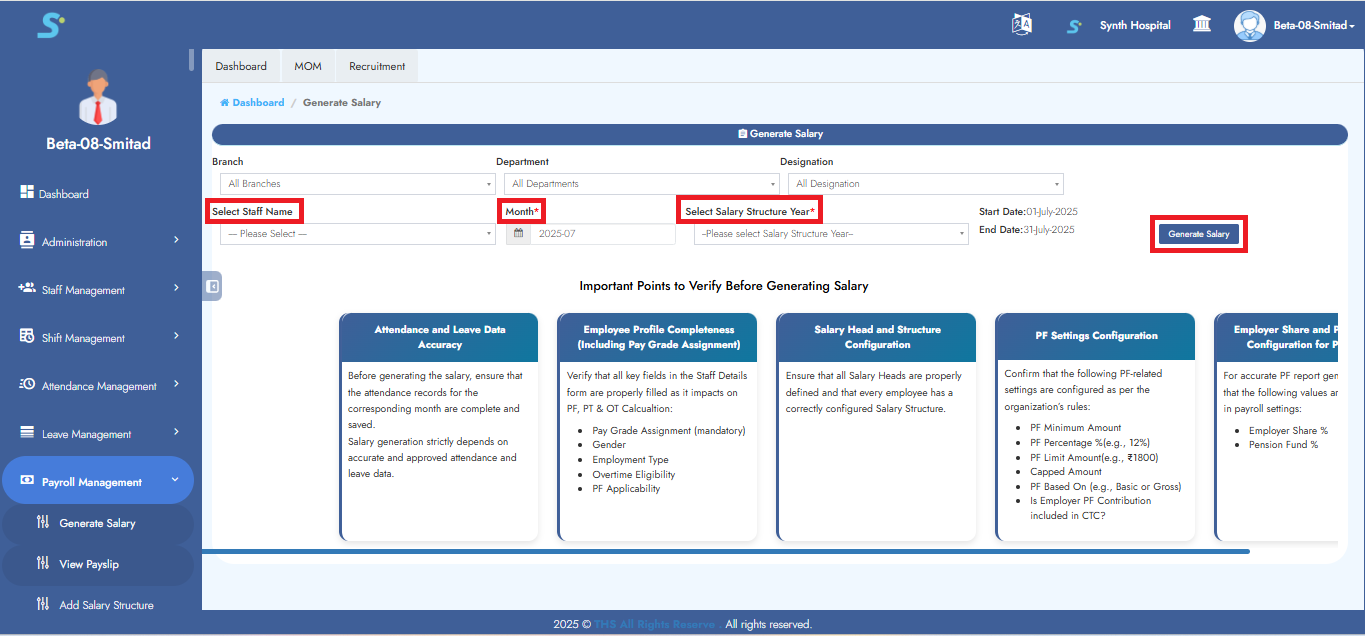
Step 20: Generate Salary
Note: Ensure the attendance report (from Timing Summary) is saved before this step.
Go to the Generate Salary sub-module.
Select:
- Staff Name
- Month
- Salary Structure Year
Click Filter to generate salary.
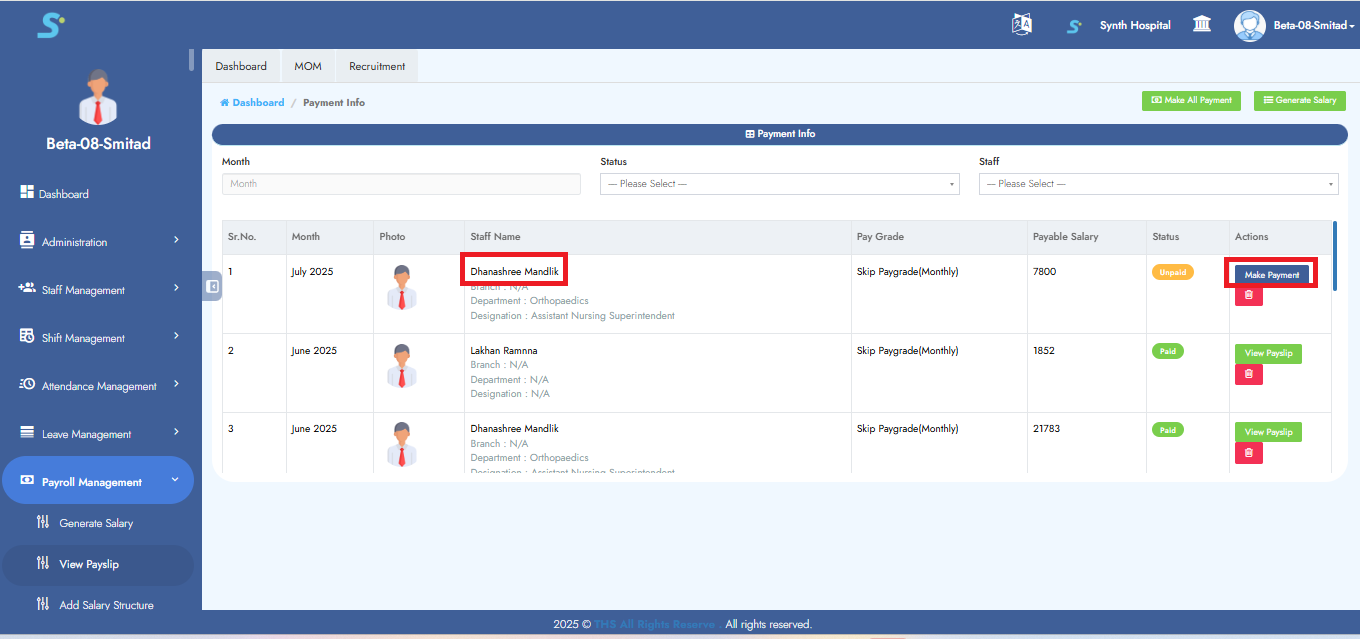
Step 21: Processing Salary Payment
Once the salary is successfully generated and the confirmation message appears, proceed by clicking the Make Payment button.
Step 22: Finalizing and Viewing the Payslip
Click the Pay button to finalize the payment.
The payslip for the selected staff member will be generated.
To view it, click on the View Payslip button.
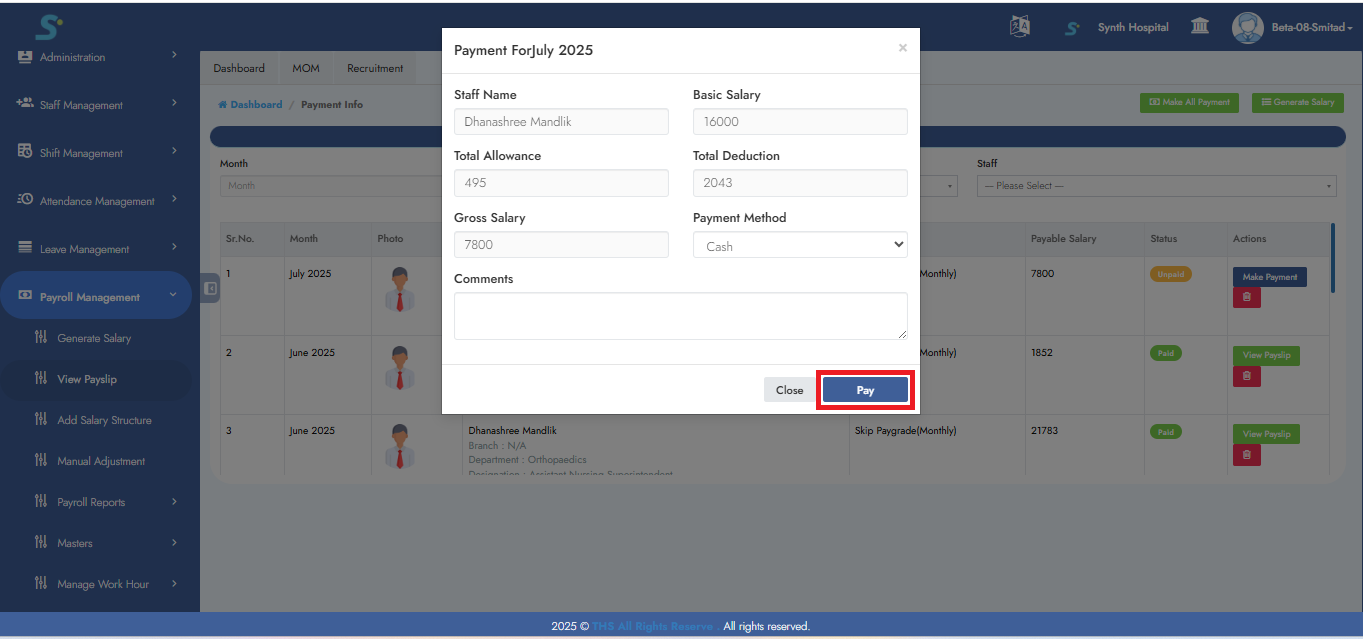
Note: To generate payslips for all staff at once, leave the Staff Name field empty.
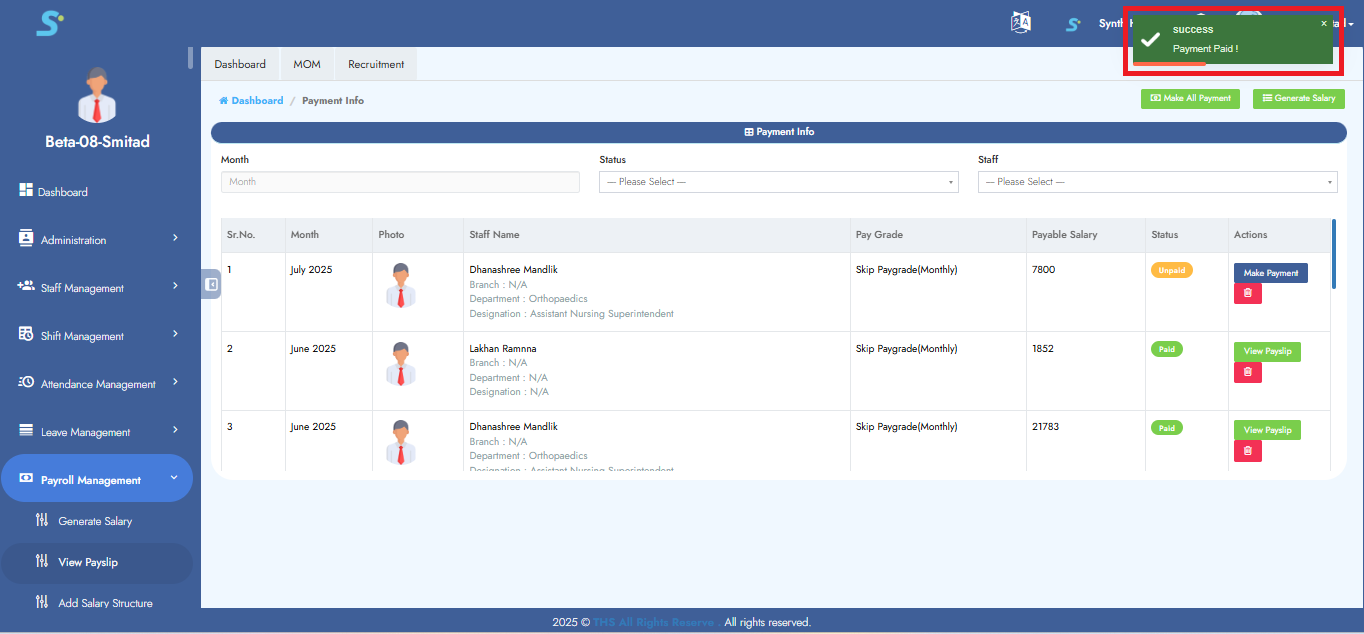
Step 23: Viewing Generated Payslip
After initiating the payslip generation, a success message will appear at the top of the screen, followed by a progress bar.
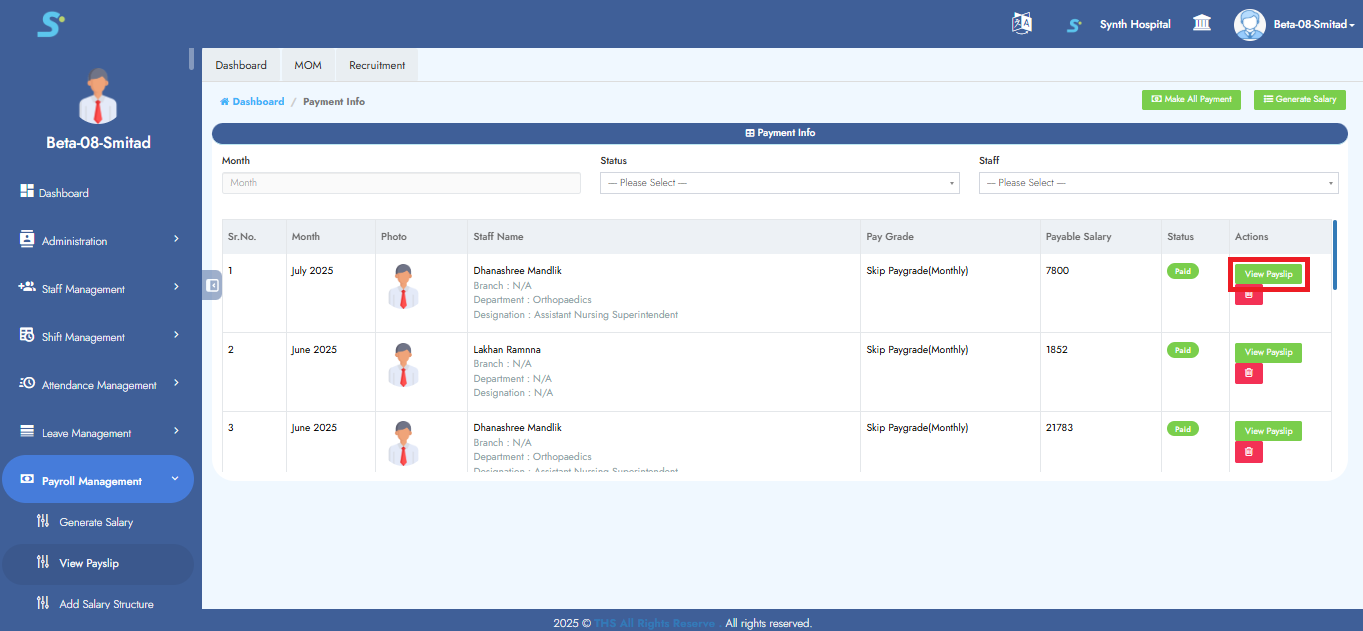
Step 24: Viewing Final Payslip Output
Once the process is complete, the payslip for the selected employee will be generated.
Click the View Payslip button to view it.
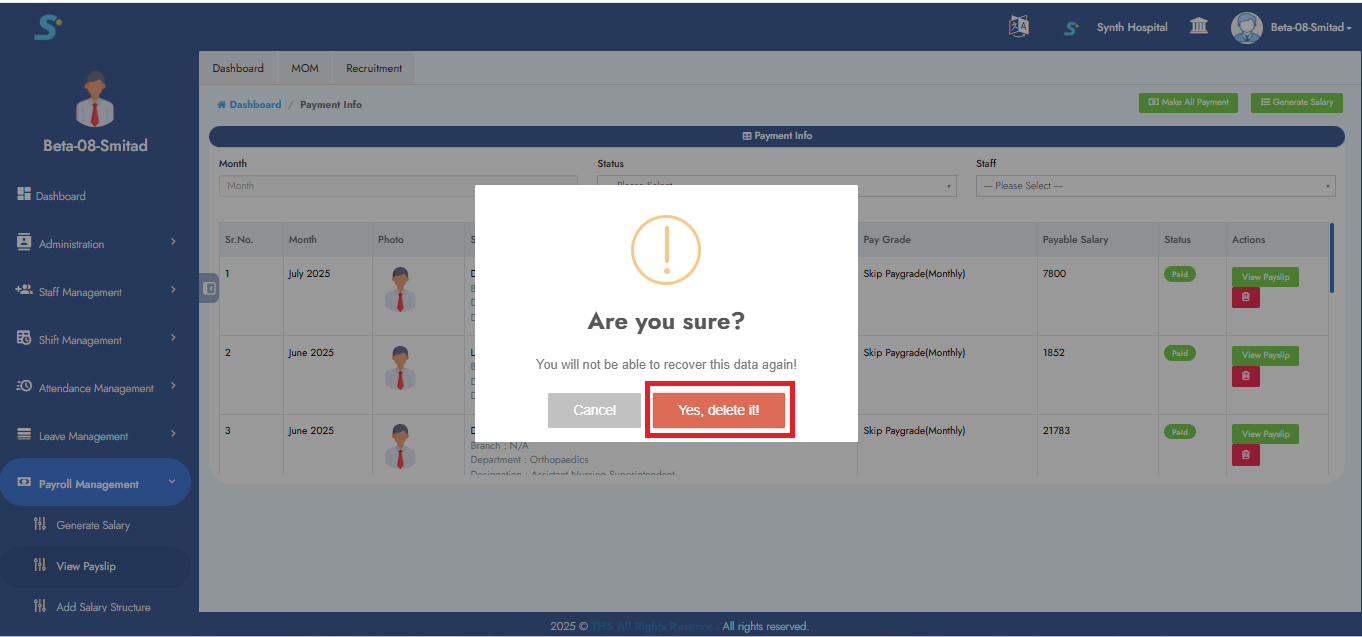
Step 25: Deleting a Payslip Record
To delete a payslip:
- Click the Delete button.
- A confirmation pop-up saying "Are you sure?" will appear.
- Click Yes, Delete to permanently remove the record.
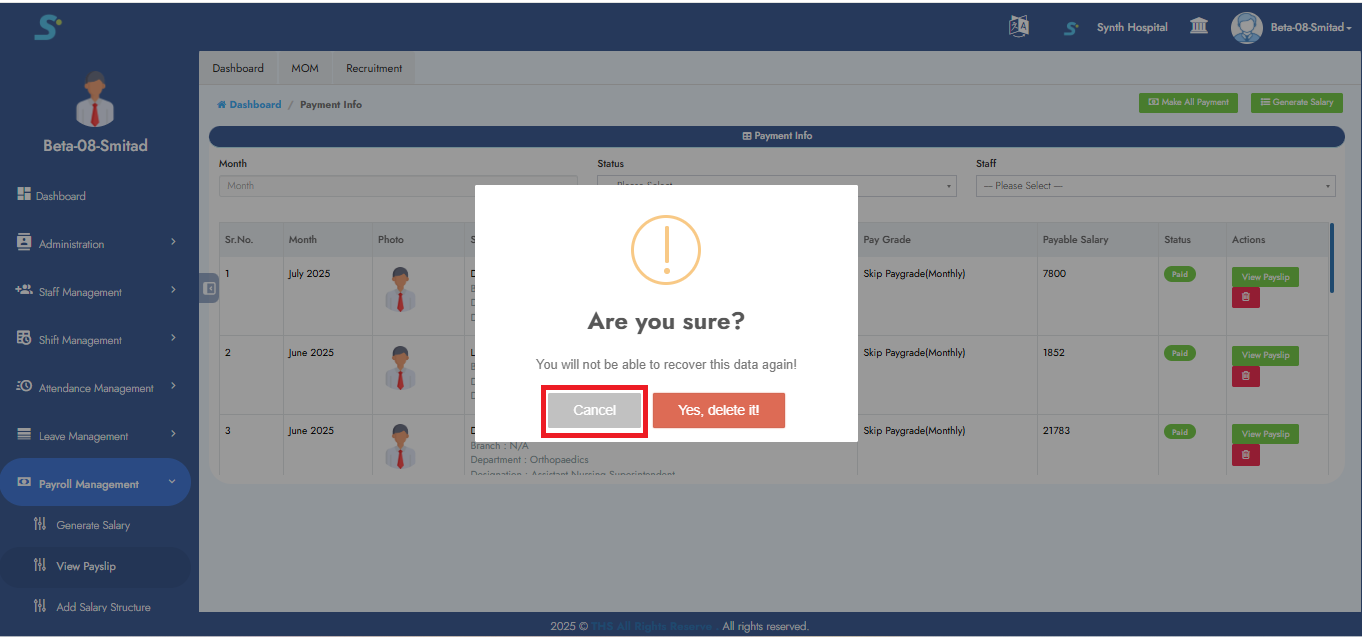
Step 26: Cancel Payslip Deletion
If you click the Cancel button in the confirmation dialog, the deletion will be aborted, and the record will remain unchanged.
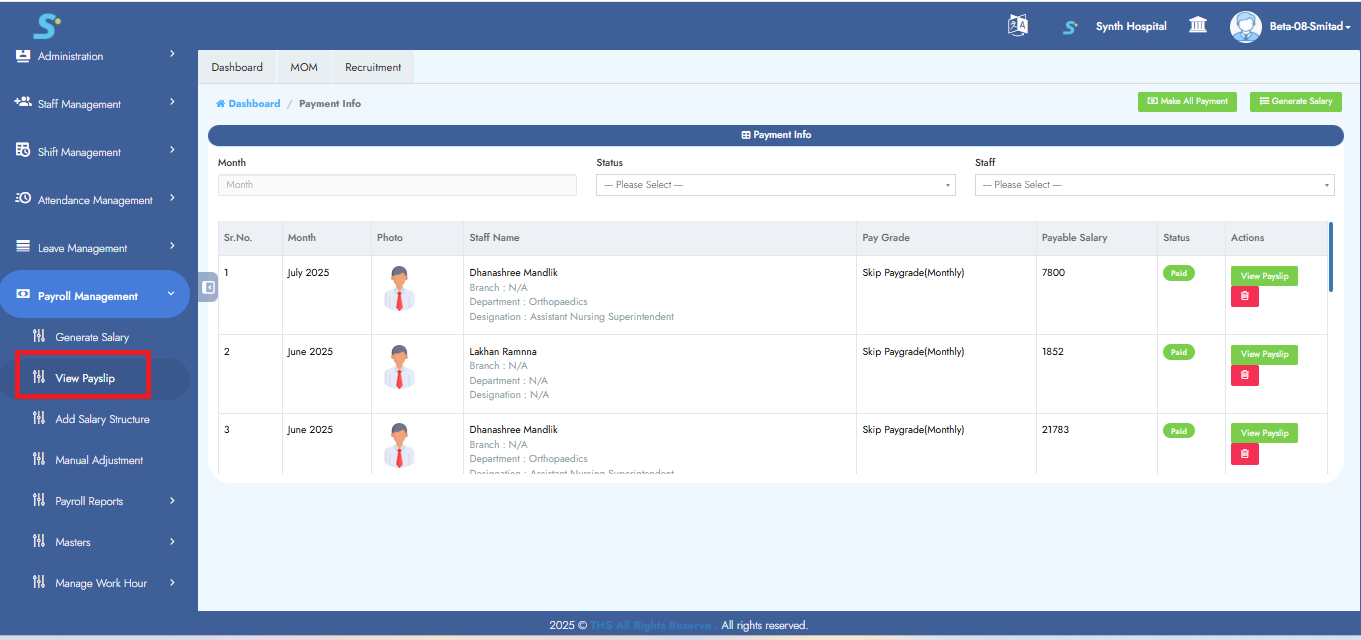
Step 27: View Payslip from Side Menu
You can also view the payslip by clicking on the ‘View Payslip’ option from the side menu.
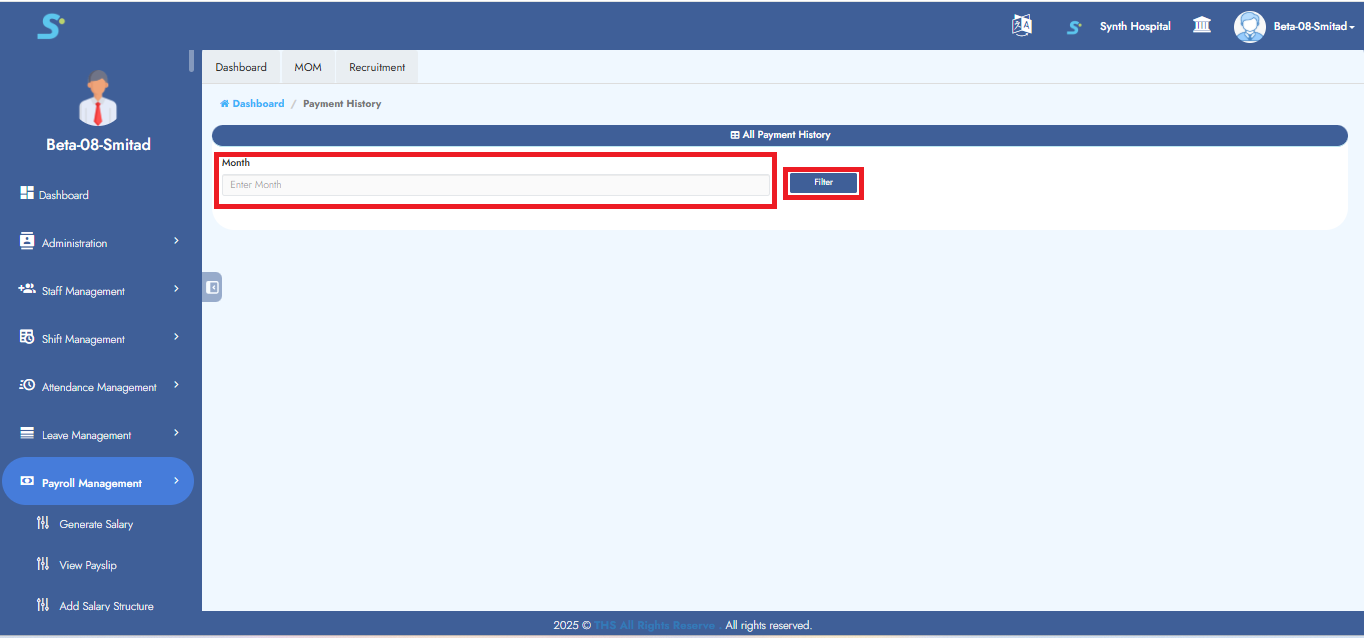
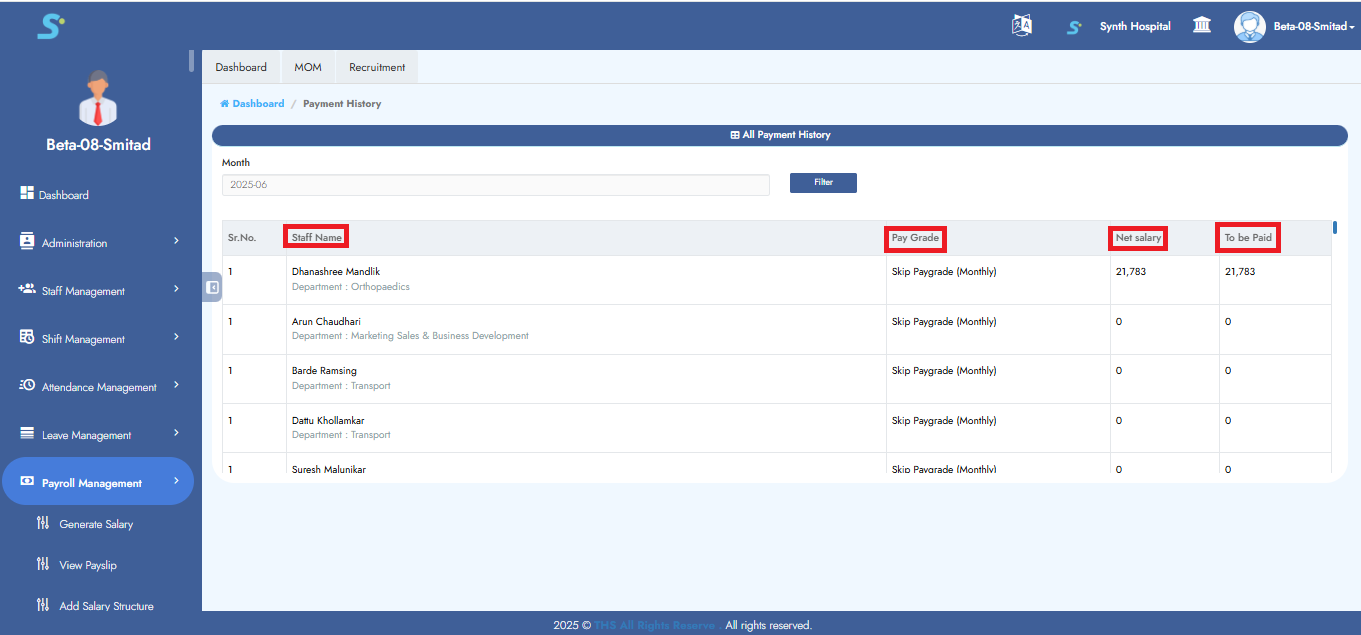
Step 28: Payment History
In the Payment History section, you can conveniently view the complete payment history of staff members.
Select the desired month and click the Filter button.
Step 29: Viewing Salary Summary of Staff
After applying the filter, you can view:
- Staff Name
- Pay Grade
- Net Salary
- Amount to be Paid
Step 30: Payroll Summary Report
Click on the Payroll Summary Report from the side menu.
This displays a detailed summary for all staff members, including:
- Professional Information
- Attendance Overview
- Applicable Components
- Earnings and Deductions

Step 31: Employee Payroll Reports
Click on the Employee Payroll Report from the side menu to view multi-month summaries for staff.
- If Attendance = Yes, attendance data will be shown.
- If Attendance = No, it will be excluded.

Step 32: View PF Reports
To view PF Reports:
-
If a specific employee is selected:
Choose multiple months to view detailed payroll info for that employee. -
If no employee is selected:
Select the month and click Filter to see the PF report for all employees.
