Performance New Module
Step 1: Add Quadrant
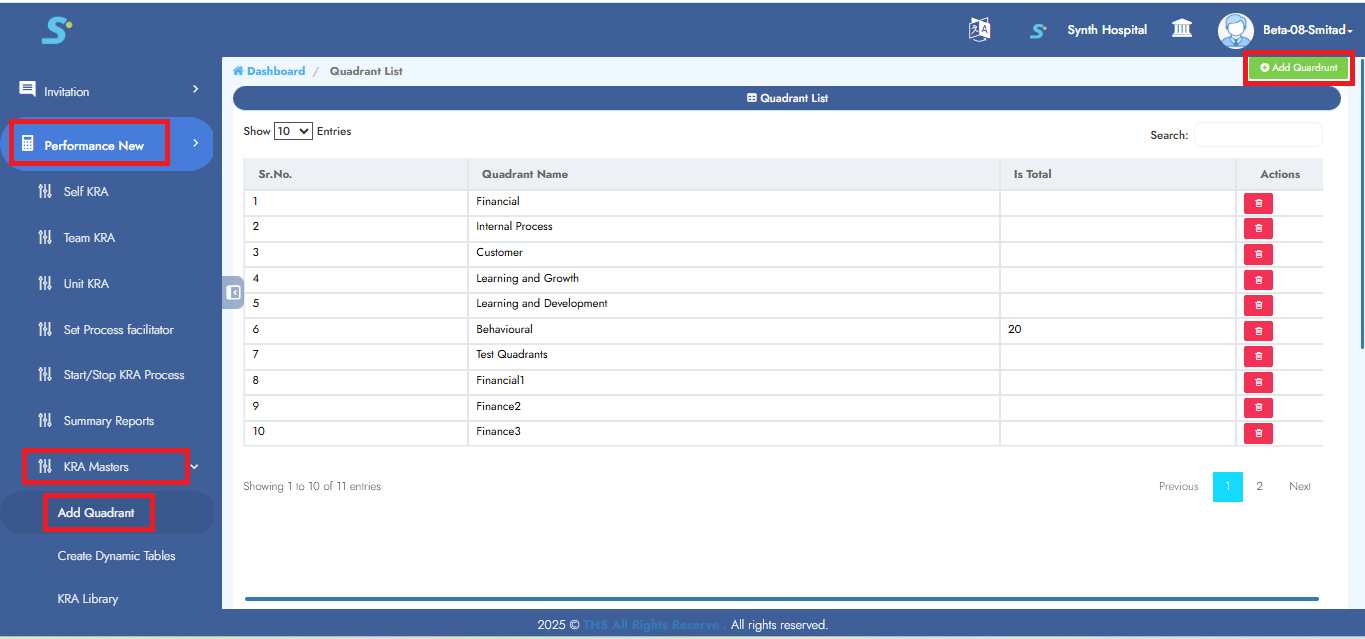
Go to Performance New > Masters > Add Quadrant, then click on Add Quadrant from the side menu.
Click the Add Quadrant button located at the top right corner.
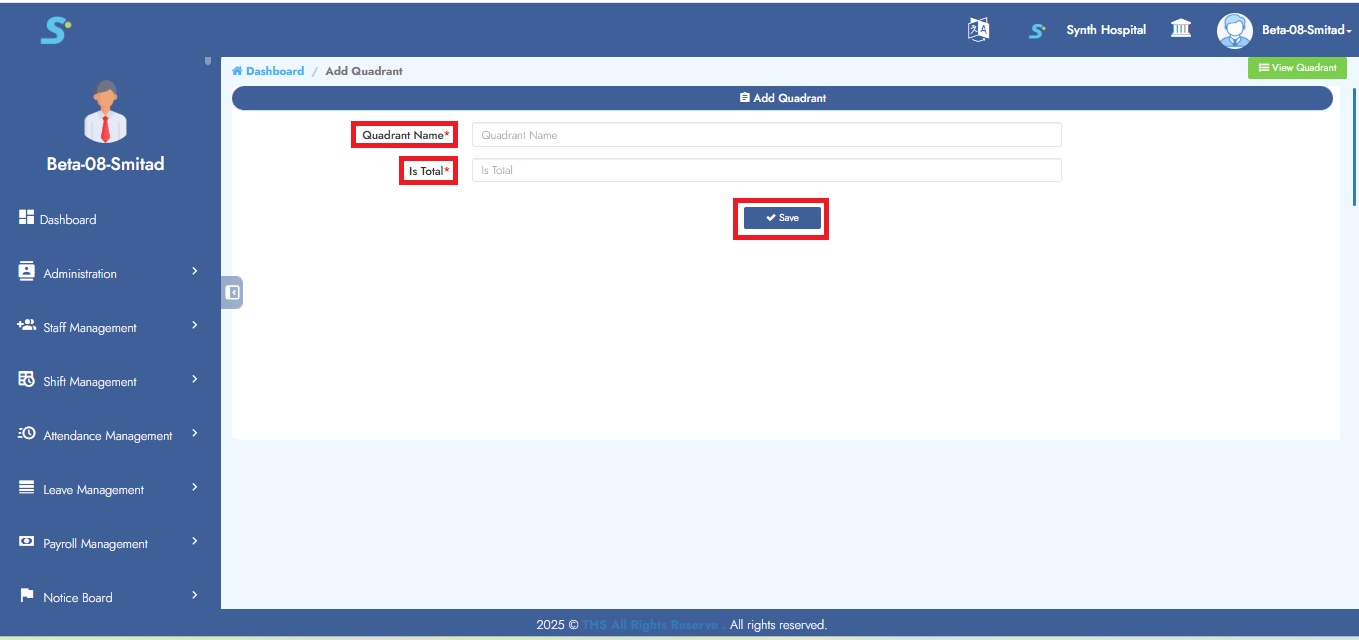
Step 2: Saving Quadrant
Enter quadrant name, is total and then click on the Save button to successfully add the record.
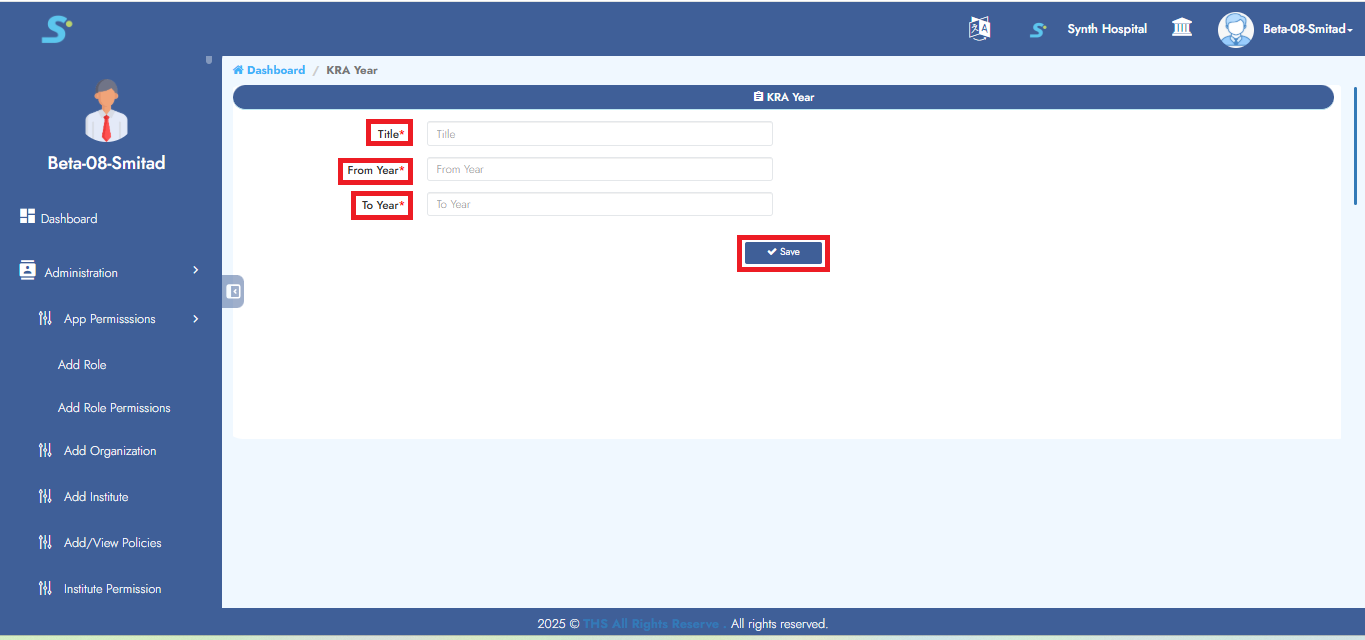
Step 3: Add KRA Year
Go to Performance New > KRA Year from the side menu.
Click the KRA Year button located at the top right corner.
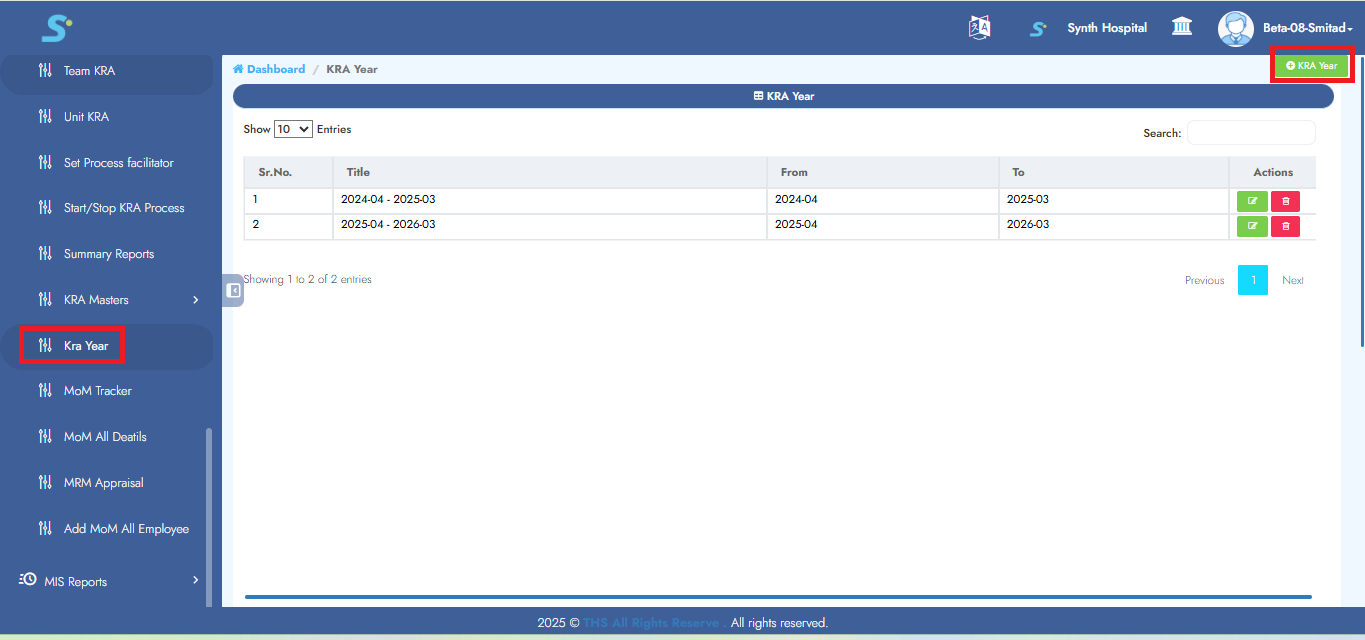
Step 4: Saving KRA Year
Enter title, from year, to year and then click on the Save button to successfully add the record.
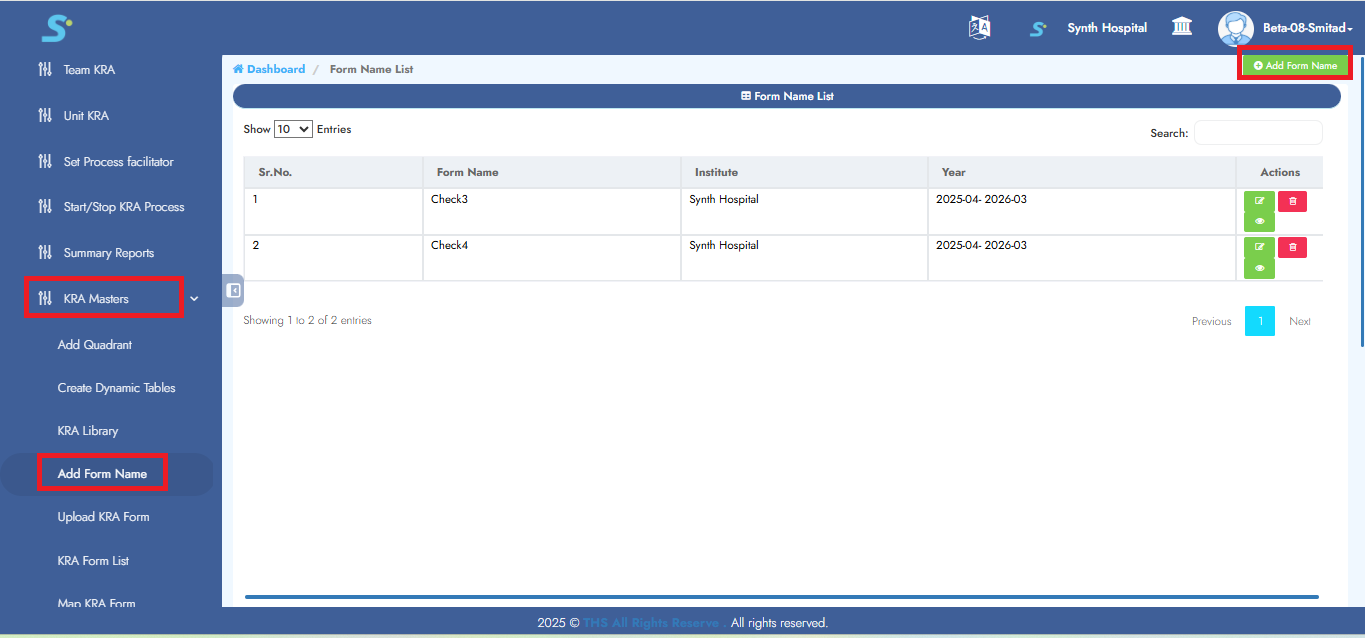
Step 5: Create Form Name
Go to Performance New module. Click on Masters sub module. Then click on Add Form Name side menu as shown in the image. Click the Add Form Name button located at the top right corner.
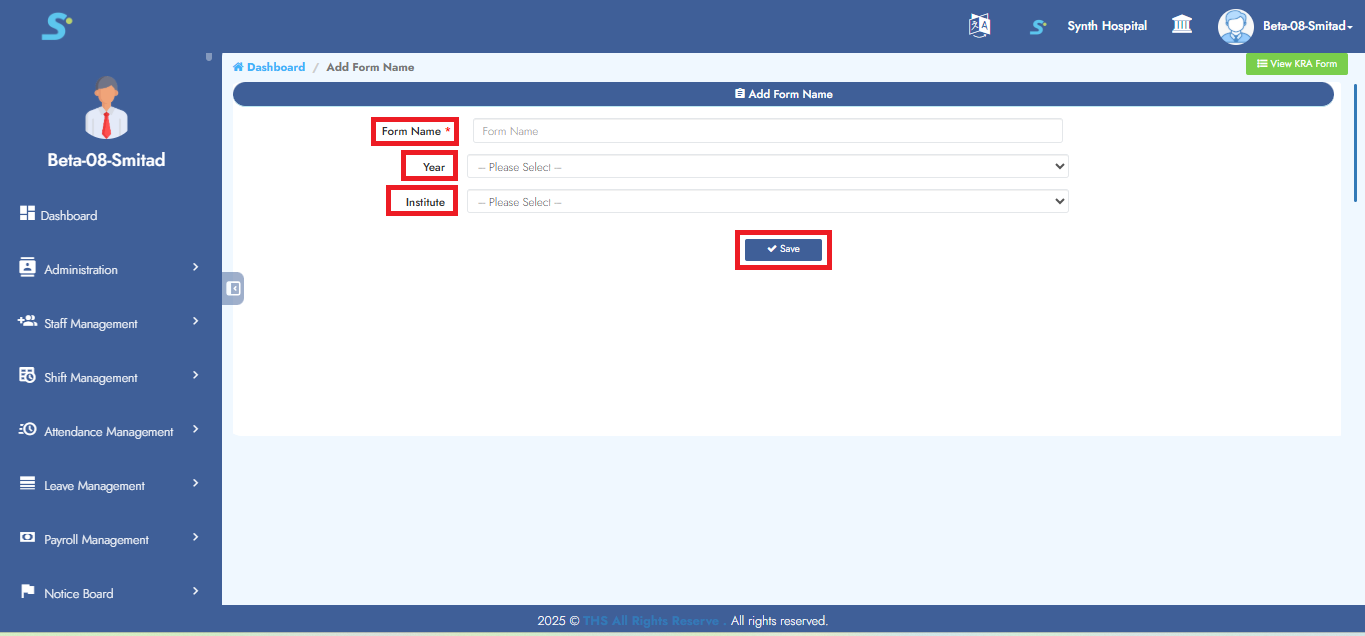
Step 6: Saving Form
Enter form name, year (from drop-down list), institute (from drop-down list) and then click on the Save button to successfully add the record.
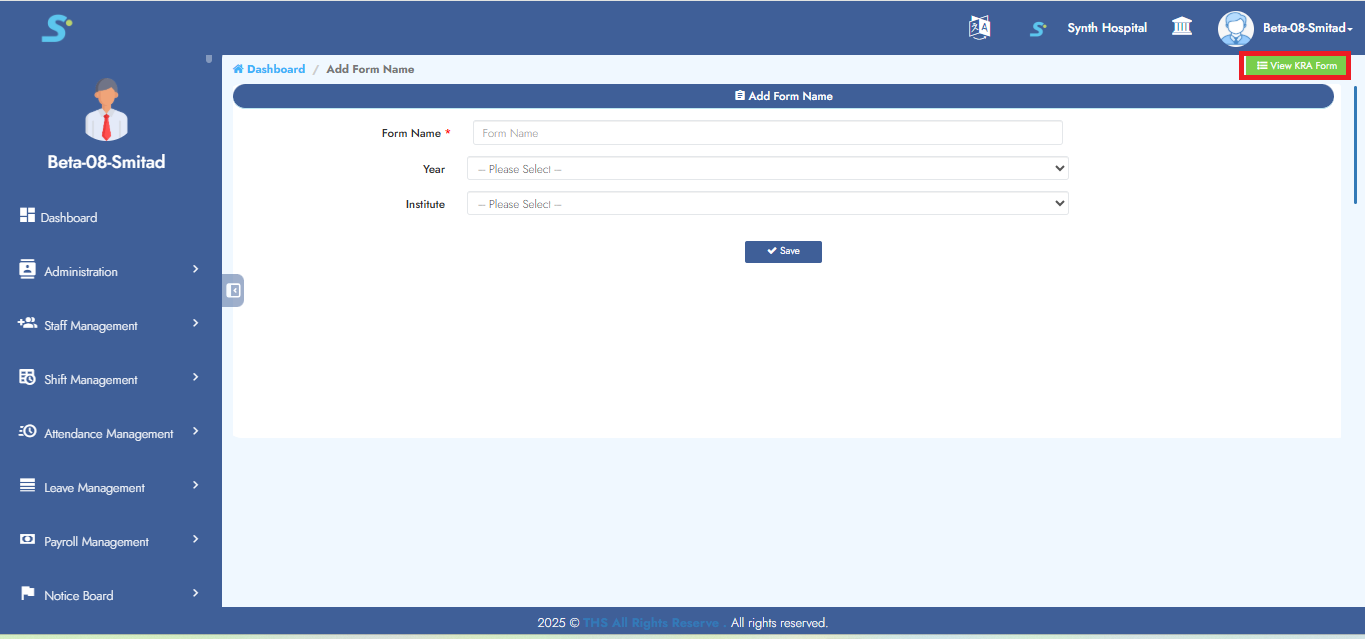
Step 7: View Form Name
To view the created form, click on View KRA Form as shown in the image.
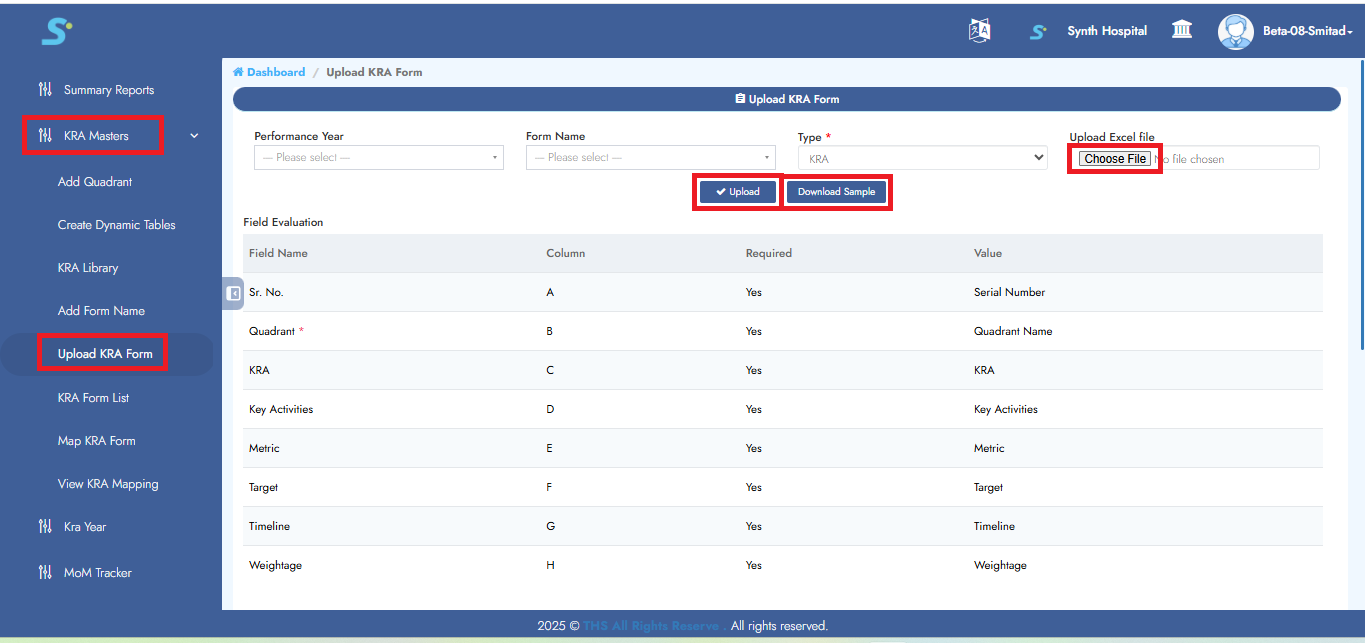
Step 8: Upload KRA Form
Go to Performance New > Masters > Upload KRA Form, then click on the Download Sample button.
Fill in the required details in the Excel sheet. After updating, click Choose File, then click Upload to complete the process.
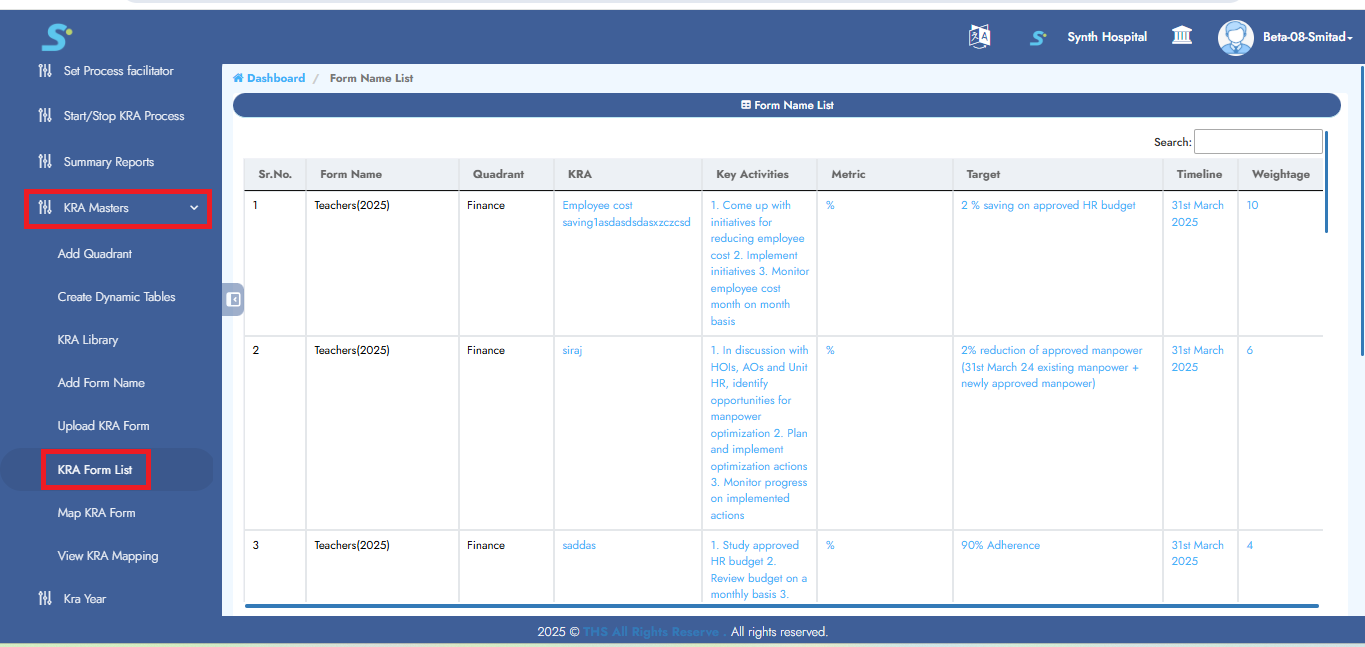
Step 9: KRA Form List
You can view the uploaded form in the KRA Form List as shown in the image.
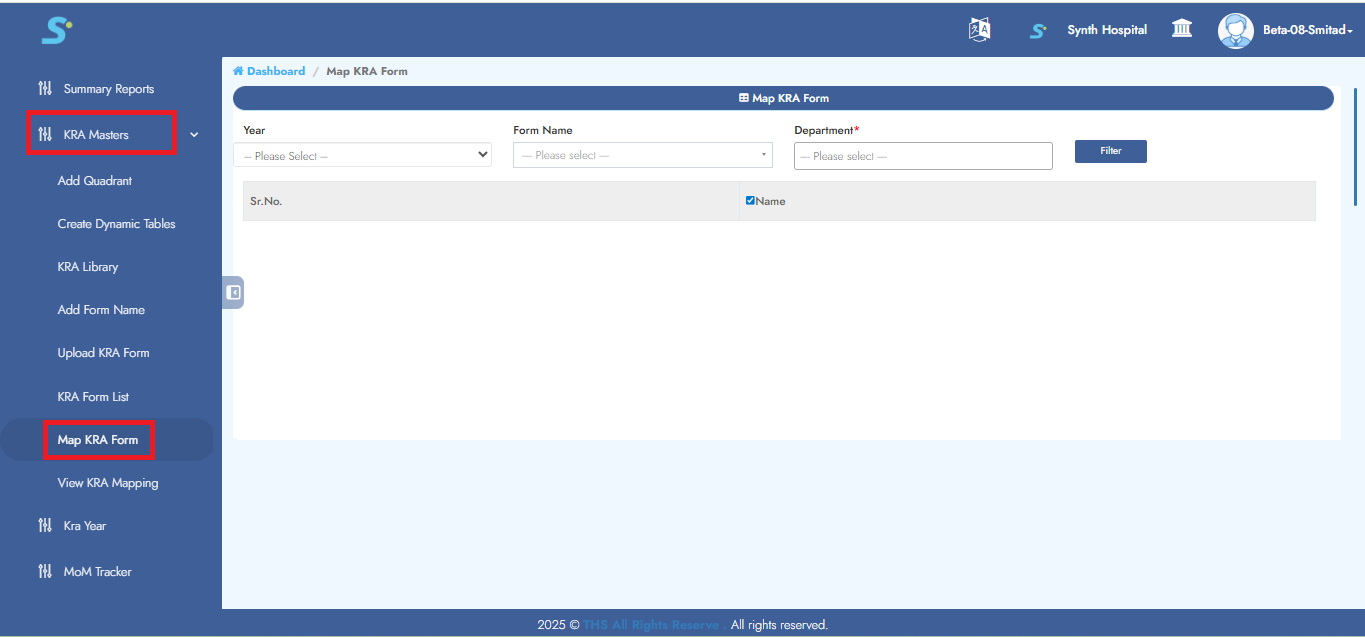
Step 10: Map KRA Form
Go to Performance New > Masters > Map KRA Form, then click on the Map KRA Form from the side menu.
Select year, form name, and select department, then click the Filter button.
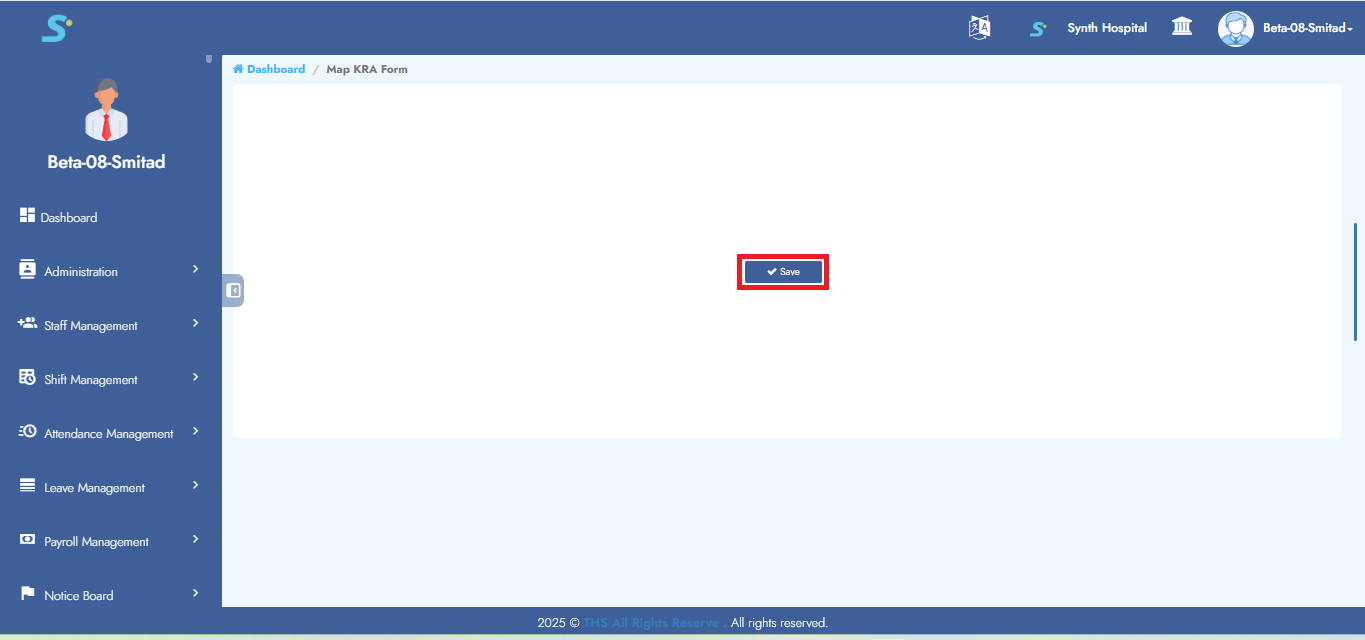
Step 11: Mapping KRA Form
Tick the checkbox for employees who should have access to this form as shown in the image.
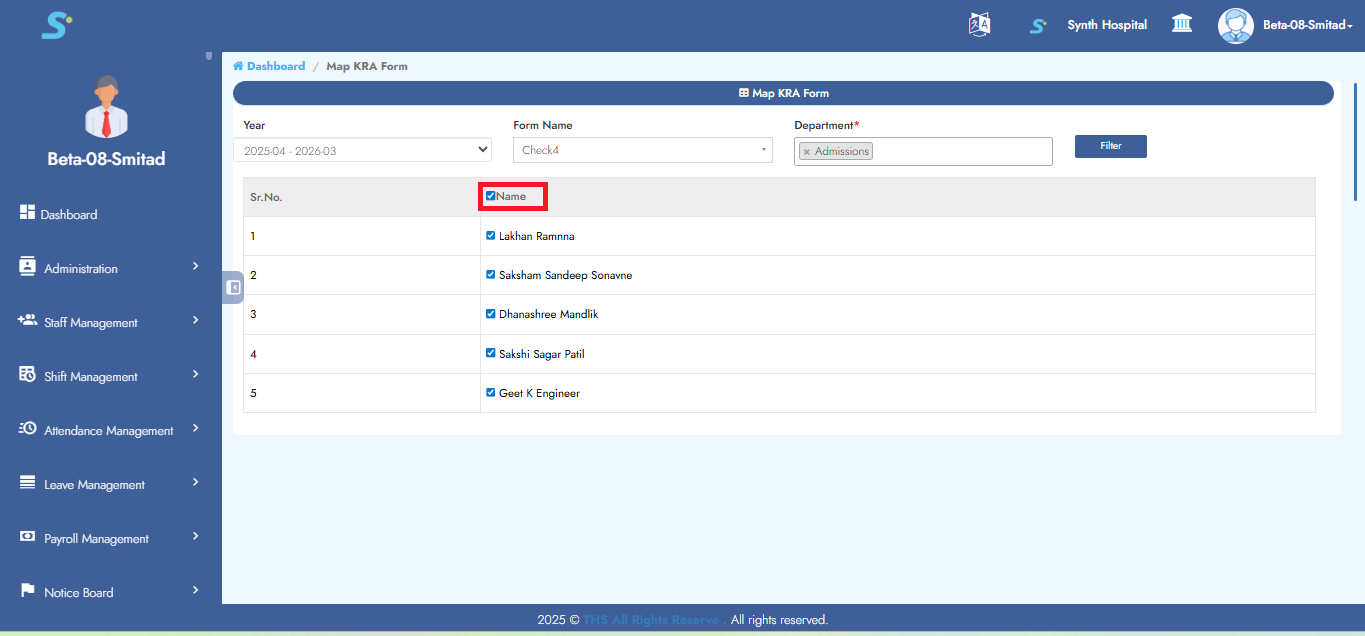 Then click the Save button to successfully add the record.
Step 12: View KRA Mapping
Go to Performance New > Masters > View KRA Mapping, then click on the View button.
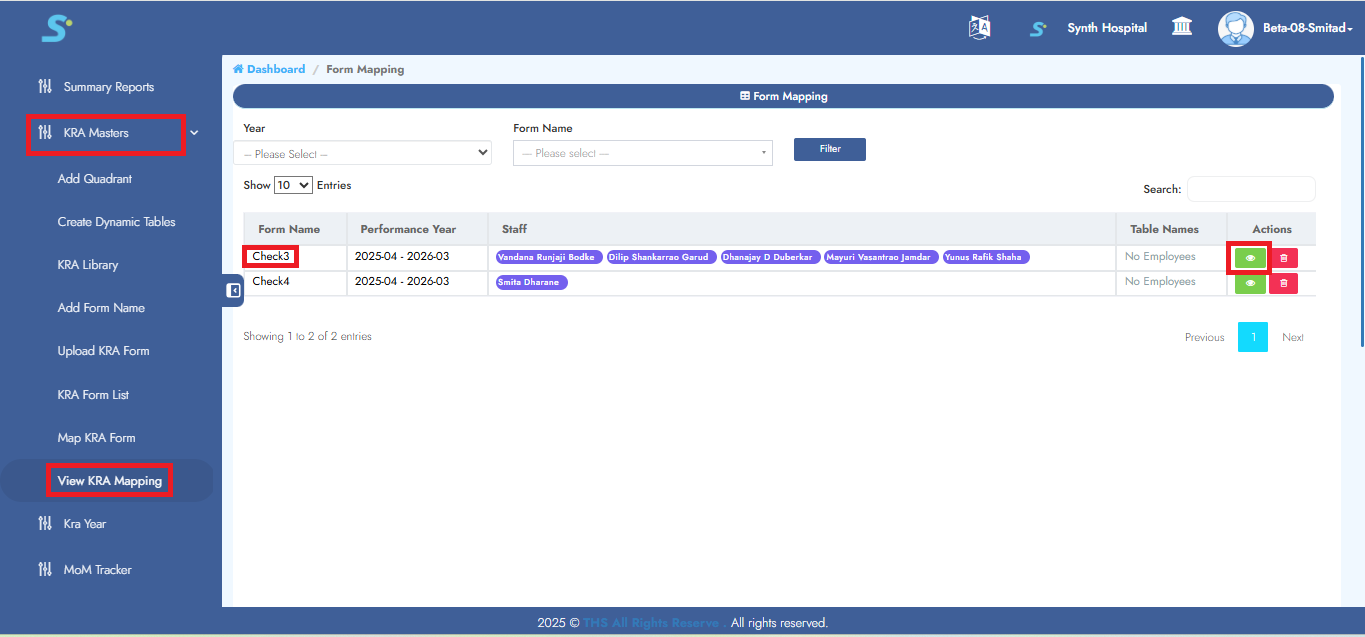
Step 13: KRA Mapping View
It will display the screen below.
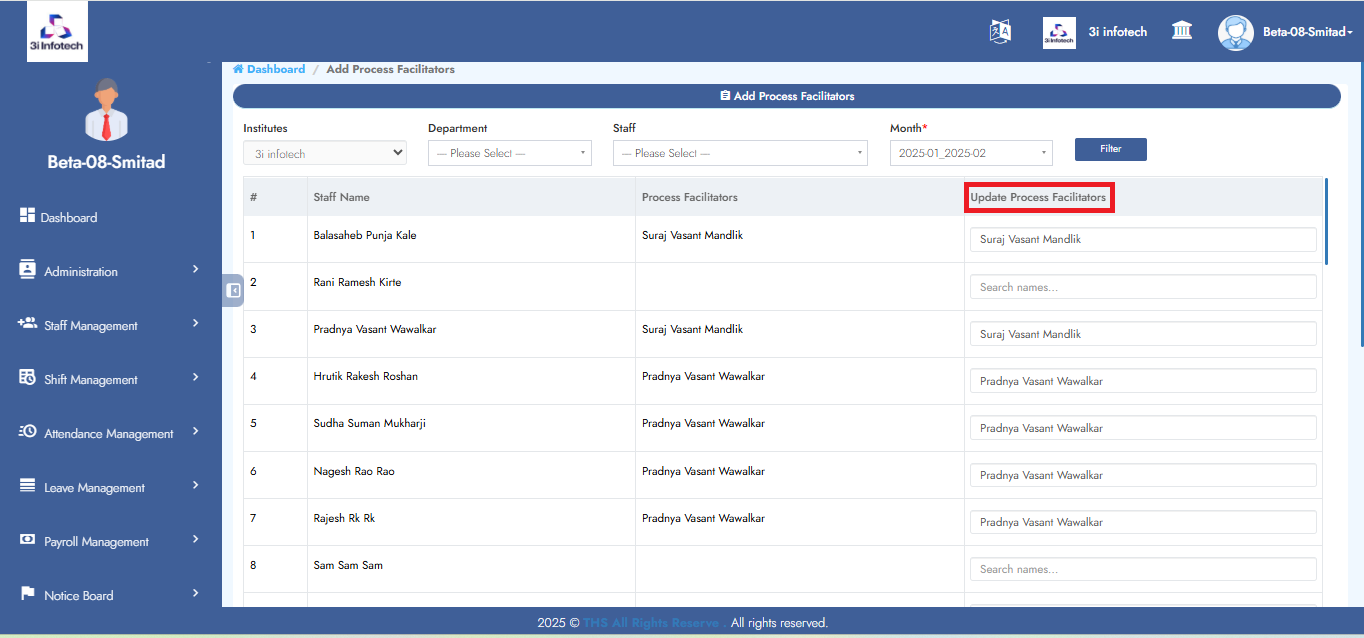
Step 14: Set Process Facilitator
Go to Performance New > Set Process Facilitator, select the month and click on the Filter button.
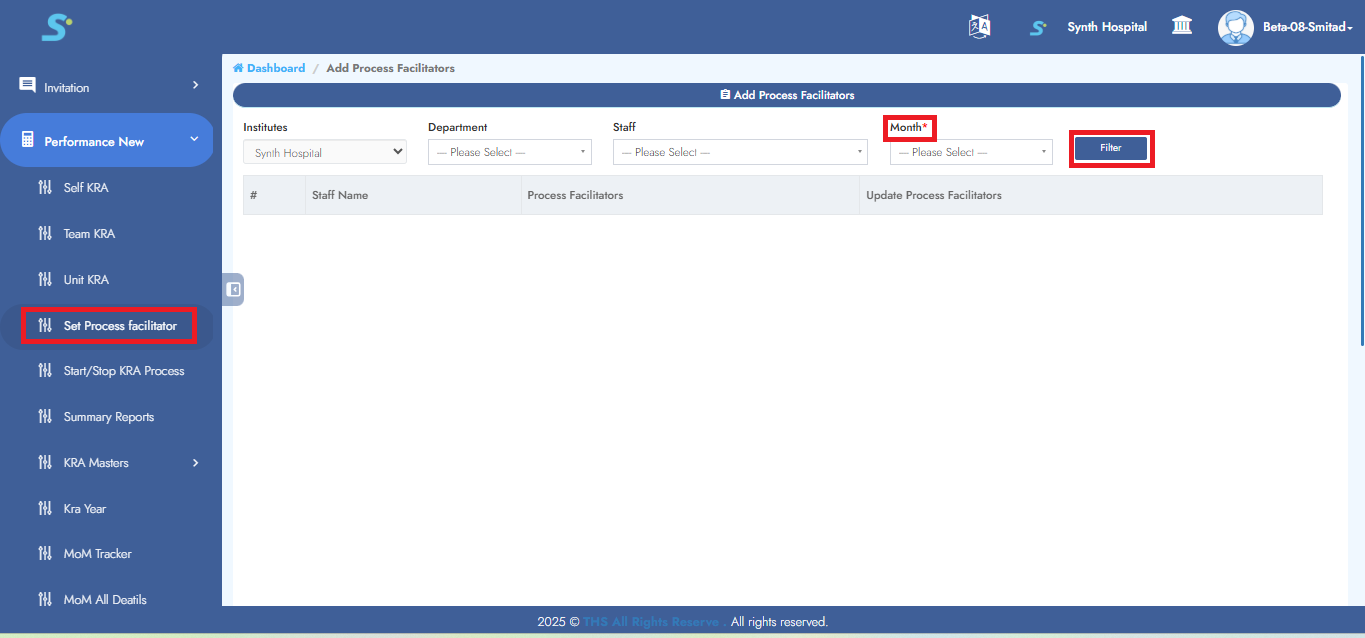 Now this screen will appear where you can update or set the facilitator.
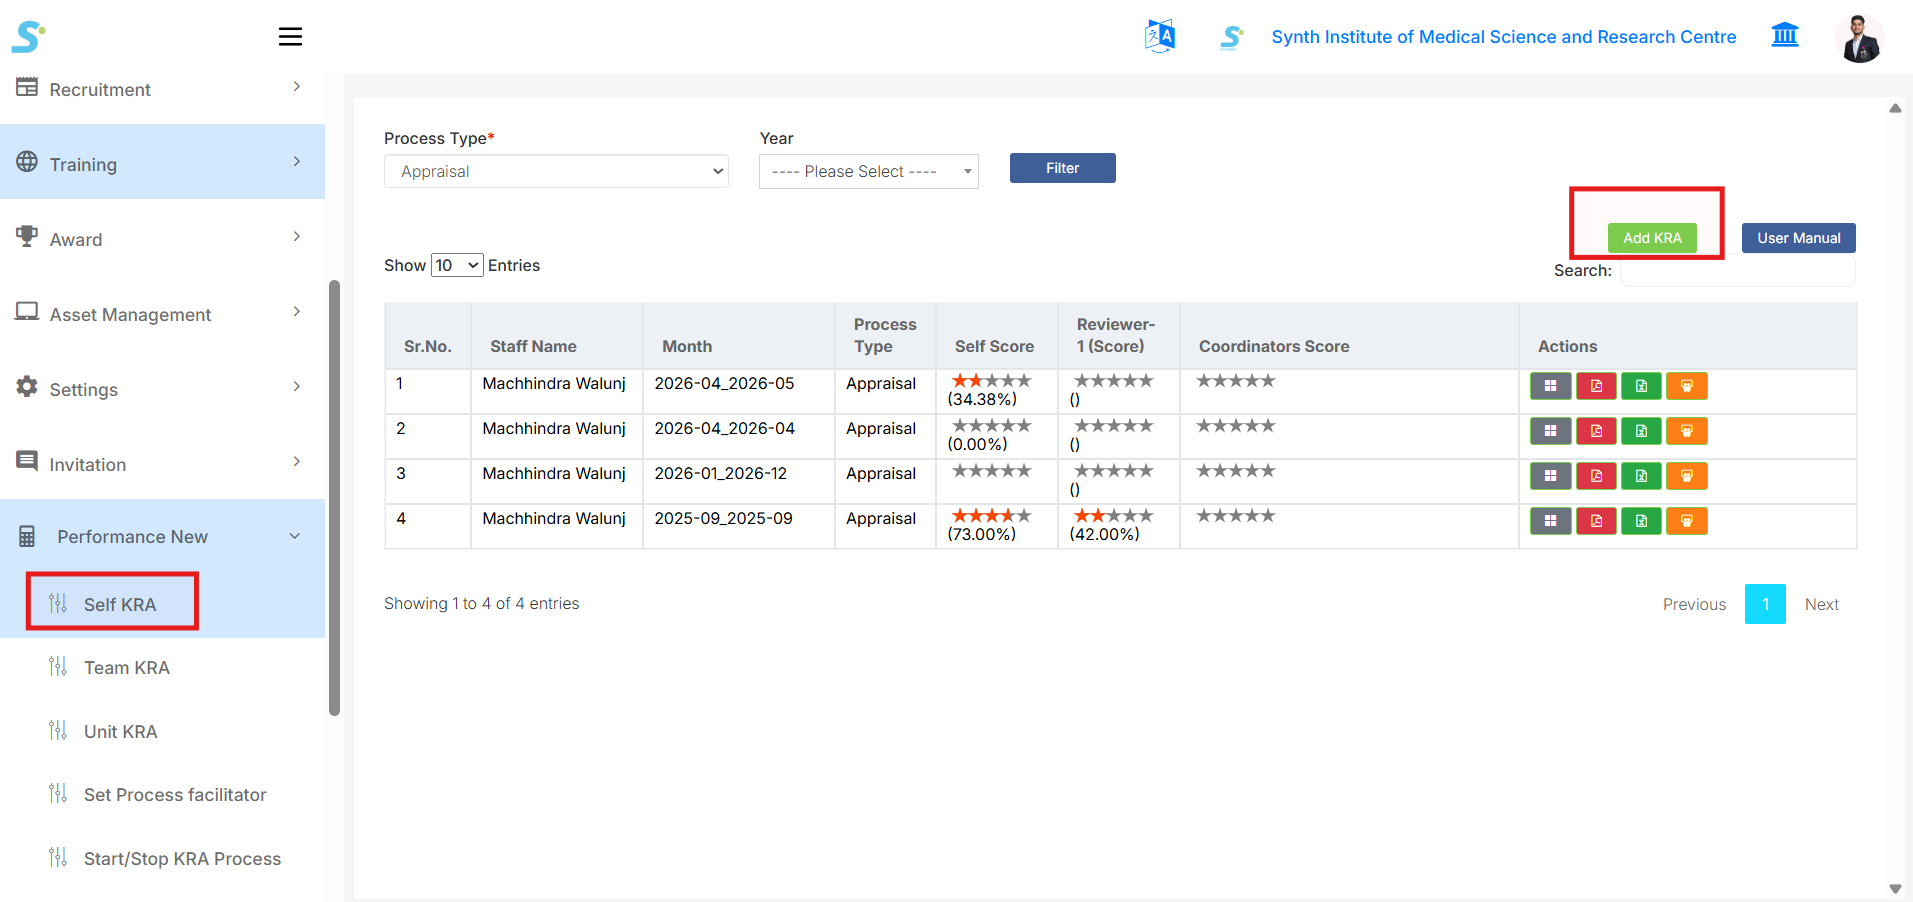
Step 15: Self KRA
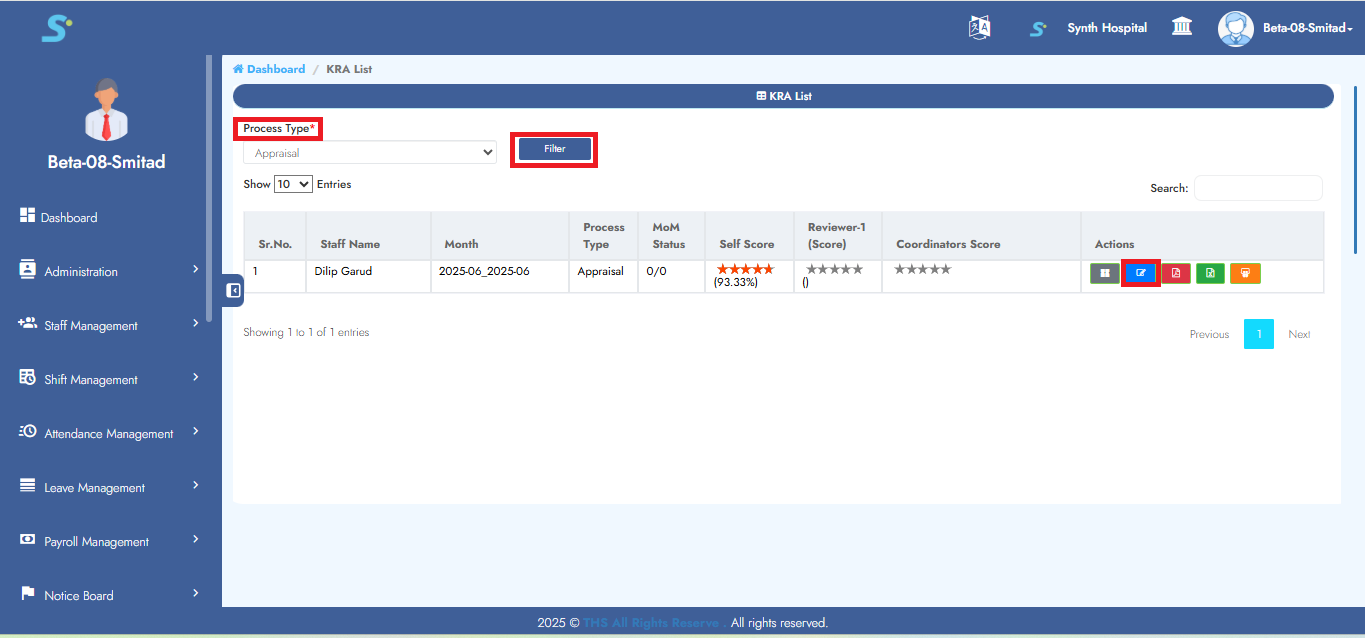
Go to Performance New > Self KRA from the side menu.
This page is used by employees to view and fill their own KRA/Appraisal forms.
On this screen, you can see the following options and details:
- Process Type
-
Select the process type, such as Appraisal.
-
Year
-
Select the required year.
-
Filter
-
Click the Filter button to search KRA records based on selected values.
-
Add KRA
-
Click the Add KRA button to add a new KRA/Appraisal form.
-
User Manual
- Click the User Manual button to open the related documentation.
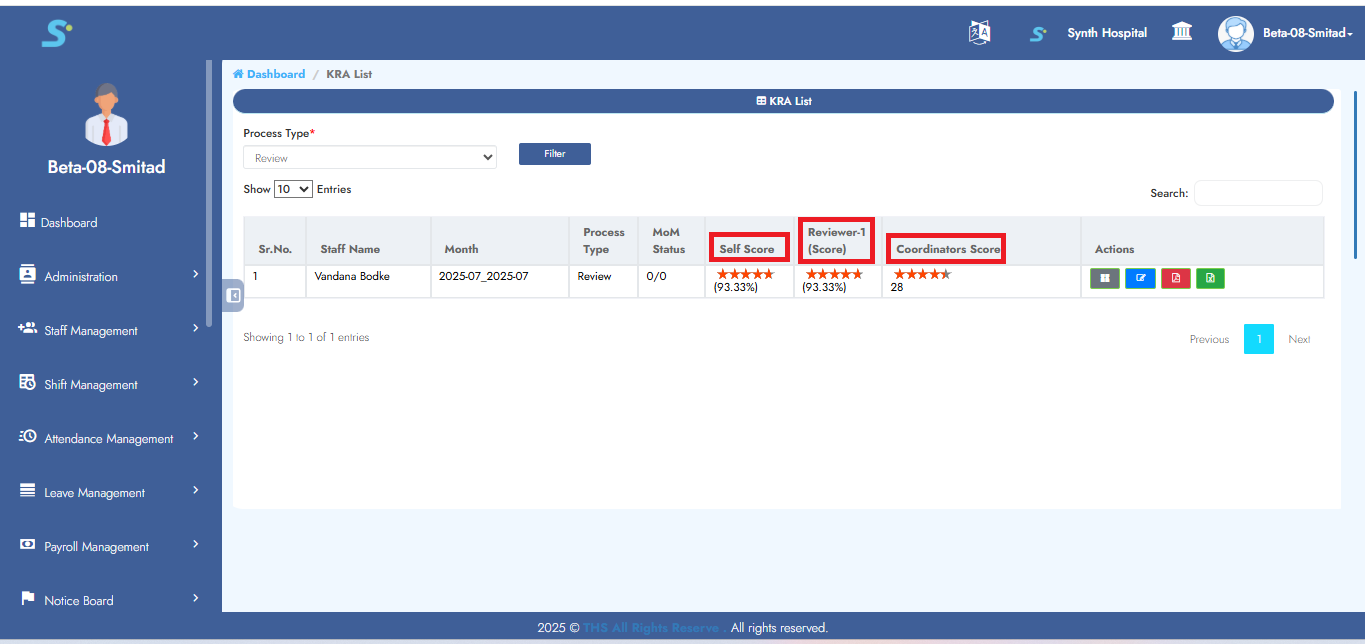
The KRA list displays details such as:
- Sr. No.
- Staff Name
- Month
- Process Type
- Self Score
- Reviewer-1 Score
- Coordinators Score
- Actions
In the Actions column, you can perform available actions such as viewing, editing, downloading, exporting, or printing the KRA details.
To add a new Self KRA:
- Click the Add KRA button.
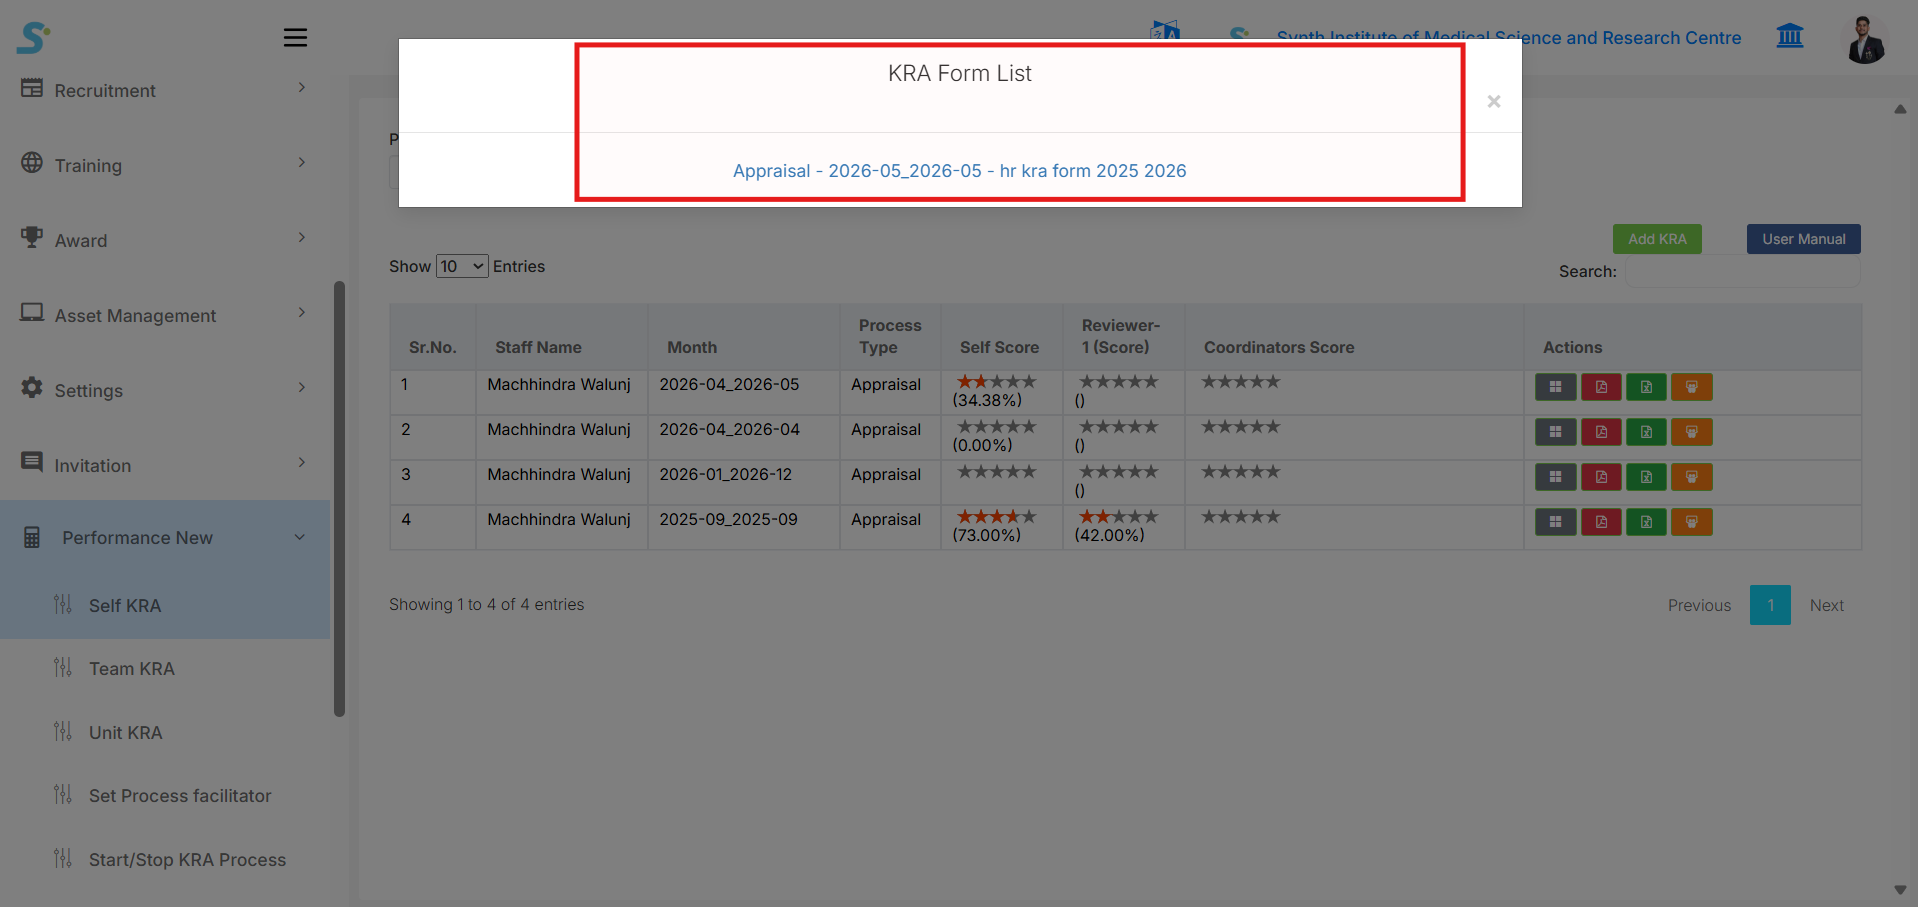
- A popup will open with the KRA Form List.
- Select the required KRA/Appraisal form name from the popup.
- Click on the form name to start the KRA filling process.
- Fill in the required KRA details and scoring information.
- Submit or save the form as required.
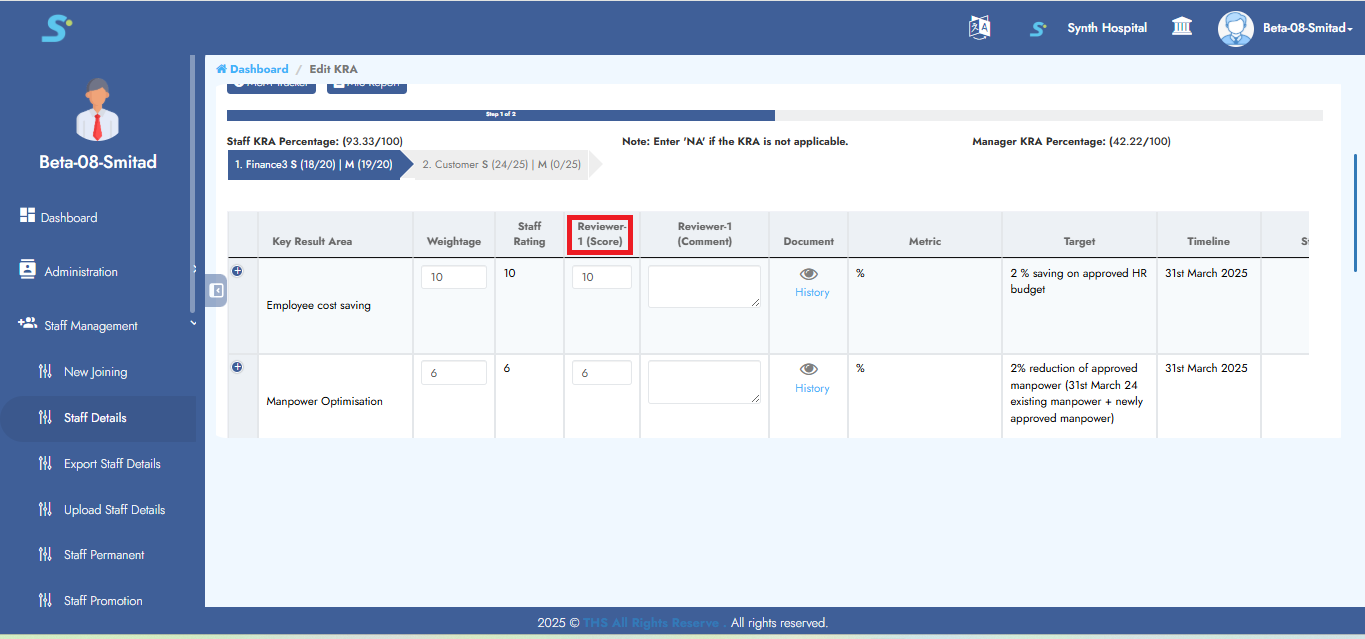
To update or give scoring for an existing KRA:
- Select the Process Type.
- Select the Year, if required.
- Click the Filter button.
- Find the required KRA record from the list.
- Click the Edit button from the Actions column.
- Enter or update the self-score details.
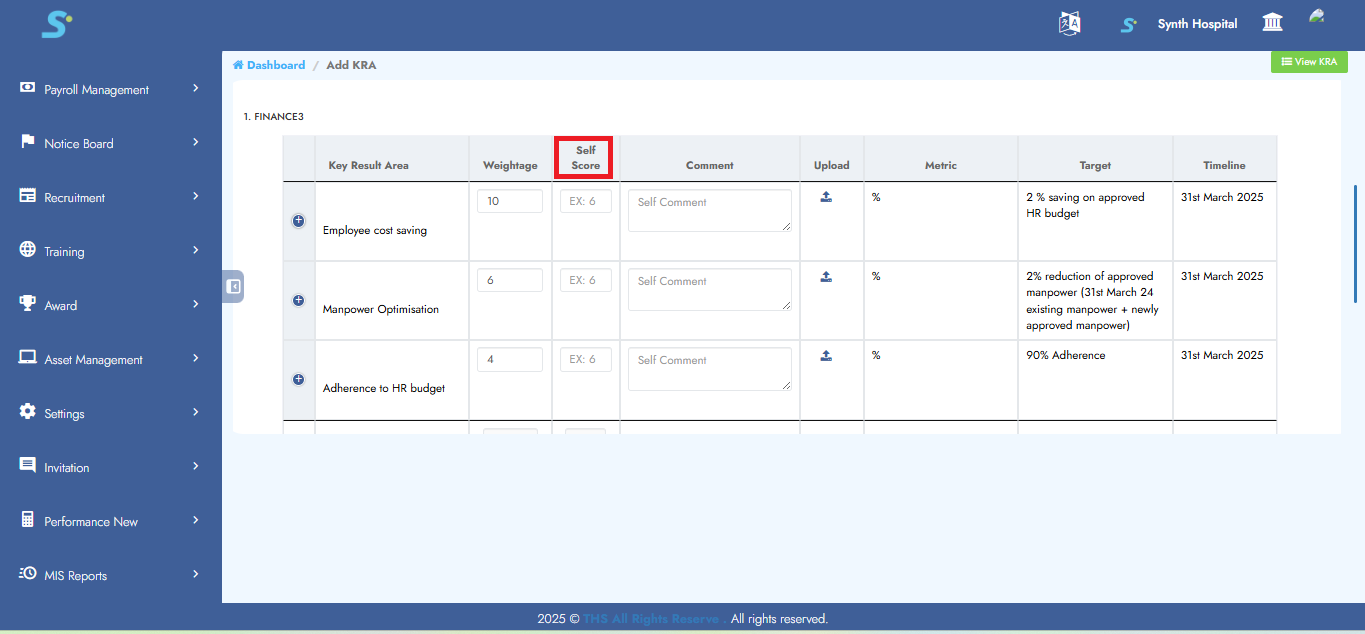
Step 16: Enter Self-Scores
Enter self-scores in the given area, click Continue, and then click Save to successfully add the record.
Step 17: View Team KRA
Go to Performance New > Team KRA, select the process type, and click on the Filter button.
Then click on the Edit button to give scoring.
Step 18: Team Member's Score
Enter team members' scores in the given area, click Continue, and then click Save to successfully add the record.
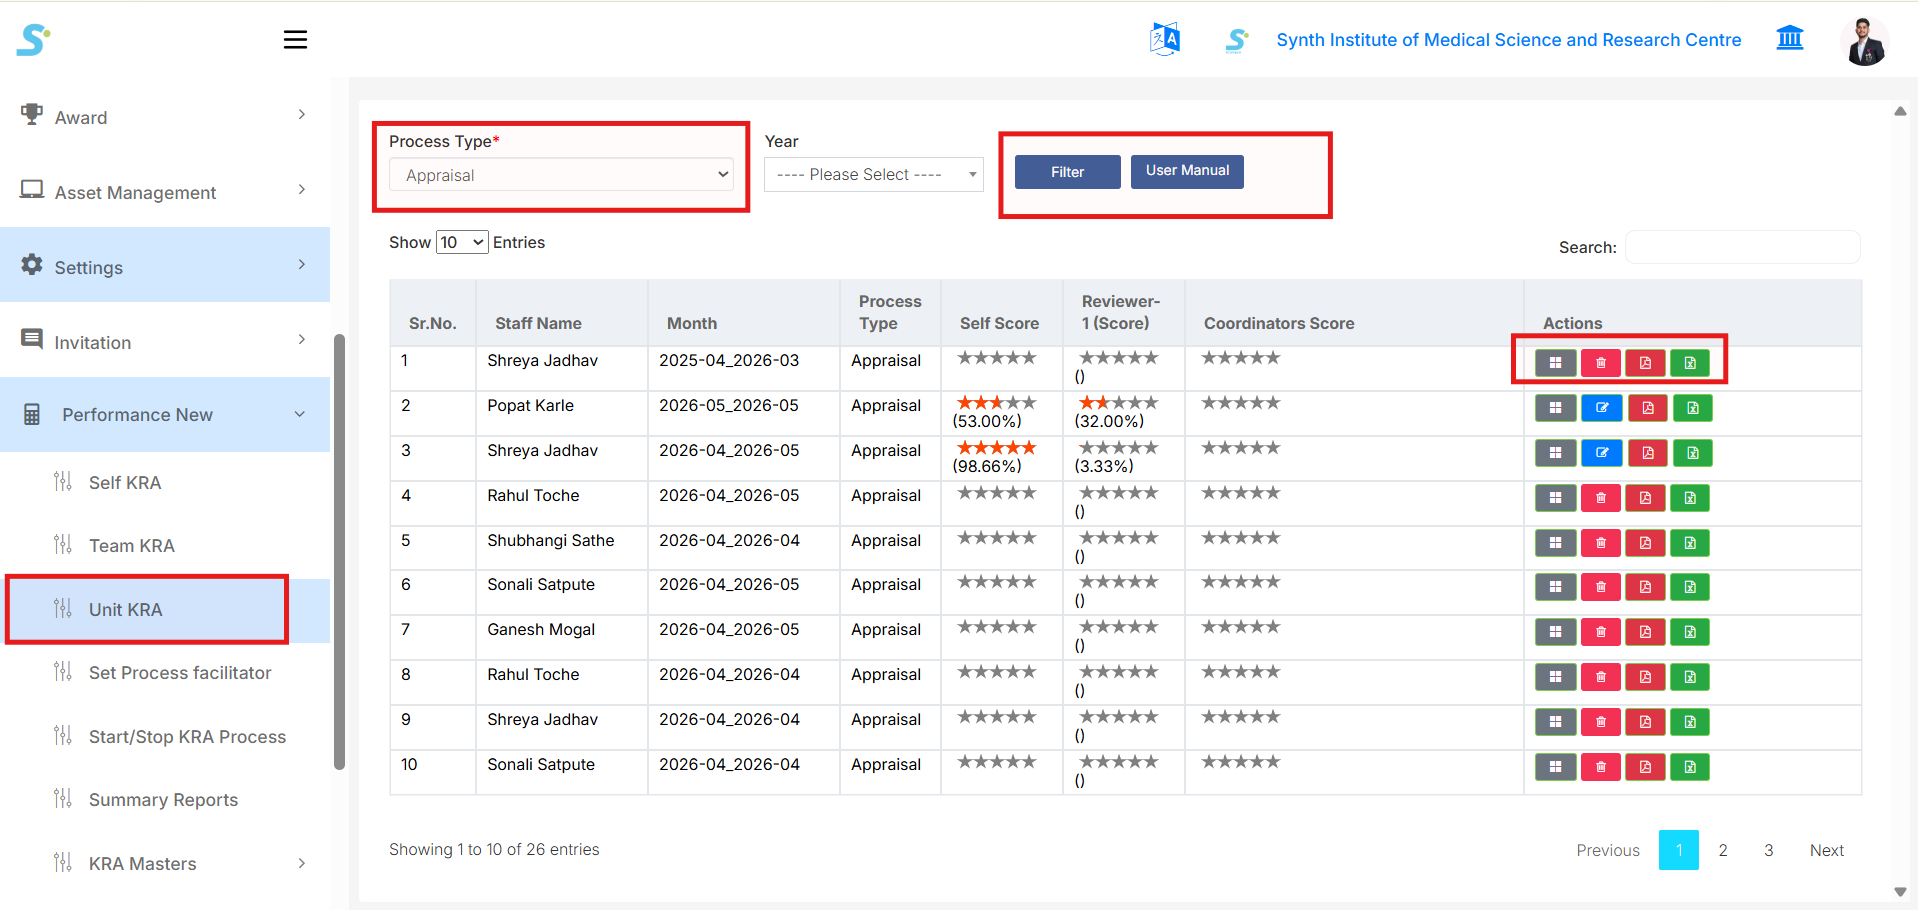
Step 18.1: Unit KRA
Go to Performance New > Unit KRA from the side menu.
This page is used to view KRA/Appraisal forms for all employees under your unit.
The records shown here are access-based, so you can view only the unit KRA records that are assigned or permitted for your role.
Use the available filters:
- Process Type
-
Select the process type, such as Appraisal.
-
Year
- Select the required year.
After selecting the required values, click the Filter button.
The Unit KRA list displays details such as:
- Sr. No.
- Staff Name
- Month
- Process Type
- Self Score
- Reviewer-1 Score
- Coordinators Score
- Actions
In the Actions column, you can perform available actions such as:
- View KRA form details
- Edit or update scoring, if access is available
- Delete record, if permitted
- Download PDF
- Export Excel
Use this page to check the KRA/Appraisal progress and scores of employees in your unit.
Step 19: Start/Stop KRA Process
Go to Performance New > Start/Stop KRA Process, then click on the Start Process button located at the top right corner.
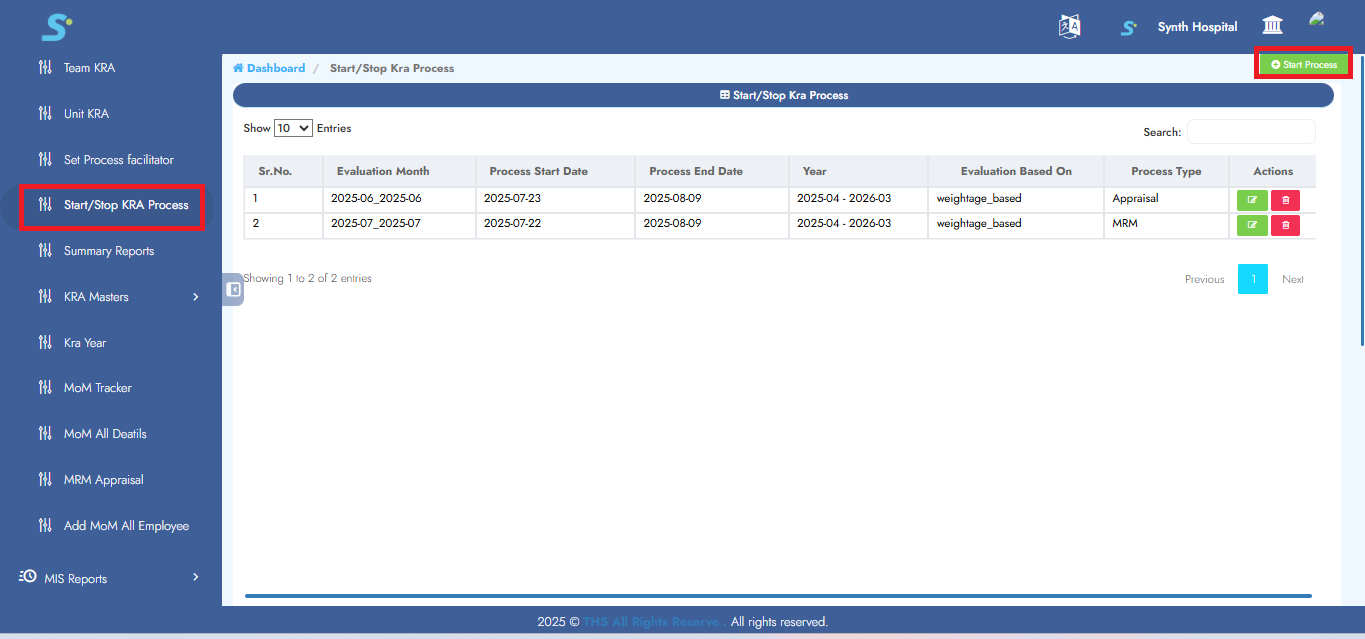
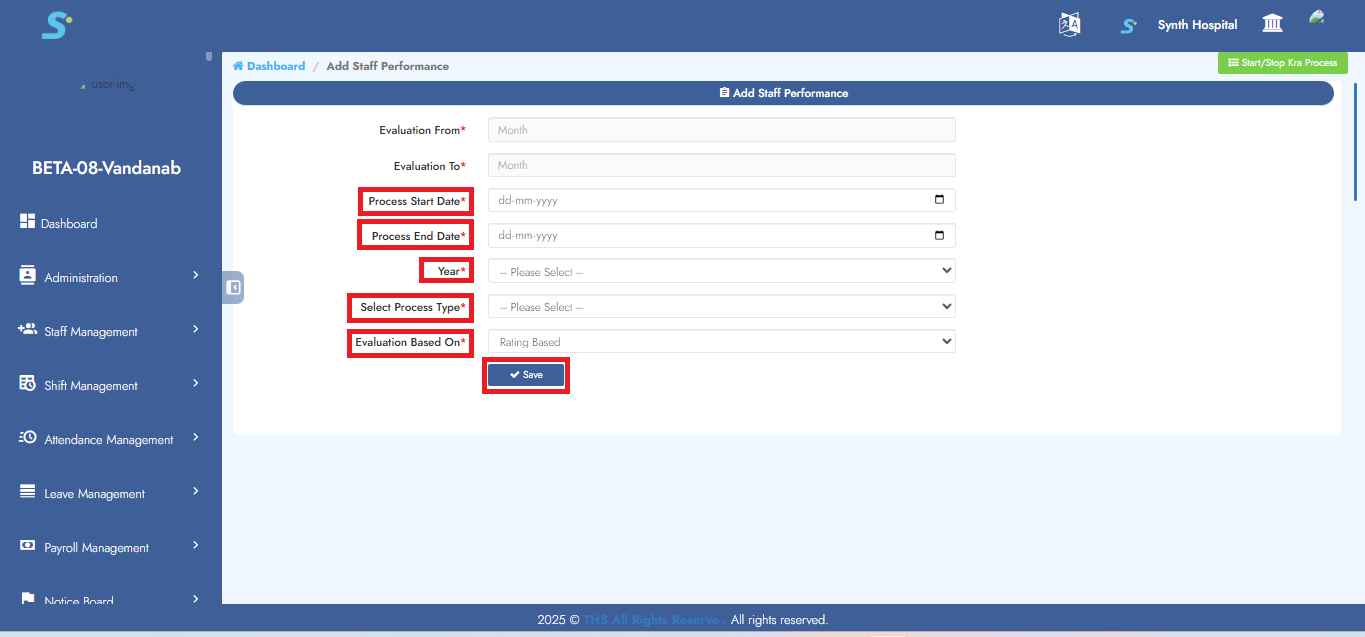
Step 20: Enter Process Details
Enter process start date, process end date, year, select process type, evaluation based on, and then click on the Save button to successfully add the record.
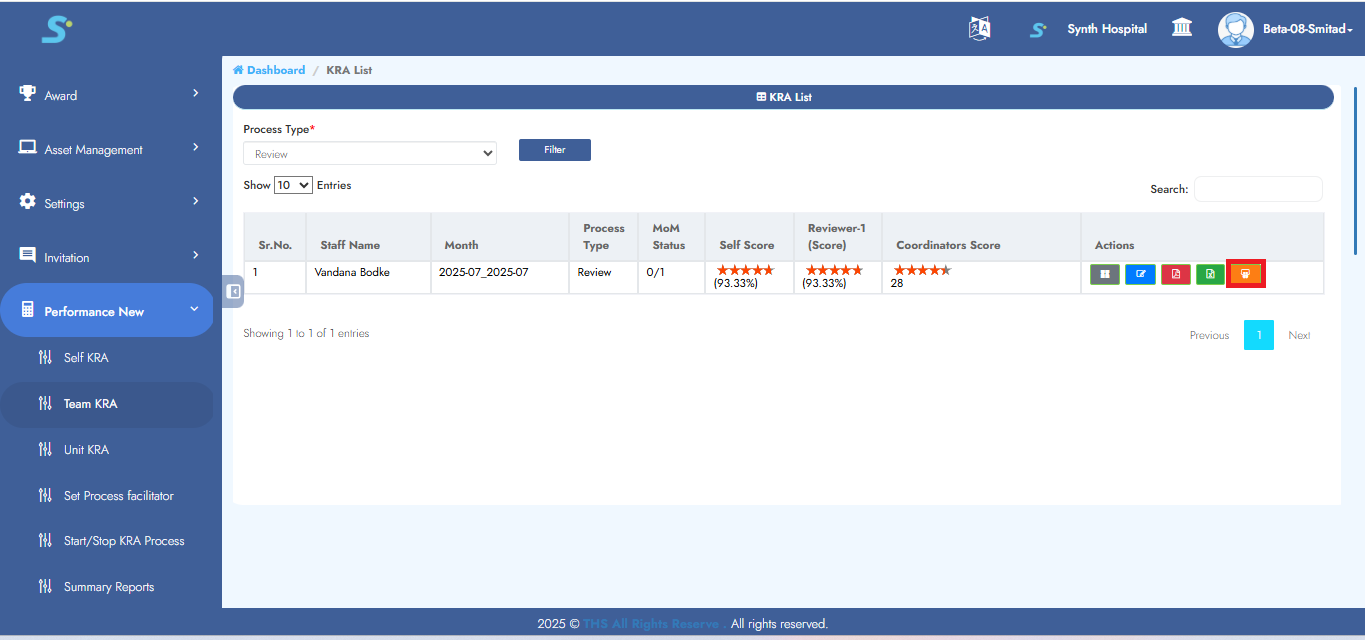
Step 21: View Scores
You can view individual, facilitator, and reviewer scores under Self KRA, Team KRA, and Unit KRA as shown in the image.
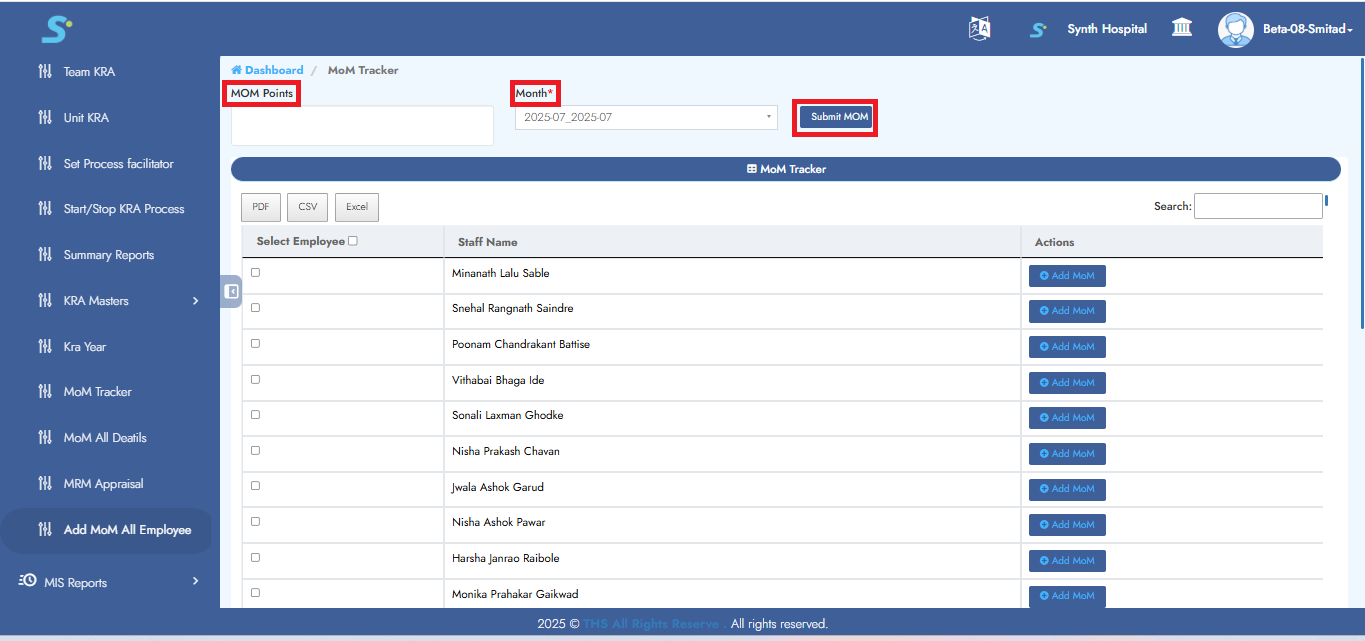
Step 22: Add MOM All Employees
Enter MOM points, select the month, and then click on Submit MOM. It will add MOM to all employees.
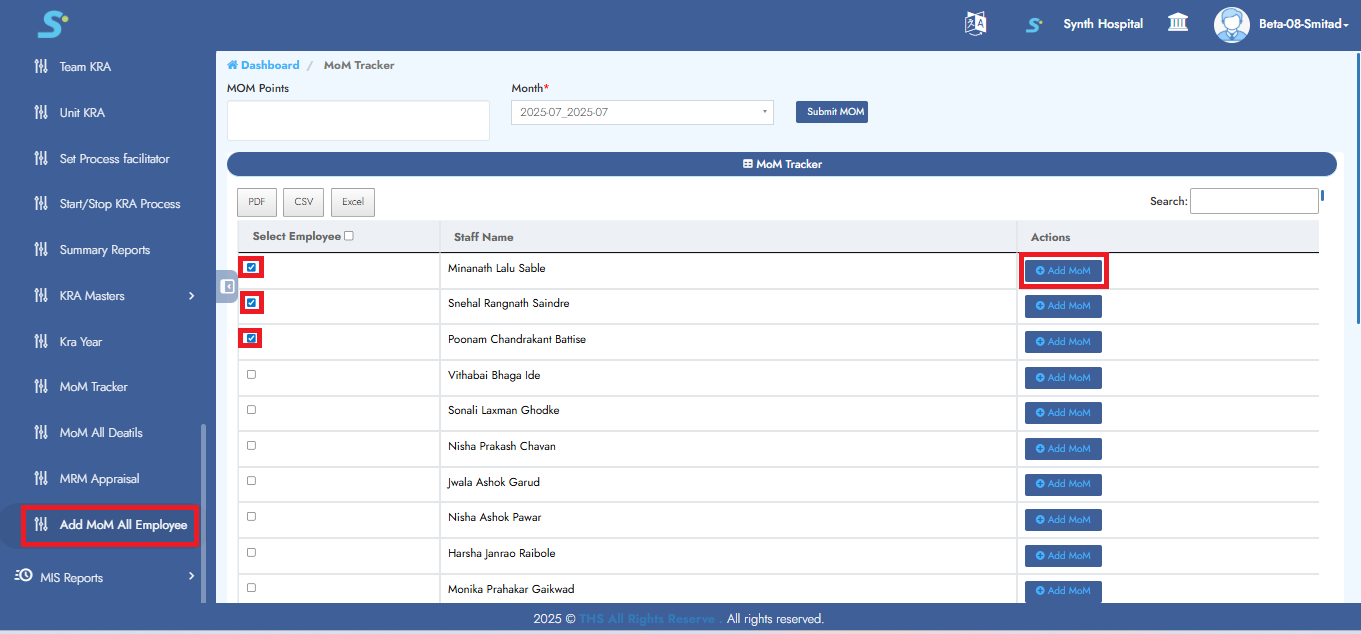
Step 23: Add MOM for Selected Employees
Enter MOM points, select the month, and then click on Submit MOM. It will add MOM to selected employees.
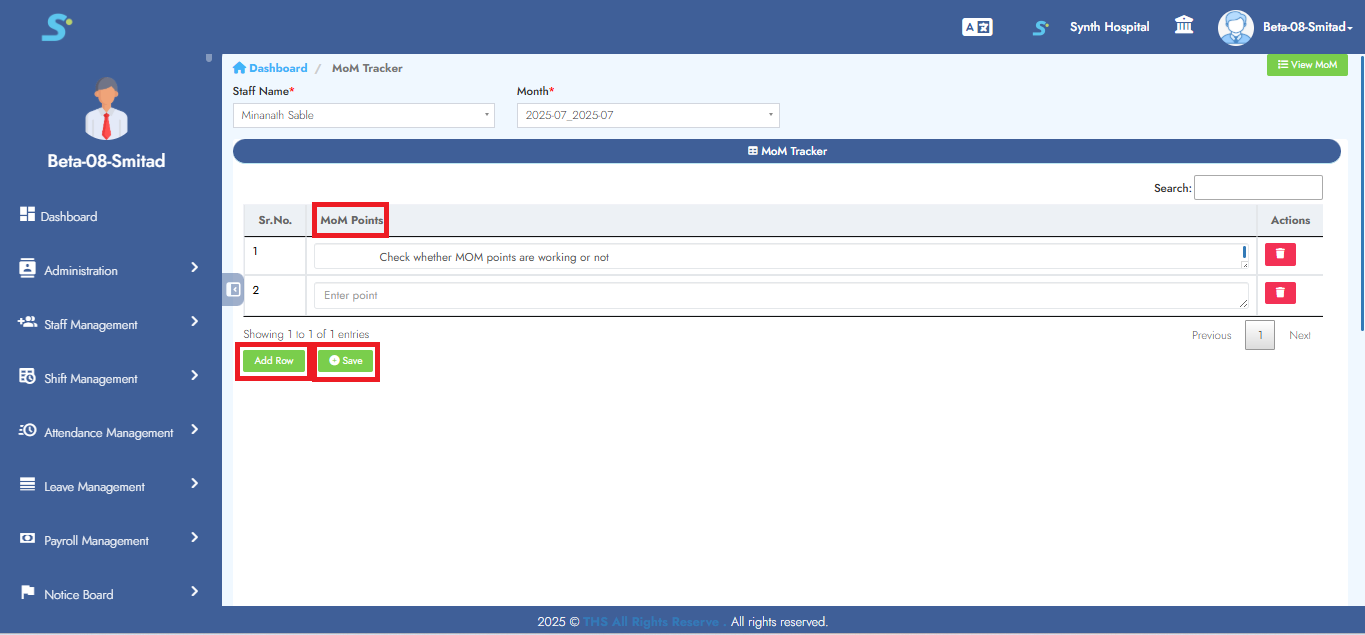
Step 24: Add Multiple MOM Points
Click Add Row to enter multiple MOM points, then click Save to add the record successfully.
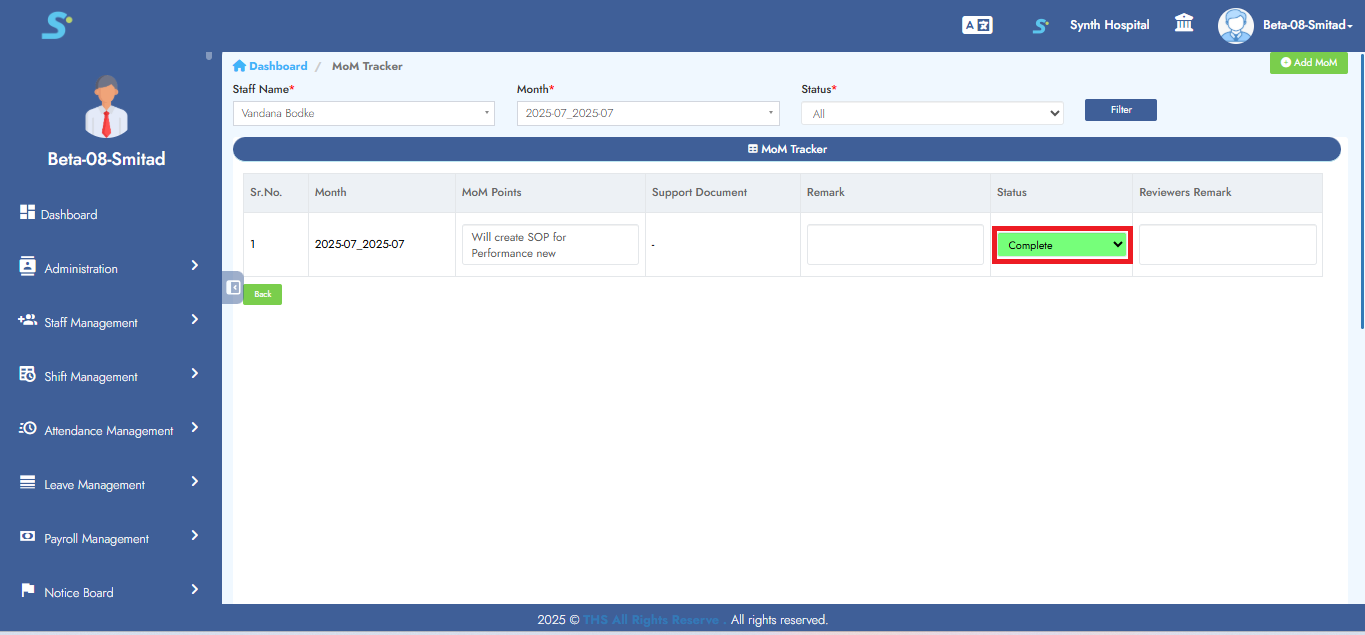
Step 25: Update MOM Status
To update MOM status, click on Presentation View.
Click on the MOM Tracker and then select the desired status.
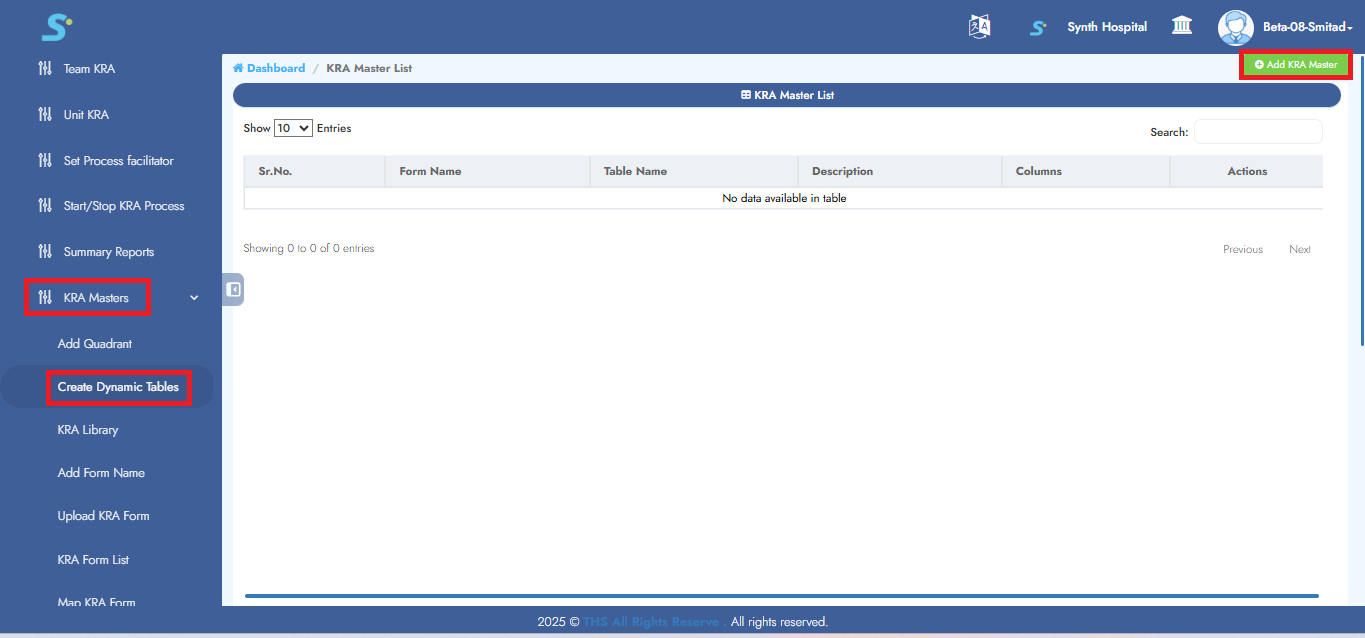
Step 26: Create Dynamic Tables
Go to Performance New > Masters > Create Dynamic Tables, then click on the Add KRA Master button.
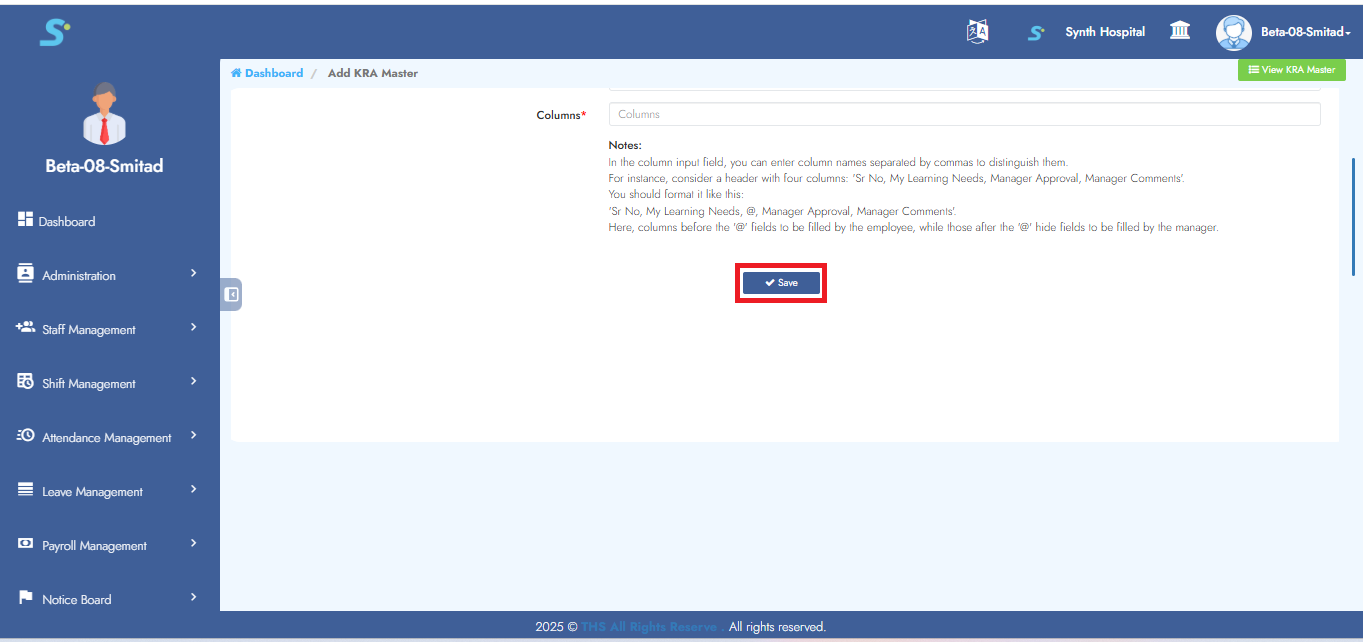
Step 27: Enter Dynamic Table Information
Enter year, form name, is training related, table name, description, columns.
 then click the Save button to add the record successfully.
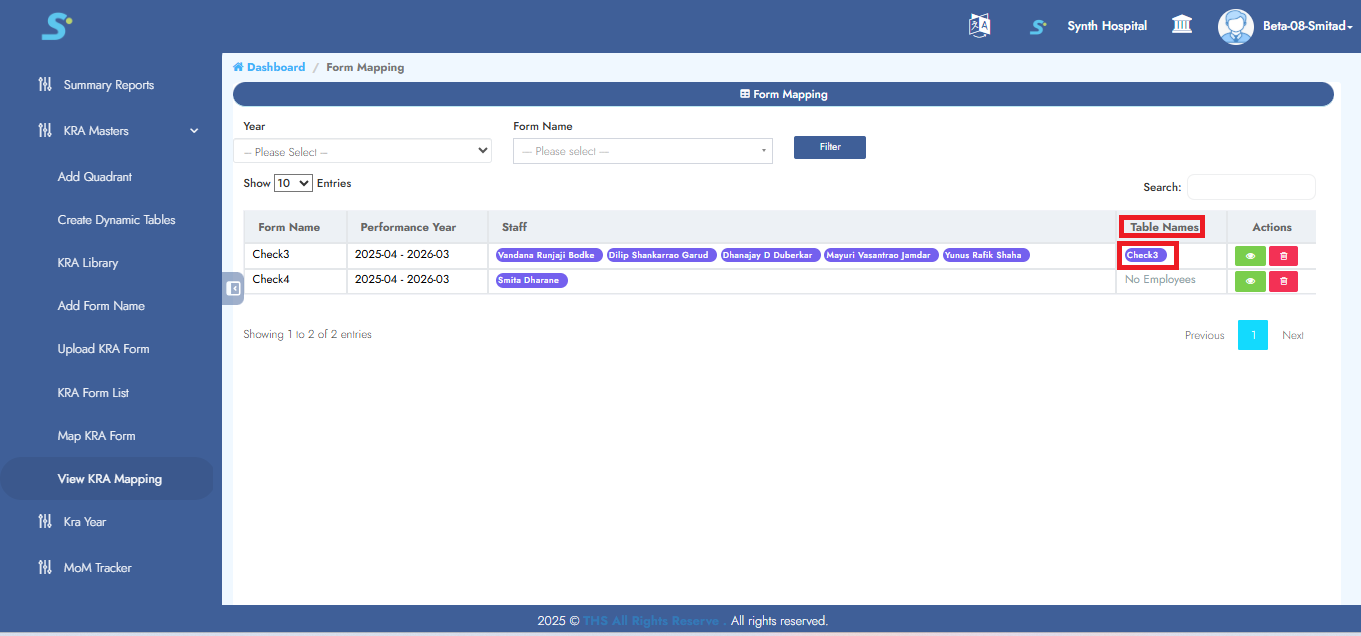
Step 28: View Mapped Dynamic Tables
To view mapped dynamic tables, check the form as shown in the image.
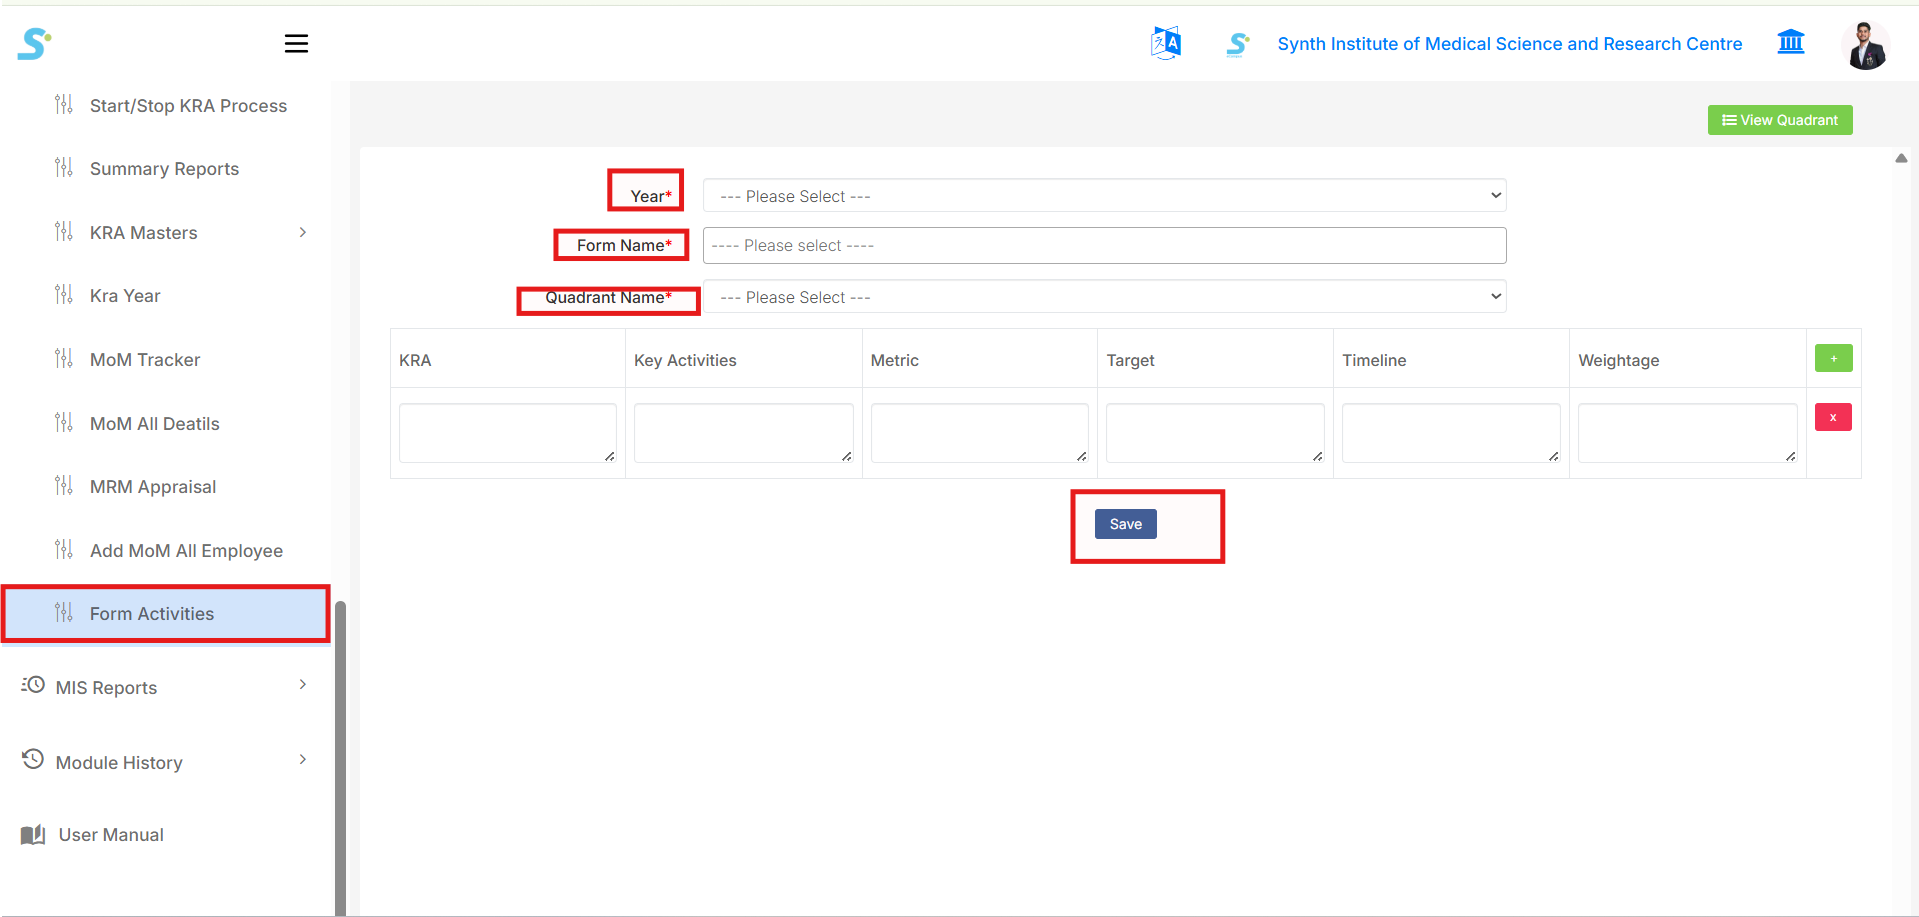
Step 29: Add Form Activities
Go to Performance New > KRA Masters > Form Activities from the side menu.
This page is used to add KRA activities for a selected performance form and quadrant.
Select the required details:
- Year
-
Select the KRA/performance year.
-
Form Name
-
Select the performance form name.
-
Quadrant Name
- Select the quadrant under which the activities will be added.
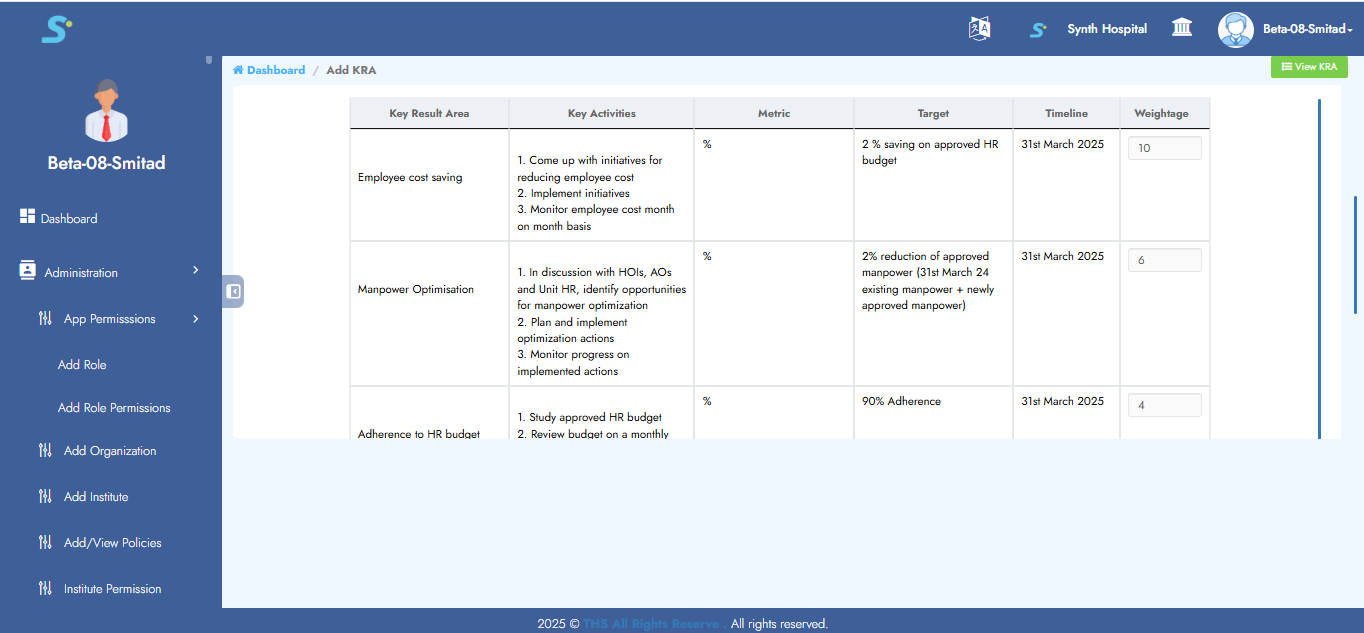
After selecting the above details, enter the KRA activity information in the table.
The activity table includes:
- KRA
-
Enter the KRA name.
-
Key Activities
-
Enter key activity details.
-
Metric
-
Enter the measurement metric.
-
Target
-
Enter the target value or target description.
-
Timeline
-
Enter the completion timeline.
-
Weightage
- Enter the weightage for the activity.
Use the + button to add more activity rows.
Use the x button to remove an activity row if required.
After entering all required details, click the Save button to save the form activities.
From the top-right side, click View Quadrant to return to the quadrant list page.