Staff Management Module
Step 1: Add Department
Go to Staff Management > Masters > Add Department, then click on Add Department from the side menu.
Click the Add Department button located at the top right.
Step 2: Adding a New Department
Click the Add Department button located at the top right corner.
Step 3: Saving Department Information
Enter the department name, abbreviation, and optionally the department HOD as shown in the image.
Click the Save button to successfully add the record.
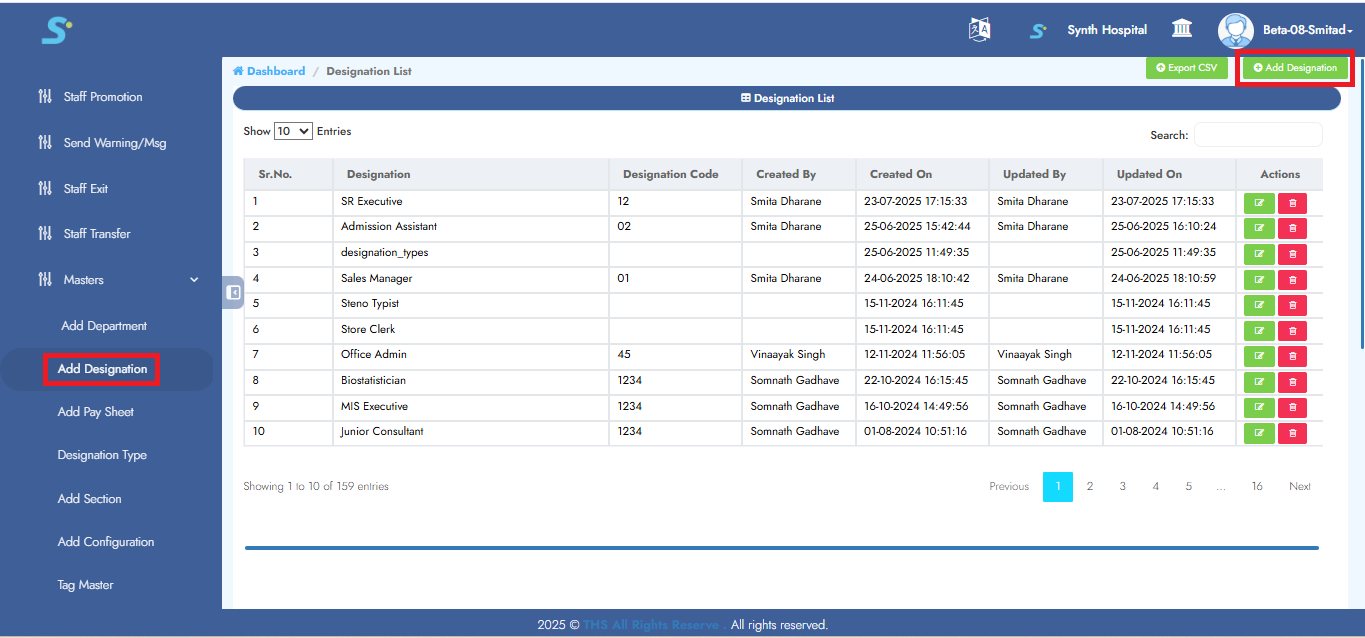
Step 4: Add Designation
Go to Staff Management > Masters > Add Designation, then click on Add Designation from the side menu.
Click the Add Designation button located at the top right corner.
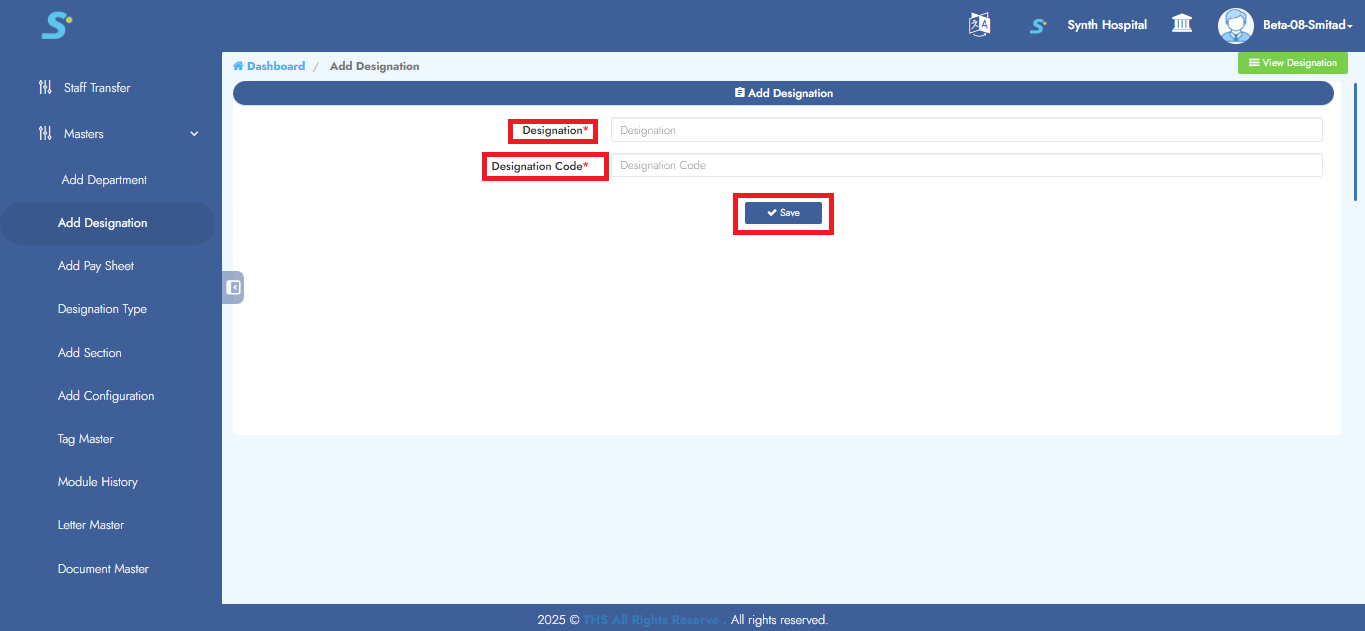
Step 5: Saving Designation Information
Enter the designation and designation code as shown in the image.
Click the Save button to successfully add the record.
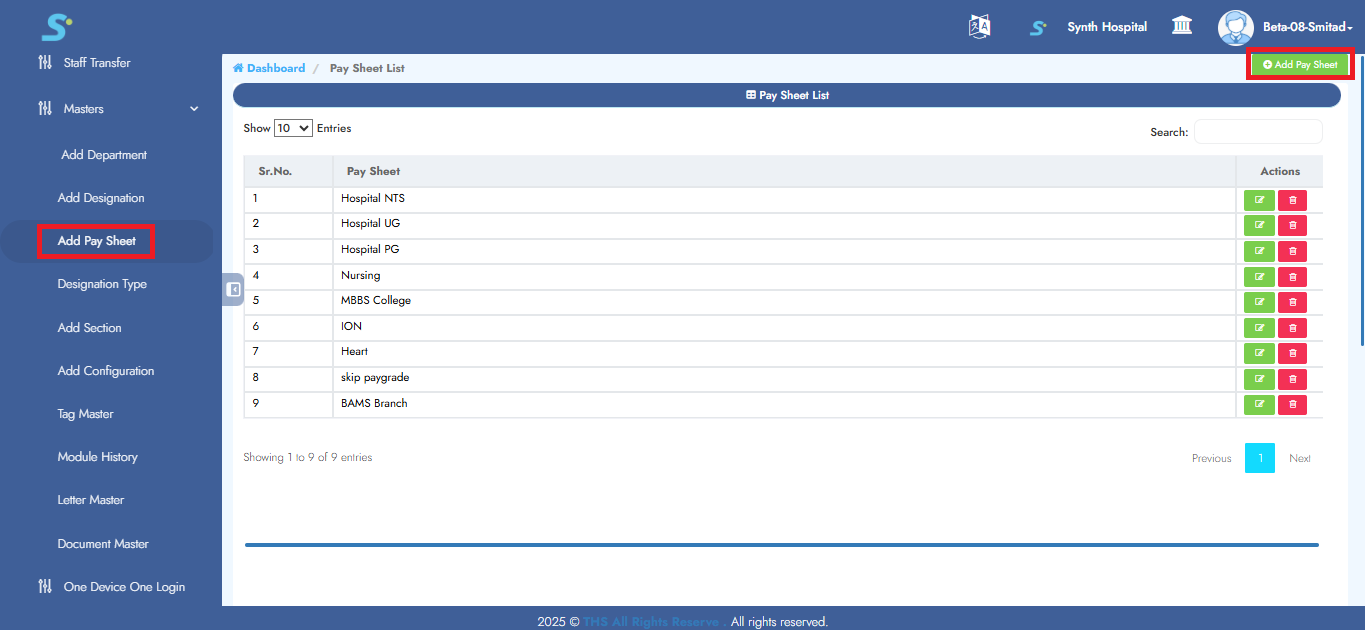
Step 6: Add Paysheet
Go to Staff Management > Masters > Add Pay Sheet, then click on Add Pay Sheet from the side menu.
Click the Add Pay Sheet button located at the top right corner.
Step 7: Saving Pay Sheet Information
Enter the Pay Sheet as shown in the image.
Click the Save button to successfully add the record.

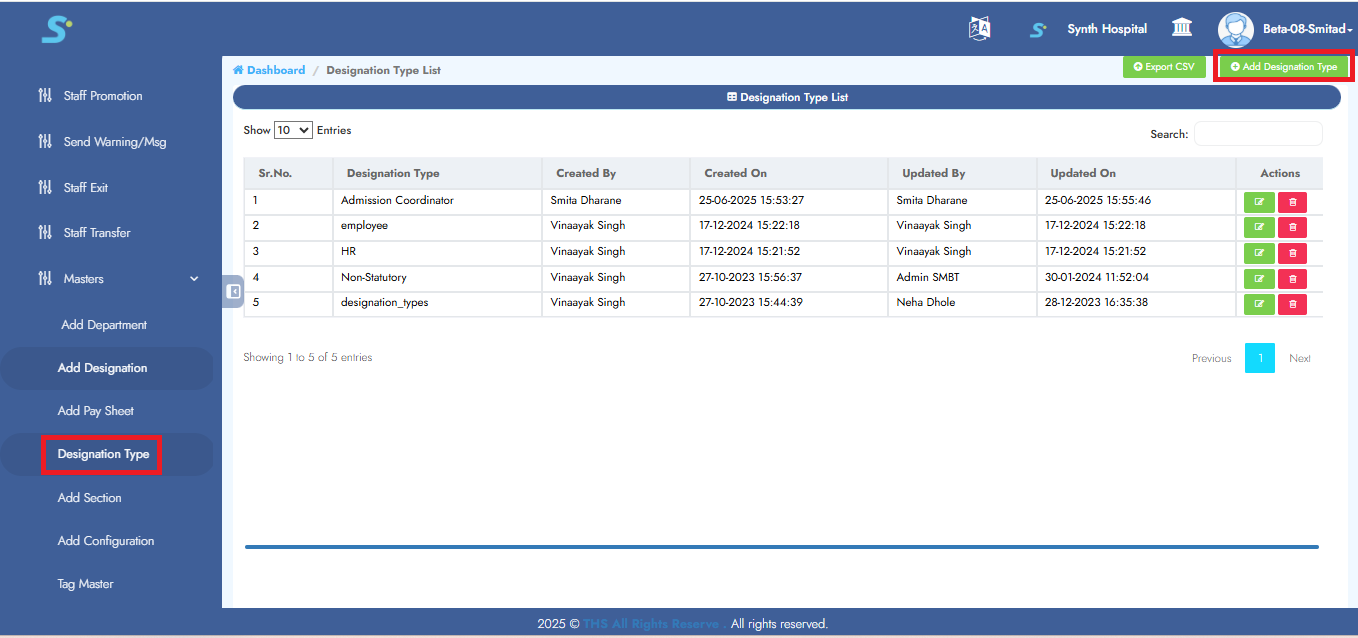
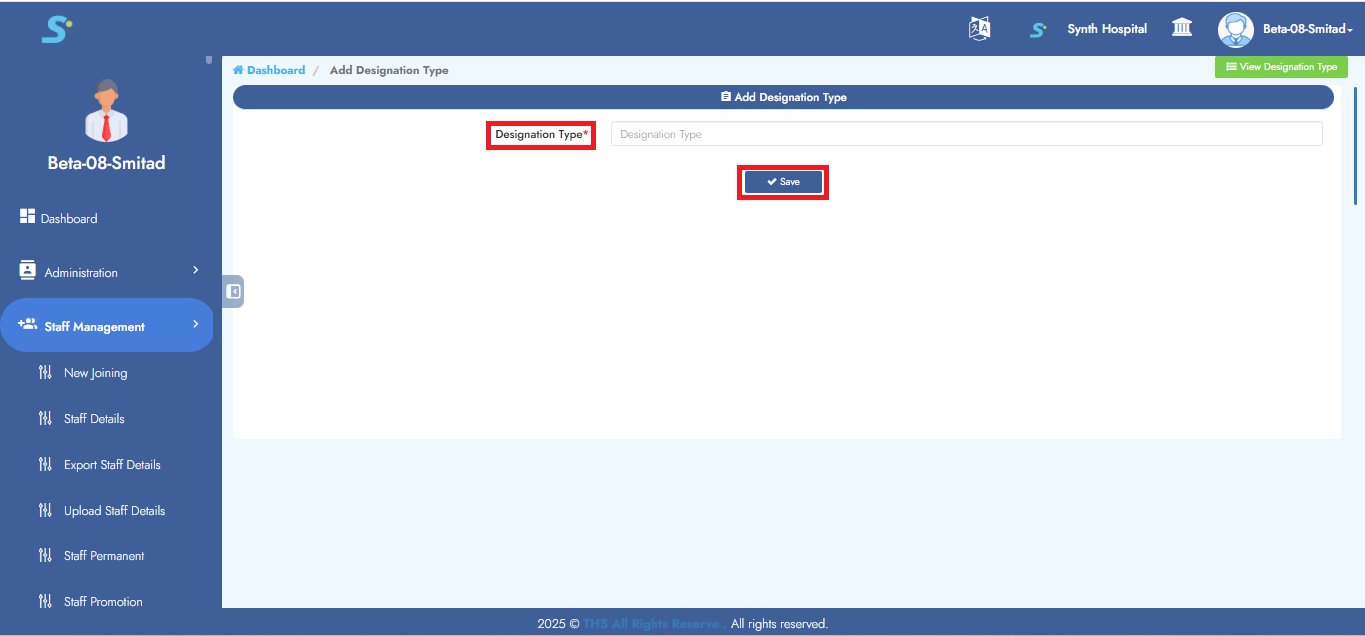
Step 8: Add Designation Type
Go to Staff Management > Masters > Add Designation Type, then click on Add Designation Type from the side menu.
Click the Add Designation Type button located at the top right corner.
Step 9: Saving Designation Type Information
Enter the designation type as shown in the image.
Click the Save button to successfully add the record.
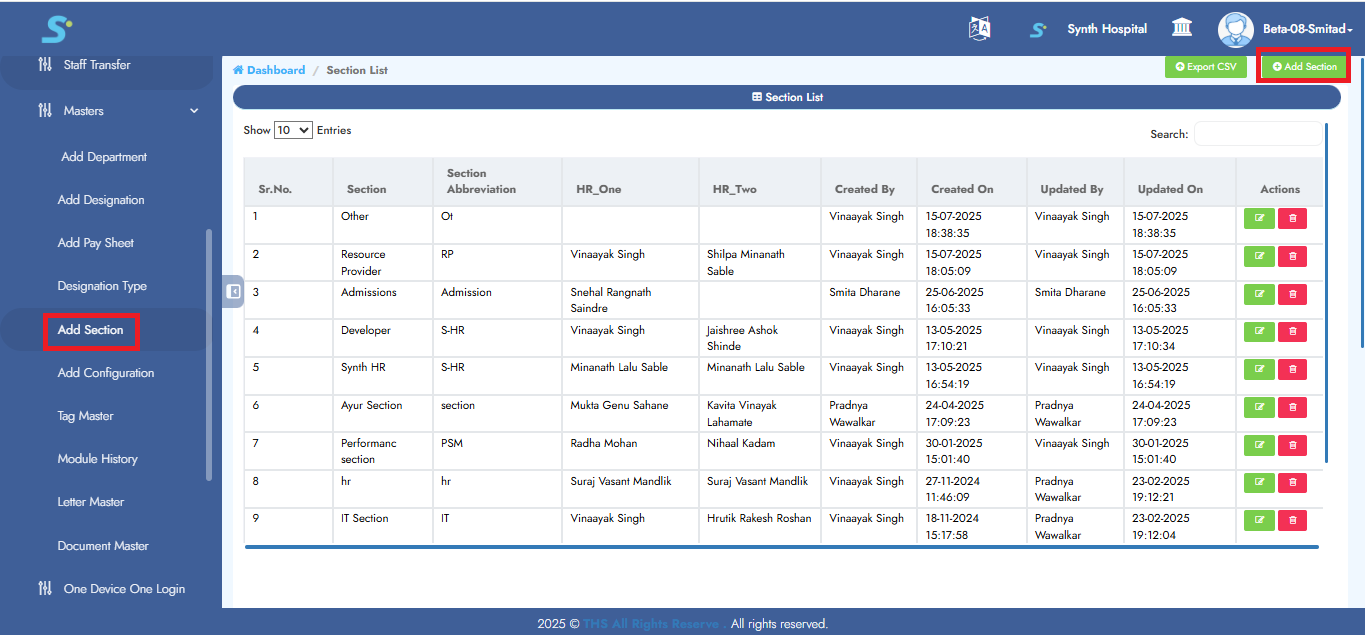
Step 10: Add Section
Go to Staff Management > Masters > Add Section, then click on Add Section from the side menu.
Click the Add Section button located at the top right corner.
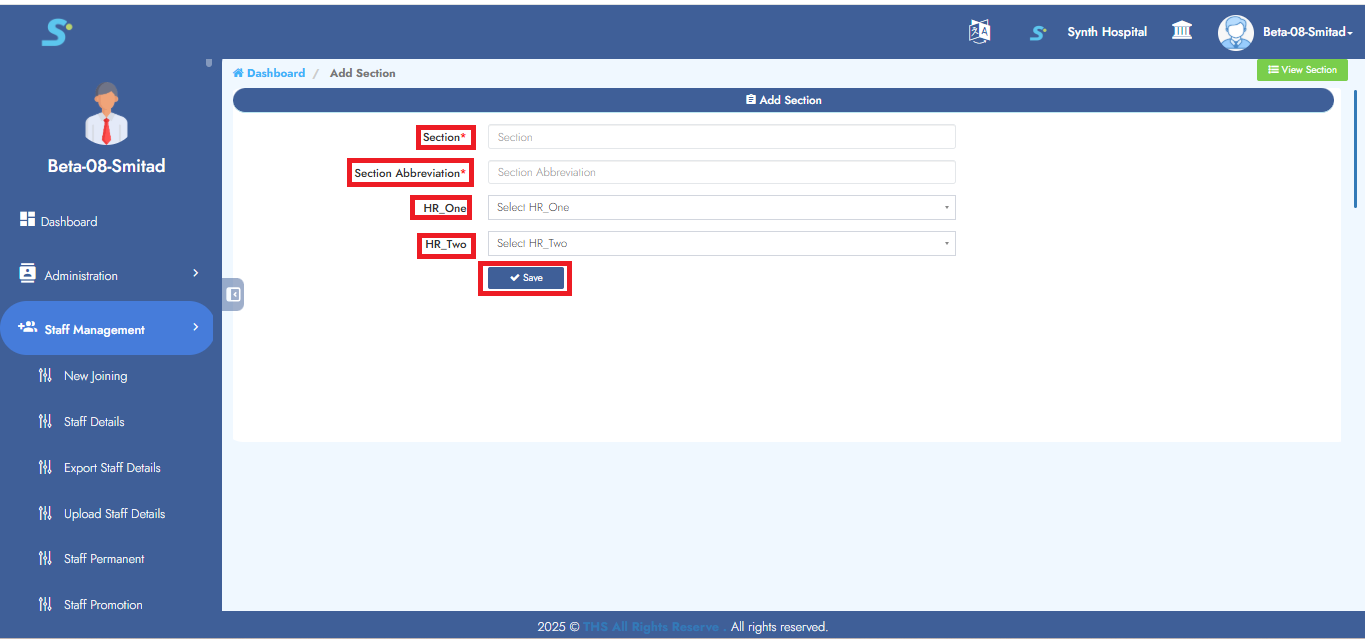
Step 11: Saving Section Information
Enter the section, section abbreviation, HR one (optional), HR two (optional) as shown in the image.
Click the Save button to successfully add the record.
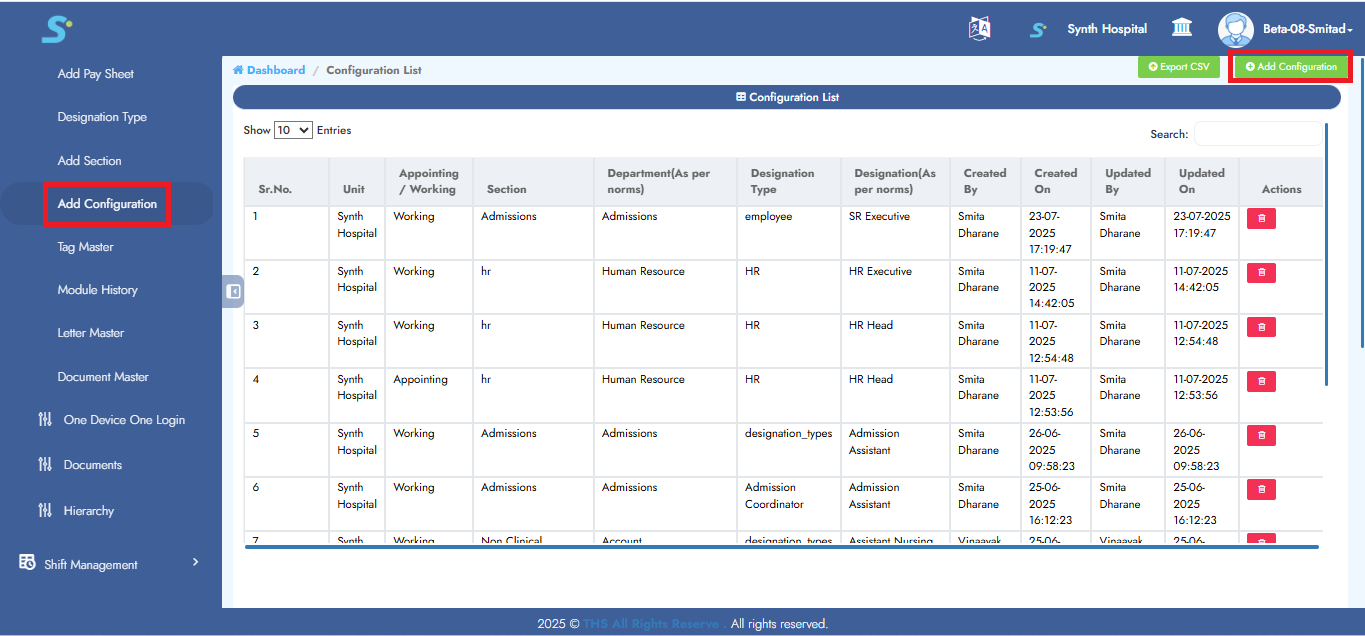
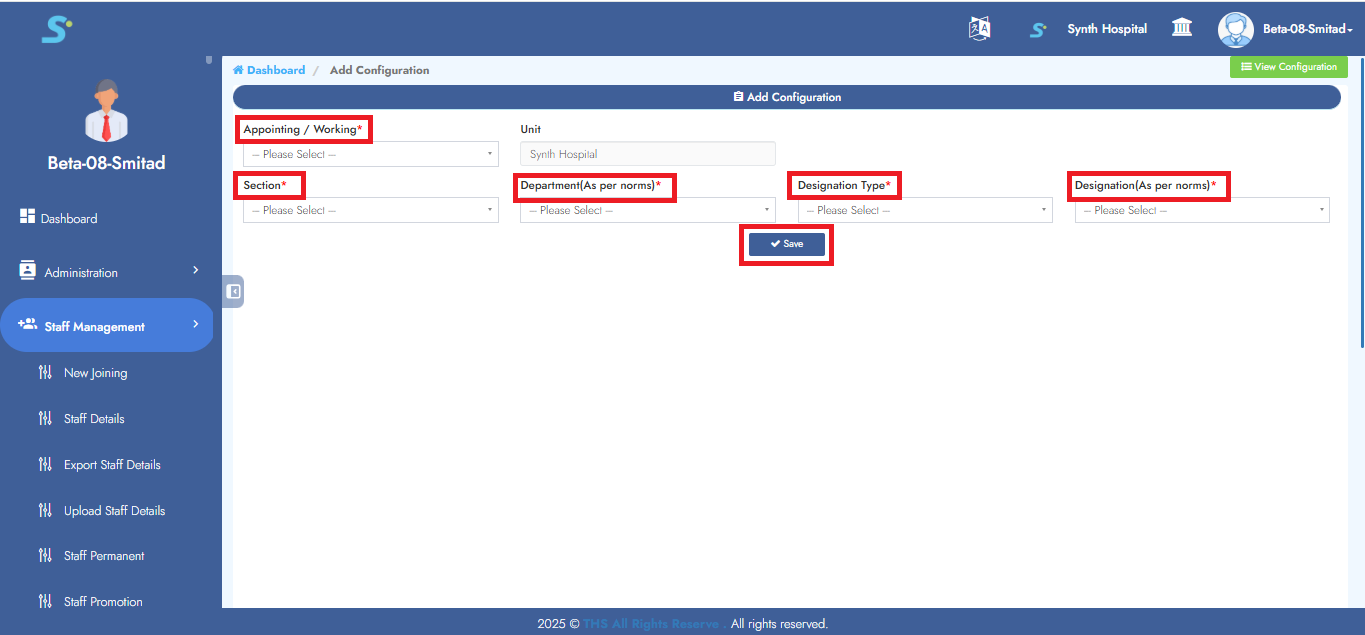
Step 12: Add Configuration
Go to Staff Management > Masters > Add Configuration, then click on Add Configuration from the side menu.
Click the Add Configuration button located at the top right corner.
Step 13: Saving Configuration Information
Enter the appointing/working, section, department, designation type, designation as shown in the image.
Click the Save button to successfully add the record.
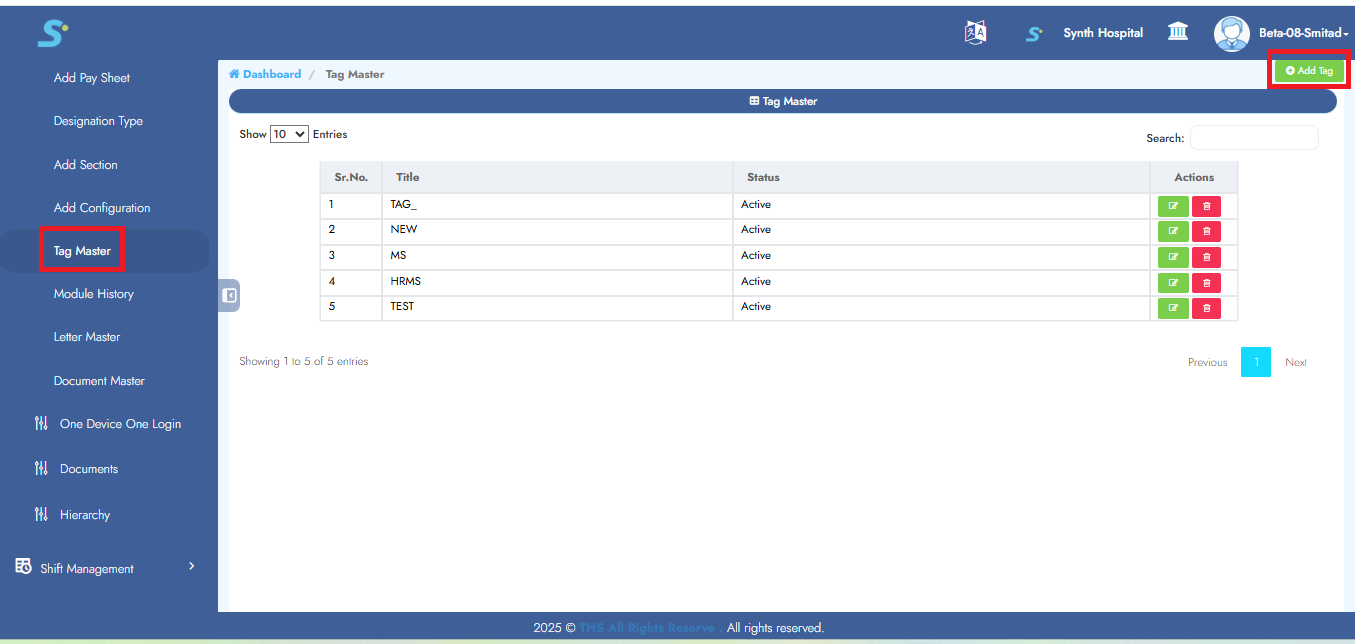
Step 14: Tag Master
Go to Staff Management > Masters > Add Tag, then click on Add Tag from the side menu.
Click the Add Tag button located at the top right corner.
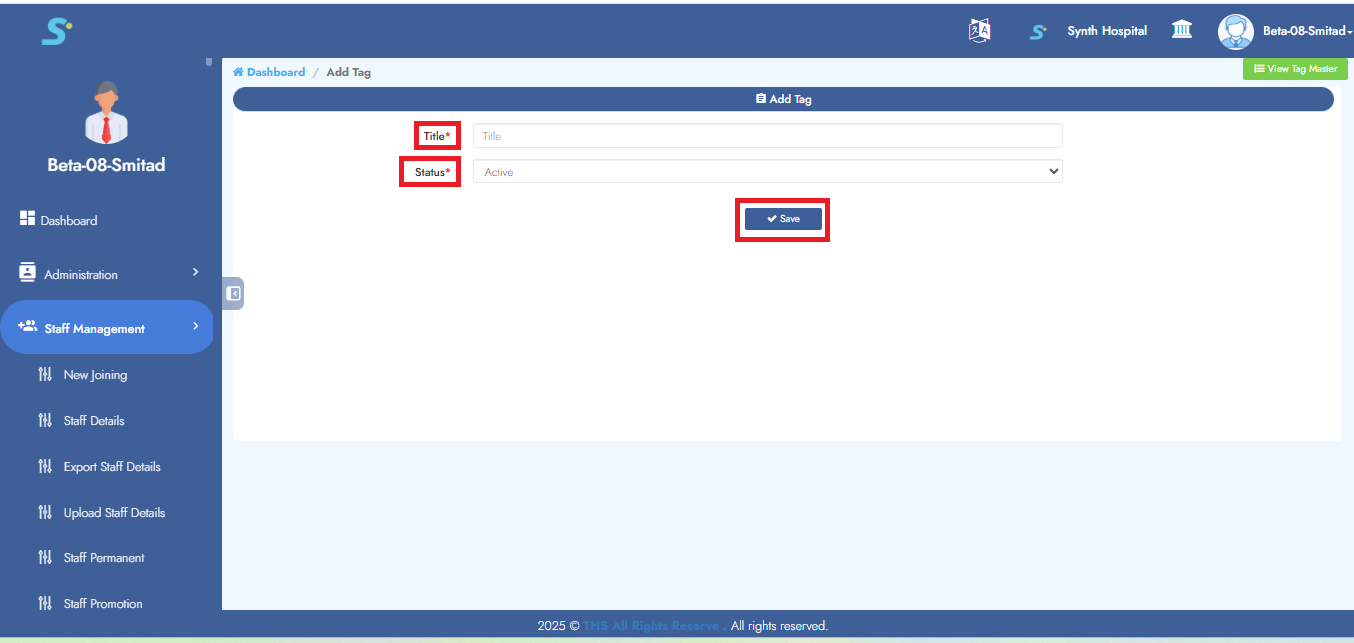
Step 15: Saving Tag Master
Enter the title, status as shown in the image.
Click the Save button to successfully add the record.
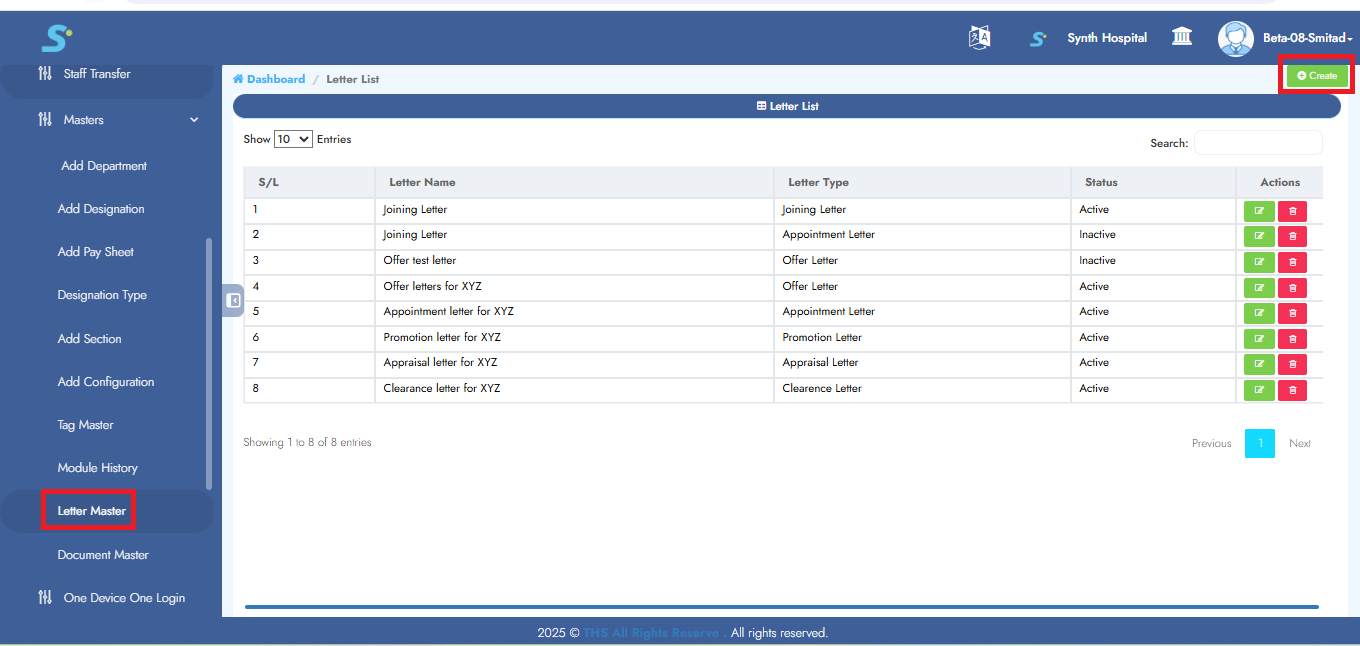
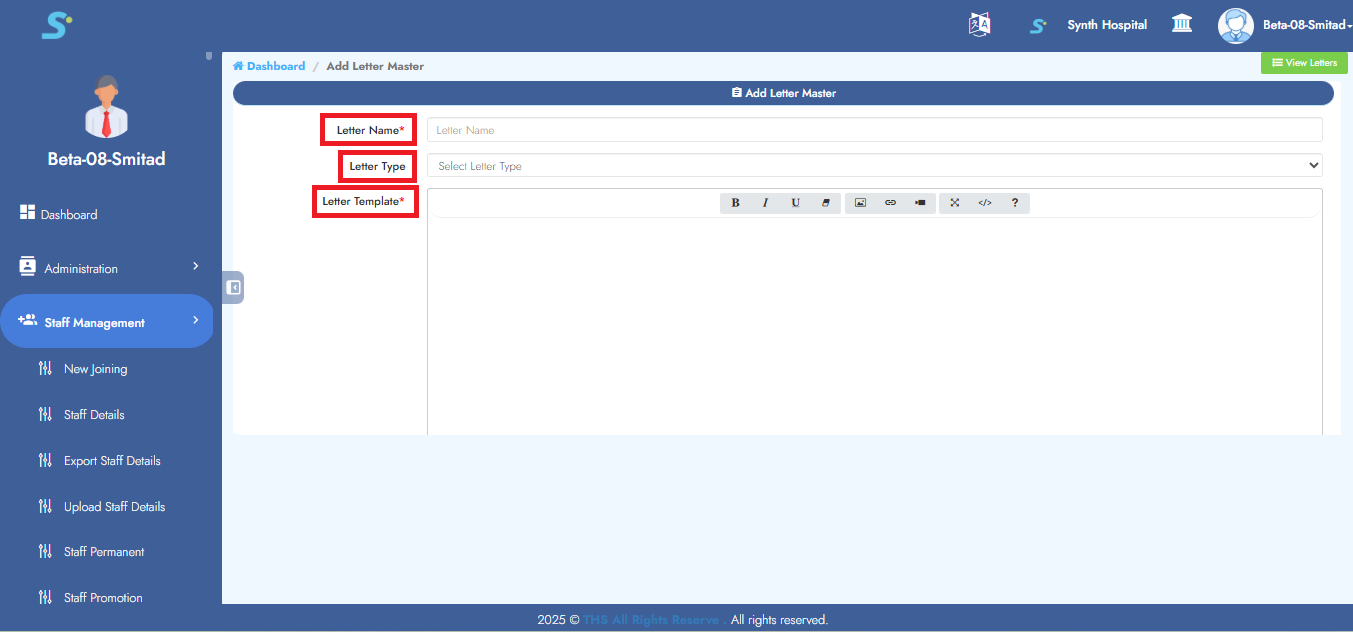
Step 16: Letter Master
Go to Staff Management > Masters > Letter Master, then click on Create located at the top right corner.
Step 17: Saving Letter Master
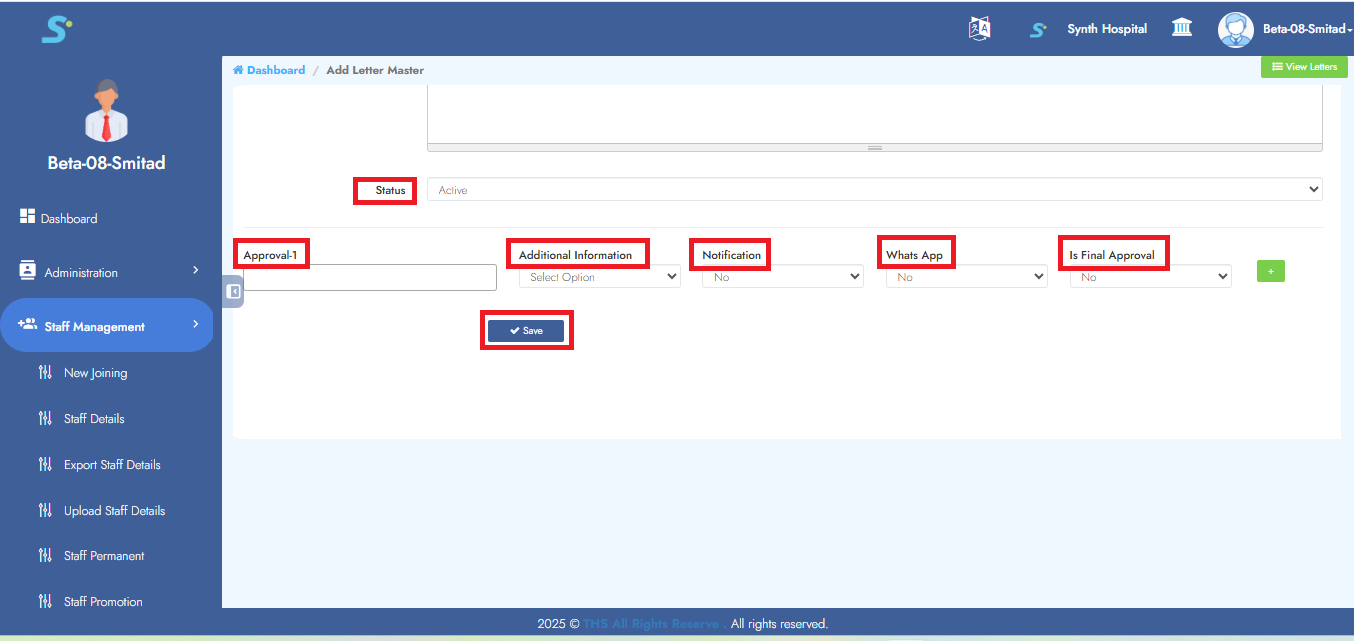
Enter the letter name, letter type (select from drop-down list), letter template, status and set approvals as shown in the image.
In approval setting, enter approval-1, additional information, notification (yes/no), WhatsApp (yes/no), is final approval (yes/no) and to add more approvals, click on the Add button.
Click the Save button to successfully add the record.
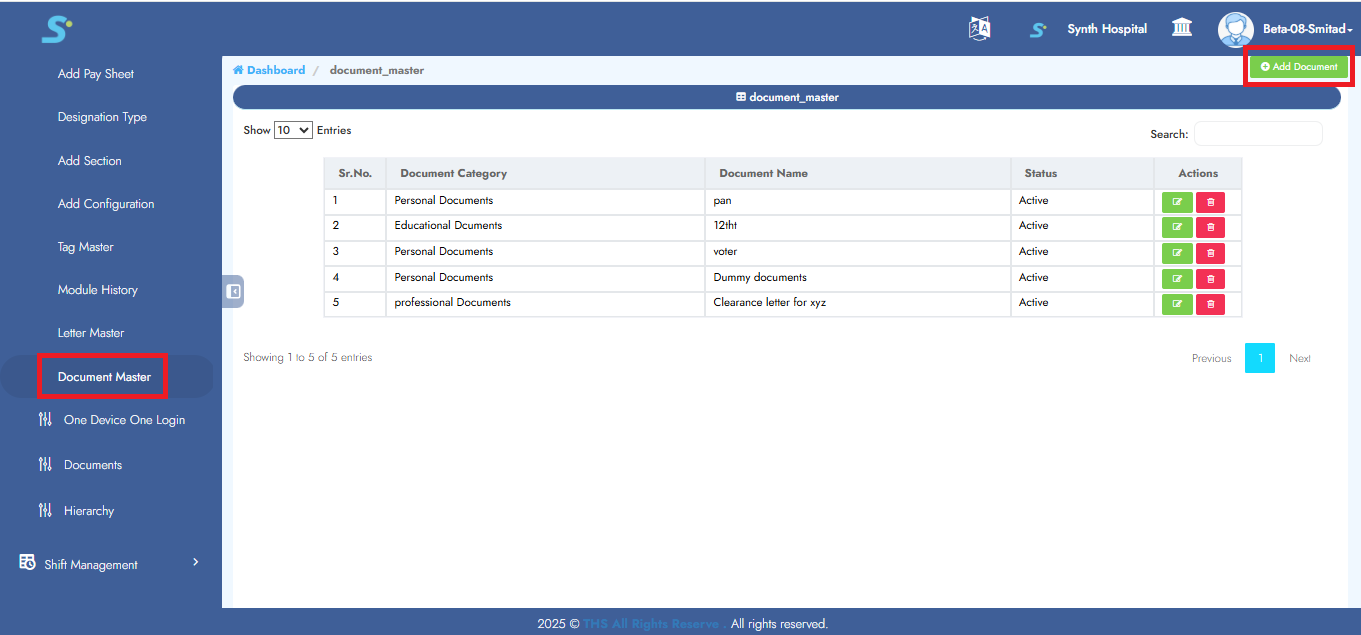
Step 18: Document Master
Go to Staff Management > Masters > Document Master, then click on Add Document from the side menu.
Click the Add Document button located at the top right corner.
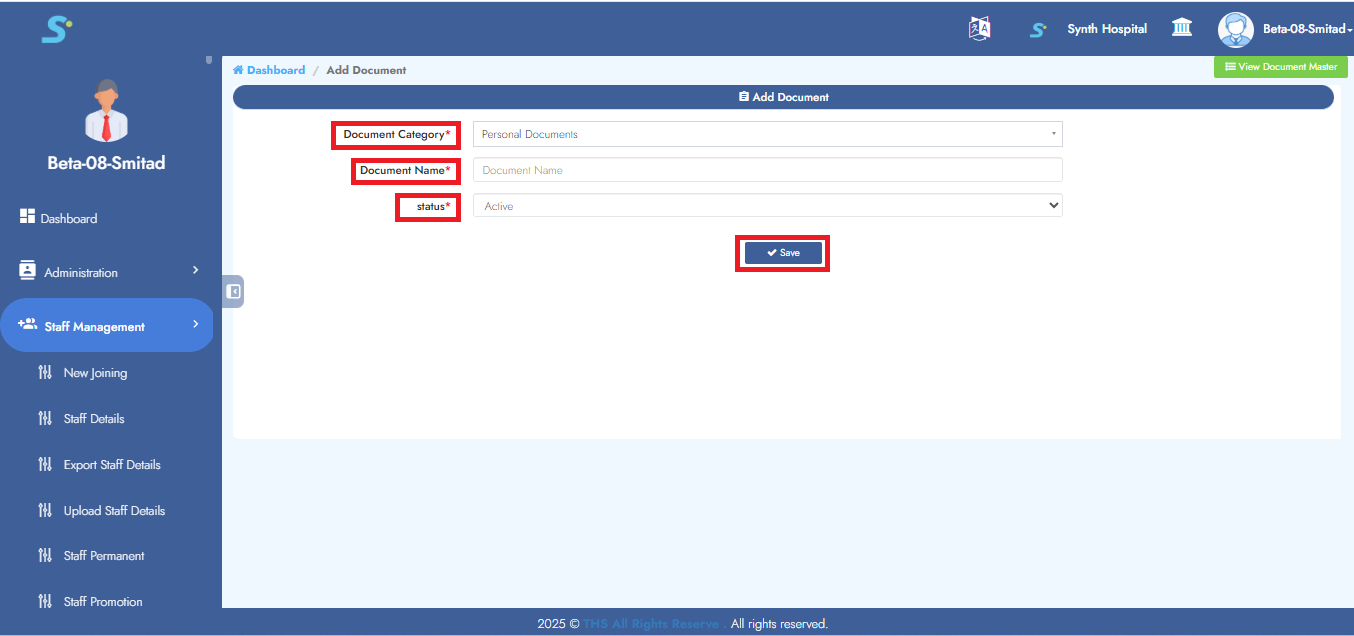
Step 19: Saving Document Master
Enter the document category (select from drop-down list), document name and status (active/inactive as shown in the image).
Click the Save button to successfully add the record.
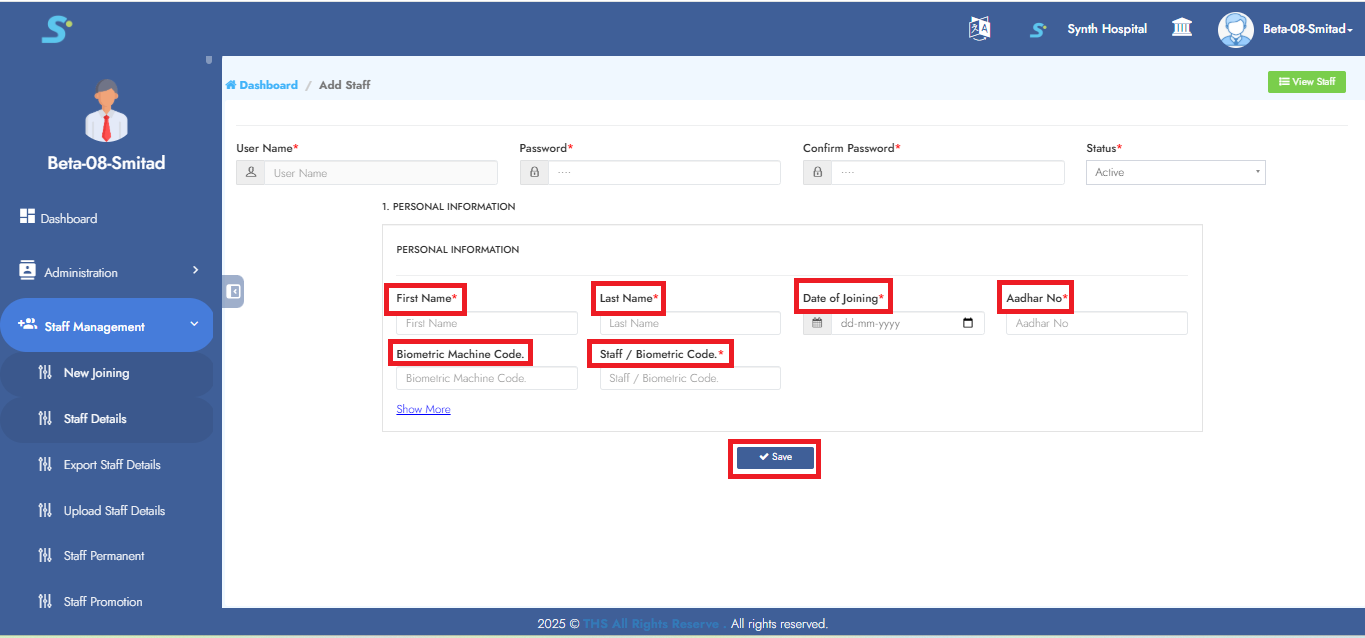
Step 20: New Joining
Enter first name, last name, date of joining, Aadhar no, biometric machine code, staff/biometric code as shown in the image.
Click the Save button to successfully add the record.
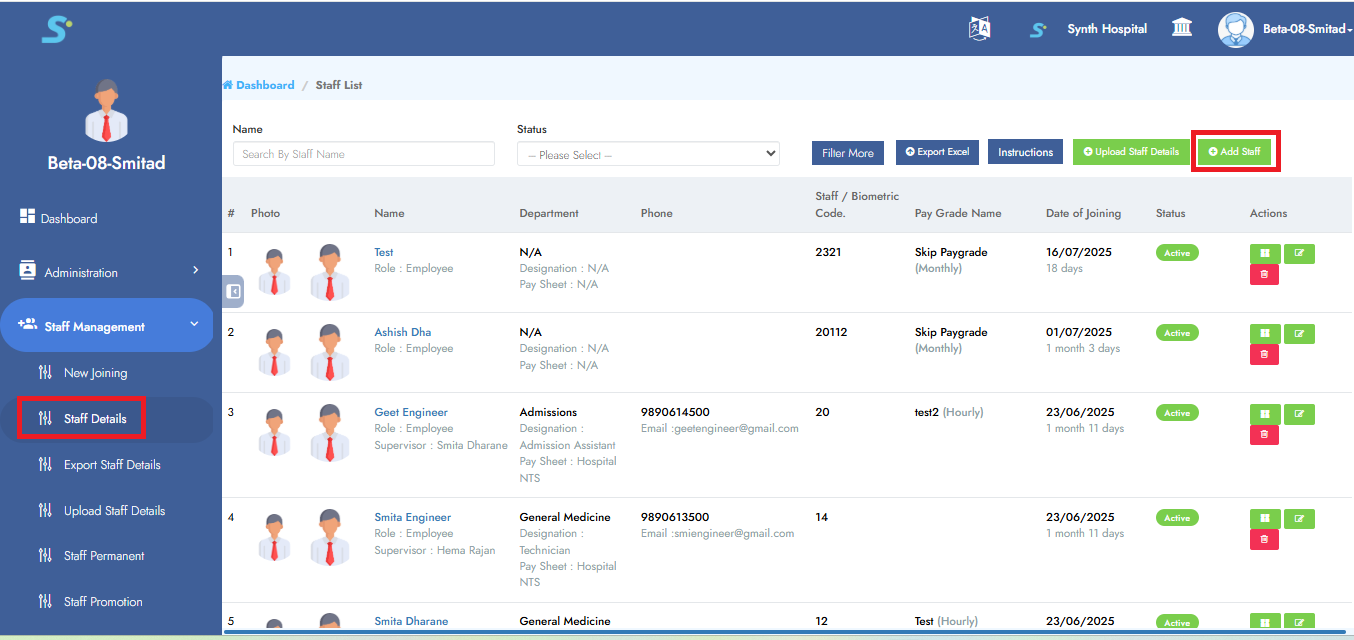
Step 21: Staff Details
Go to Staff Management > Staff Details, then click on the Add Staff button located at the top right corner.
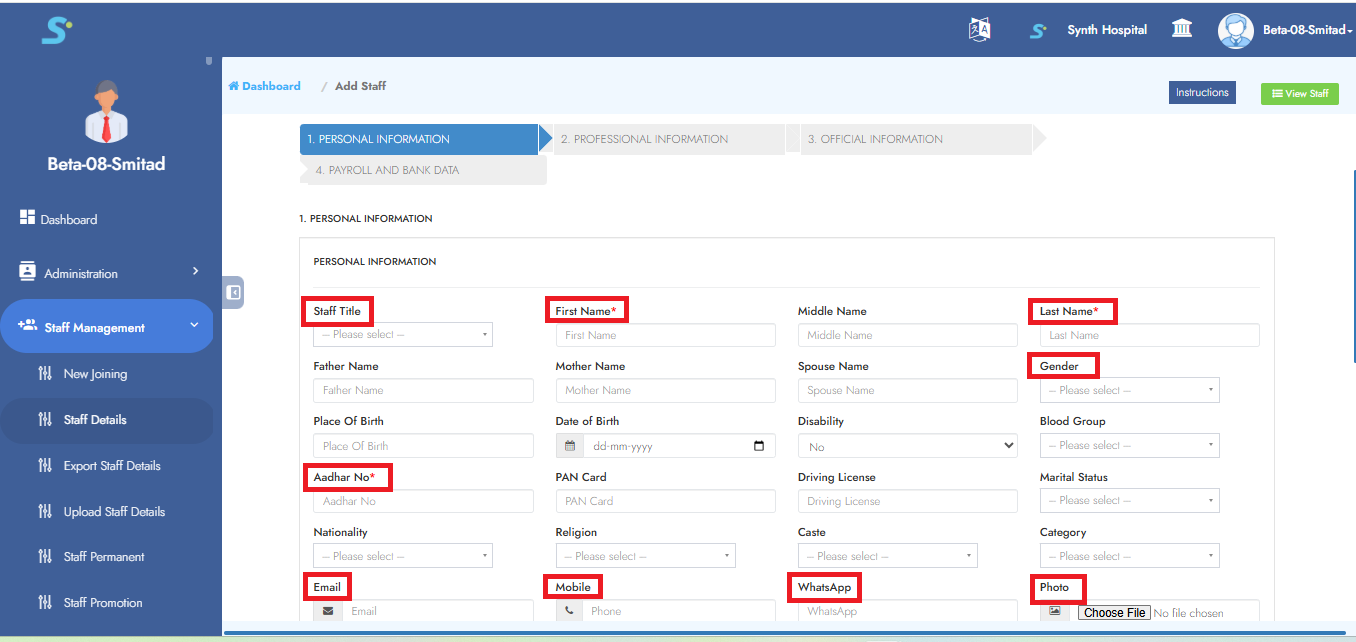
Step 22: Enter Personal Information
Enter required personal details in the Personal Information tab as shown in the image.
Enter personal information, educational information as shown in the image.
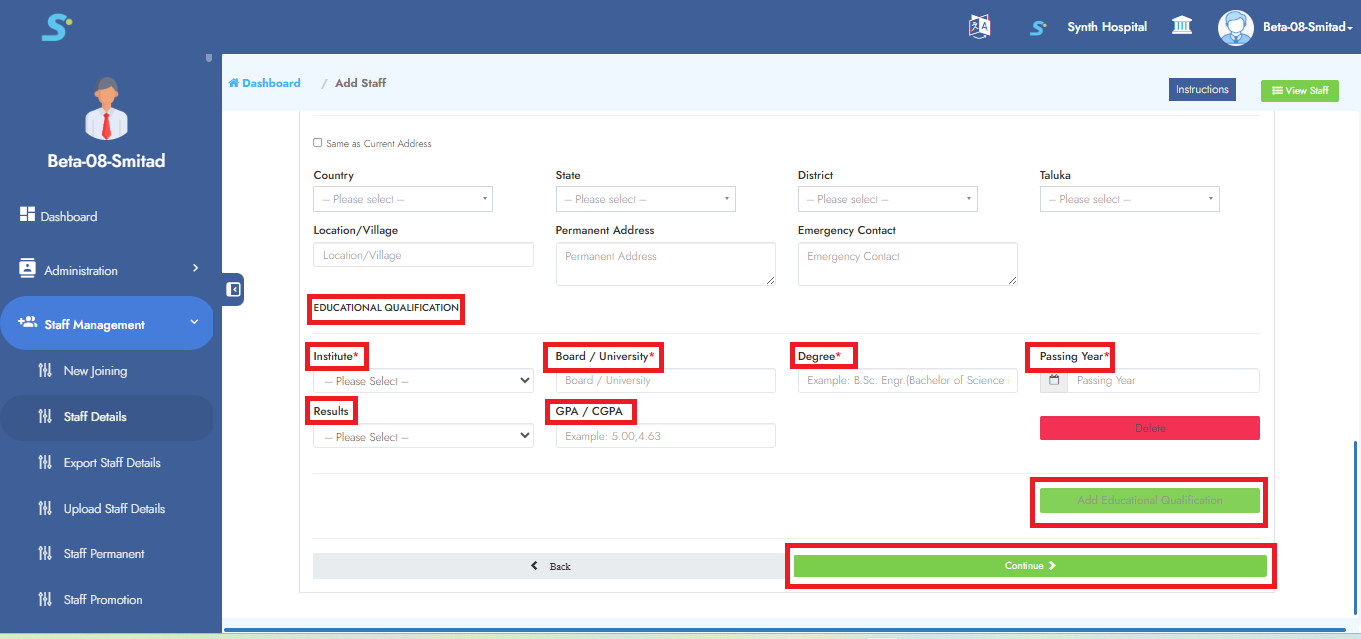
 Enter current address and permanent address as shown in the image.
Click on the Add Educational Qualification button. Enter educational information as shown in the image.
Enter current address and permanent address as shown in the image.
Click on the Add Educational Qualification button. Enter educational information as shown in the image.
To add more educational qualifications, click on the Add Educational Qualification button.
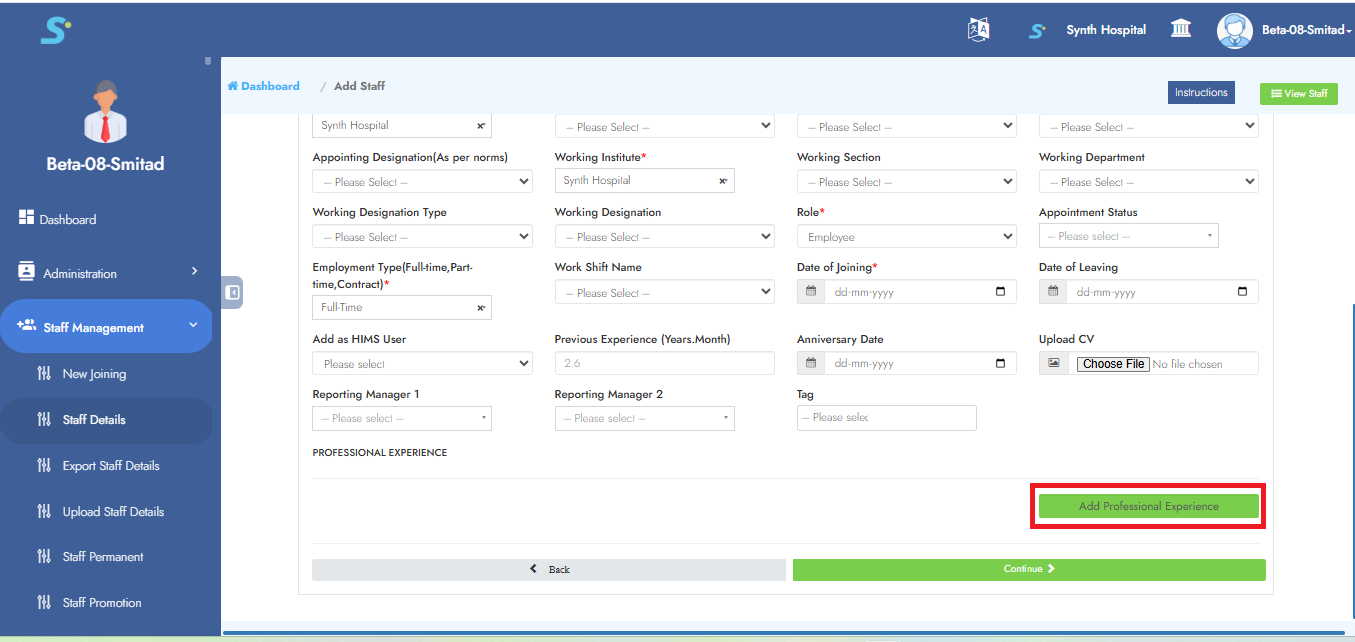
Step 23: Enter Professional Information
Enter required professional information as shown in the image.
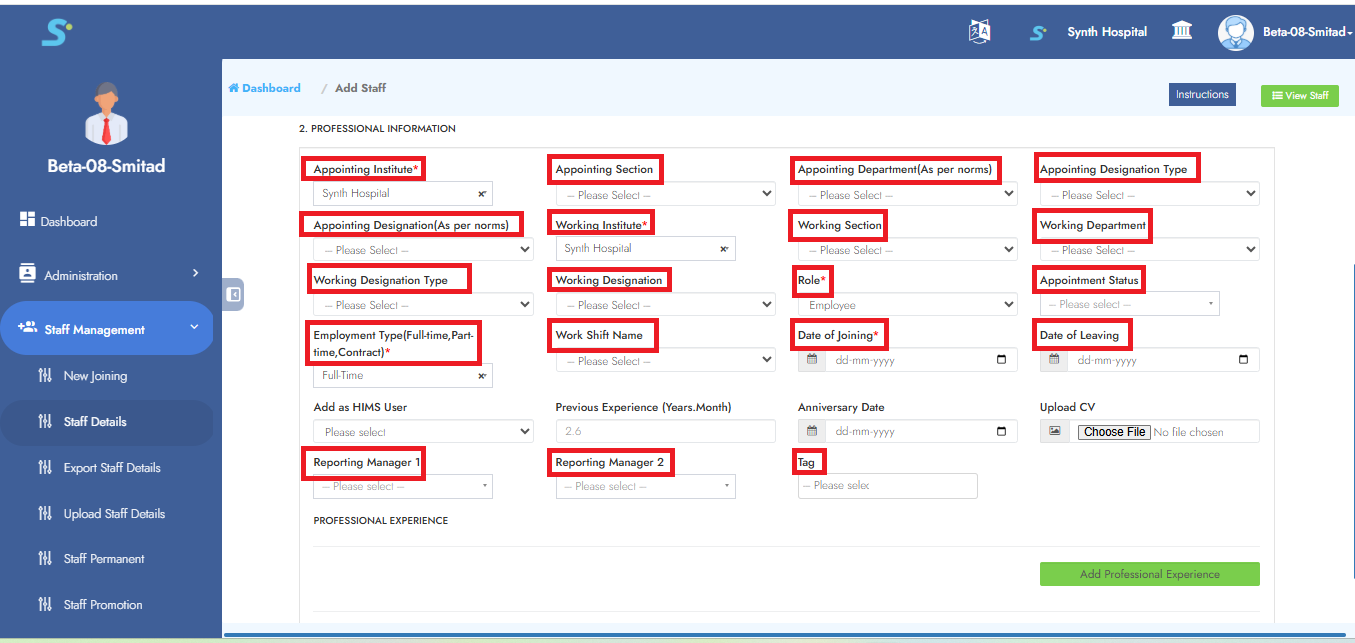
To add employees' professional information, click on the Add Professional Experience button as shown in the image.
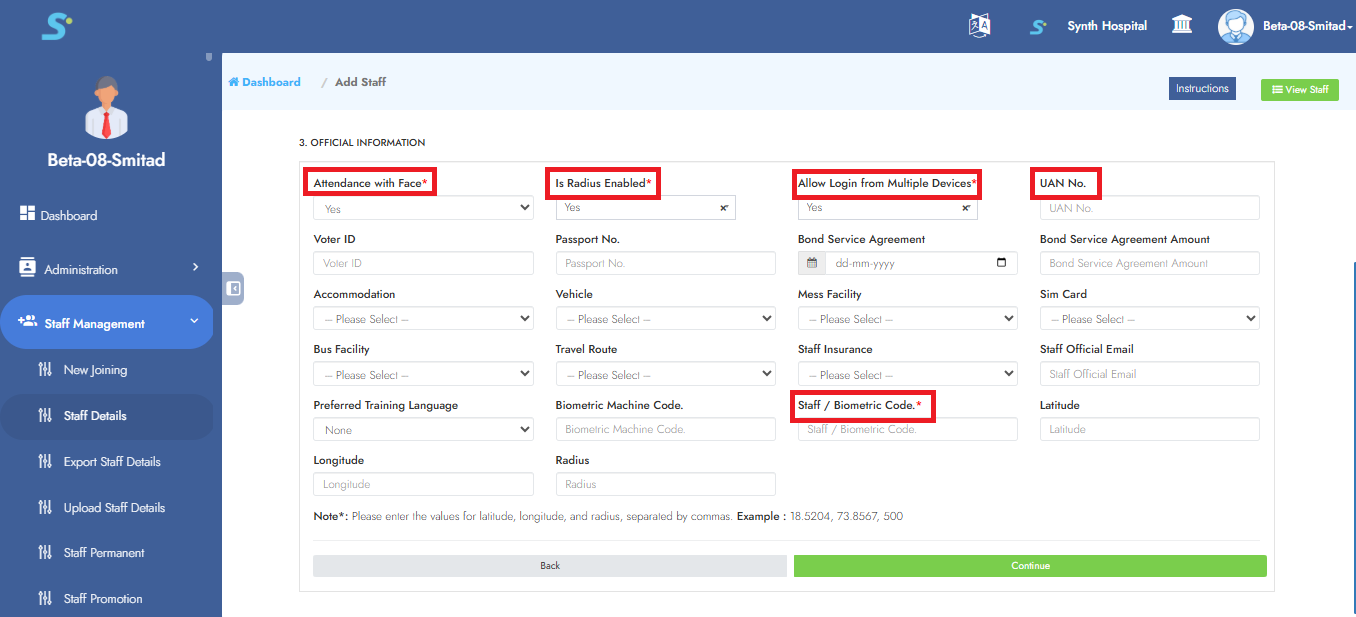
Step 24: Official Information
Add official information details as shown in the image.
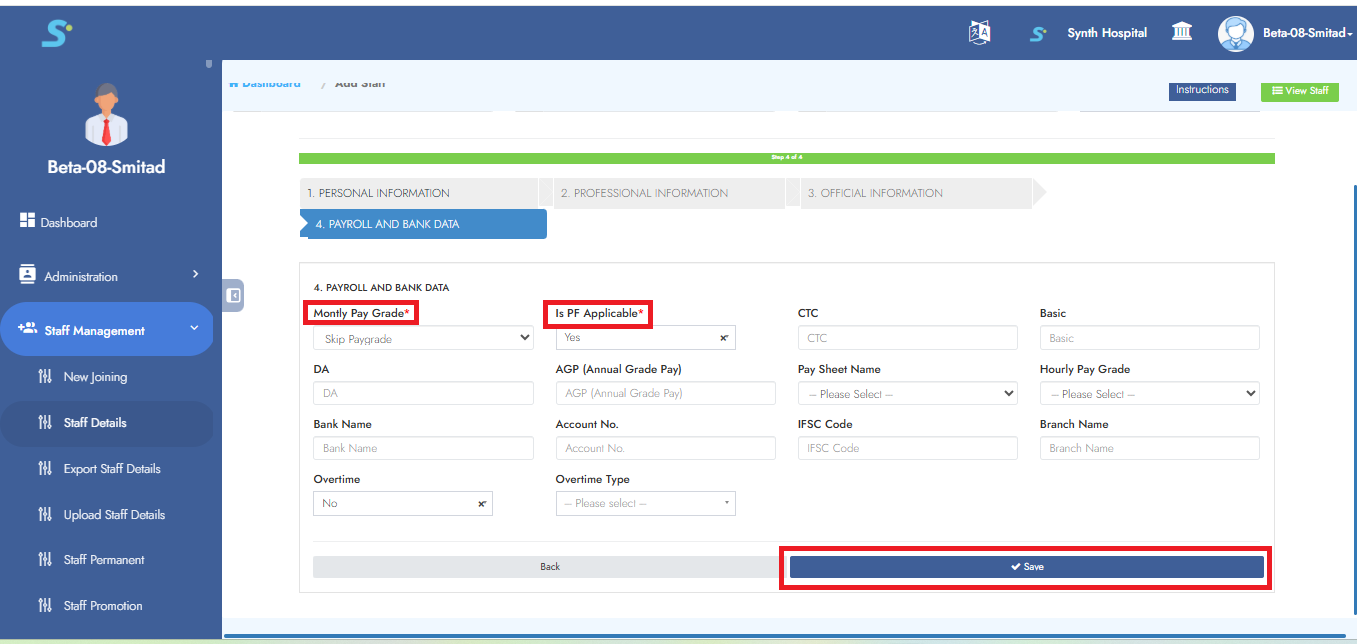
Step 25: Payroll and Bank Data
Add required payroll and bank details in this section as shown in the image.
Click the Save button to successfully add the record.
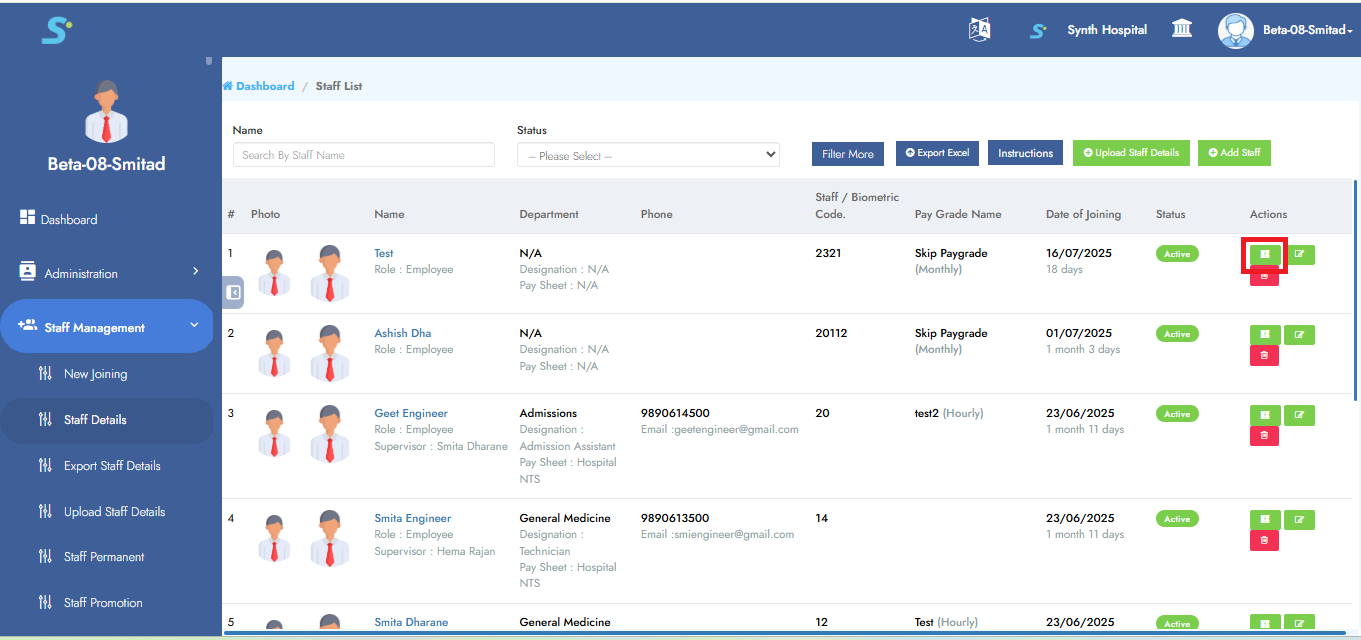
Step 26: Viewing Staff Details
To view entered staff details, click on the Profile button as shown in the image.
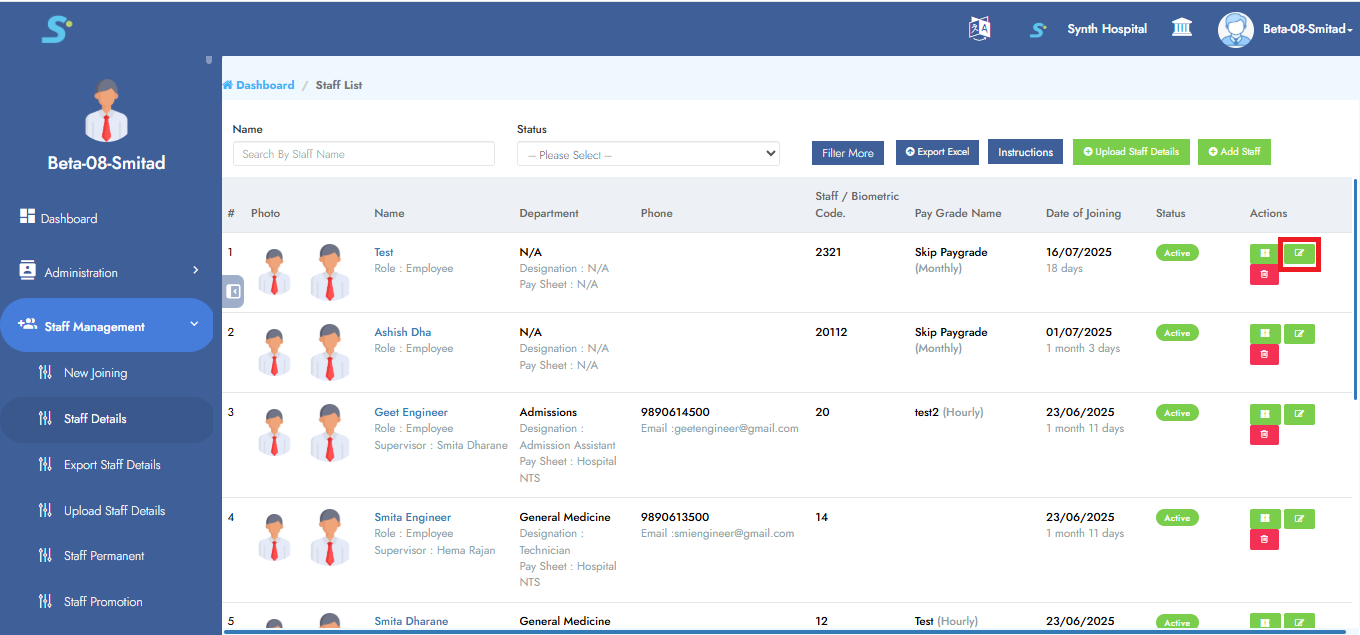
Step 27: Edit Staff Details
To edit staff details, click on the Edit button as shown in the image.
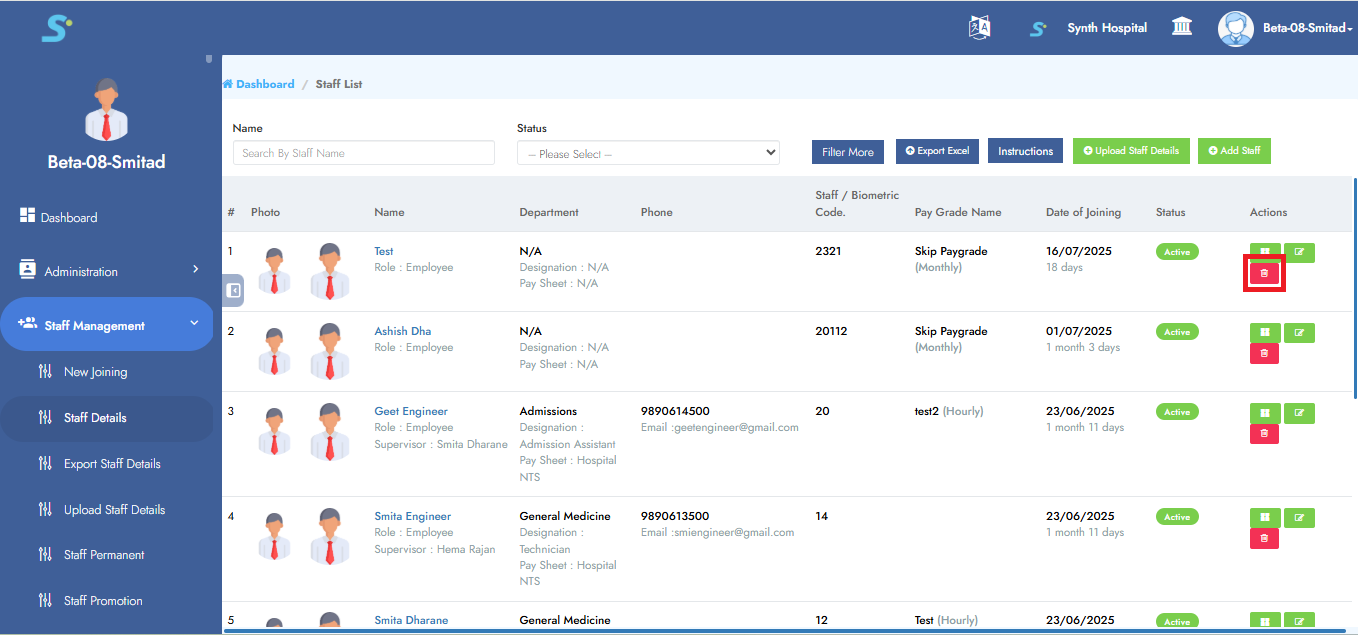
Step 28: Delete Staff Details
To delete staff details, click on the Delete button as shown in the image.
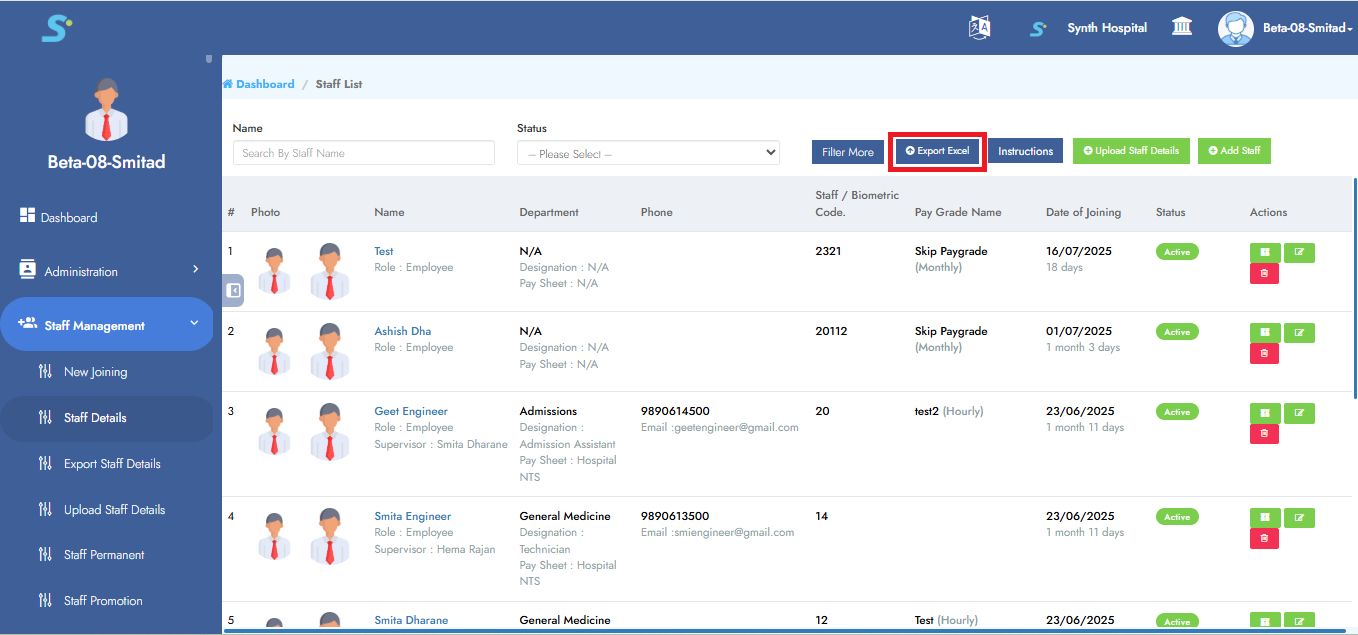
Step 29: Export Staff Details
Clicking on Export Staff Details will export an Excel file of staff details.
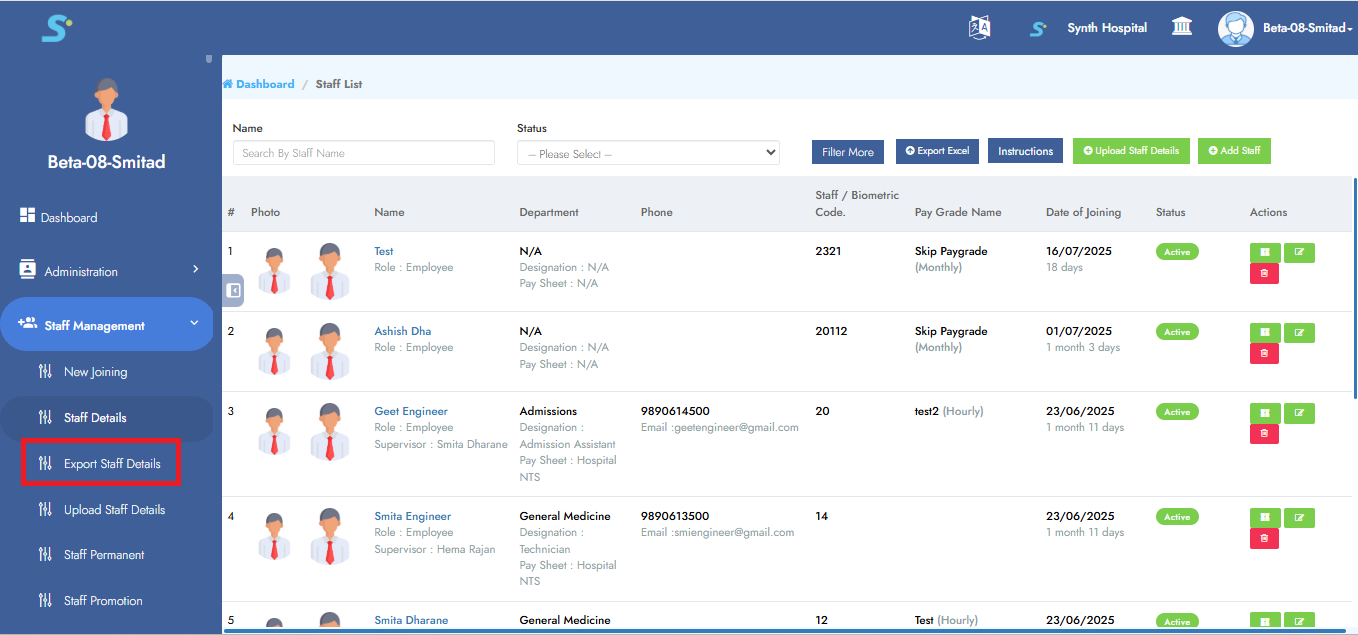 To export an Excel file, you can also click on Export to Excel button, which will also export an Excel file of staff details as shown in the image.
Step 30: Upload Staff Details
Click on the Upload Staff Details option from the side menu.
First, click the Download Sample button and fill in the required details in the Excel sheet.
After updating, click Choose File, then click Upload to complete the process.
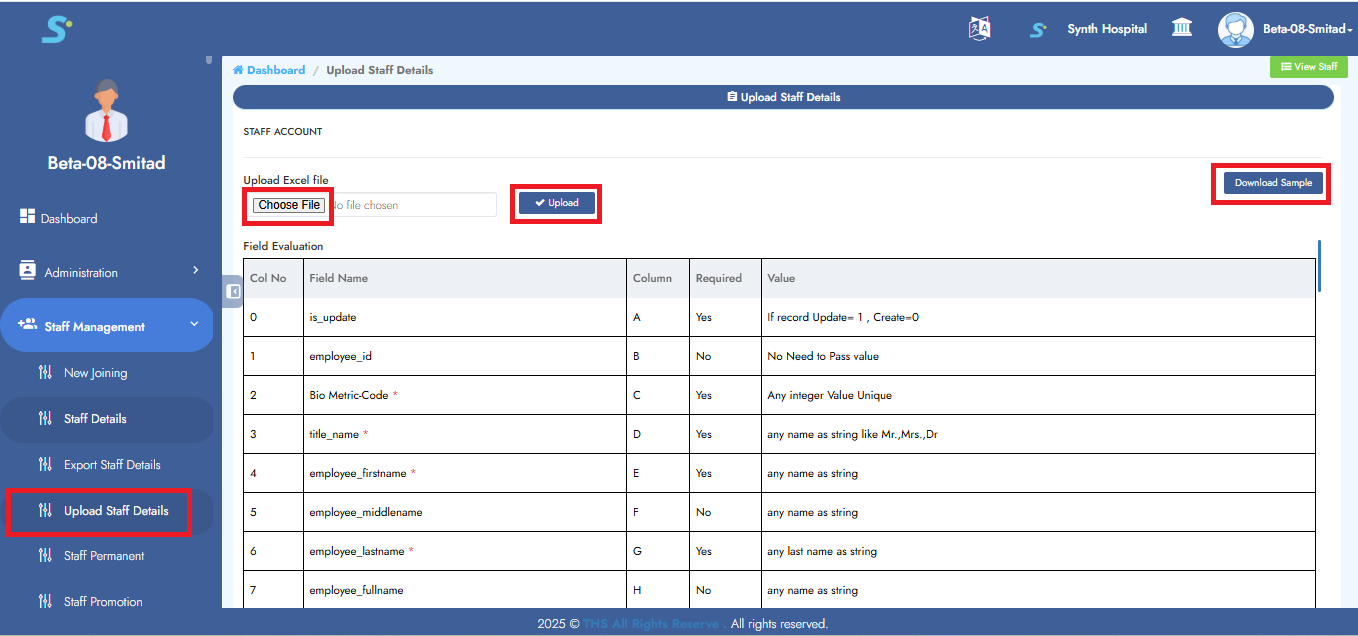
Step 31: Check Uploaded Data
Now you can check your uploaded data, which will be added in staff details.

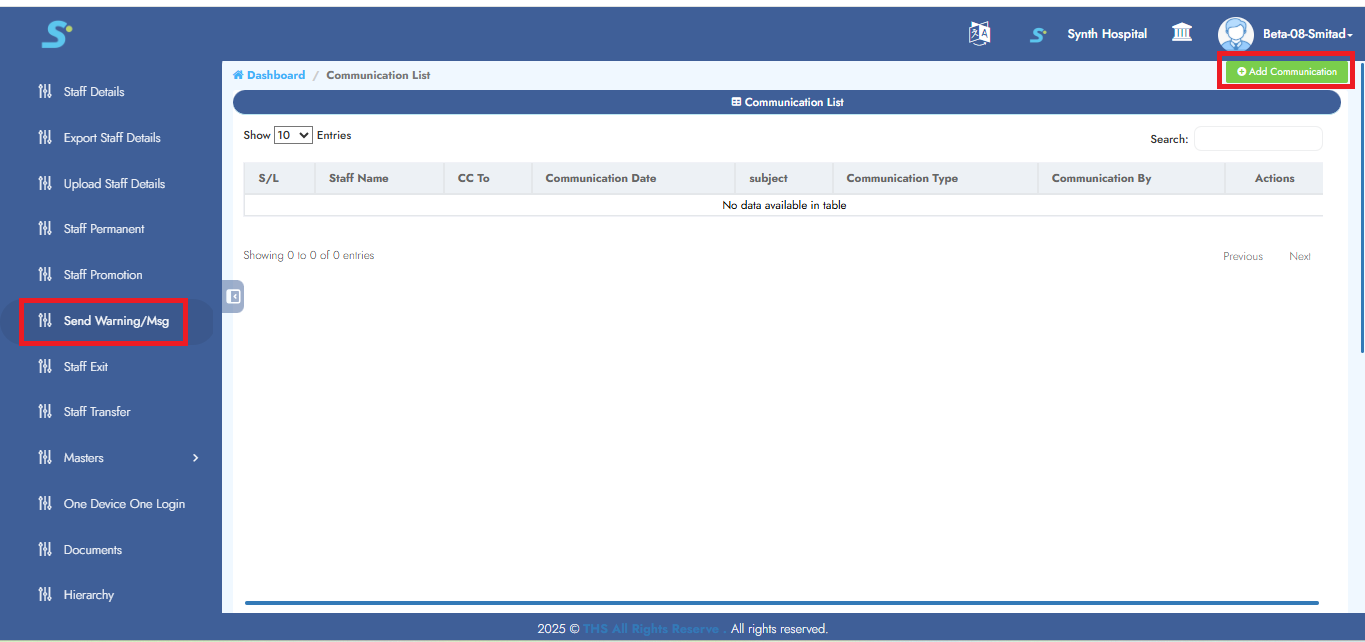
Step 32: Send Warning/Msg
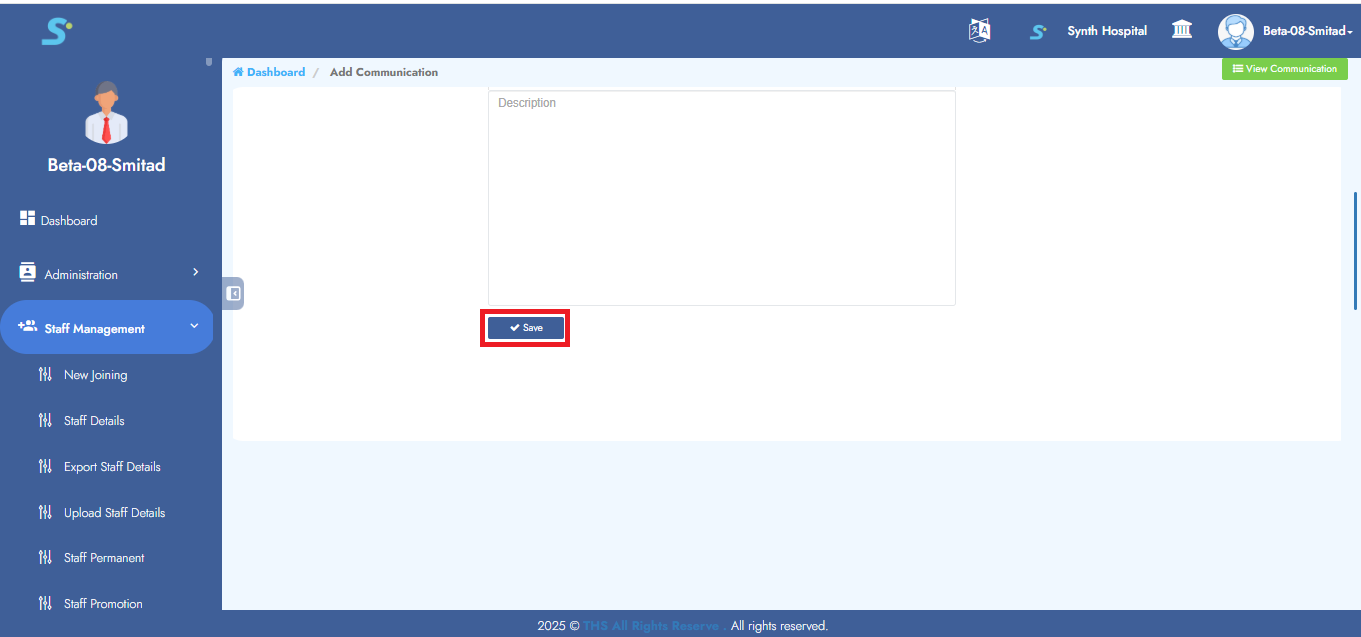
Click on the Send Warning/Msg side menu.
Click on the Add Communication button as shown in the image.
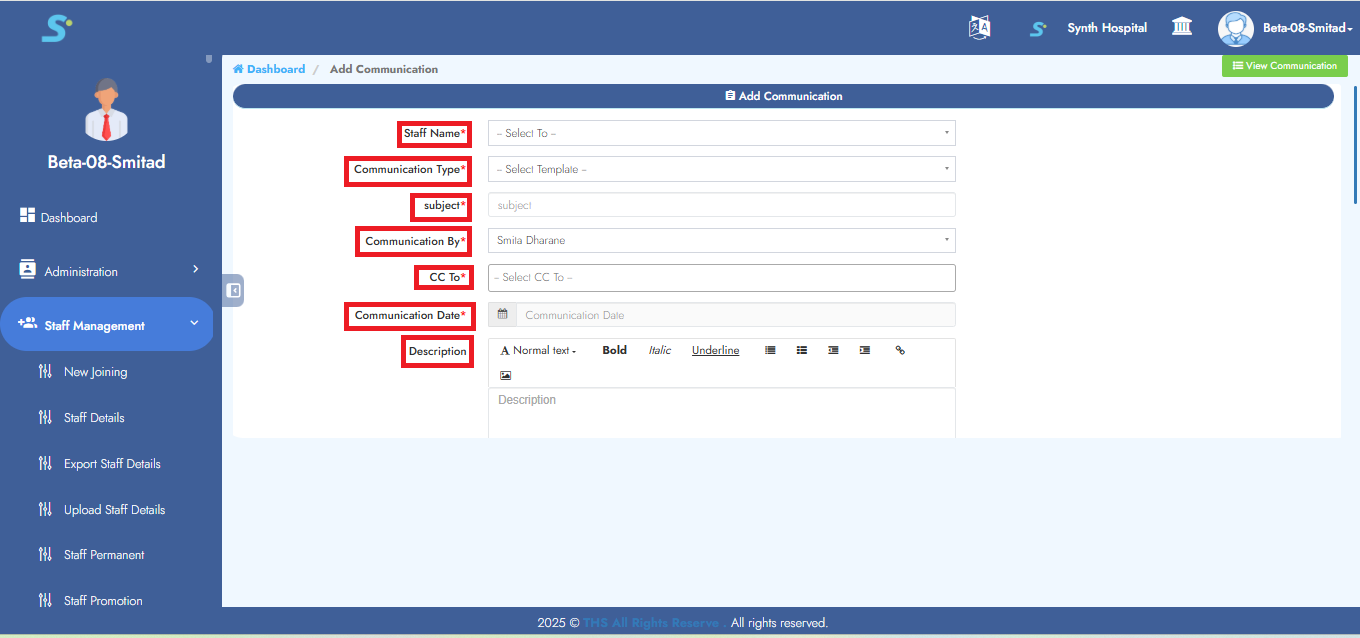
Step 33: Saving Warning/Message
Enter staff name (from drop-down list), communication type (from drop-down list), subject, communication by, CC to, communication date, description, then click on Save button to successfully add the record.
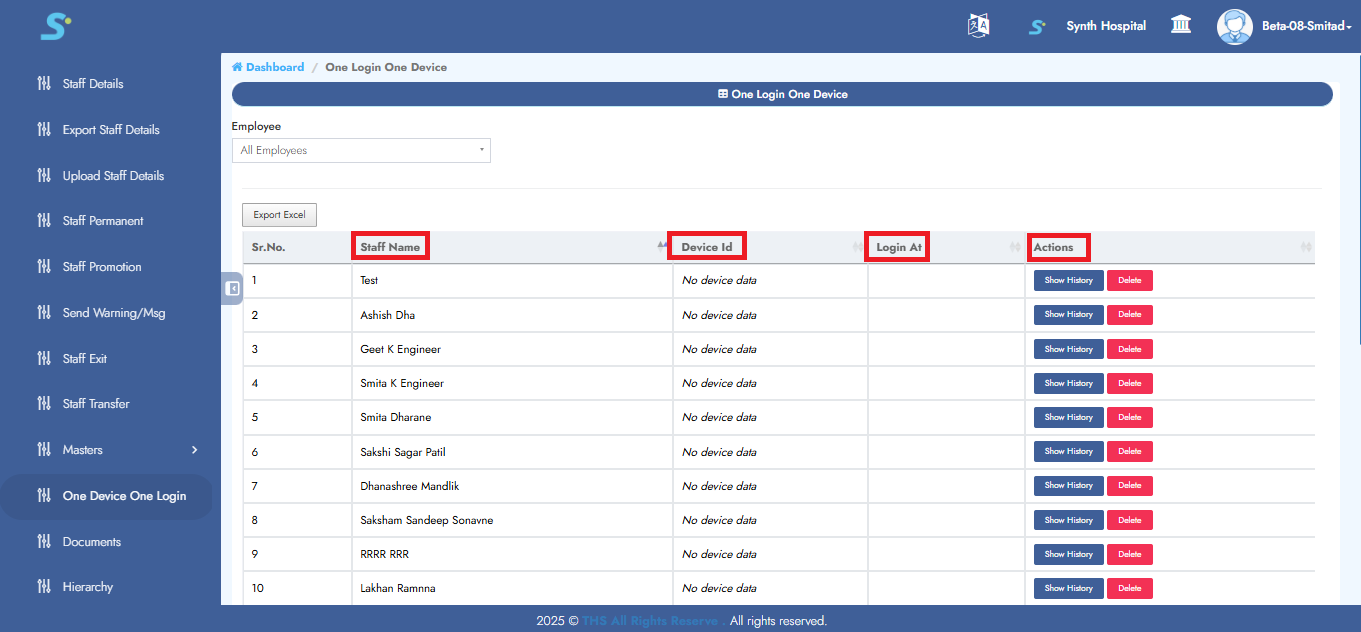
Step 34: One Device One Login
It will show the following details: staff name, device ID, login ID and actions as shown in the image.
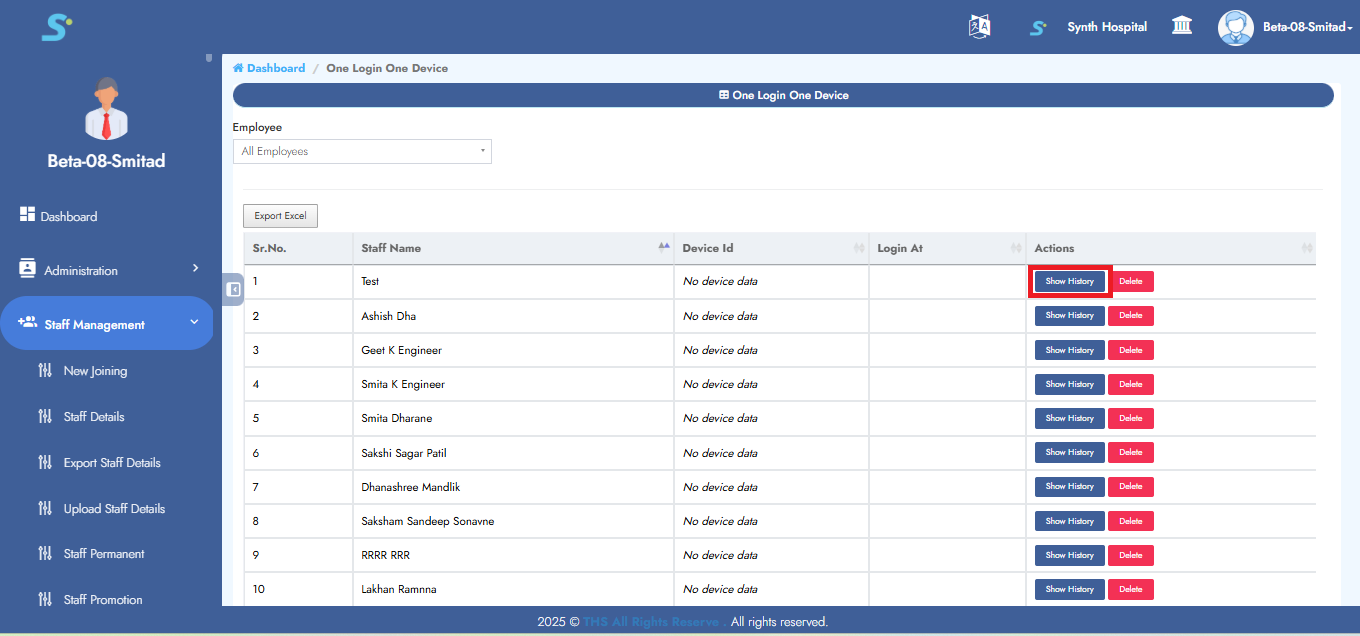
Step 35: Show History
Click on Show History button, which will show the details as shown in the image.
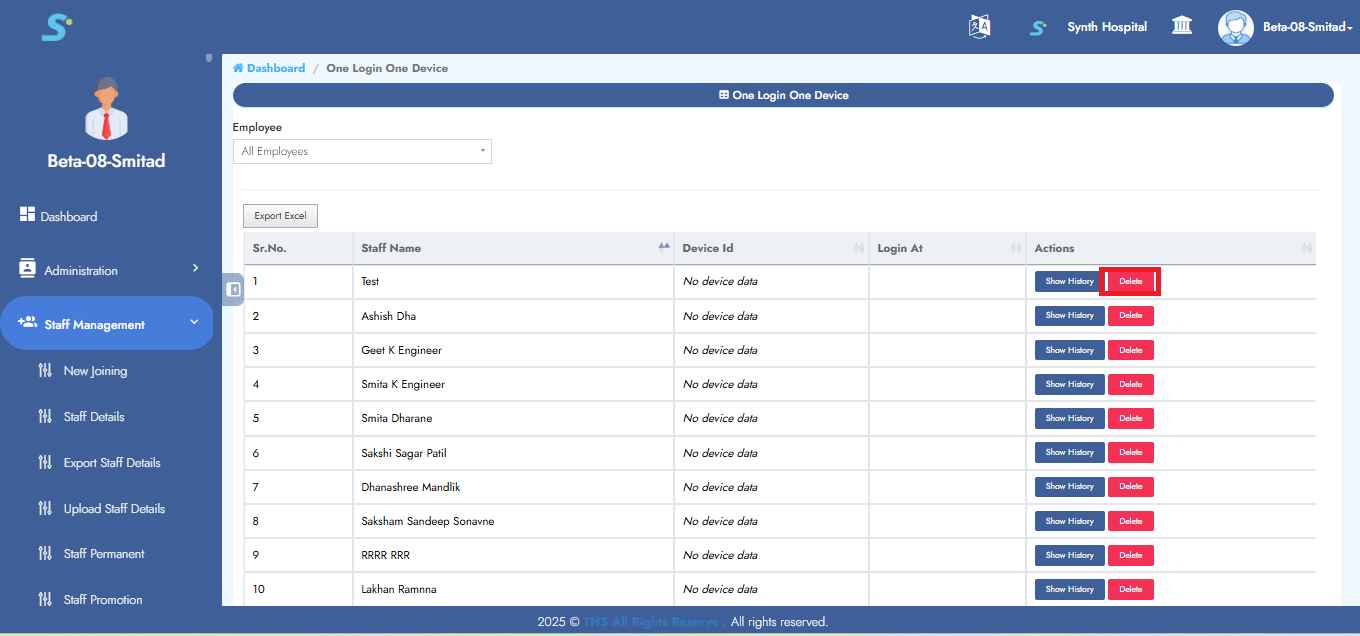
Step 36: Delete Device
Click on the Delete button as shown in the image to delete the device.
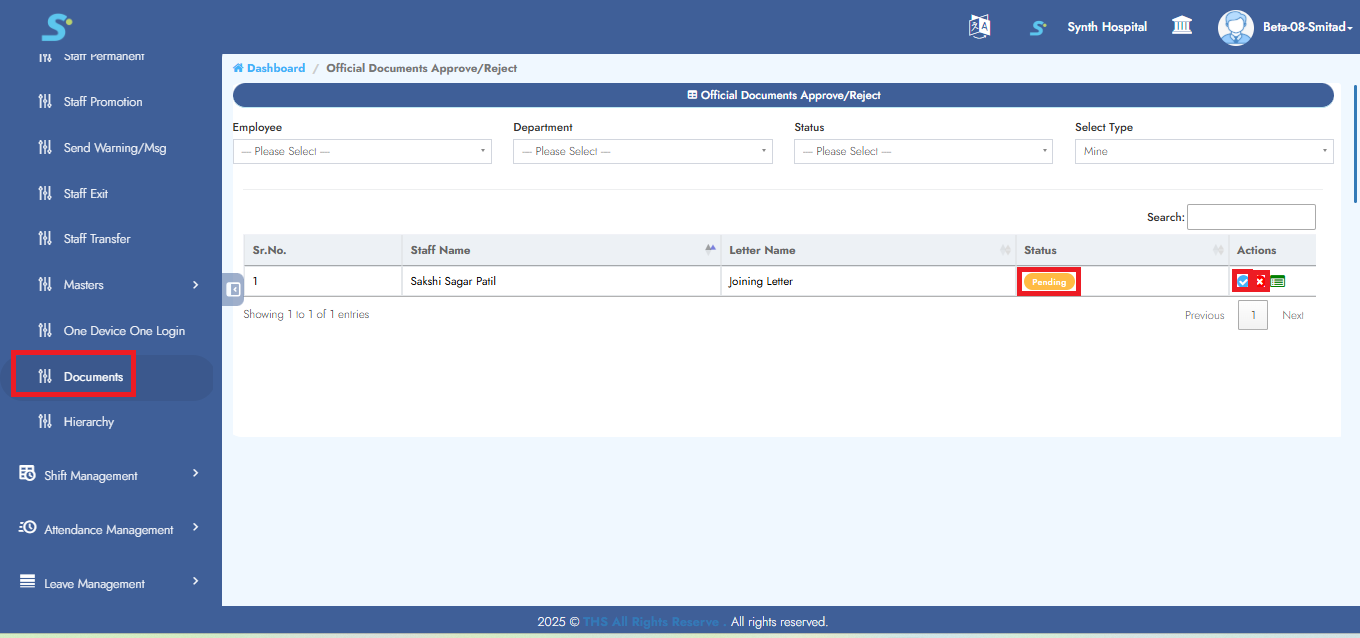
Step 37: Documents
Click on the Documents option from the side menu.
If the document status is pending, click the tick icon to approve or the cross icon to reject, as shown in the image.
Step 38: Hierarchy
Click on the Hierarchy option from the side menu to view the hierarchy structure as shown in the image.