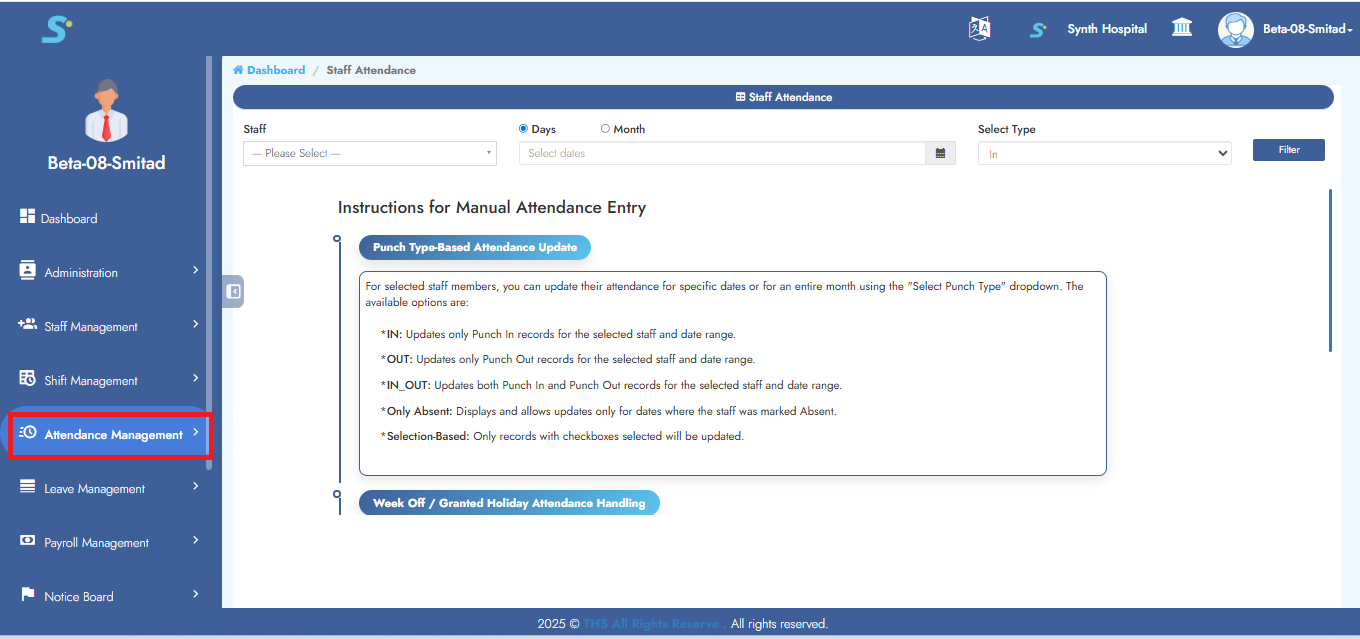
Attendance Management Module
Step 1: Masters of Attendance Management
Within the Attendance Management module and click on the option from the side menu, as shown in the image.
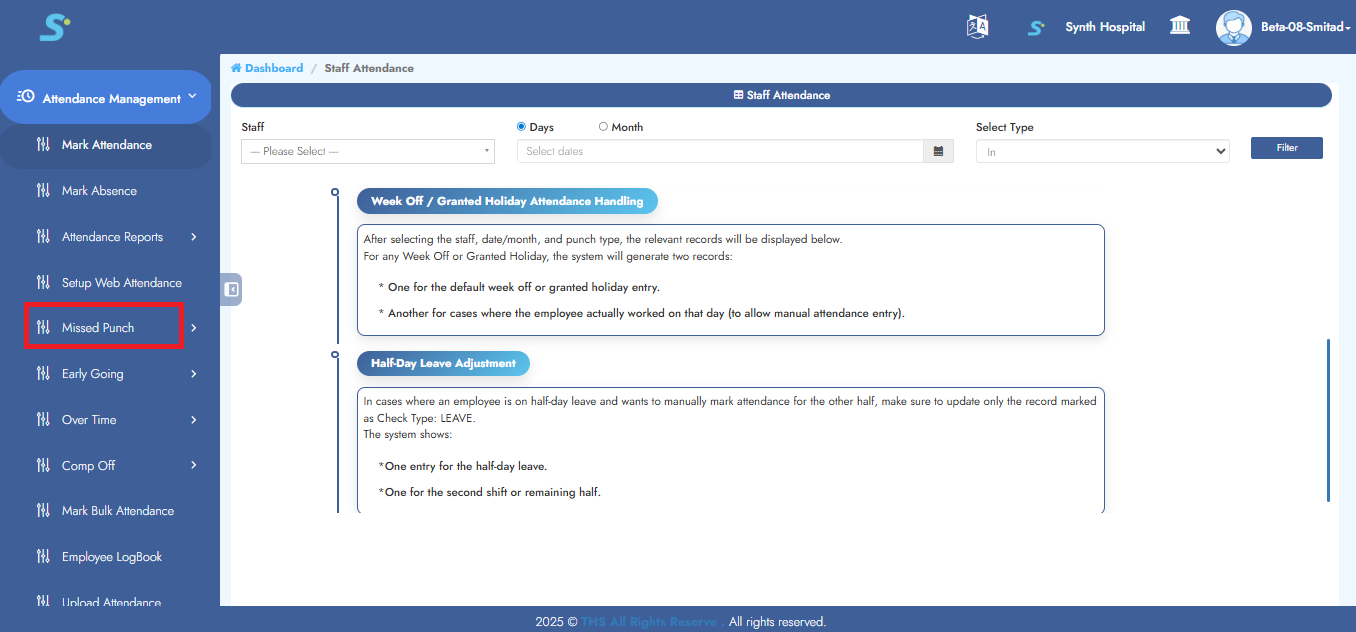
Step 2: Accessing Missed Punch Module
Within the Attendane Management module and click on the Missed Punch option from the side menu, as shown in the image.
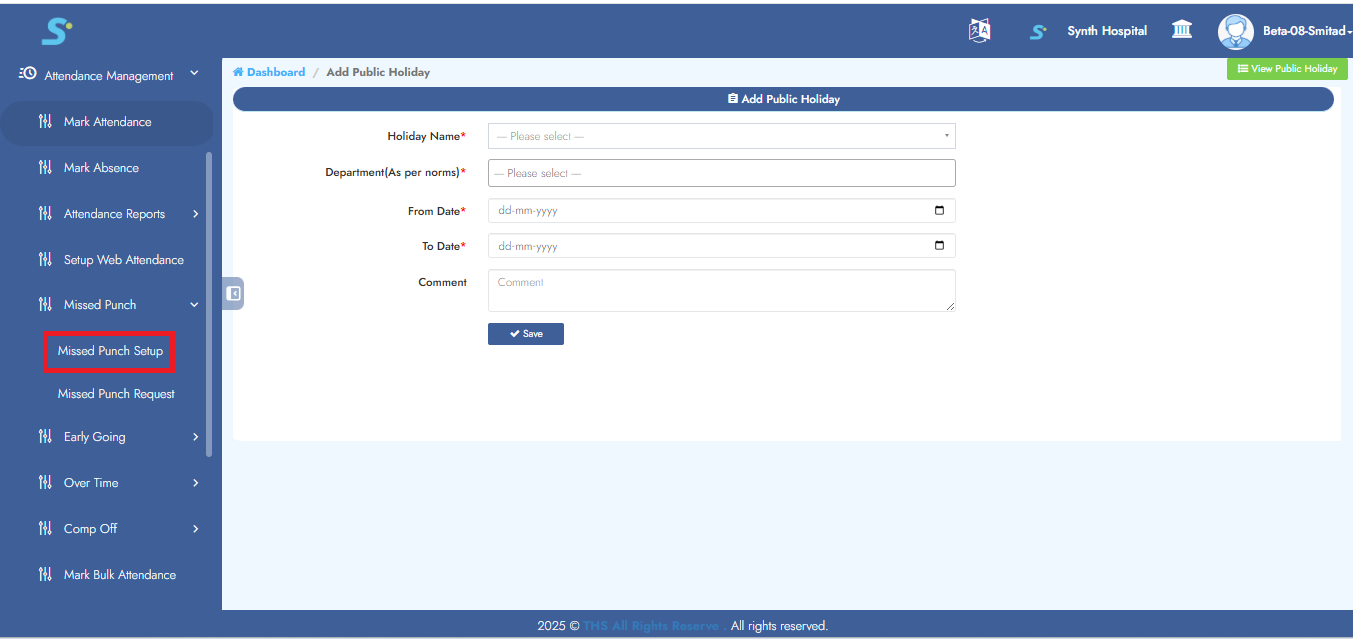
Step 3: Accessing Missed Punch Setup
Within the Missed Punch section, navigate to the Missed Punch Setup sub-module by clicking on it to configure the relevant settings.
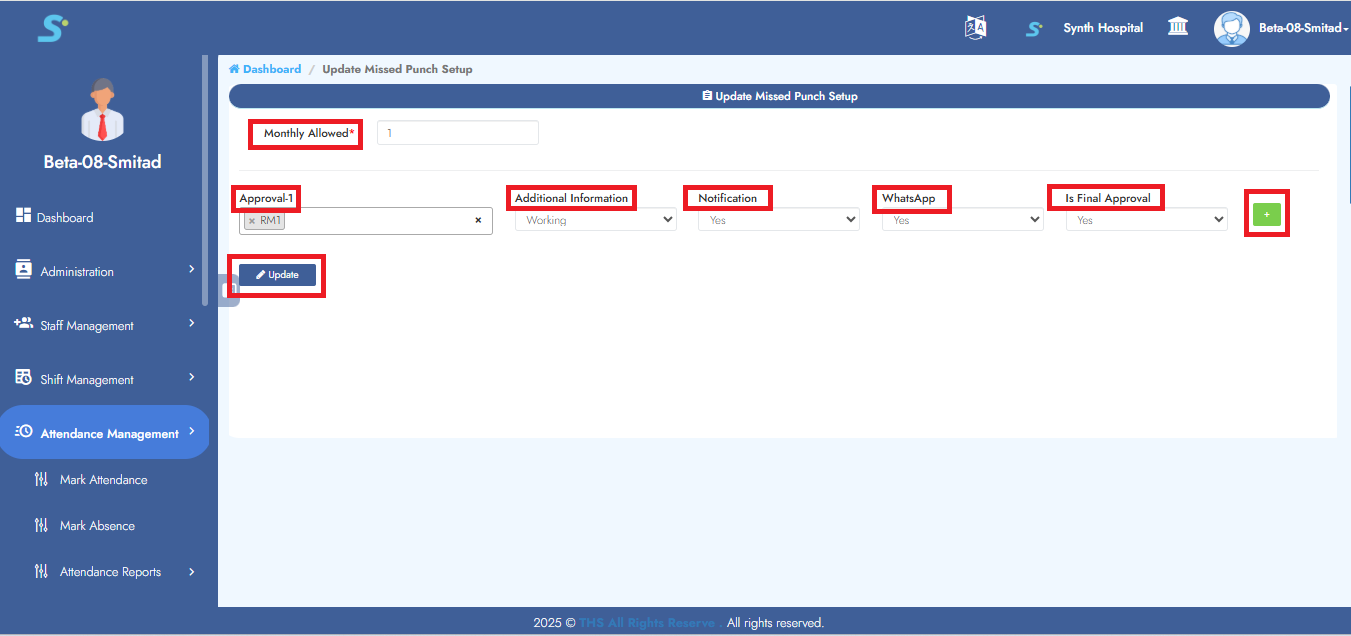
Step 4: Configuring Missed Punch Approval Settings
In the Missed Punch Setup form, enter the number of Monthly Allowed Missed Punches. Then, configure the approval workflow by selecting an
Approver (select from dropdown list)
Additional Information (Appointing/Working)
Notification (yes/no)
WhatsApp (yes/no)
Is Final Approval (Yes/No)
Click on the Add button to add additional approval levels. Click on the Update button to update configuration
"Record Saved Successfully"
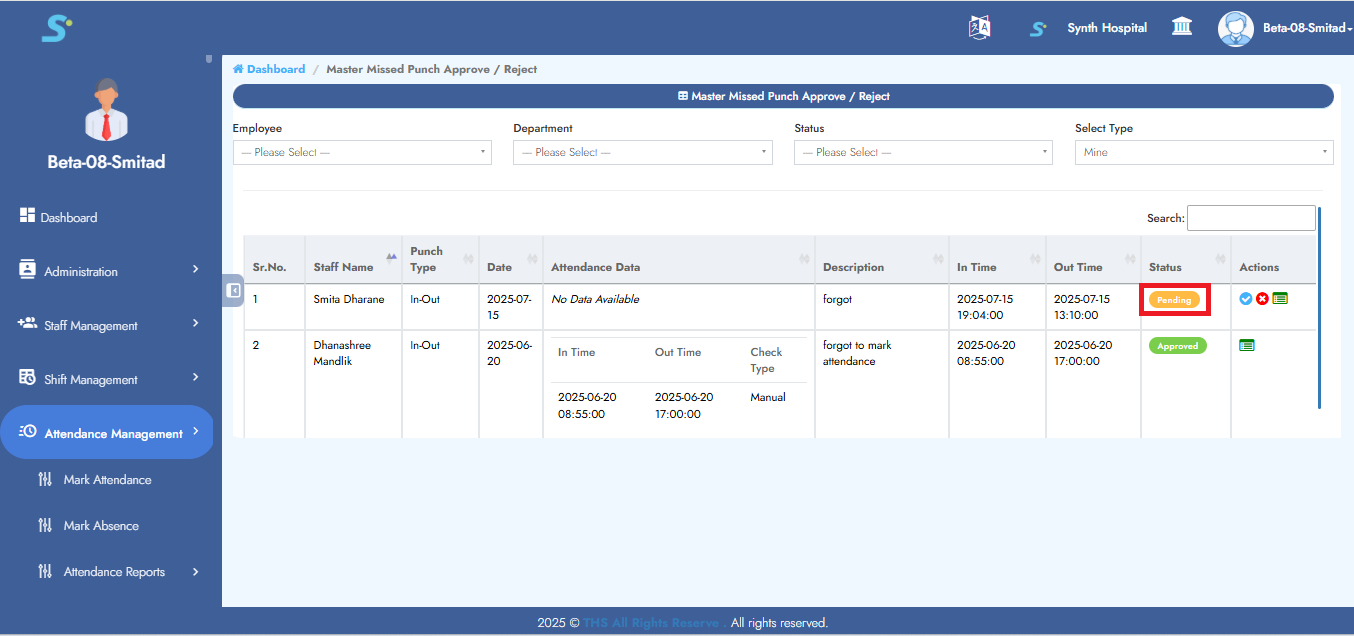
Step 5: Missed Punch Request
Within the Missed Punch section, navigate to the Missed Punch Request sub-module by clicking on it to configure the relevant settings.
The below screen appears upon clicking Missed Punch Request, displaying the request status as shown in the image.
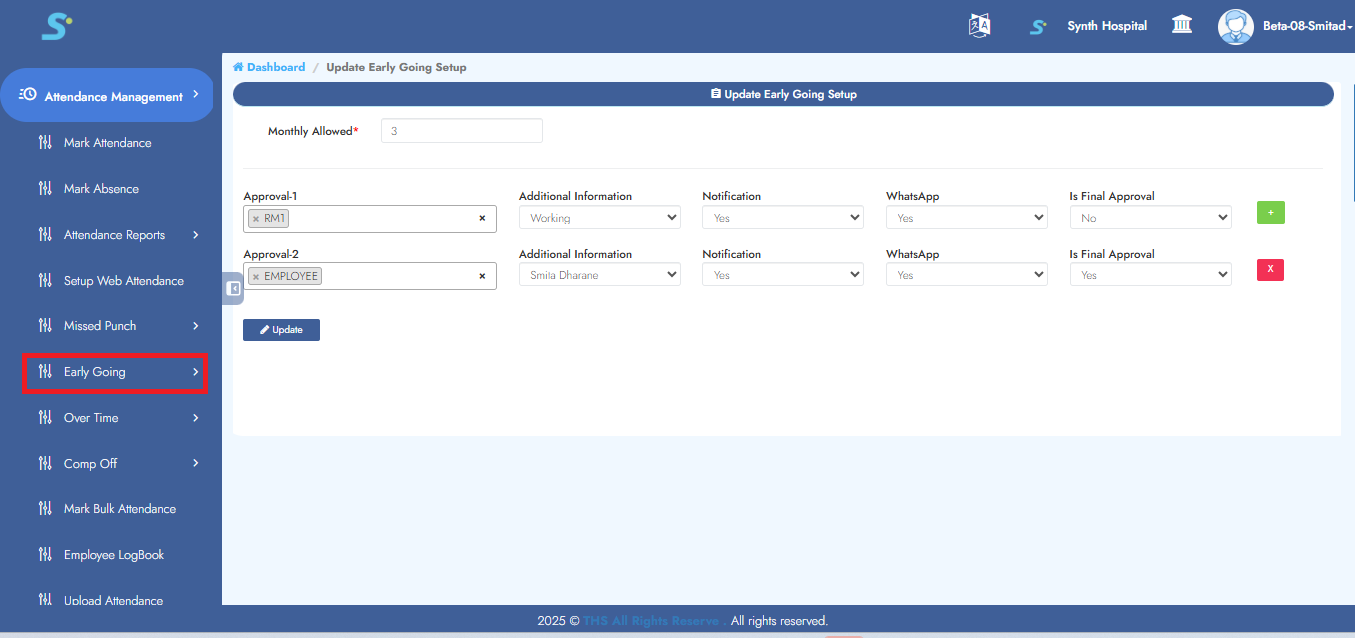
Step 6: Accessing Early Going Module
To manage early going attendance entries, navigate to the Attendance Management module and click on the Early Going sub-module as shown in the image.
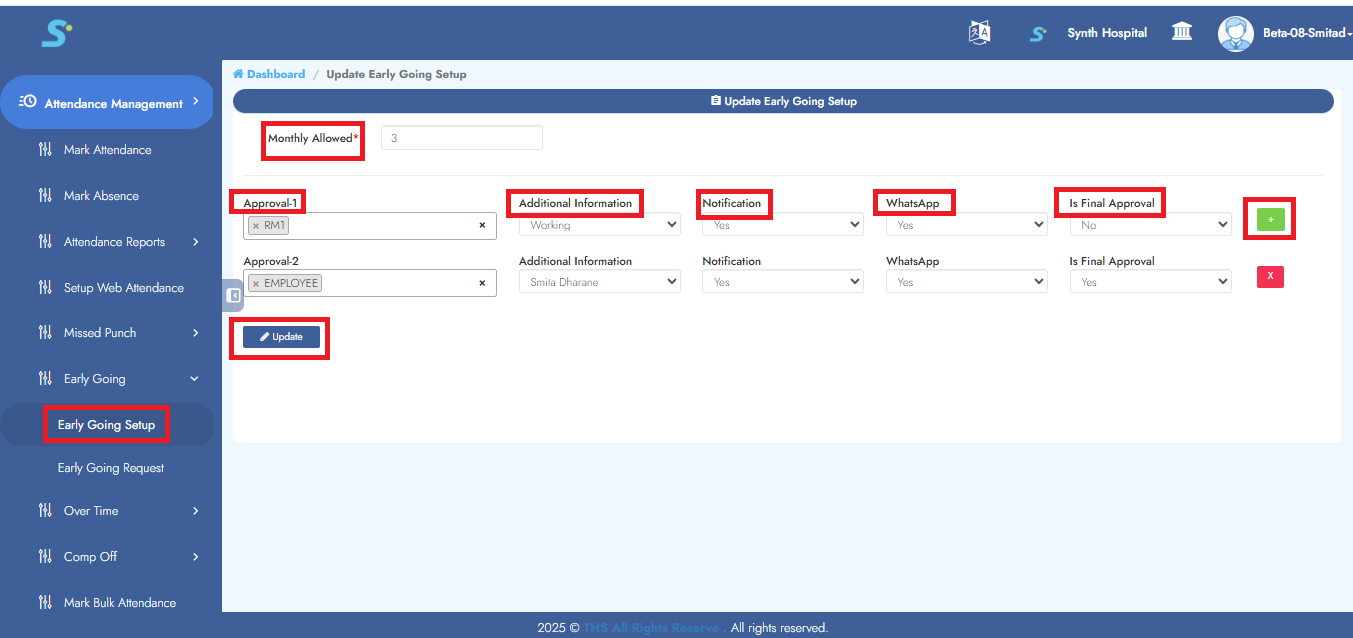
Step 7: Configuring Early Going Setup Settings
In the Early Going Setup form, enter the number of Monthly Allowed Early Going. Then, configure the approval workflow by selecting an
Approver (select from dropdown list)
Additional Information (Appointing/Working)
Notification (yes/no)
WhatsApp (yes/no)
Is Final Approval (Yes/No)
Click on the Add button to add additional approval levels. Click on the Update button to update configuration
"Record Saved Successfully"
Step 8: Early Going Request
Within the Early Going section, navigate to the Early Going Request sub-module by clicking on it to configure the relevant settings.

Step 9: Accessing Over Time Module
To manage overtime attendance entries, navigate to the Attendance Management module and click on the Over Time sub-module.
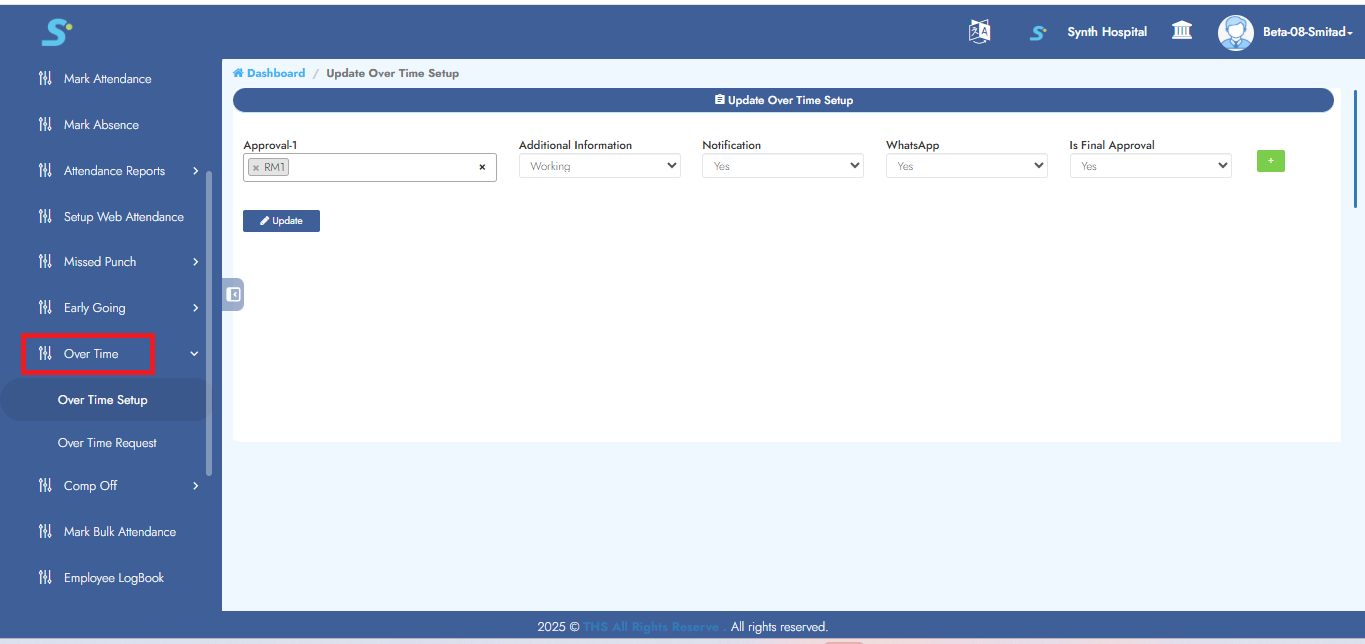
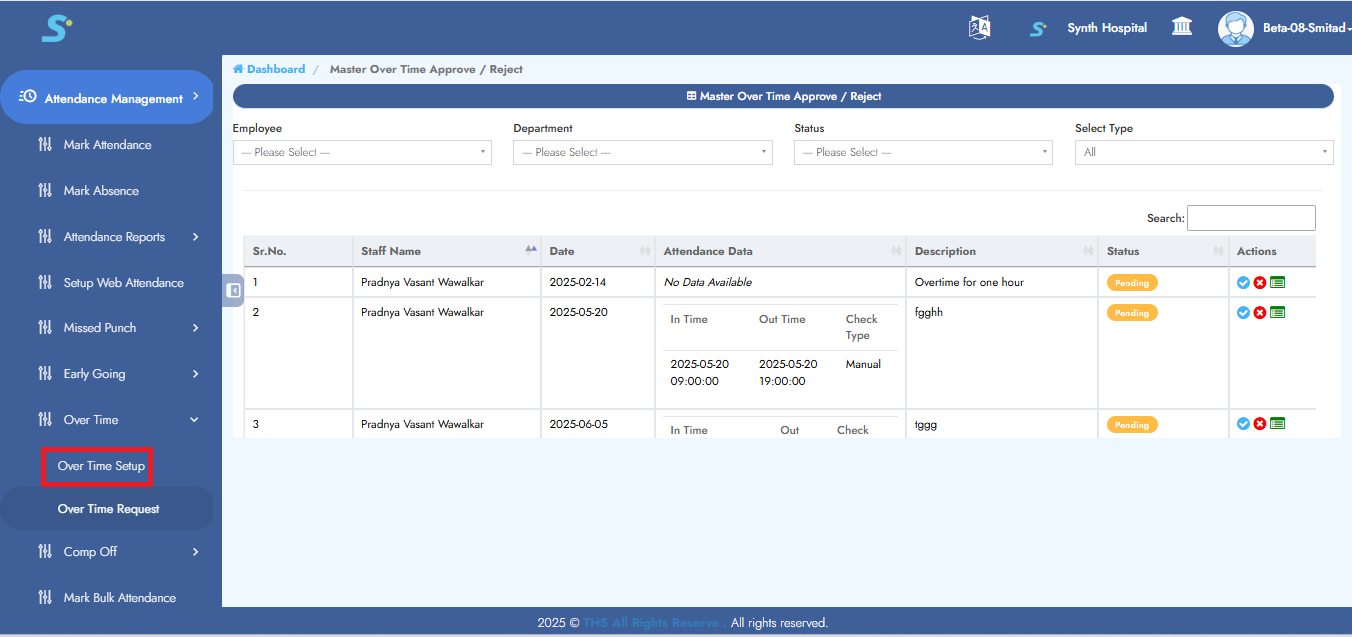
Step 10: Accessing Over Time Setup Module
To manage overtime attendance entries, navigate to the Over Time Setup sub-module.
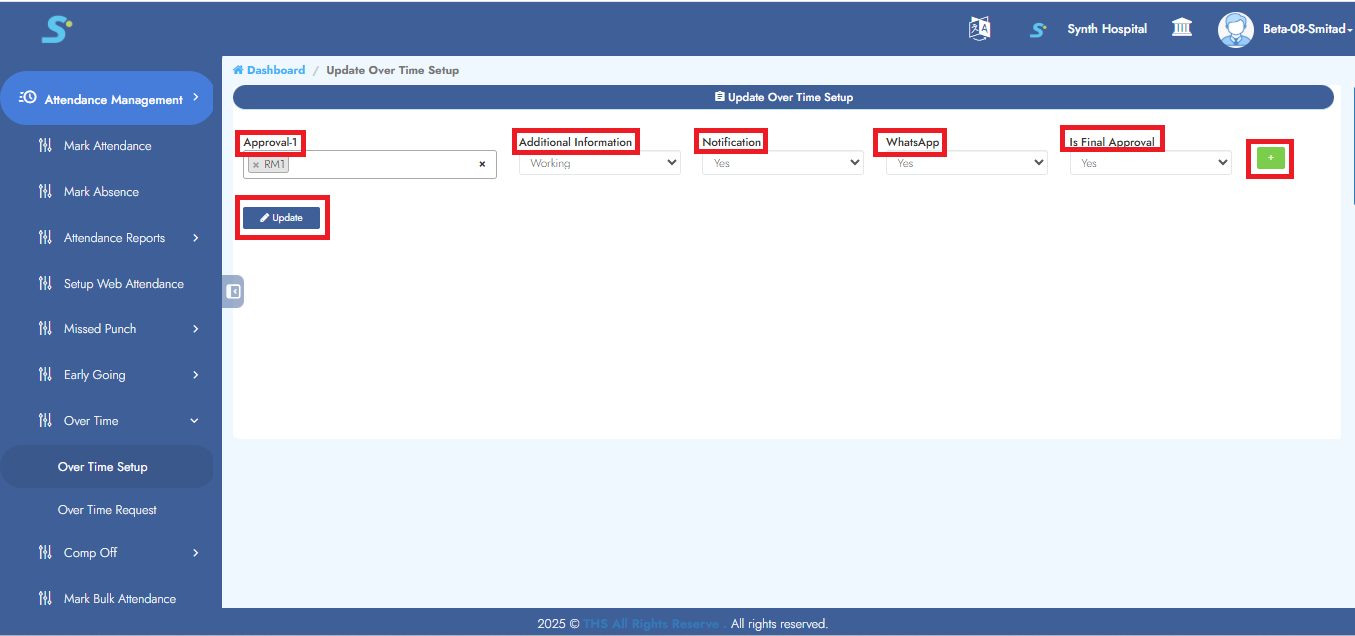
Step 11: Configuring Over Time Setup Settings
Then, configure the approval workflow by selecting an
Approver (select from dropdown list)
Additional Information (Appointing/Working)
Notification (yes/no)
WhatsApp (yes/no)
Is Final Approval (Yes/No)
Click on the Add button to add additional approval levels. Click on the Update button to update configuration
"Record Saved Successfully"
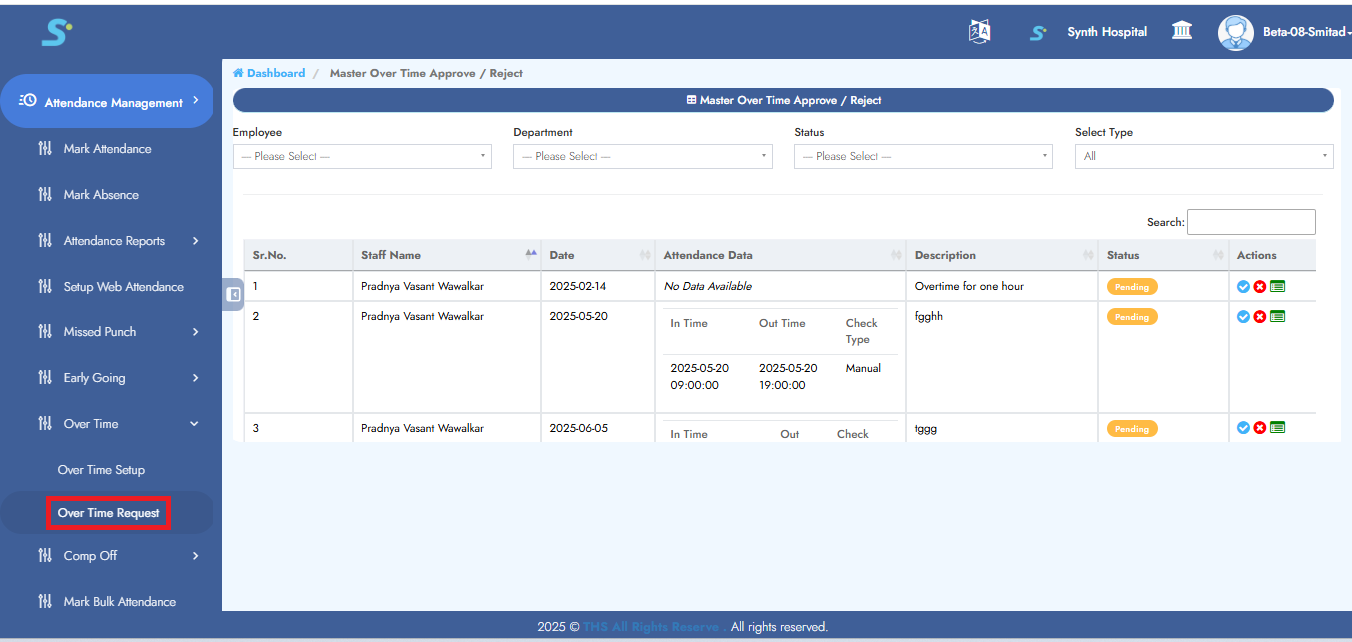
Step 12: Over Time Request
Within the Over Time section, navigate to the Over Time Request sub-module by clicking on it to configure the relevant settings.
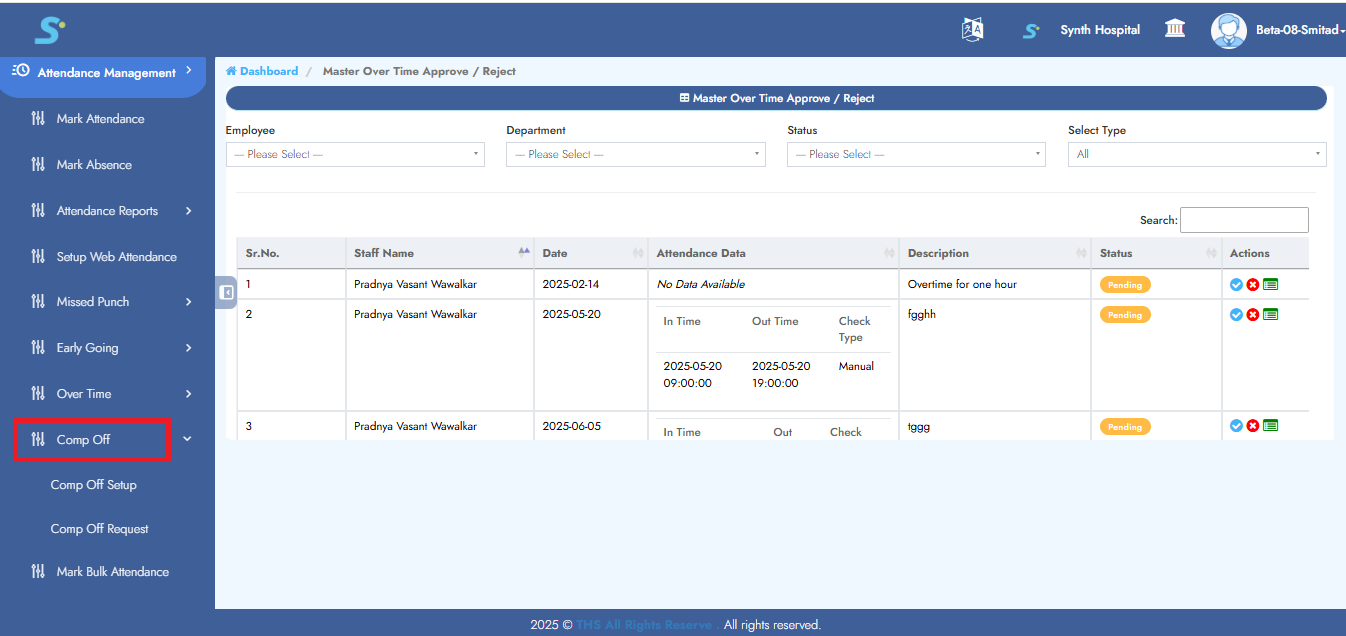
Step 13: Accessing Compo-Off Module
To manage compo-off attendance entries, navigate to the Attendance Management module and click on the Compo-Off sub-module.
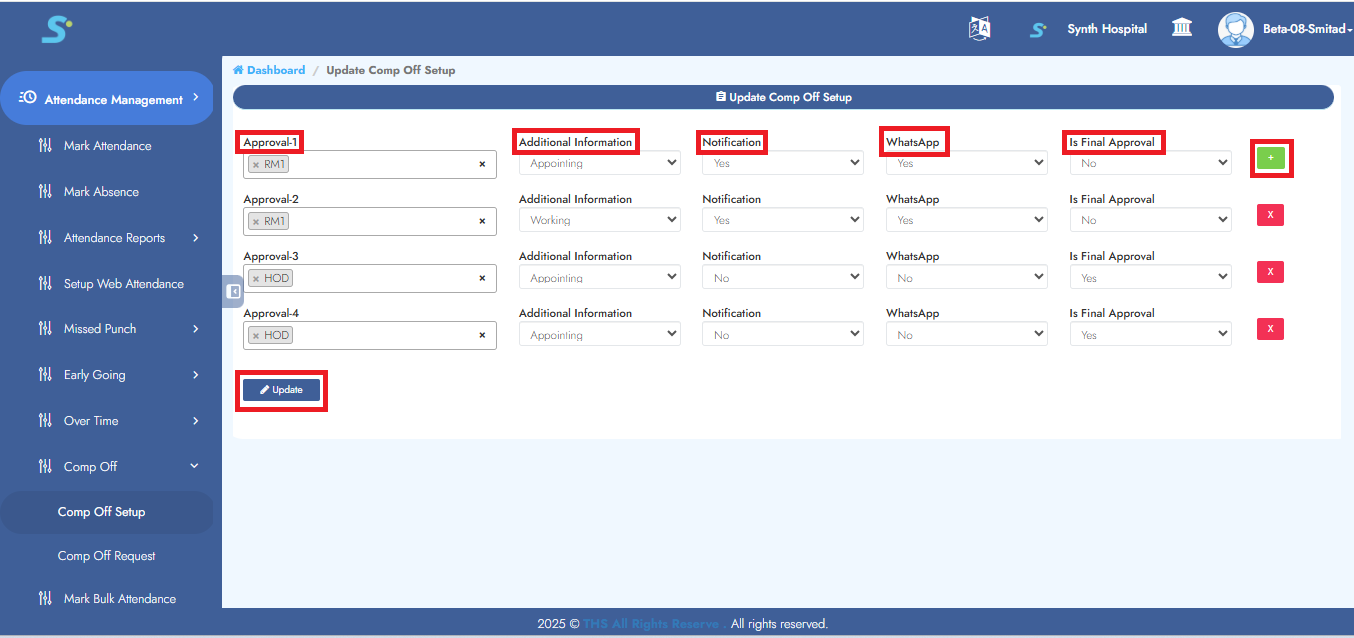
Step 14: Configuring Compo-Off Setup Settings
Then, configure the approval workflow by selecting an
Approver (select from dropdown list)
Additional Information (Appointing/Working)
Notification (yes/no)
WhatsApp (yes/no)
Is Final Approval (Yes/No)
Click on the Add button to add additional approval levels. Click on the Update button to update configuration
"Record Saved Successfully"
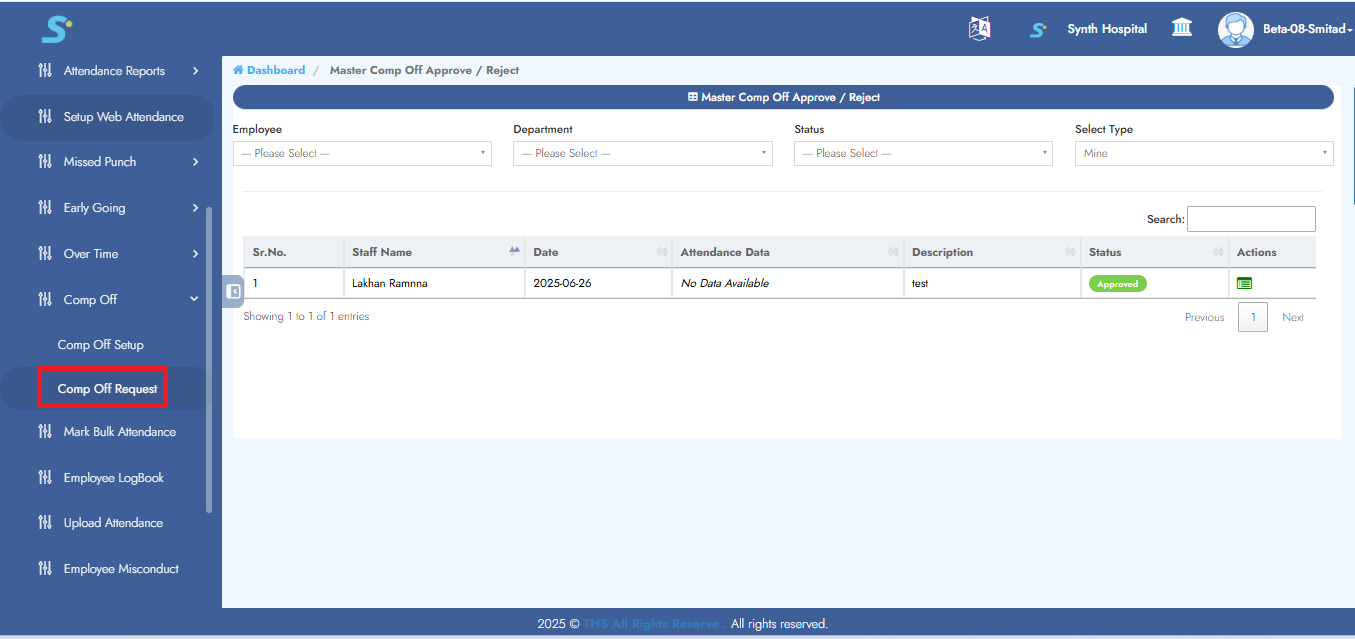
Step 15: Compo-Off Request
Within the Compo-Off section, navigate to the Compo-Off Request sub-module by clicking on it to configure the relevant settings.
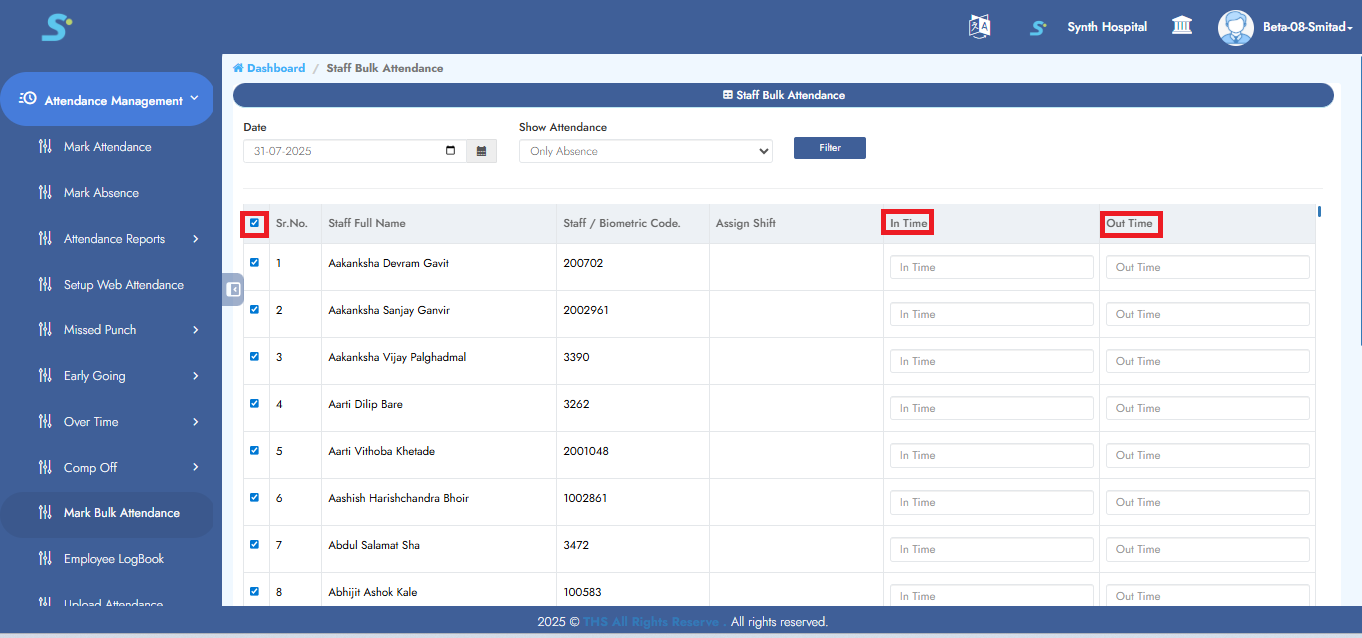
Step 16: Mark Bulk Attendance
Go to the Mark Bulk Attendance module under Attendance Management, select the Date, choose Show Attendance from the dropdown, and click the Filter button.
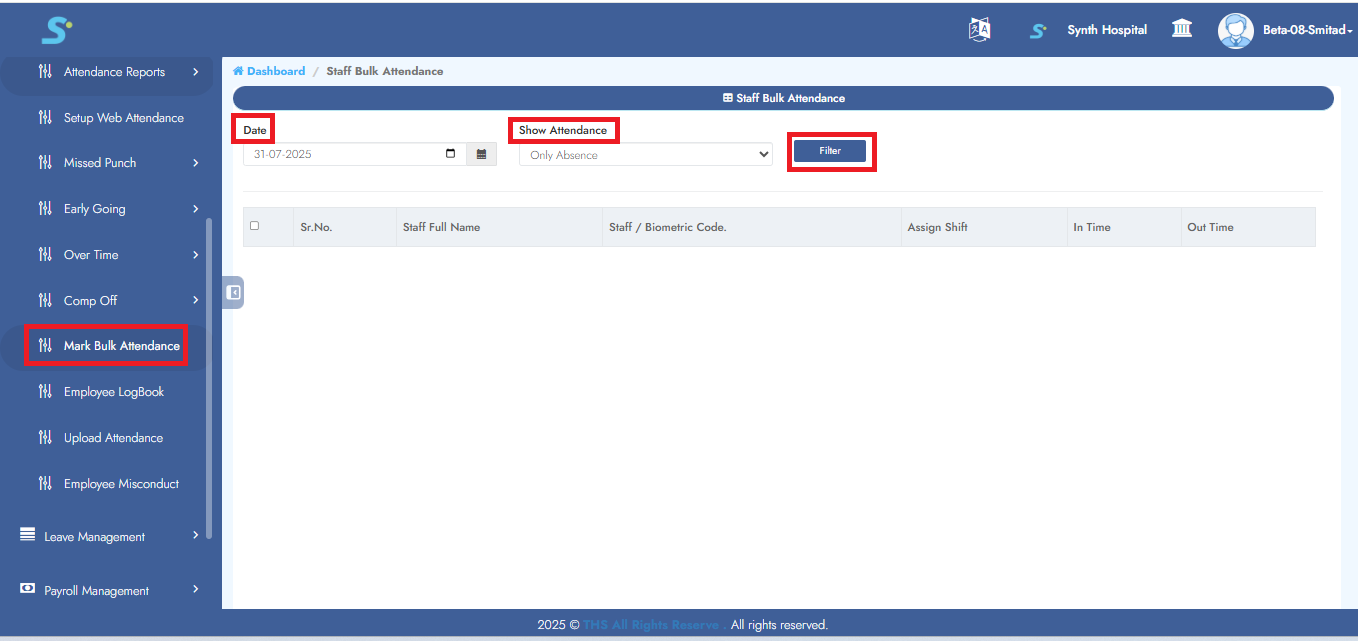
Step 17: Save Bulk Attendance
Select the checkbox for employees as shown in the image, enter their In-Out Time.
Click the Save button
"Record Saved Successfully"
Step 18: Mark Attendance
Click on Mark Attendance from the side menu to mark attendance.
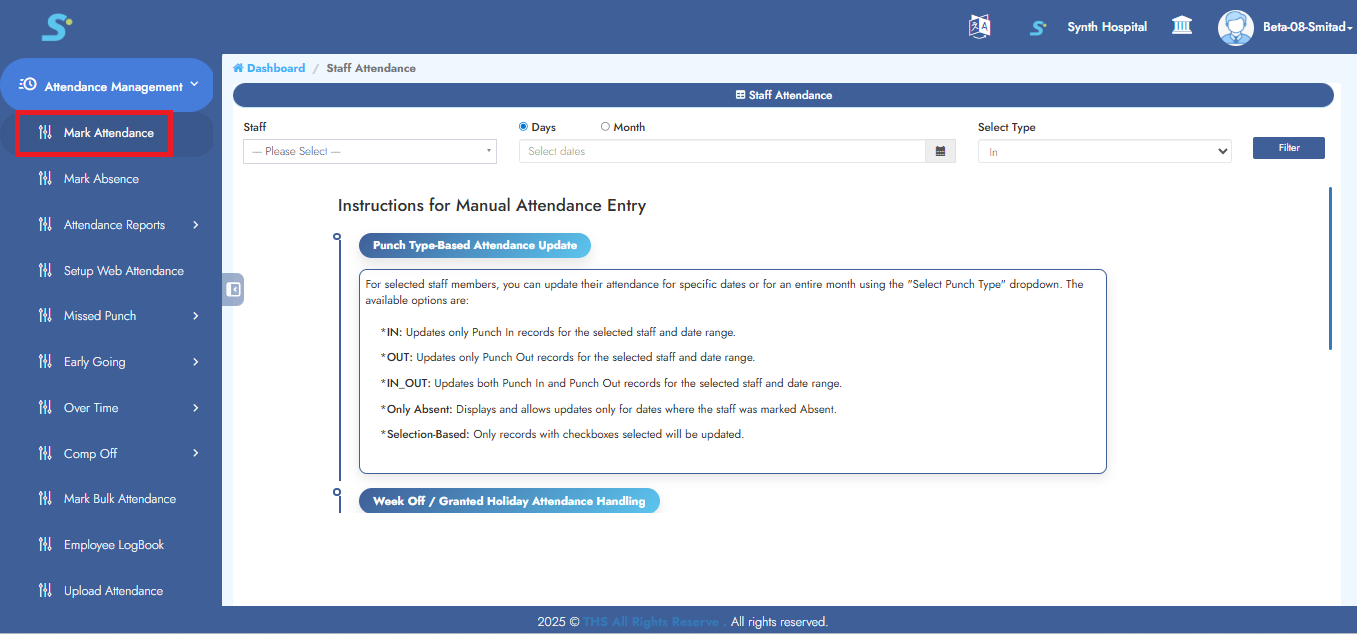
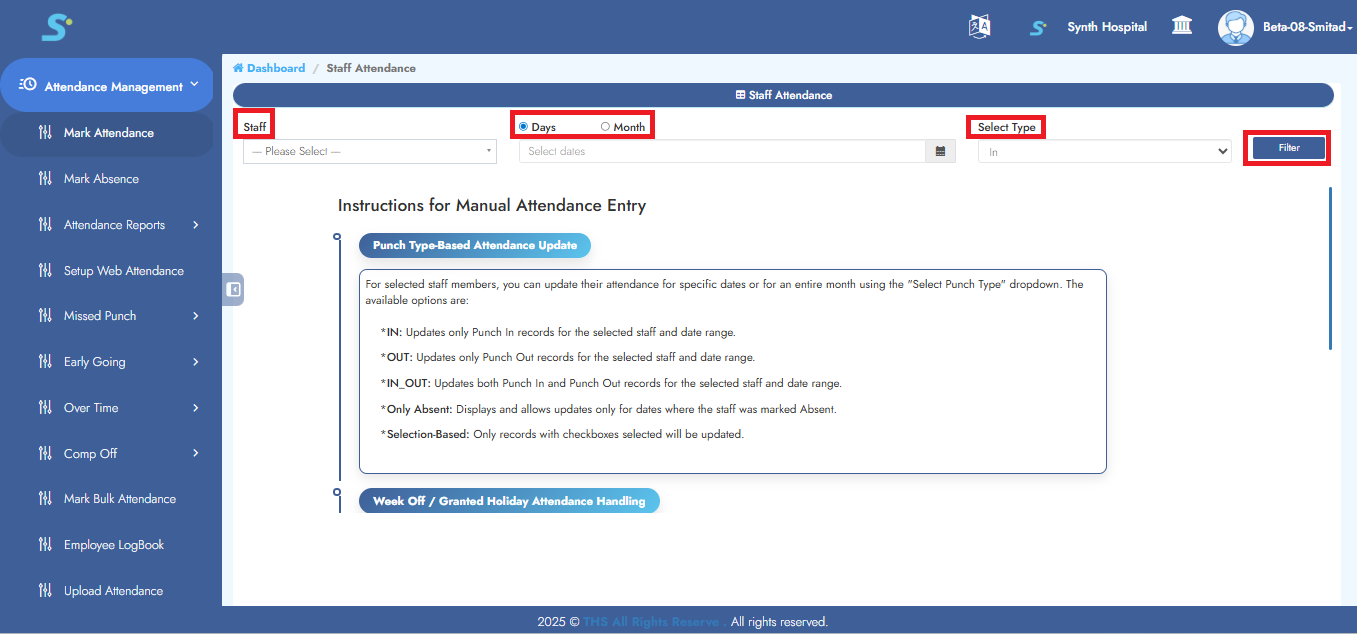
Step 19: Mark Attendance
Enter following details:
Staff (select from drop-downlist)
Days/Month (select from date filter)
Select type (select from drop-downlist)
Click on Filter button
Enter timings -> Tick appropriate checkbox -> Click Save
"Record Saved Successfully"
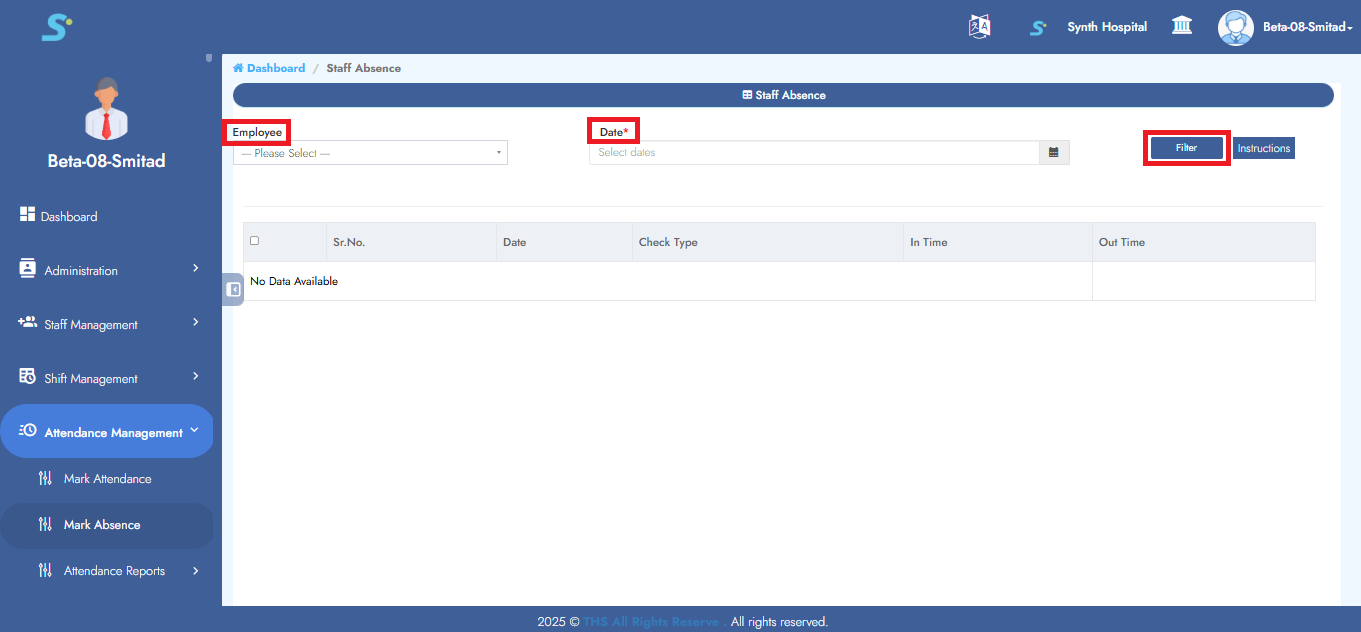
Step 20: Mark Absence
Click on Mark Absence from the side menu to mark absent.
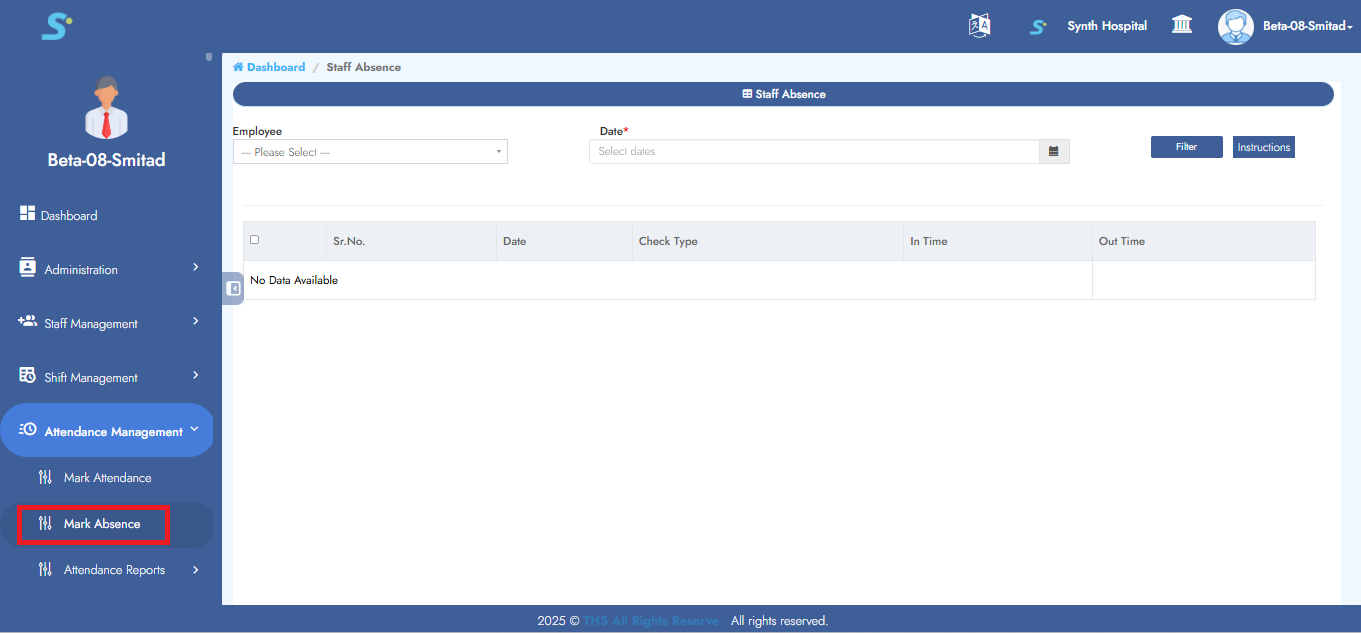
Step 21: Mark Absence
Enter following details:
Staff (select from drop-downlist)
Days/Month (select from date filter)
Select type (select from drop-downlist)
Click on Filter button
Enter timings -> Tick appropriate checkbox -> Click Save
"Marks absent successfully"
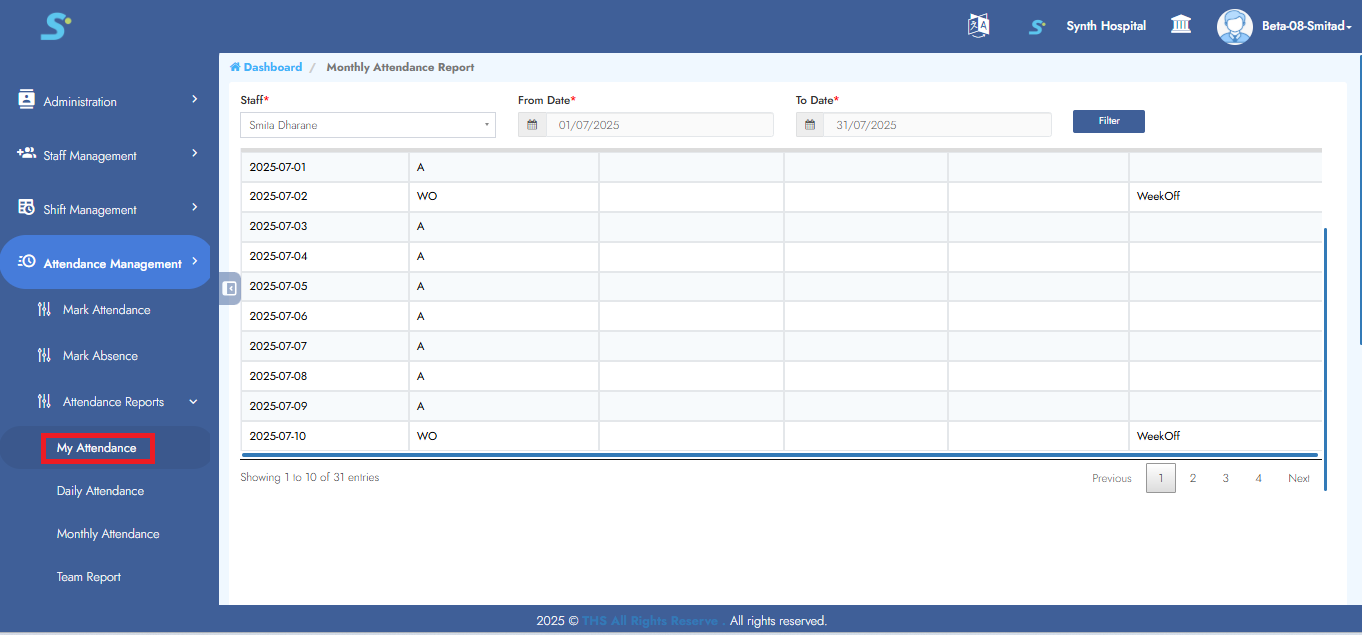
Step 22: My Attendance
Click on My Attendance. It will display only your attendance.
Step 23: Today Attendance
It will display only today’s attendance for all employees.

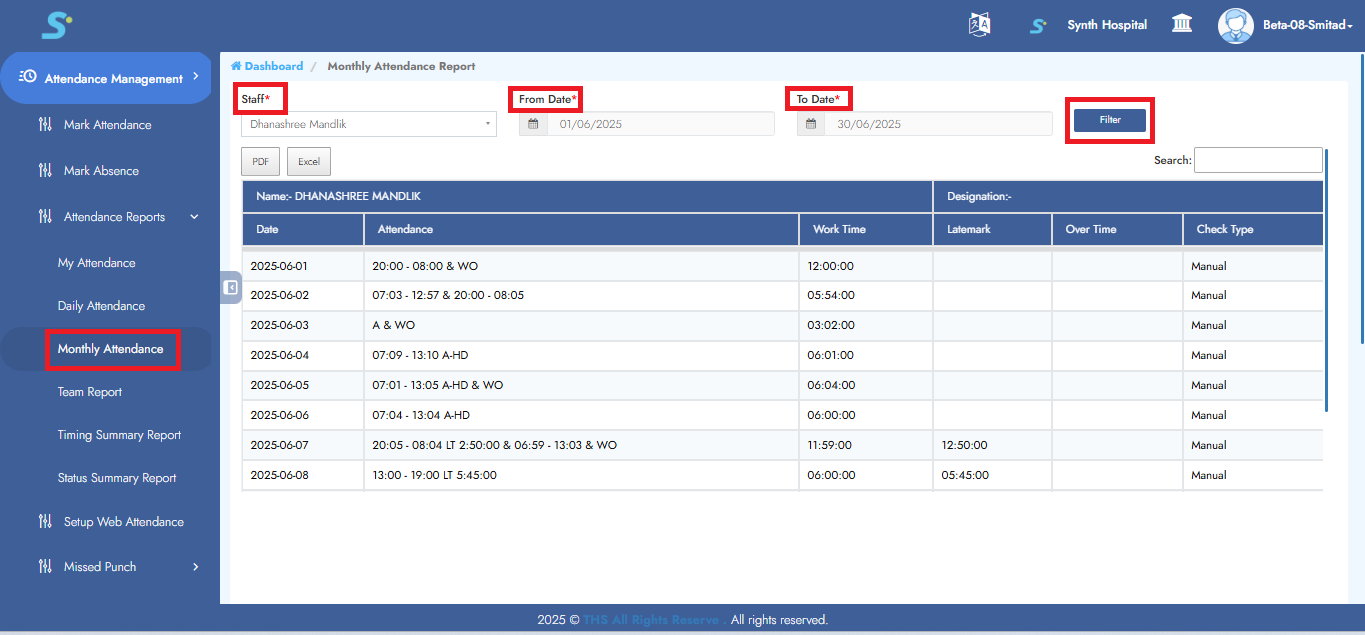
Step 24: Monthly Attendance
Go to the Monthly Attendance sub-module under Attendance Management, select
Staff Name (select from drop-downlist)
From Date, To Date, then click the Filter button to view the employee’s monthly attendance.
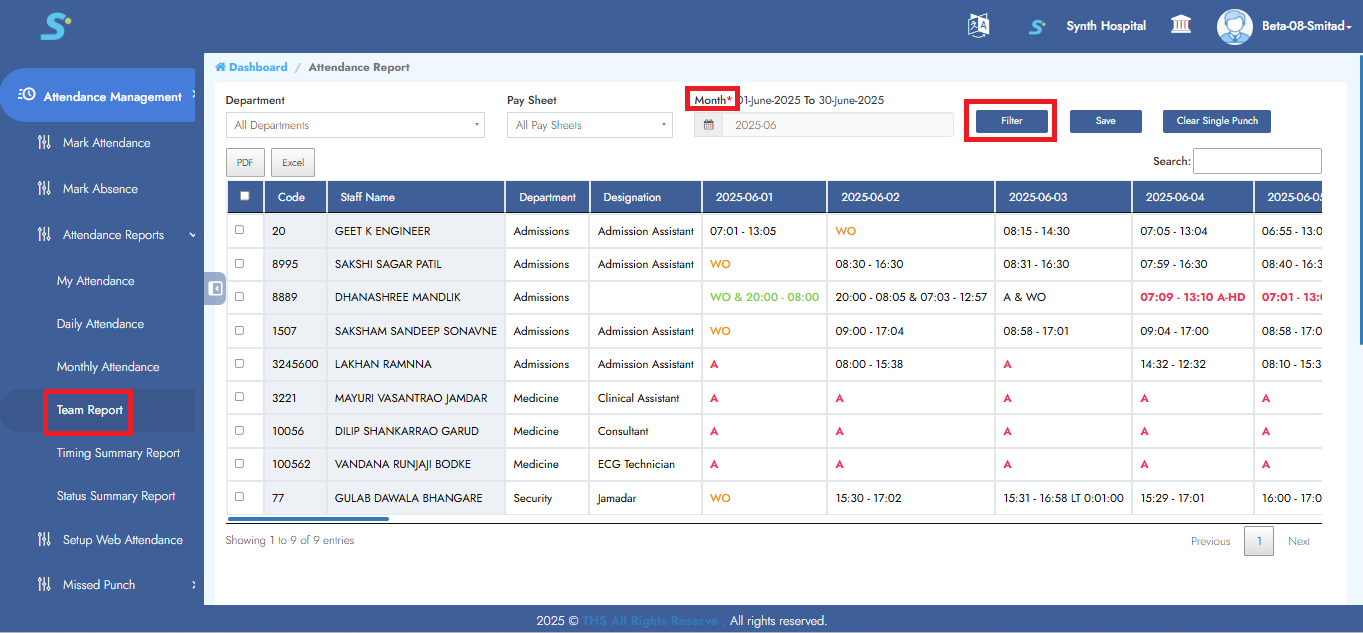
Step 25: Team Report
Click on Team Report from the side menu under Attendance Management to view only your team's attendance details.
Step 26: Timing Summary Report
Click on Timing Summary Report from the side menu under Attendance Management to view all your employee's attendance details like absent count, paid leaves count etc. as shown in the image.
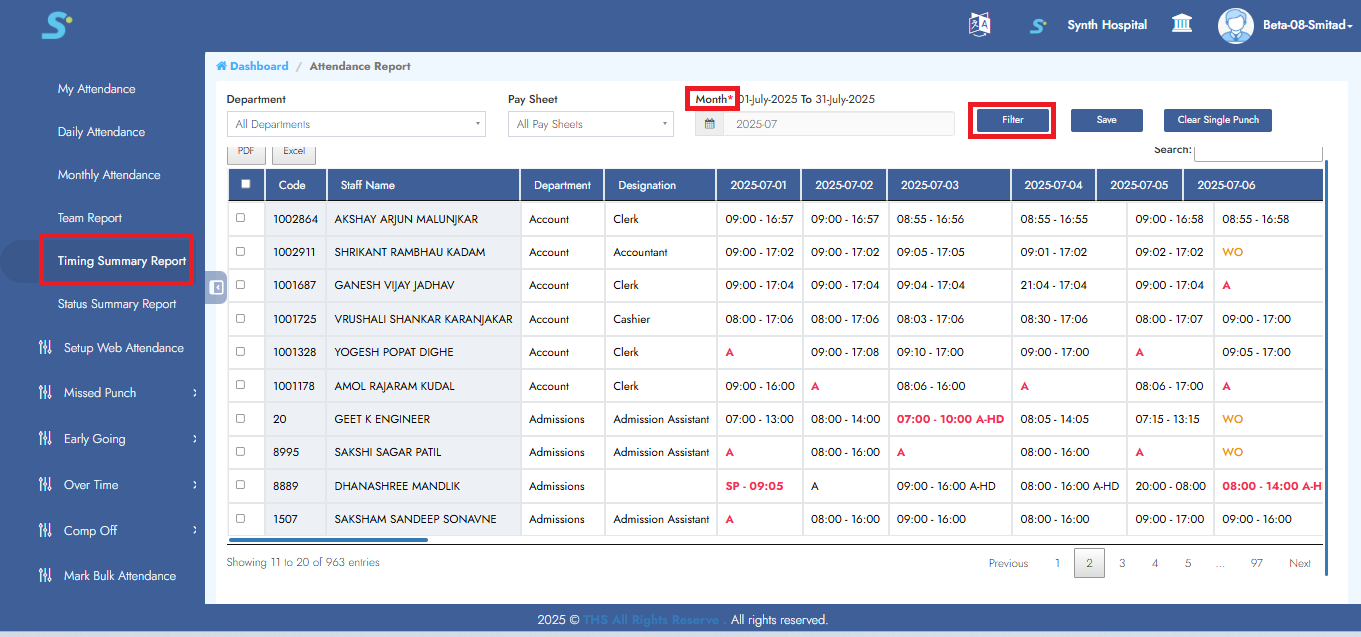
Step 27: Select Date
Click the Date button as shown in the image.
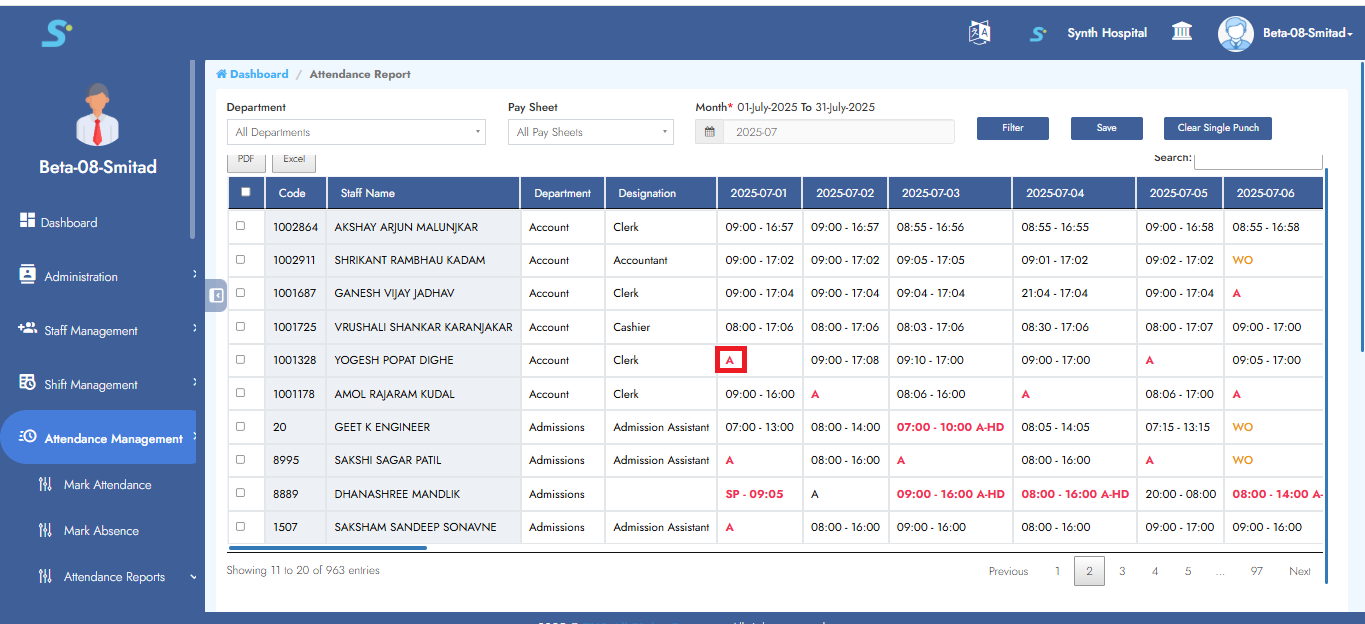
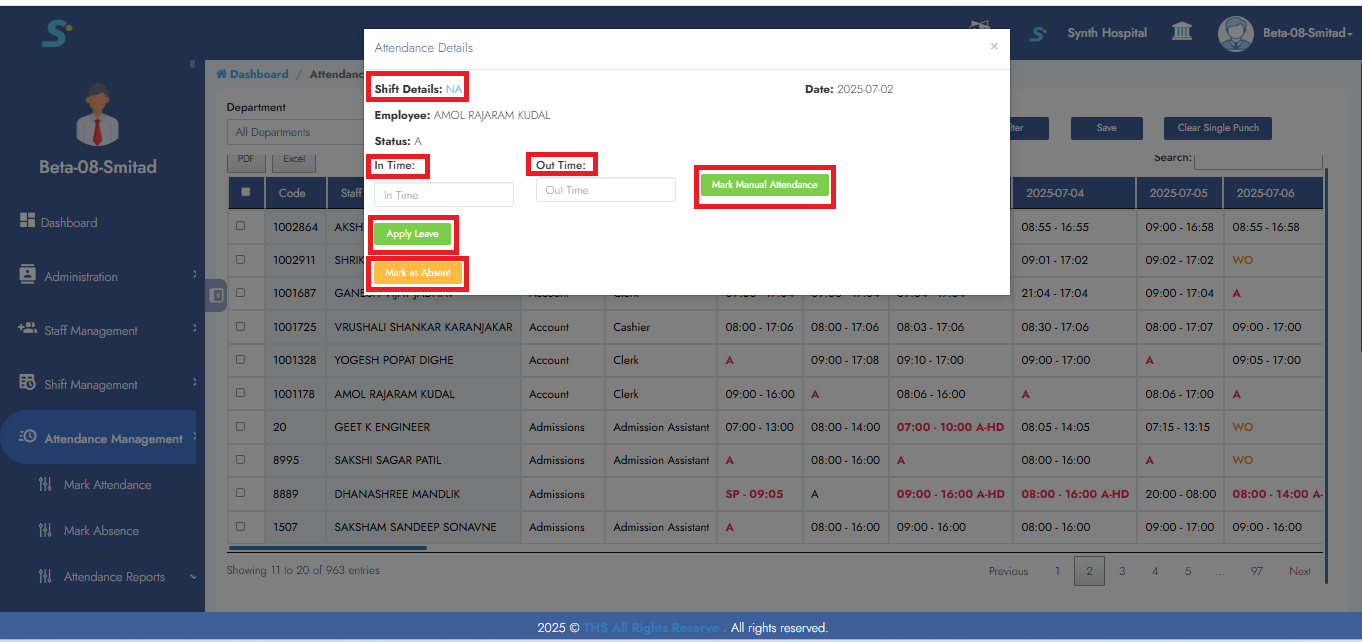
Step 28: Timing Summary Report Management
In the Timing Summary Report, you can update attendance—such as assigning shift, marking manual attendance, absents, or applying leave (Master)—as shown in the image.
Any employee activities like missed punches or early exits are also visible in the screen below.
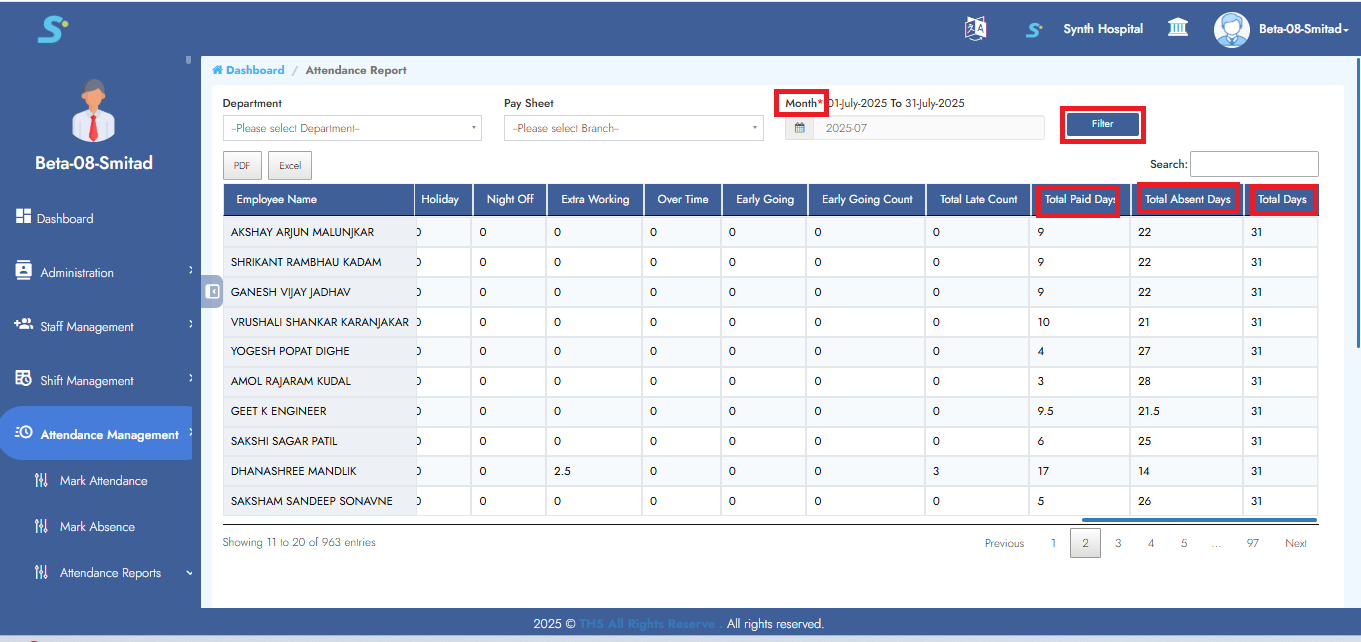
Step 29: Status Summary Report
The Status Summary Report displays a summary of Present, Absent Days count, etc., as shown in the image.
Note: Status summary report will display whether employee was present or absent, but in timing summary report, it will display exact in-out timings of an employee.
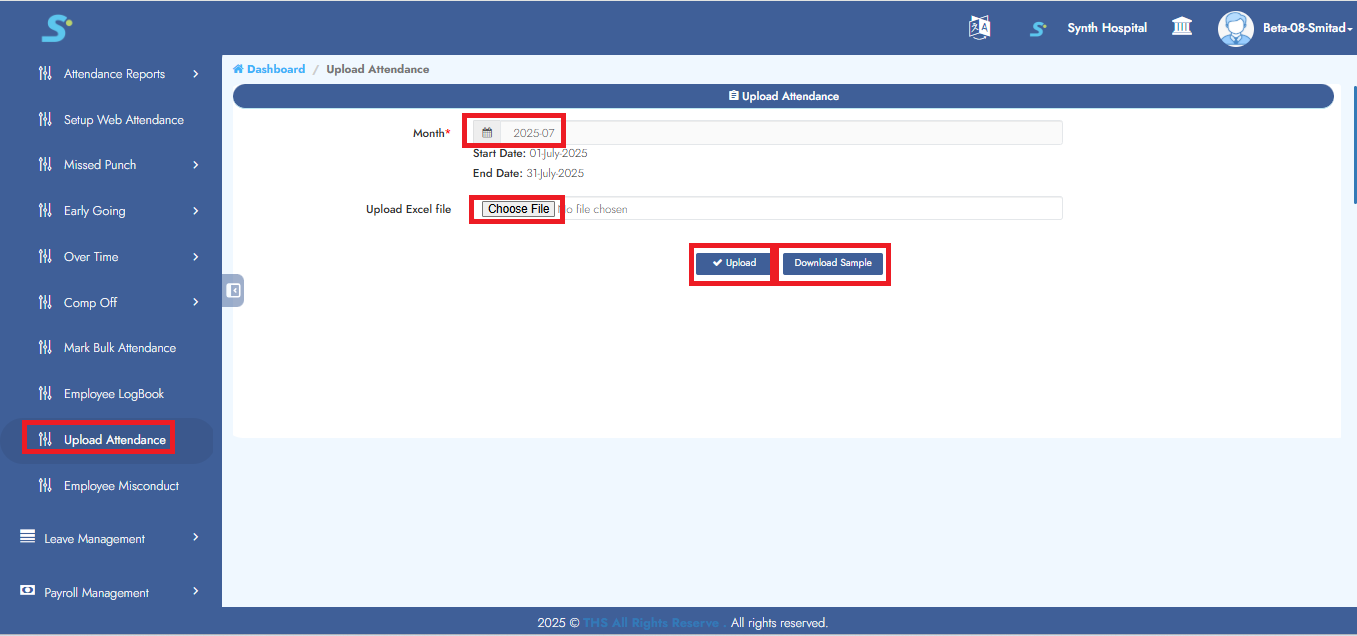
Step 30: Upload Attendance
Go to Upload Attendance from the side menu of Attendance Management module.
- First download sample as shown in the image
- Add data in this excel file as per sample data
- Then select month, choose file and then upload
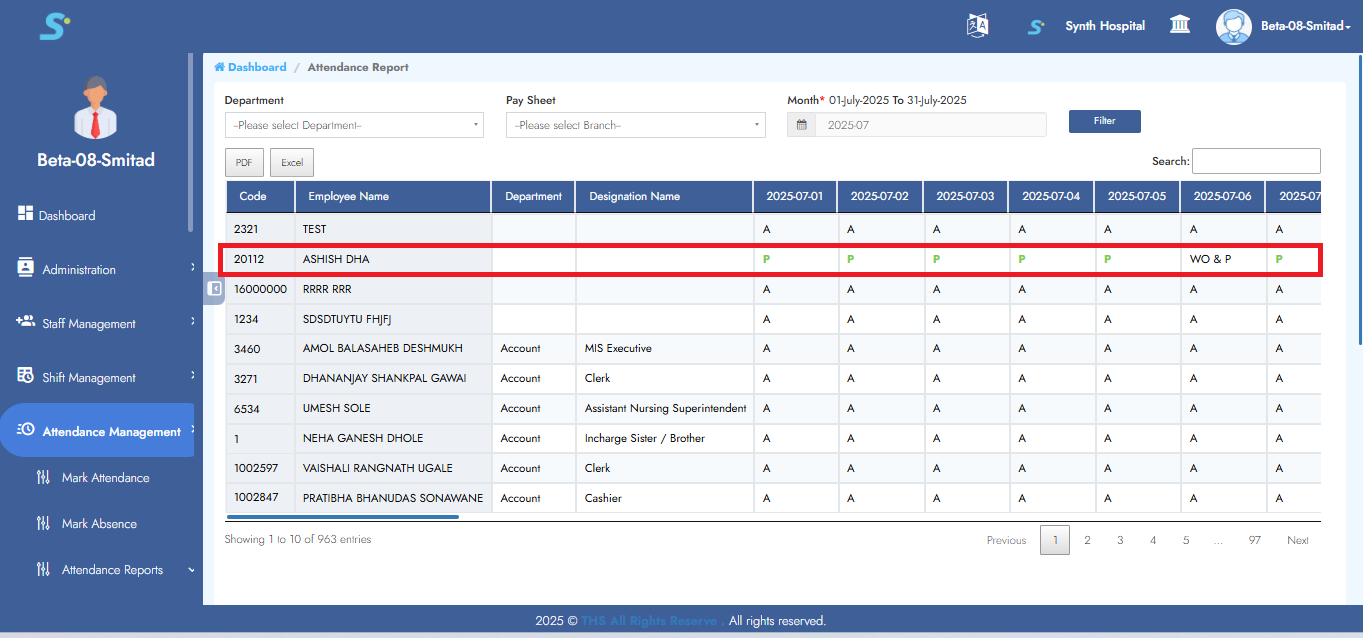
Step 31: Upload Attendance Result
View records that are reflected in the Status Summary Report when Upload Attendance feature is used.
Step 32: Employee LogBook
Go to Employee LogBook from the side menu under the Attendance Management module.
The Employee LogBook report displays employee movement/log details captured from the ECMPAUS mobile app when an employee goes outside for official work from one location to another location.
You can filter the report using the following options:
- Institute
- Department
- Employee
- From Date
- To Date
After selecting the required filters, the system displays employee log details such as:
- Staff Name
- Institute Name
- Department
- Designation
- Supervisor Name
- Date
- Out Time
- Out Description
- Out By
- Out Latitude
- Out Longitude
You can also click the Export Excel button to download the Employee LogBook report in Excel format.

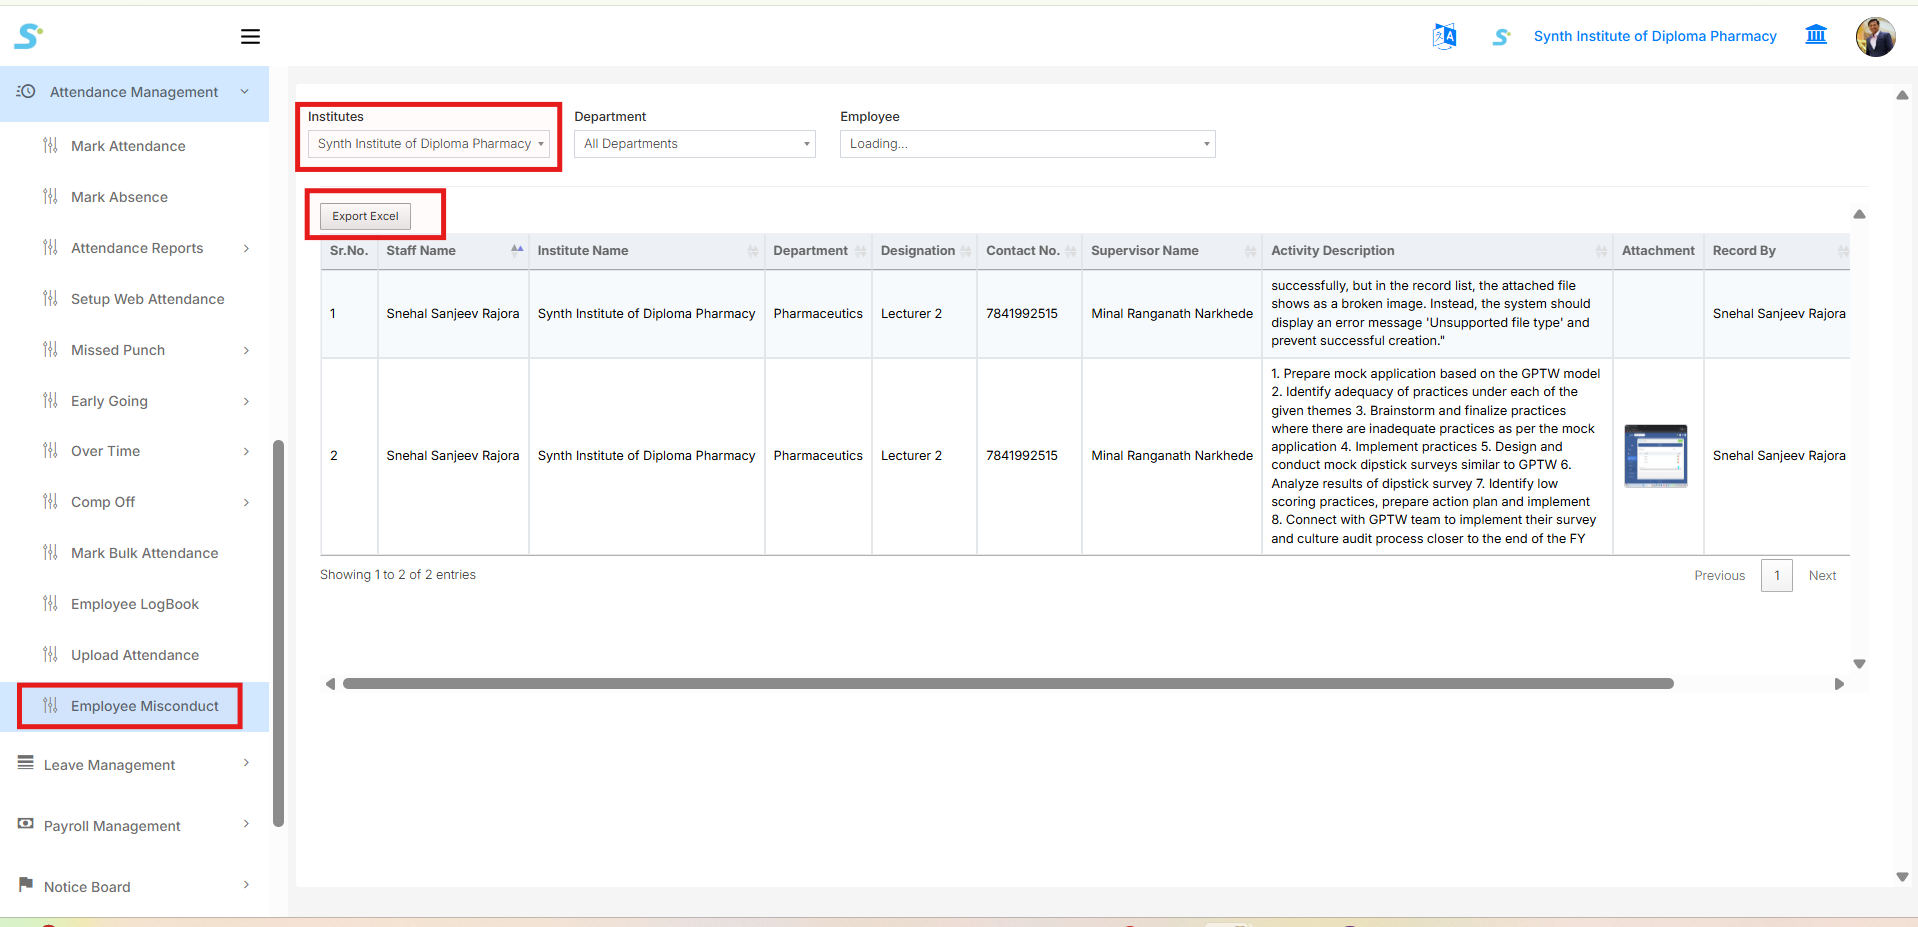
Step 33: Employee Misconduct
Go to Employee Misconduct from the side menu under the Attendance Management module.
The Employee Misconduct report displays employee misconduct/activity records captured for employees. This report helps management review activity details submitted against employees, including descriptions and supporting attachments.
You can filter the report using the following options:
- Institute
- Department
- Employee
After selecting the required filters, the system displays misconduct details such as:
- Staff Name
- Institute Name
- Department
- Designation
- Contact No.
- Supervisor Name
- Activity Description
- Attachment
- Record By
You can also click the Export Excel button to download the Employee Misconduct report in Excel format.