eDOCS Module
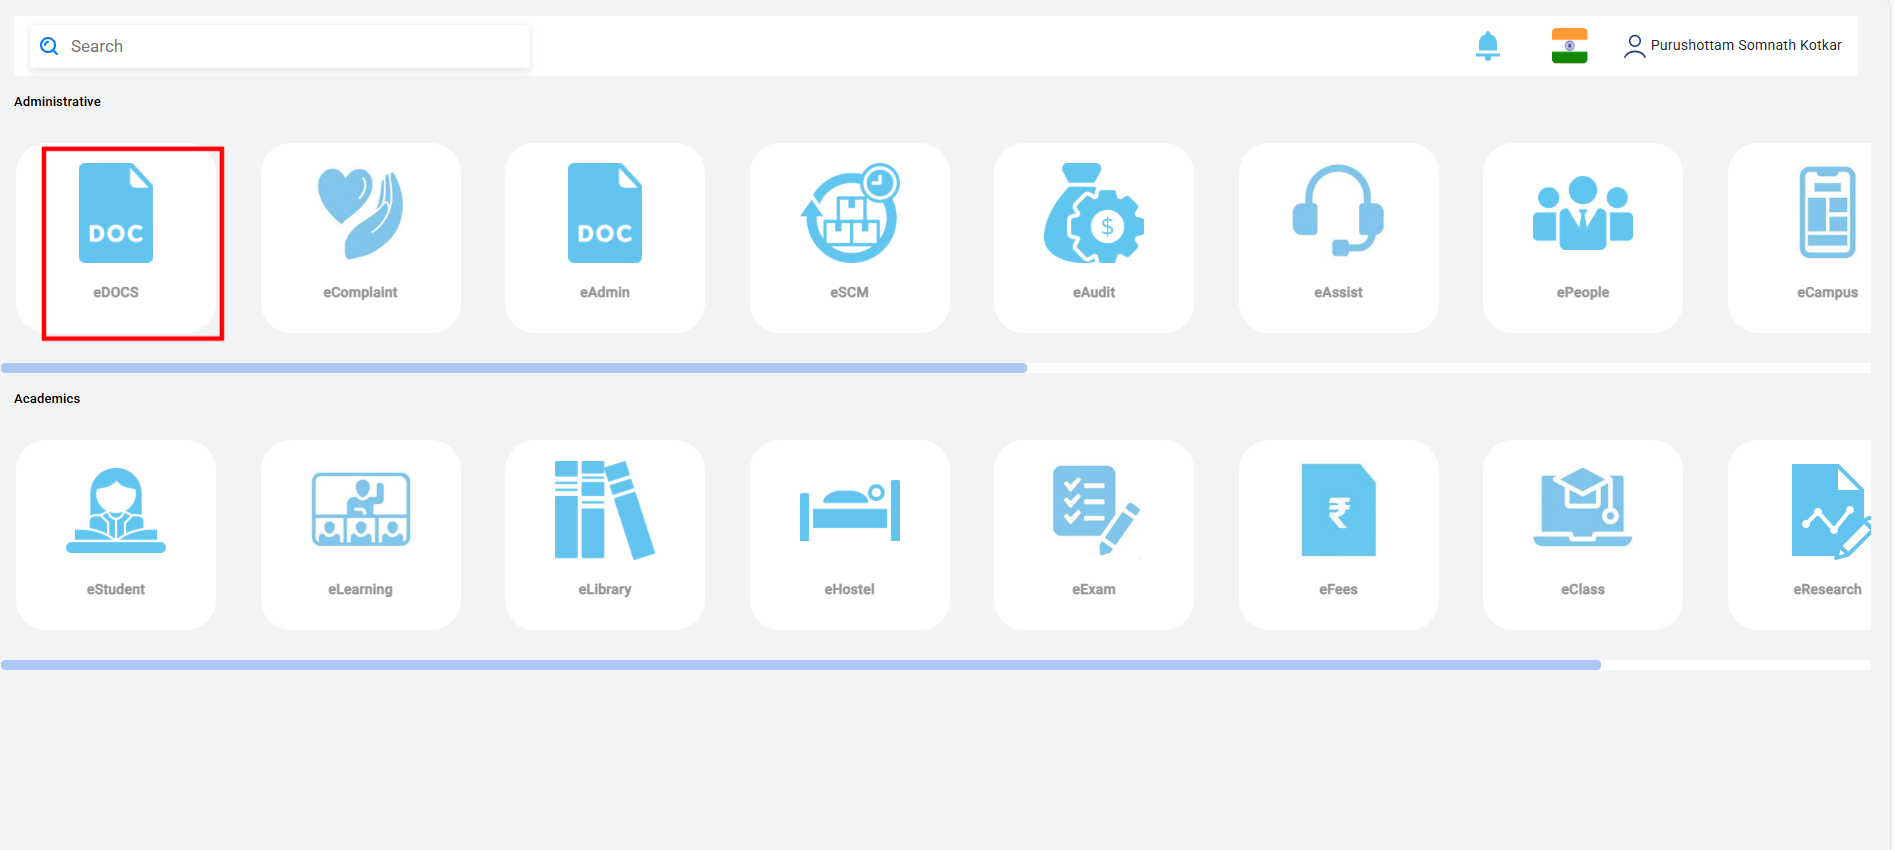
Step 1: eDOCS – Getting Started
Navigate to the eDOCS module to begin the process. Refer to the screenshot for a visual guide.
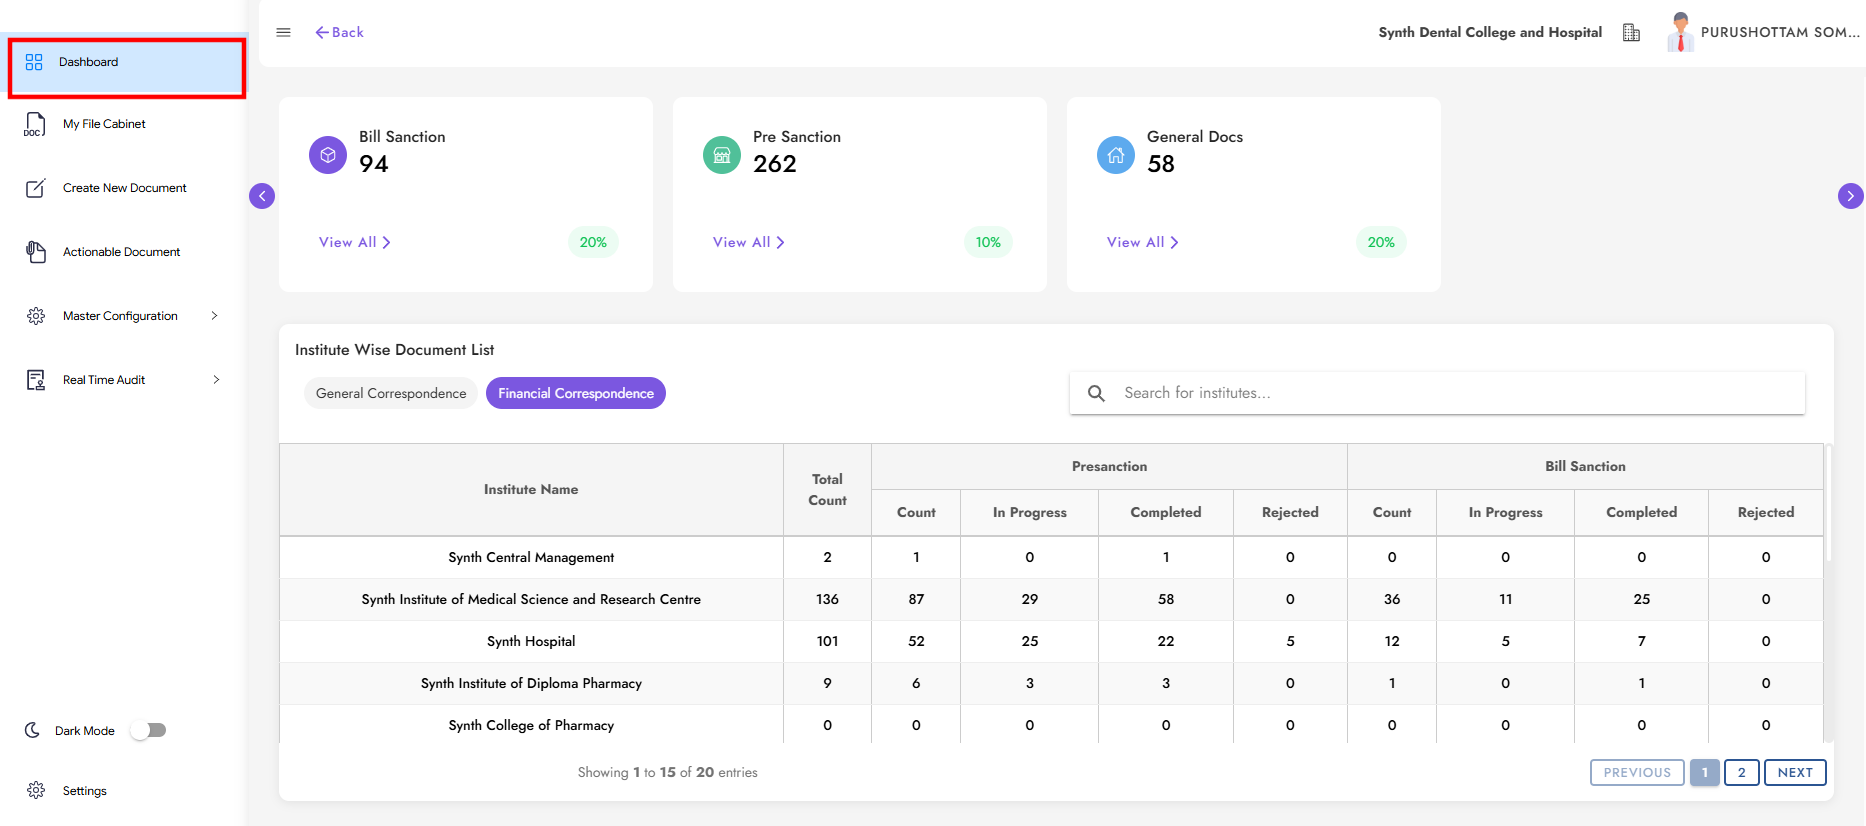
Step 2: Dashboard
The dashboard displays relevant information and available options.
Step 3: Master Configuration
Click on Master Configuration to set up necessary configurations for financial and operational workflows.

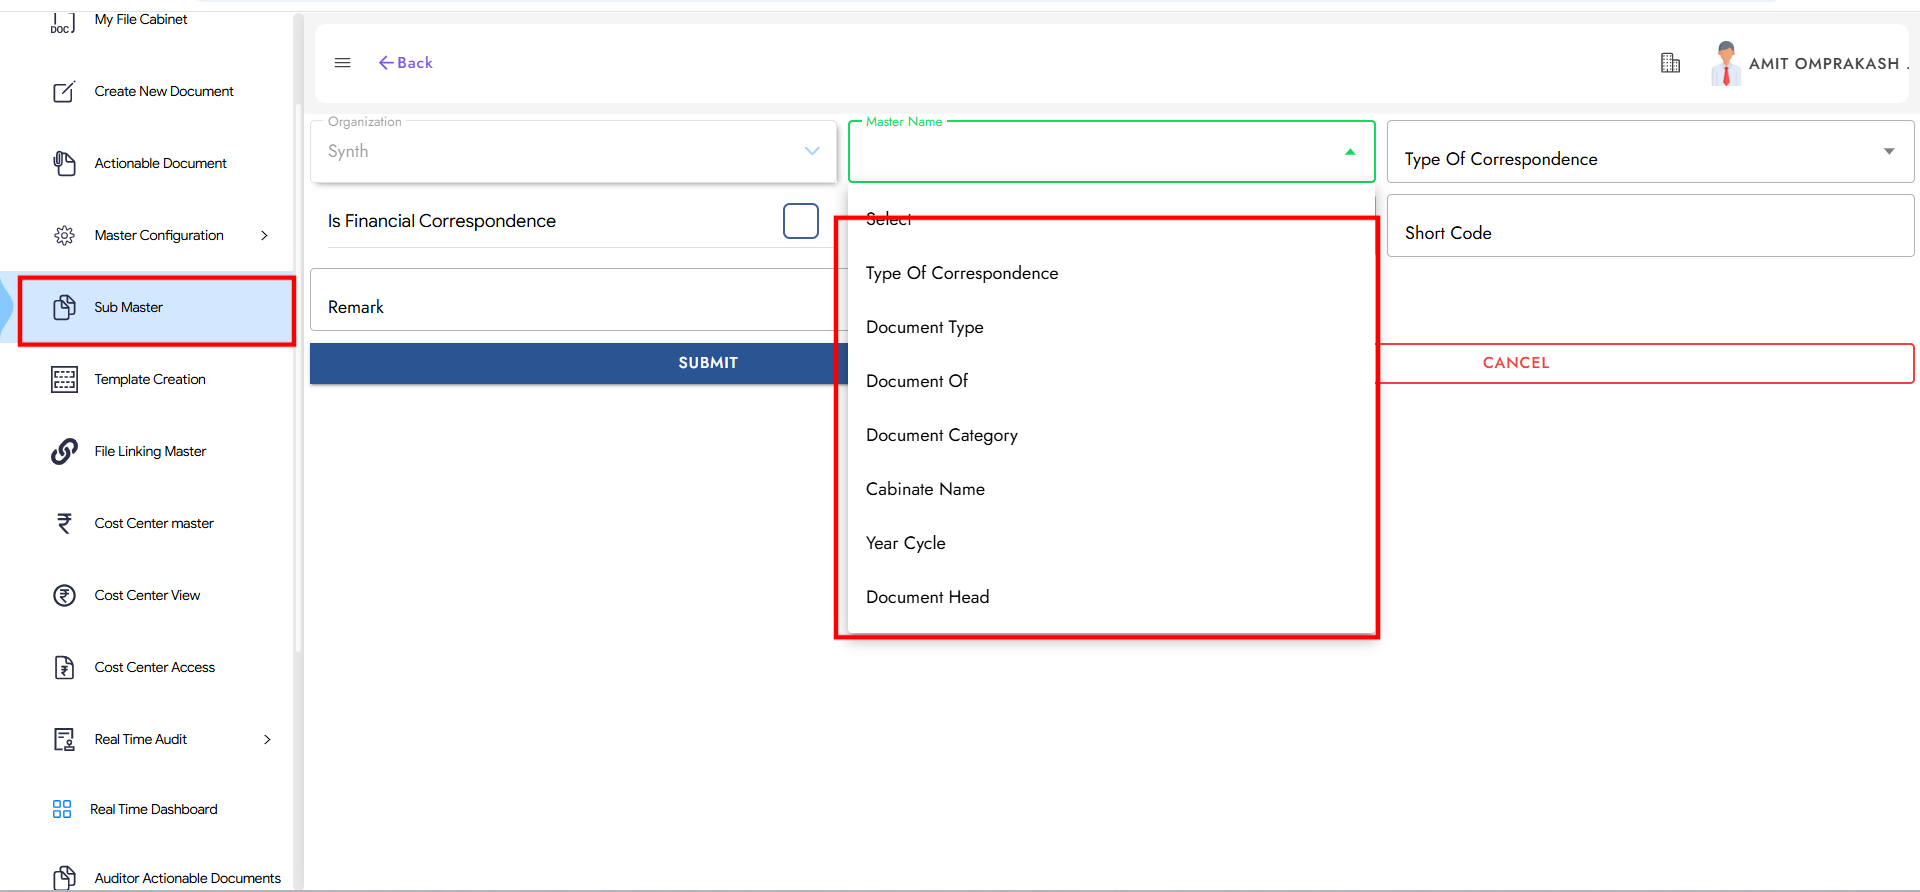
Step 4: Sub Master
Enter the required details in the Sub Master form. Submit after completing all fields.
Fields to select:
- Master Name:
- Type of Correspondence
- Document Of
- Cabinet Name
- Year Cycle
- Document Head
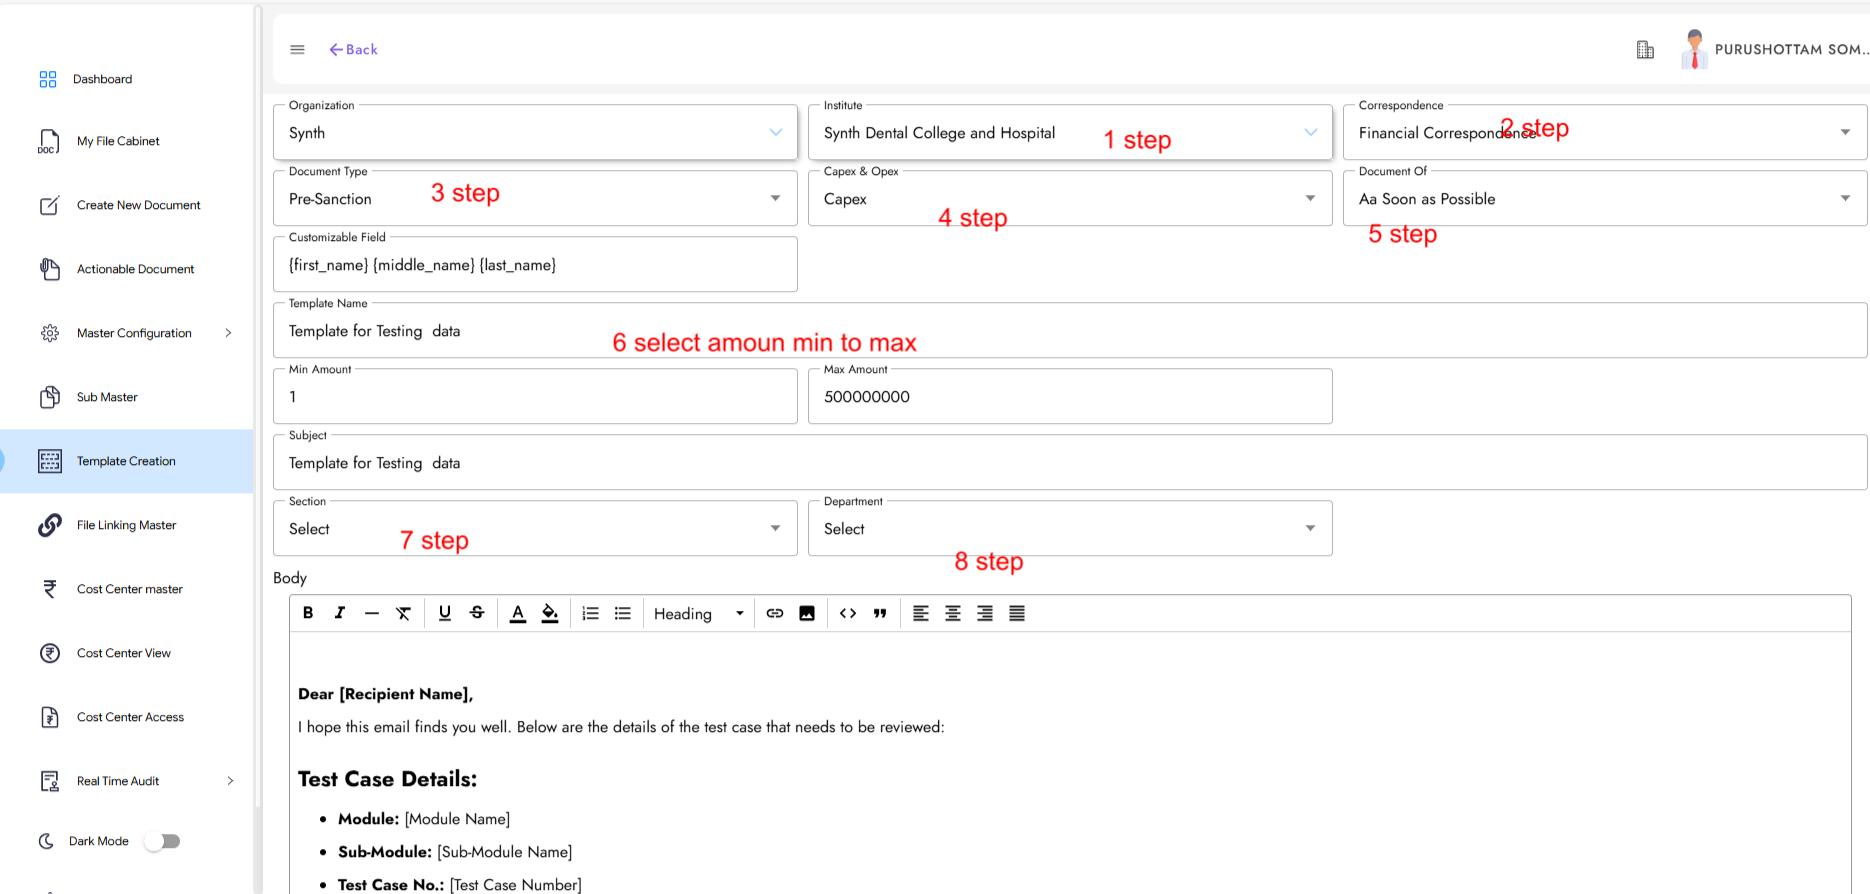
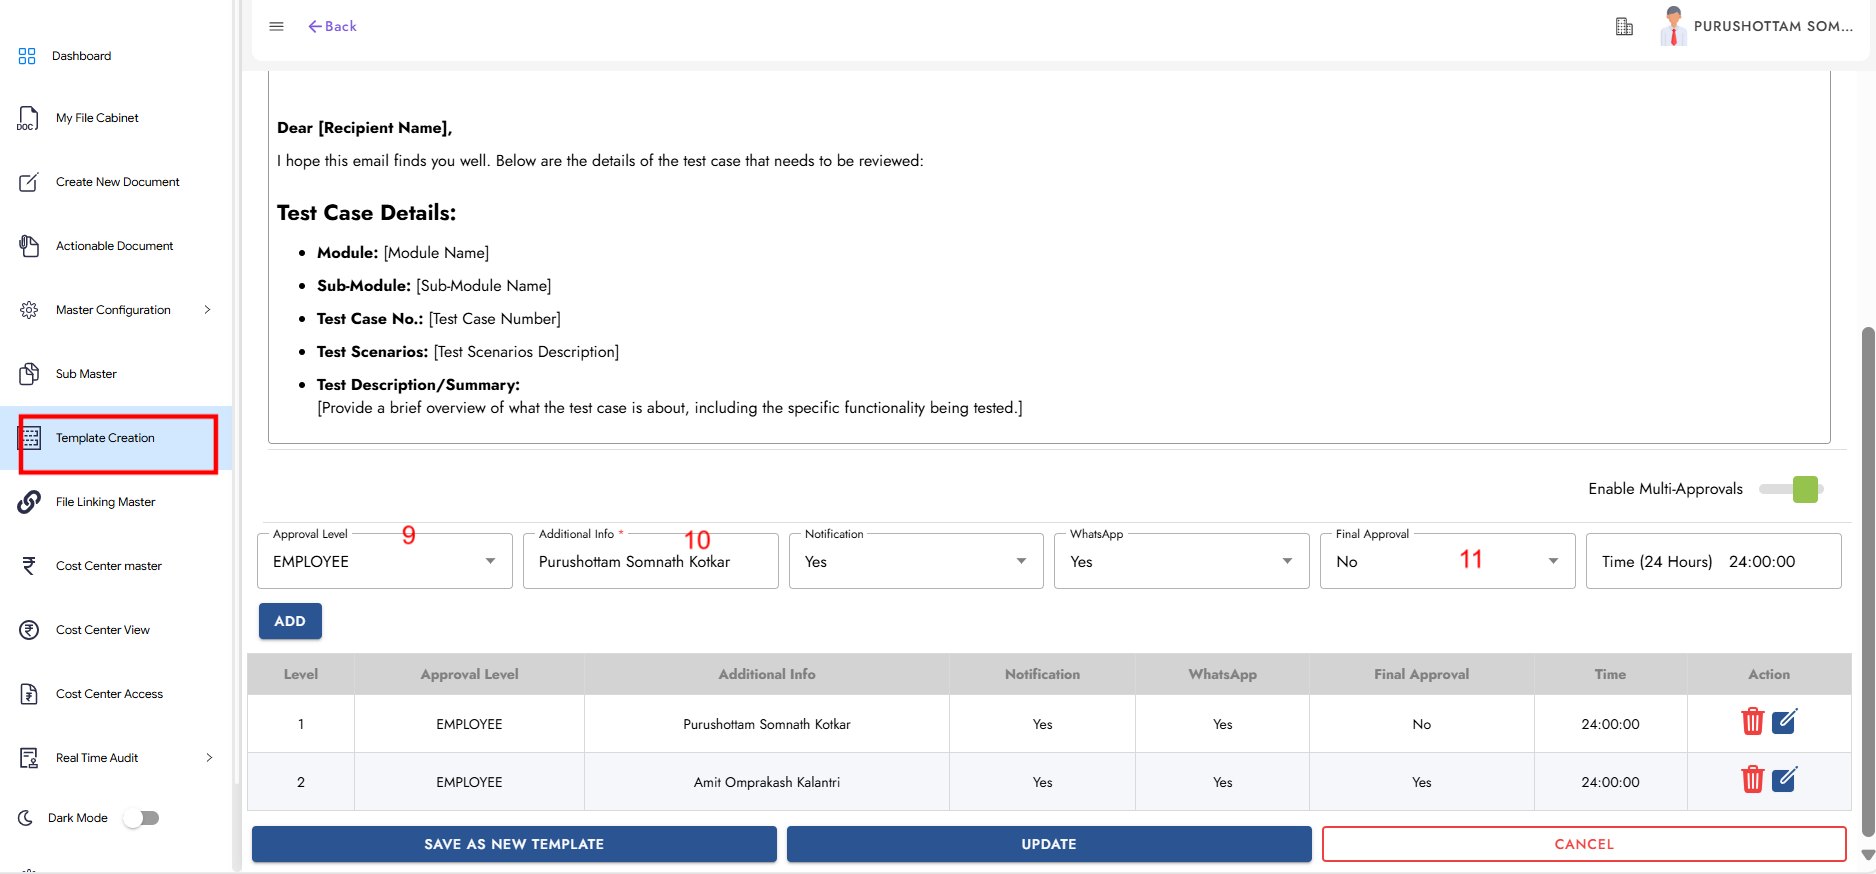
Step 5: Template Creation
Create templates for Pre-Sanction, Bill-Sanction, and General Correspondence, setting approval levels accordingly.
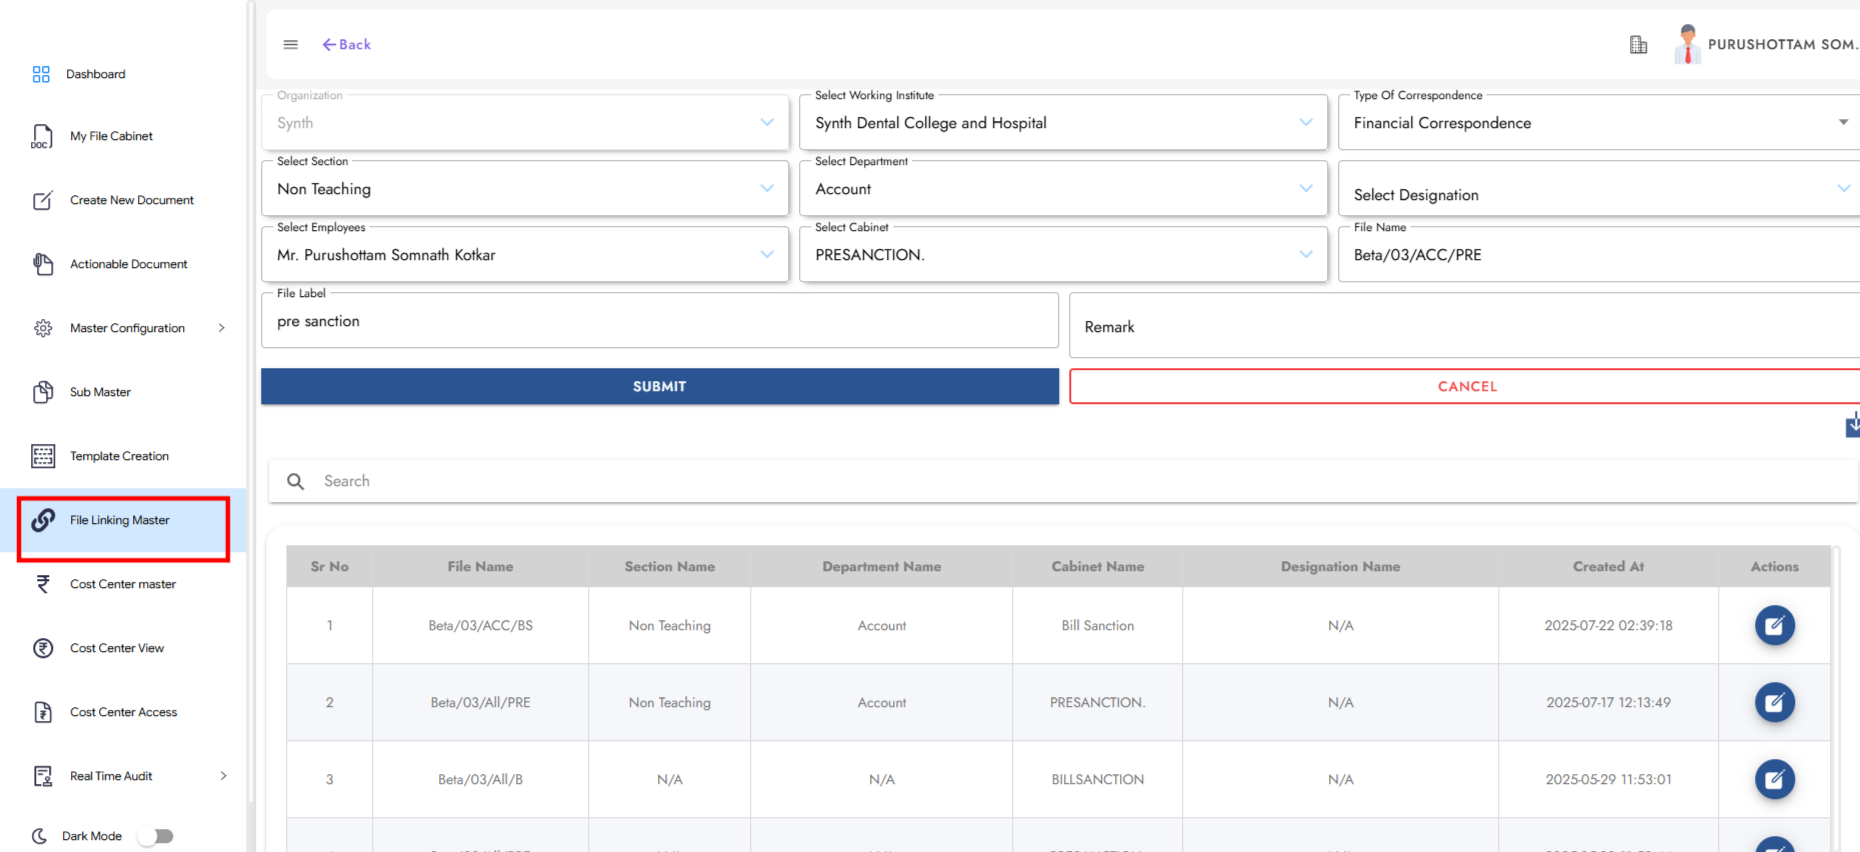
Step 6: File Linking Master
Click on File Linking Master, fill in the required sections, and click Submit.
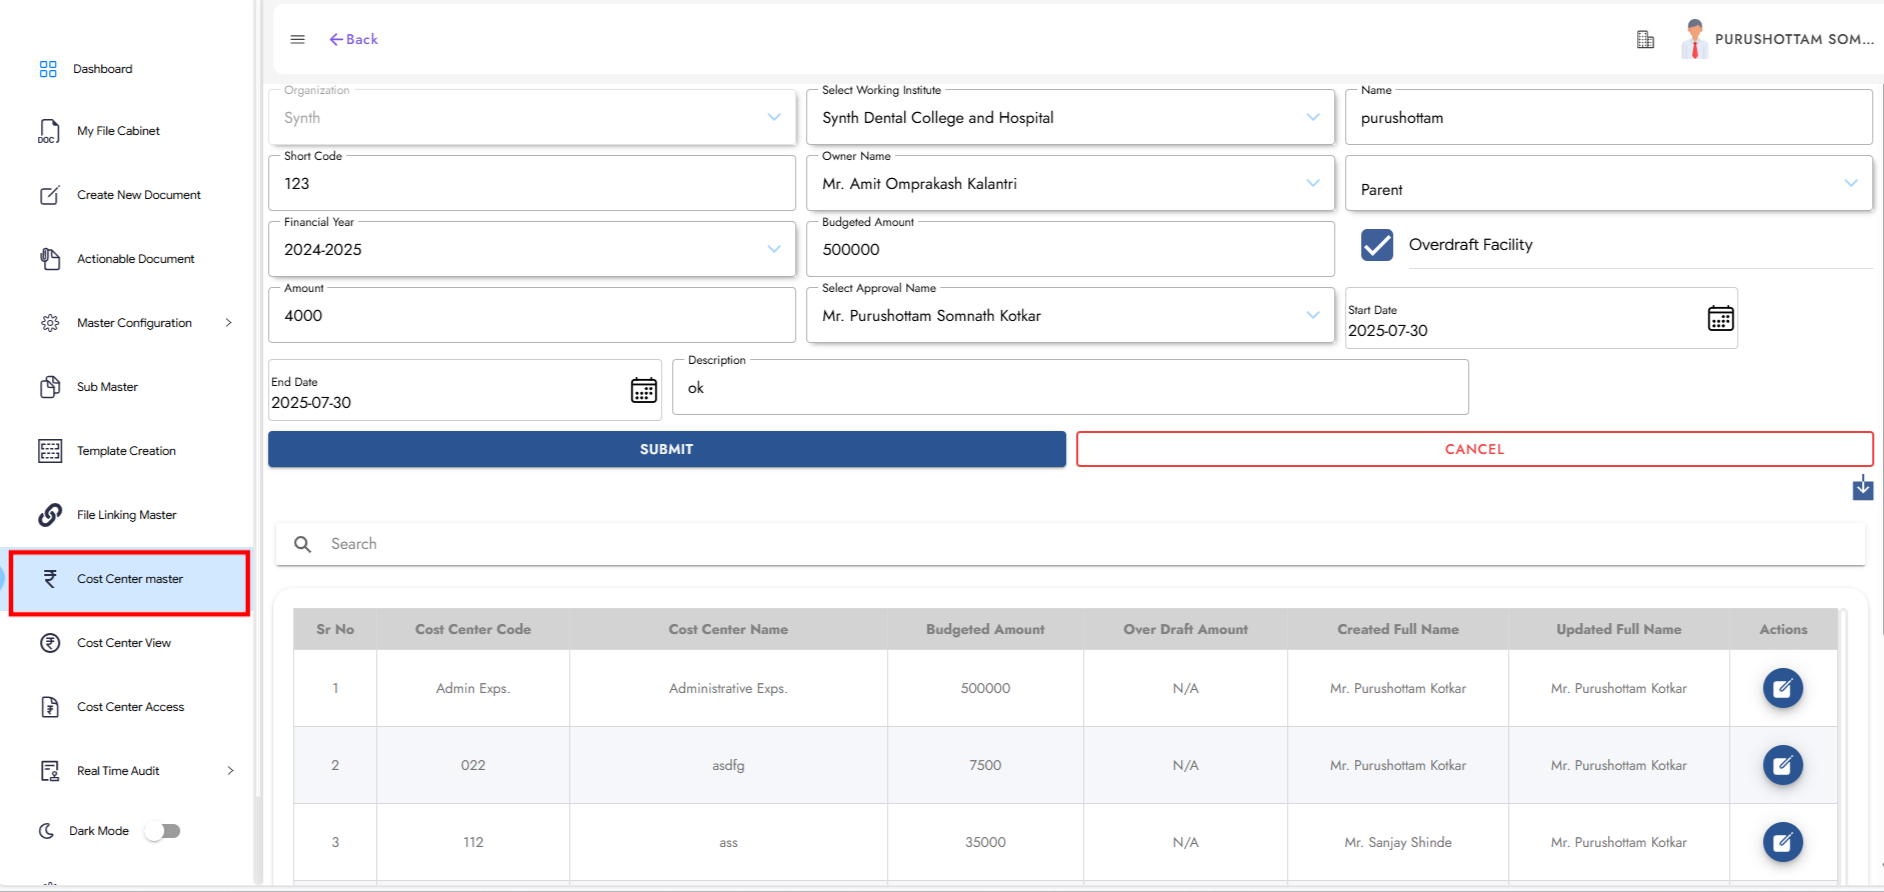
Step 7: Cost Center Master
Click on Cost Center Master as shown in the image. First, create the parent cost centre, then create the child cost centre.
Enter the following details:
1. Select Working Institute
2. Owner Name
3. Cost Centre Name
4. Financial Year
5. Budget Amount
6. Start Date & End Date
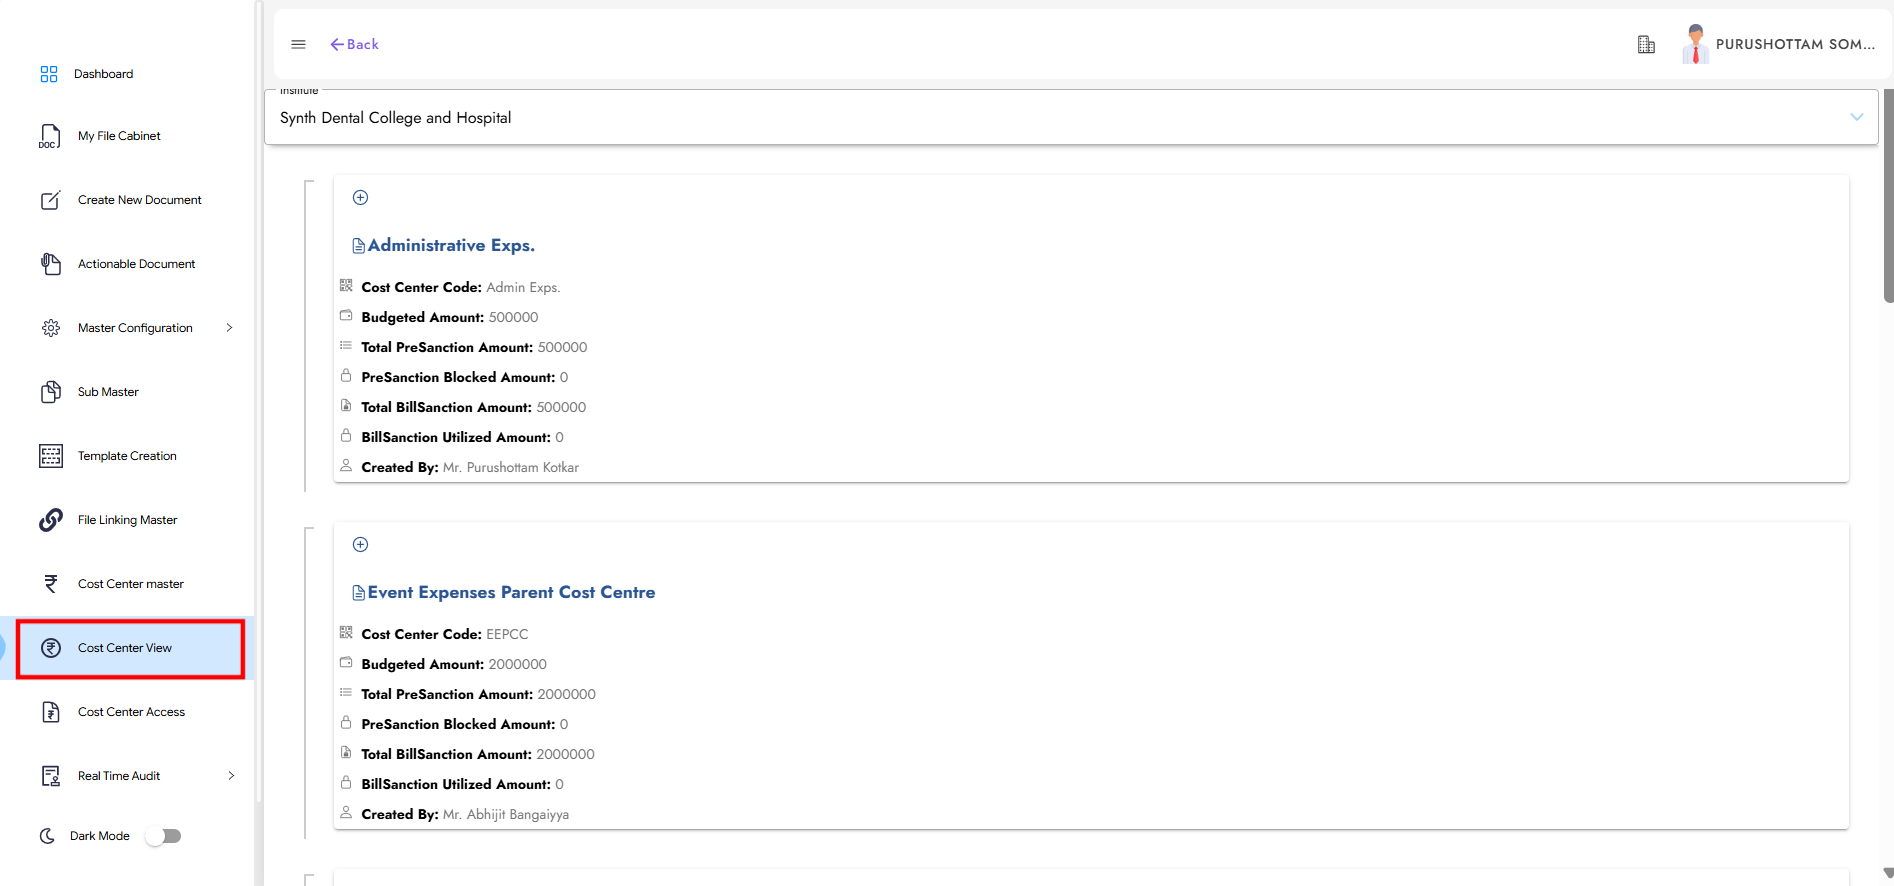
Step 8: Cost Center View
View the created cost centers by selecting the respective institute.
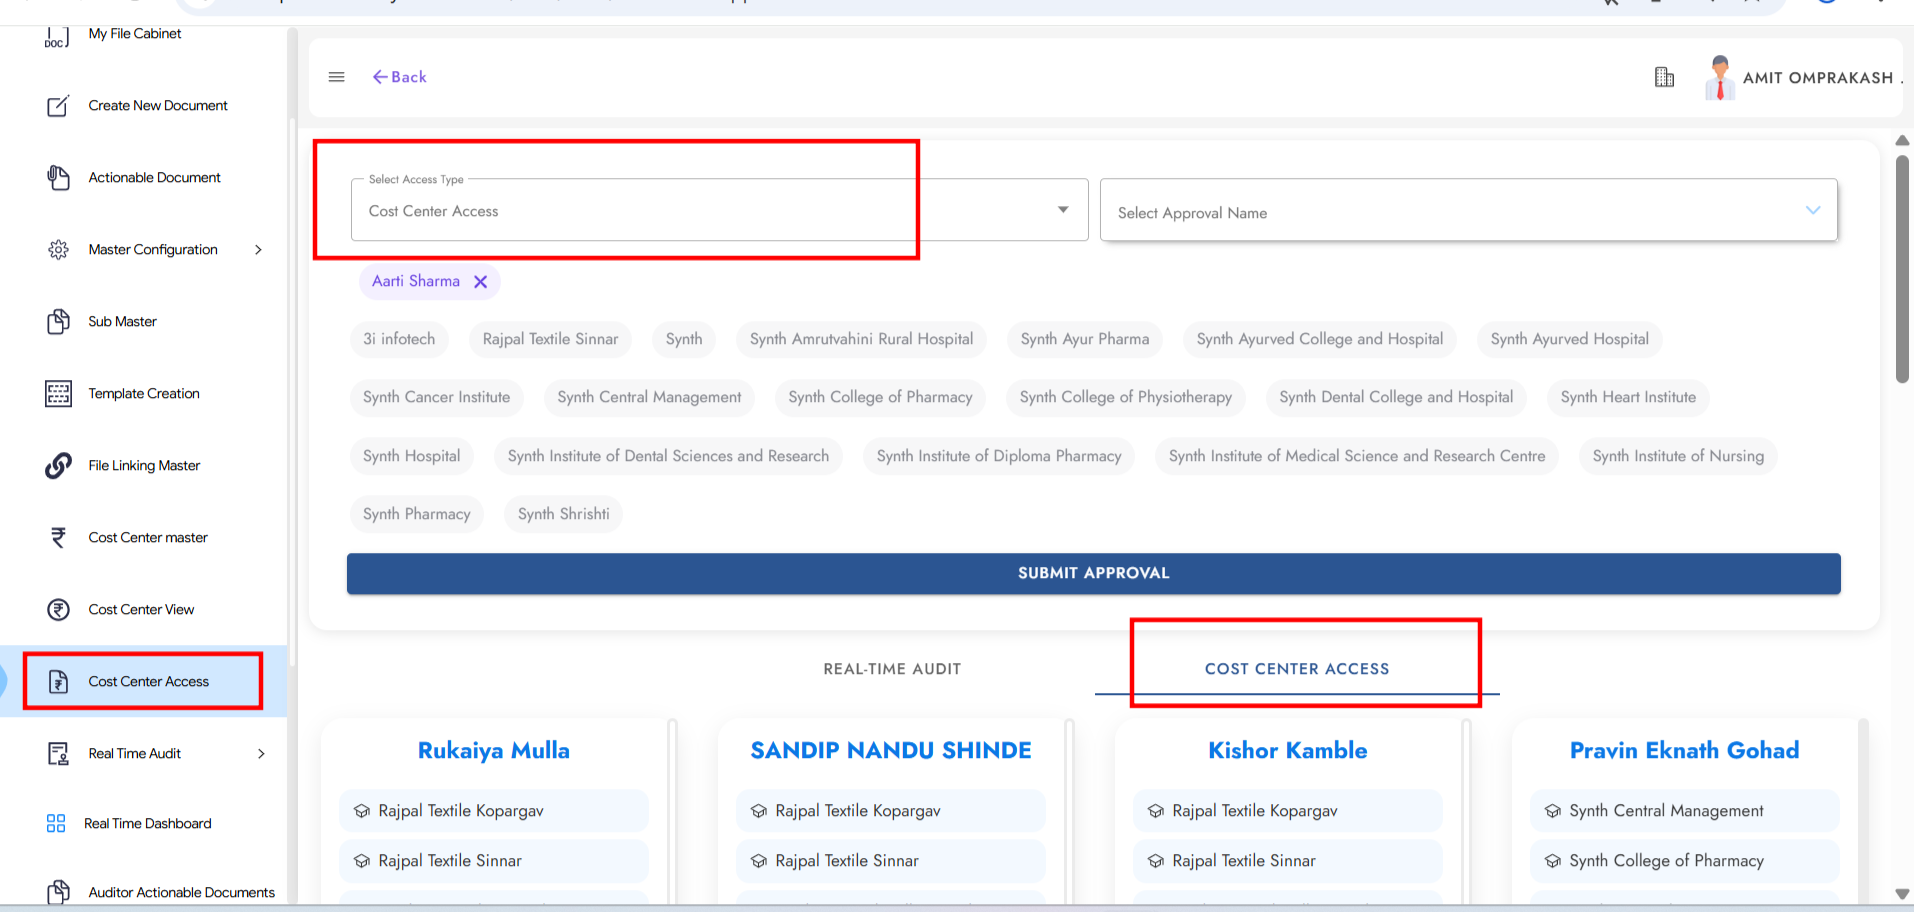
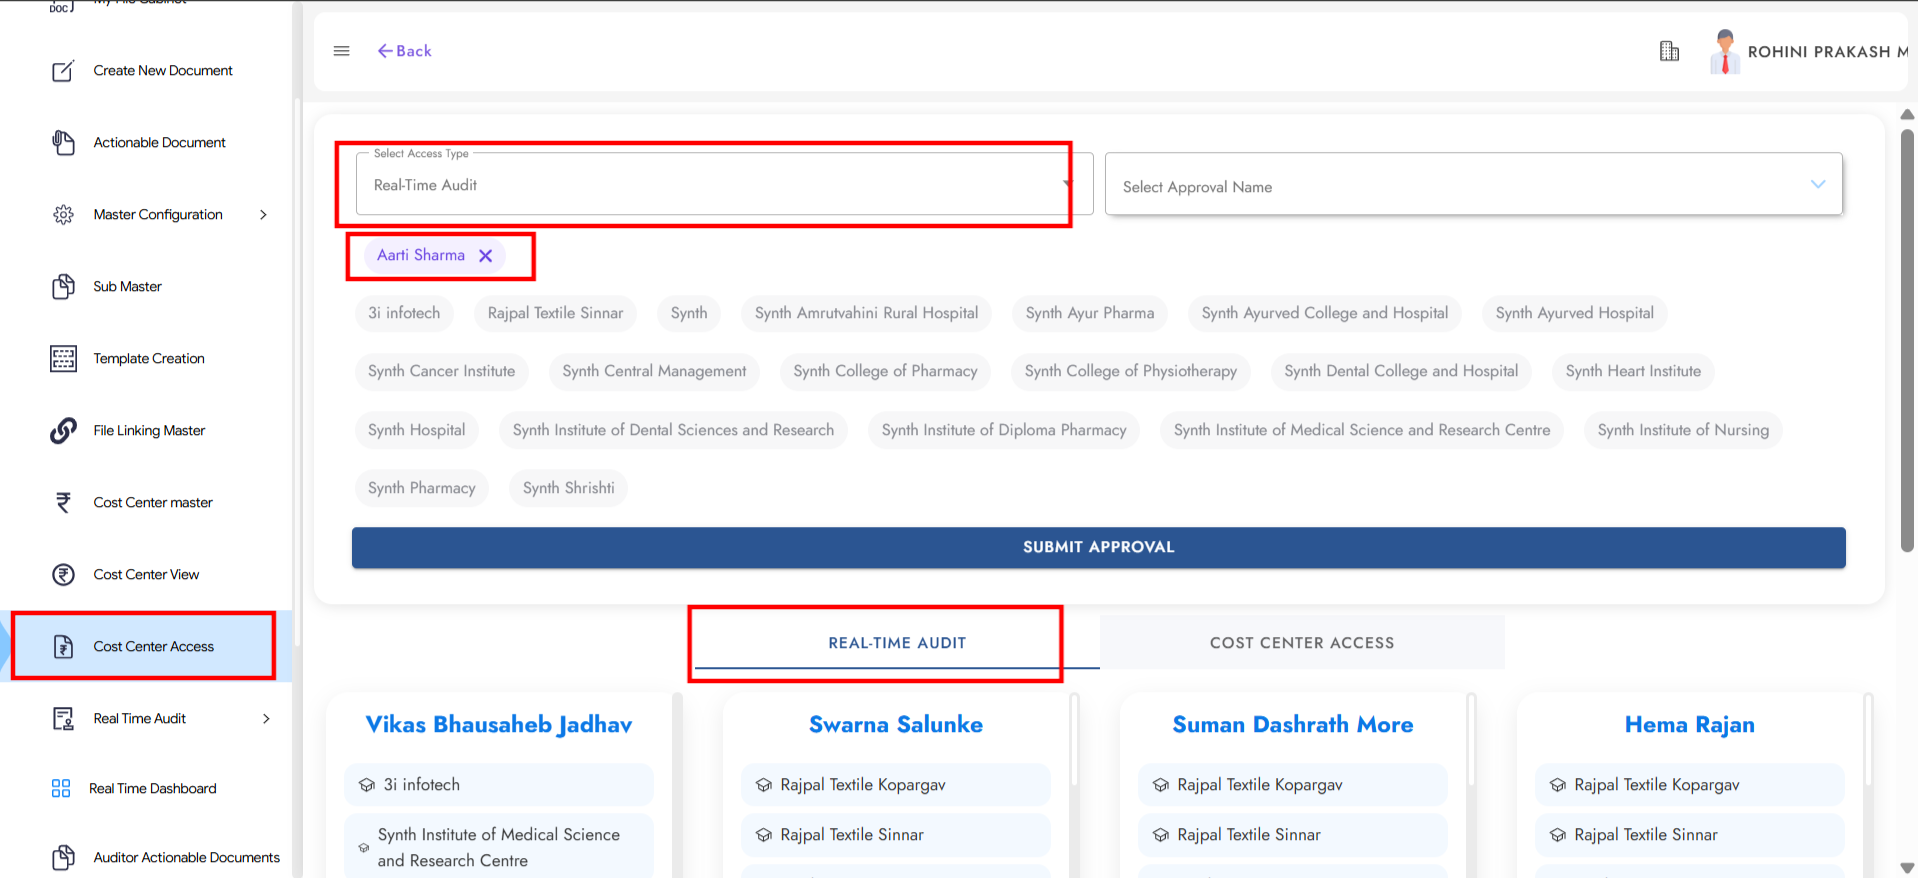
Step 9: Cost Center Access
Select the Access Type, Approval Name, and Institute, then click Submit for approval.
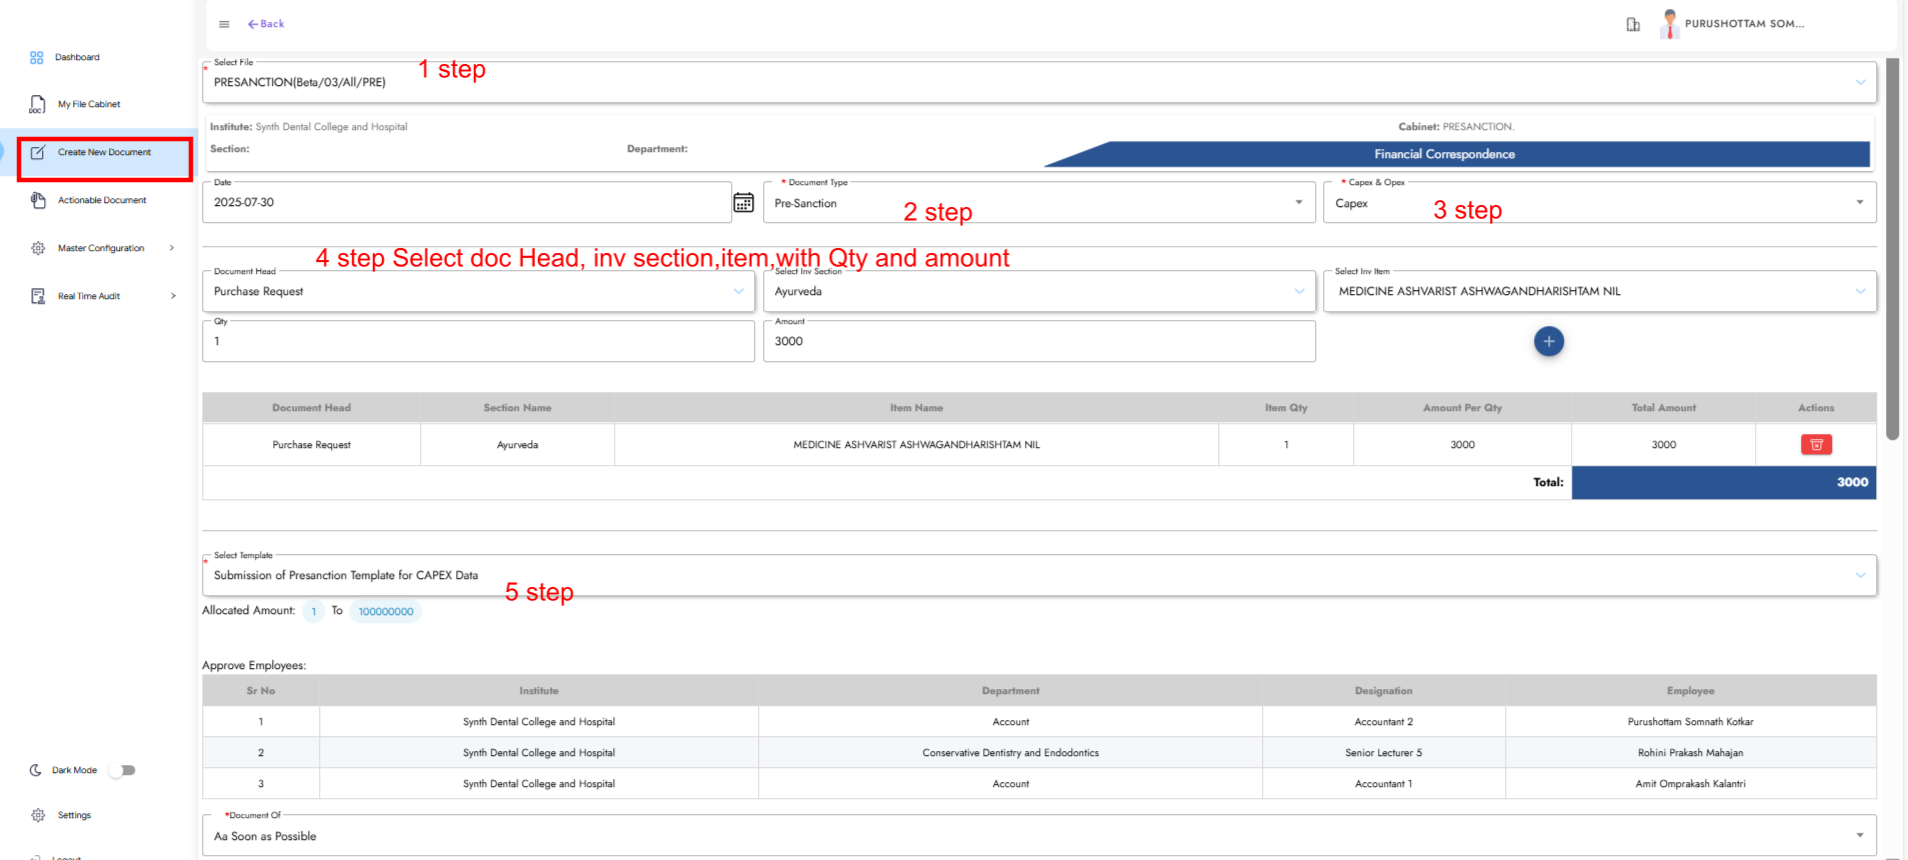
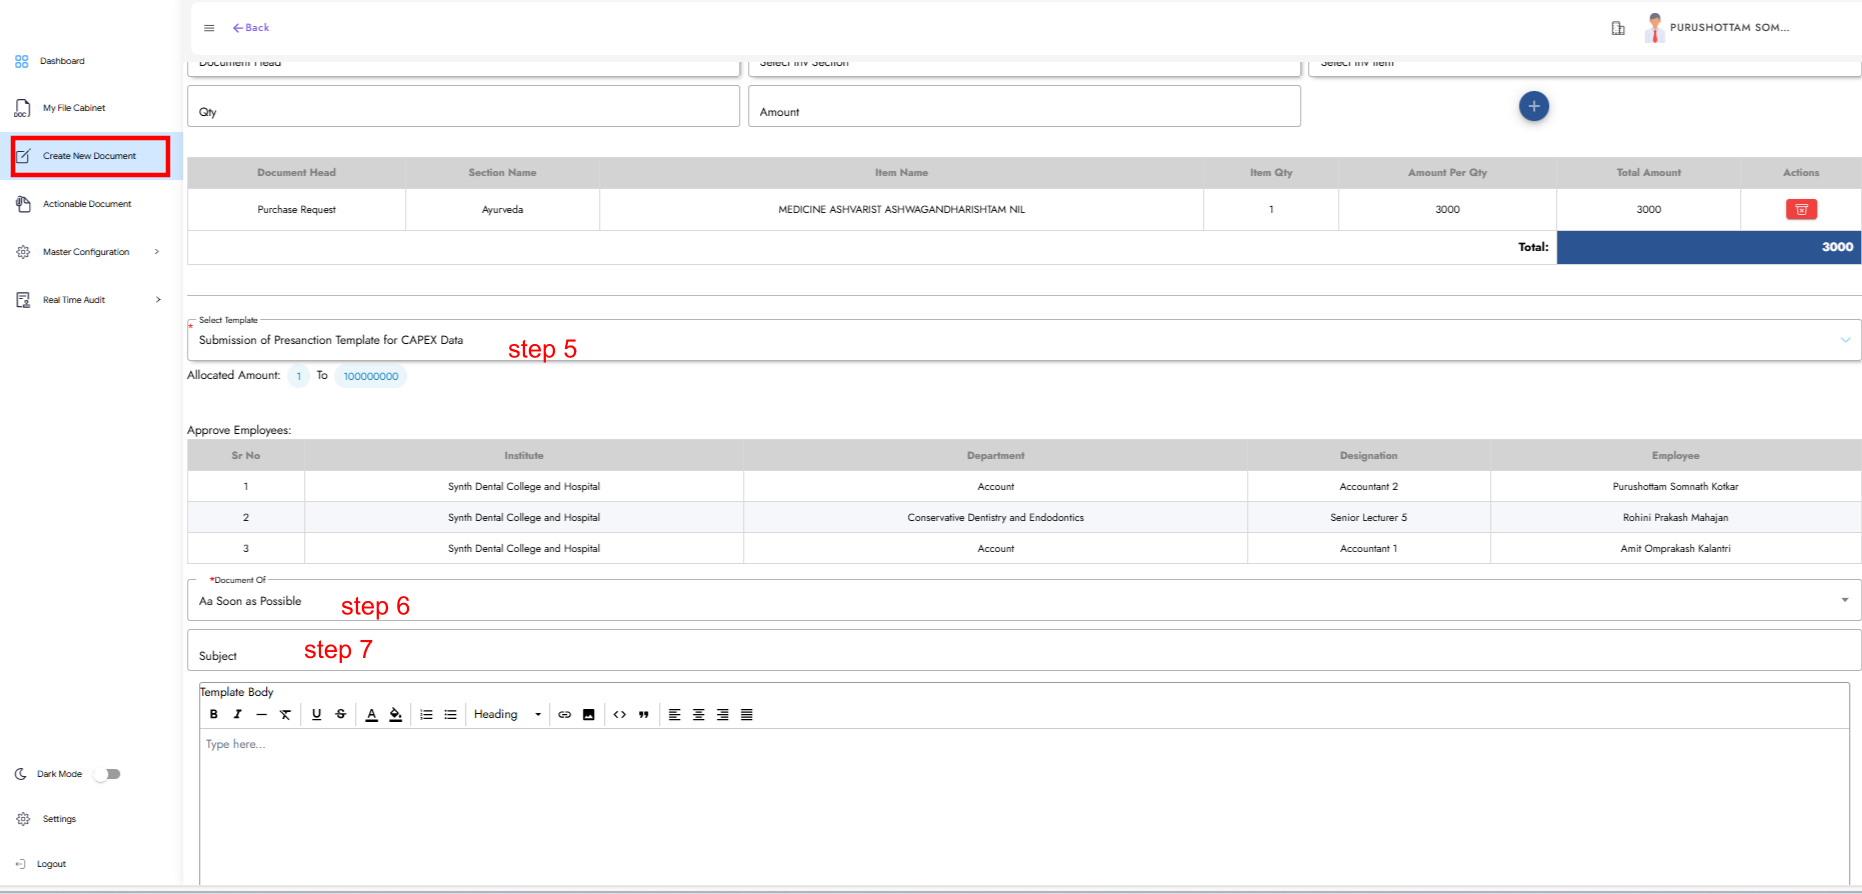
Step 10: Create Document for Pre-Sanction
Create a new document for Pre-Sanction using the form shown in the image.
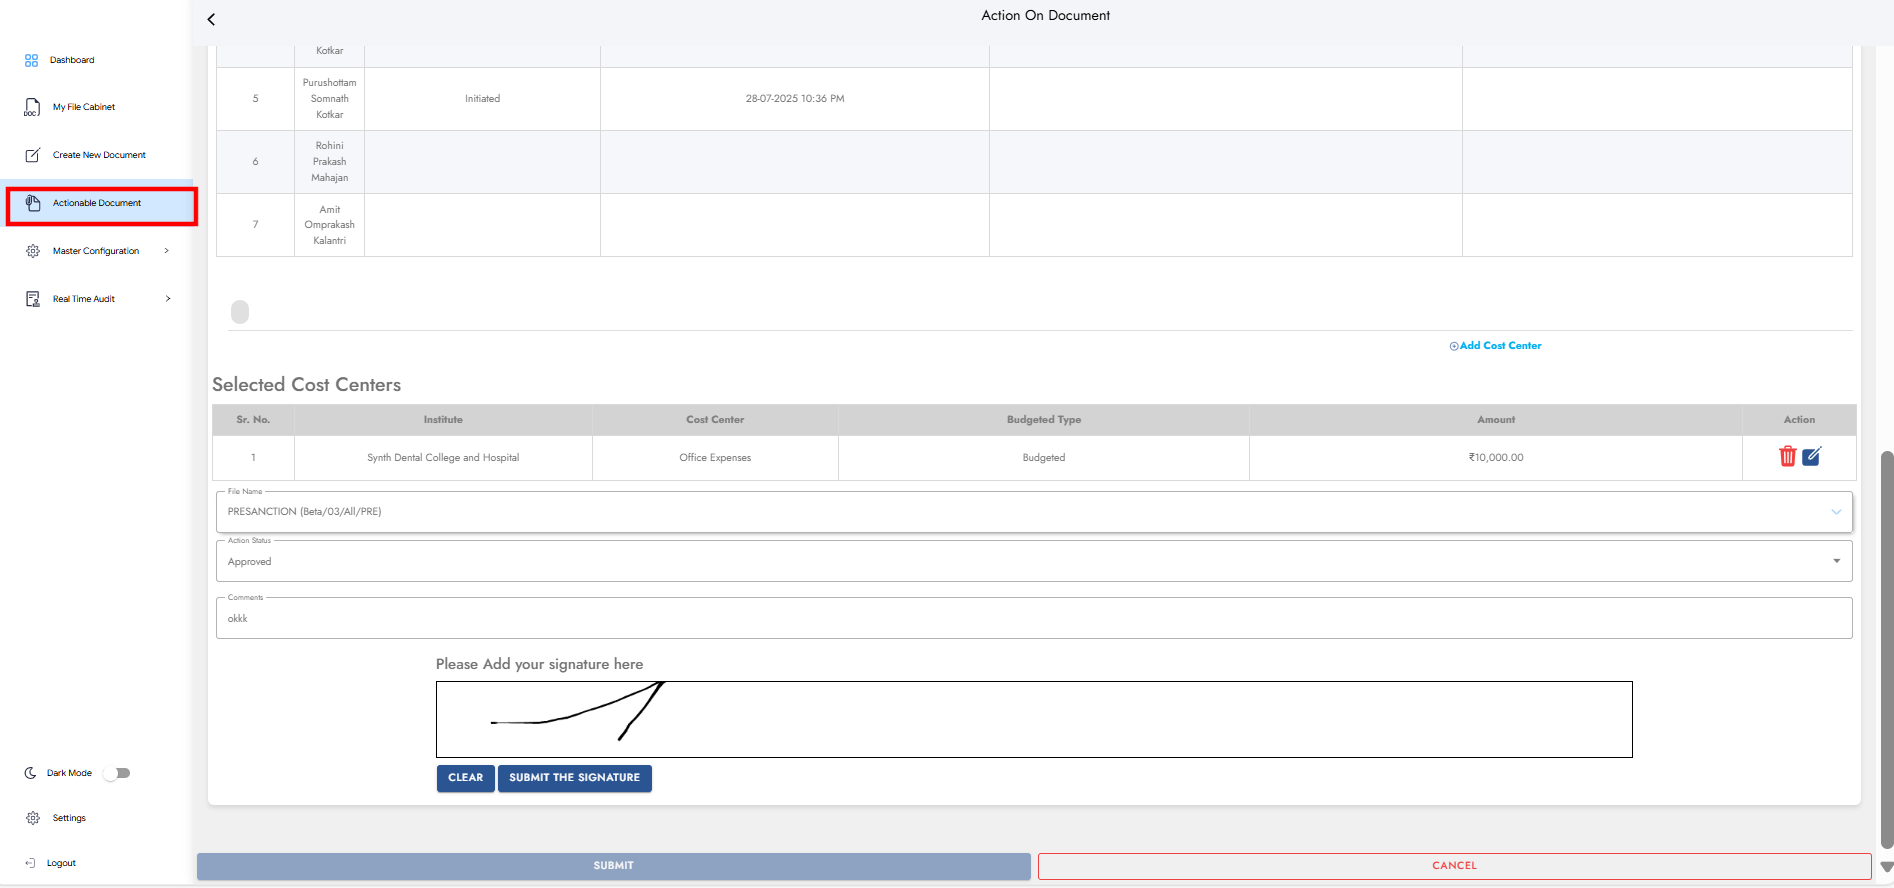
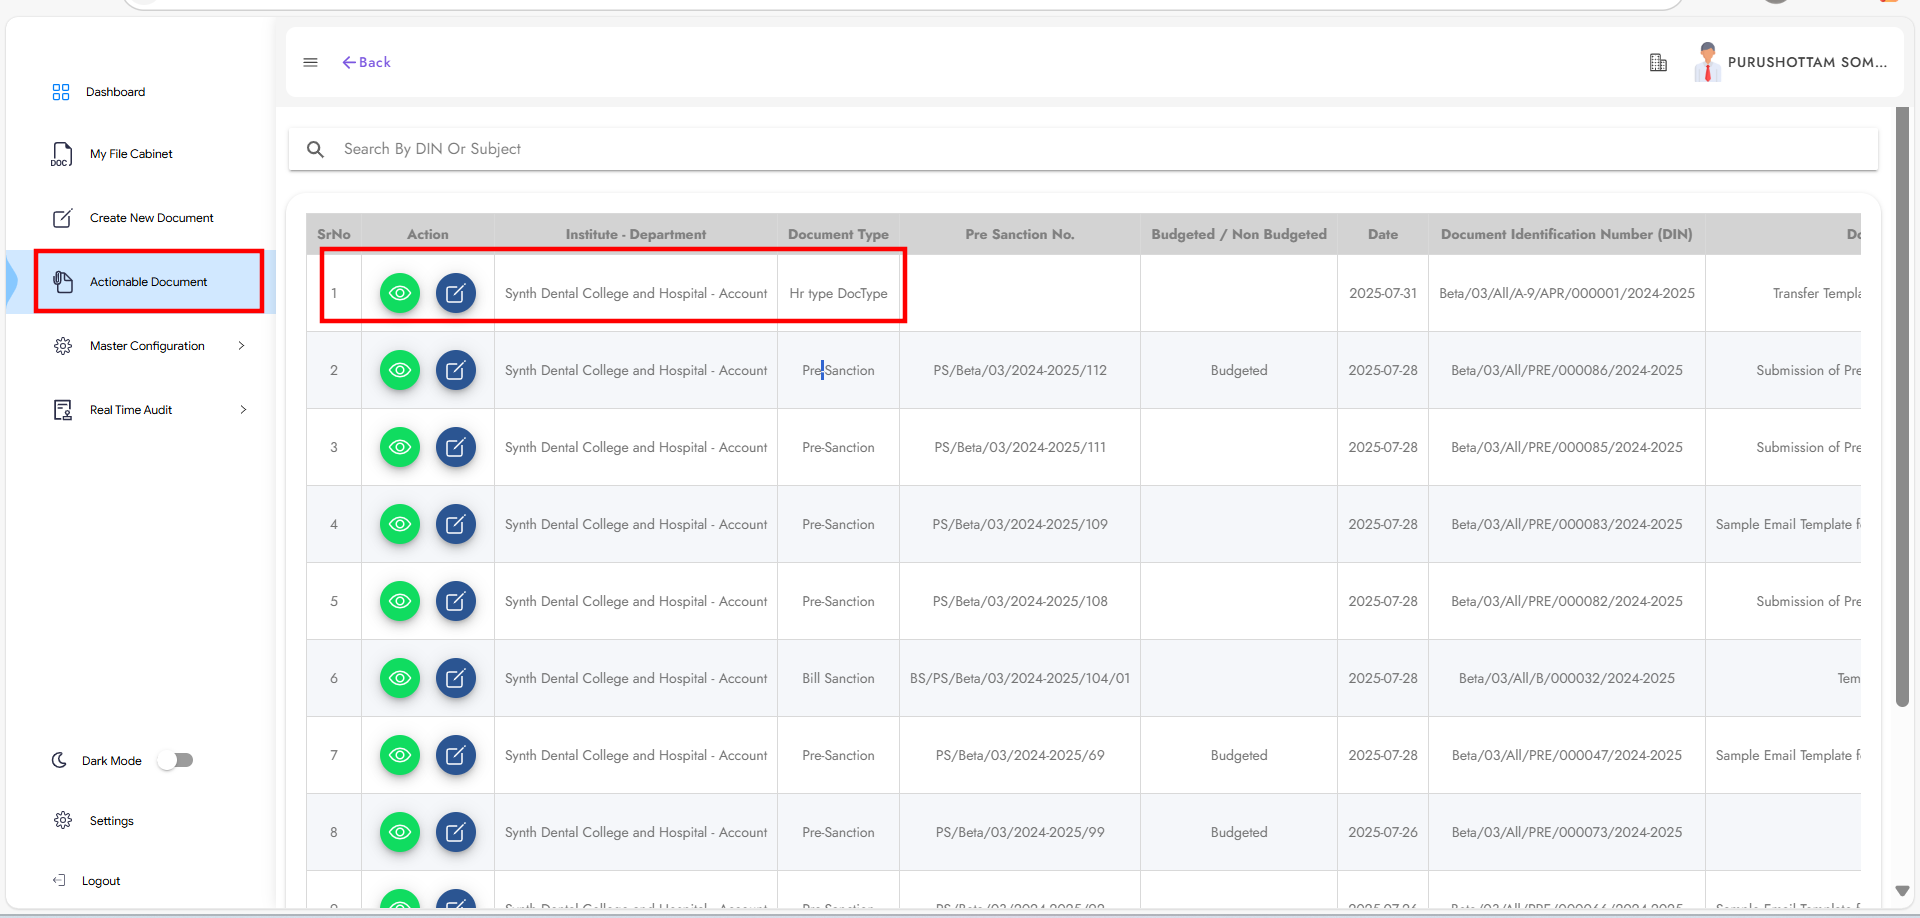
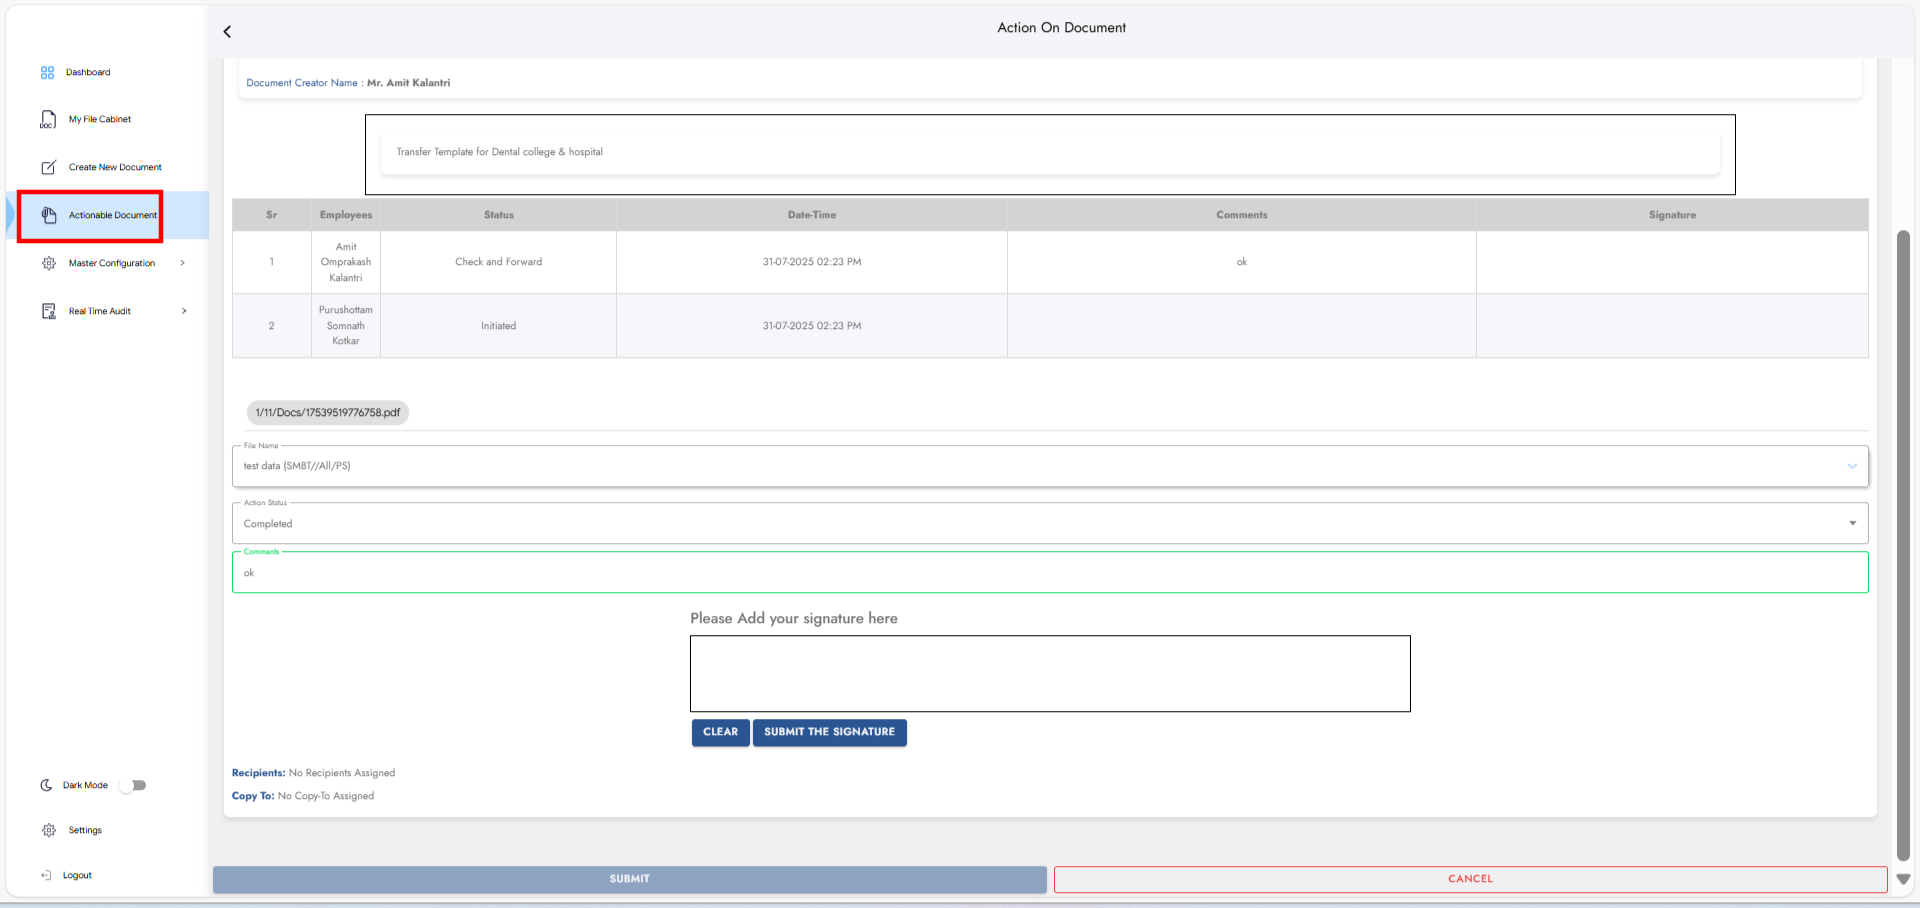
Step 11: Actionable Document (Pre-Sanction)
Login with the first-level approver credentials from the selected template. Go to Actionable Document, fill out the form and submit.
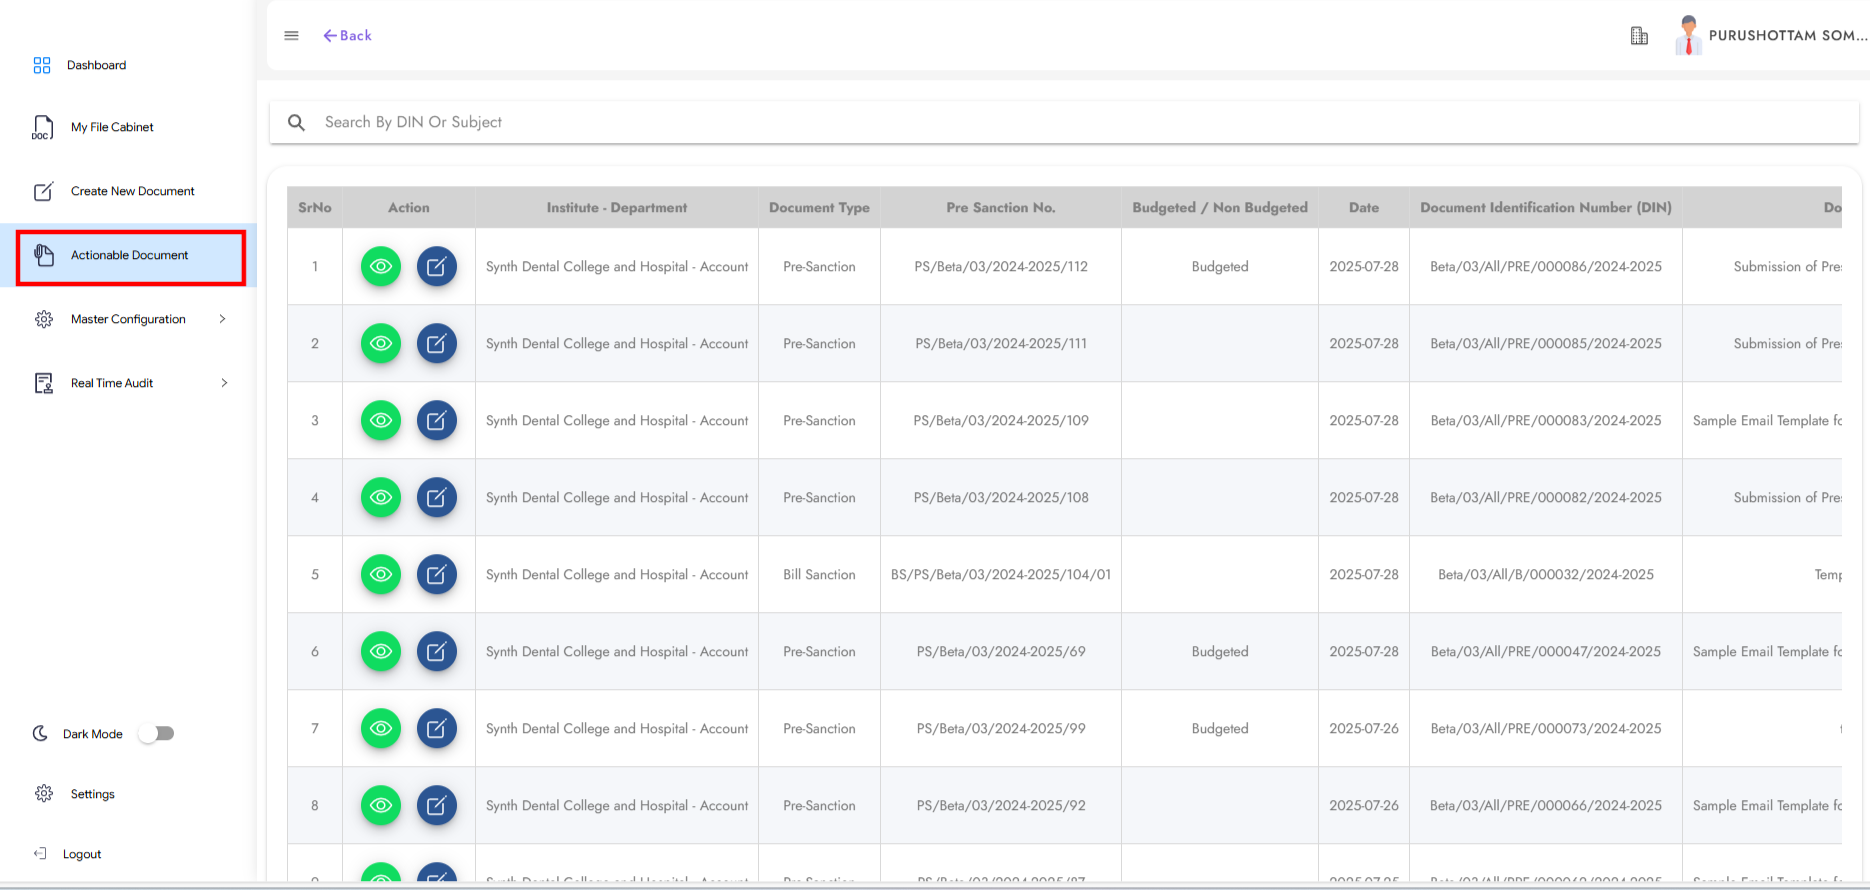
Required details:
1. Add Cost Center
2. File Name
3. Action Status
4. Comments
5. Add Signature
6. Submit
Step 12: Create Document for Bill Sanction
After Pre-Sanction is approved, log in as the document creator and create a Bill Sanction document.
Required details:
1. File Name
2. Document Type – Bill Sanction
3. Pre-Sanction No
4. Attachments
5. Select Item List

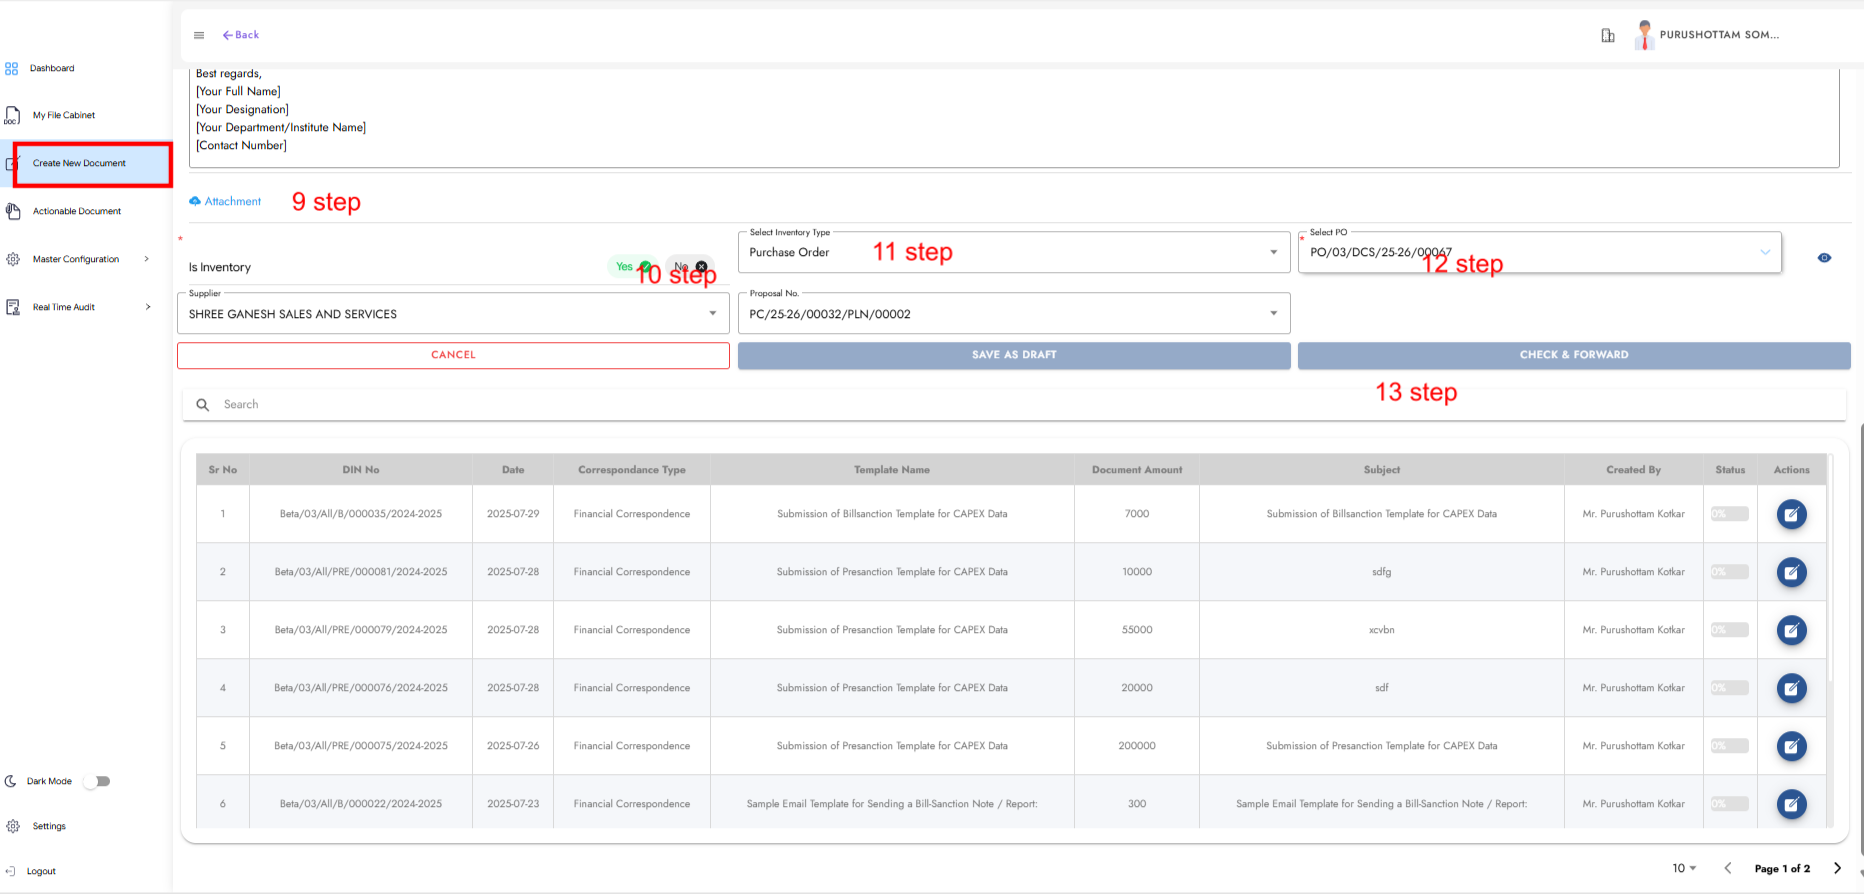
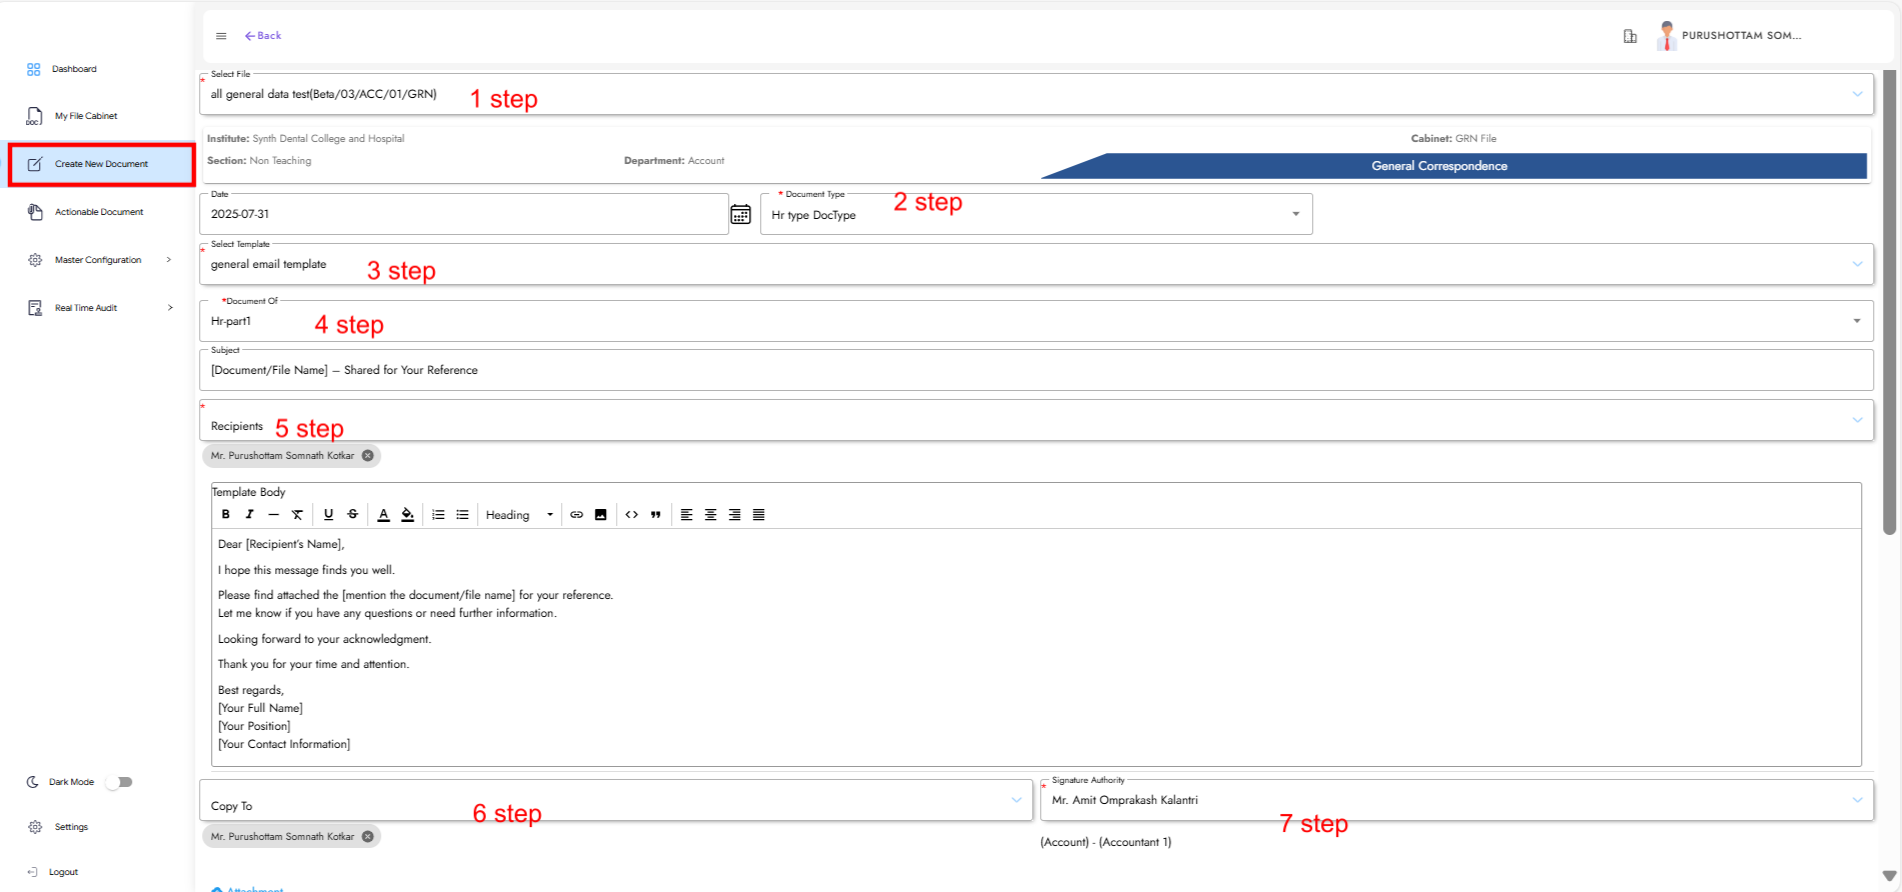
Step 13: Create Document for General Correspondence
- Select File – Upload or attach the relevant document.
- Document Type – e.g., General Correspondence.
- Select Template – Use a predefined template.
- Document Of – Specify department/unit.
- Recipients – Enter names/emails of main recipients.
- Copy To (CC) – Add secondary recipients.
- Signature Authority – Choose the approving person.
- Check and Forward – Click Forward to send for approval.
Step 14: Actionable Document for General Document
Navigate to Actionable Document, select the file and enter required information:
Fields:
- File Name
- Action Status (Approve, Reject, Amendment)
- Comments
- Add Signature
- Submit
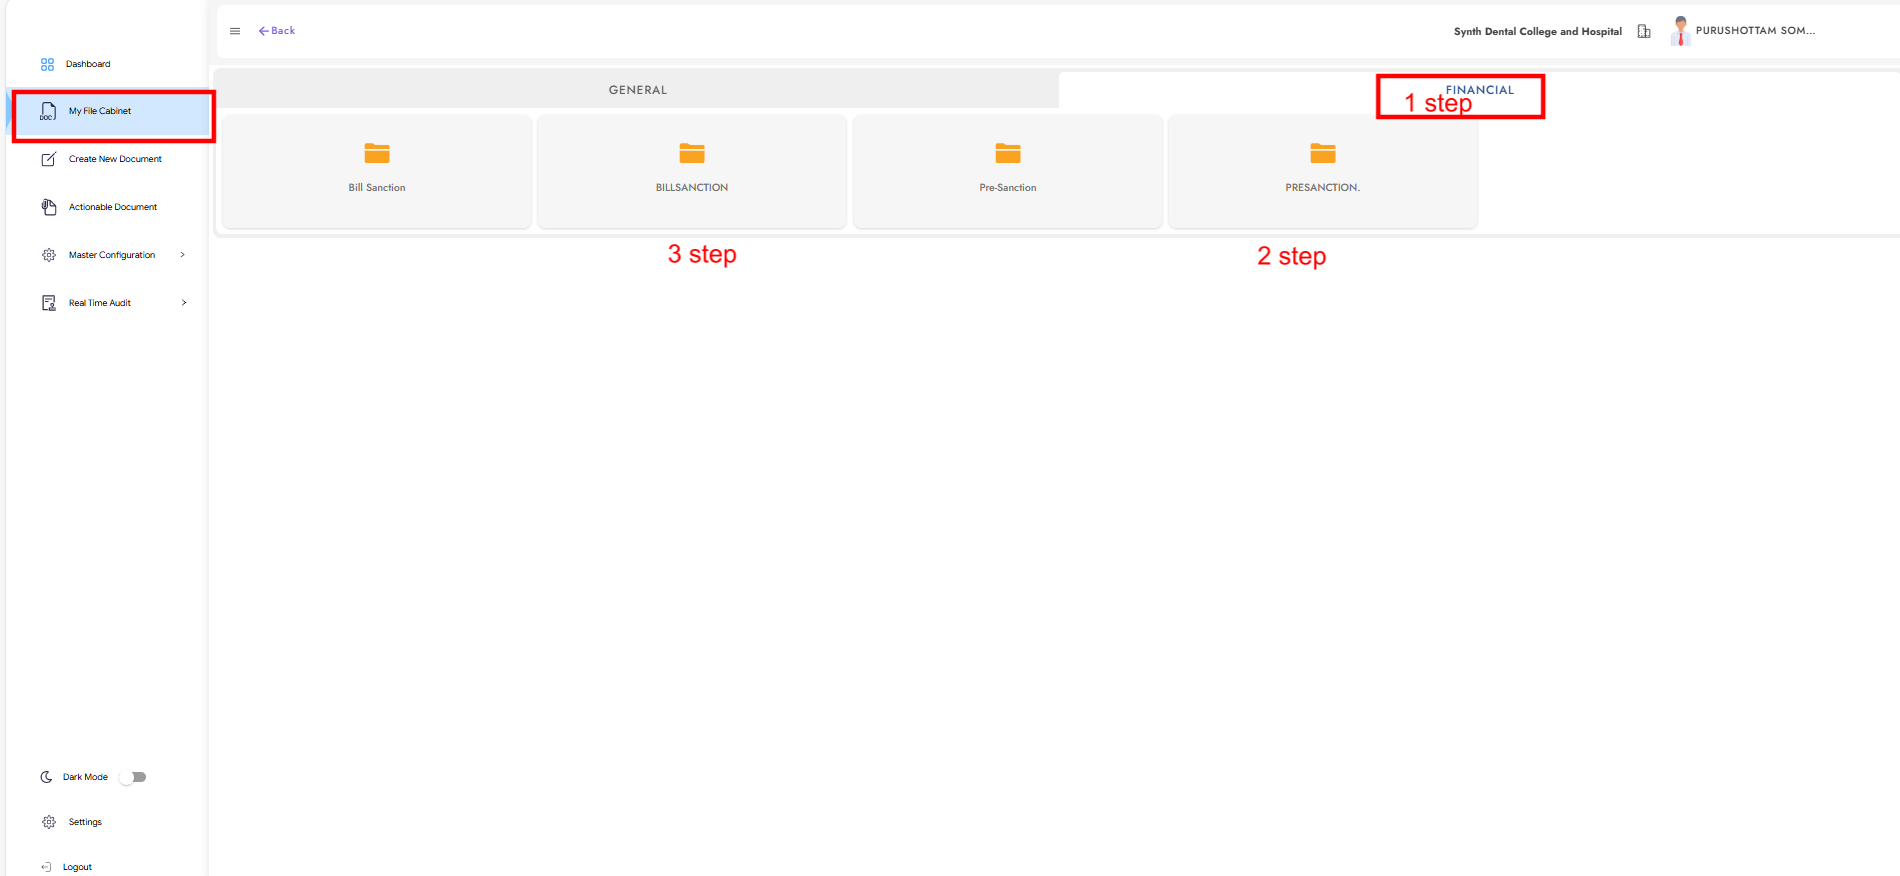
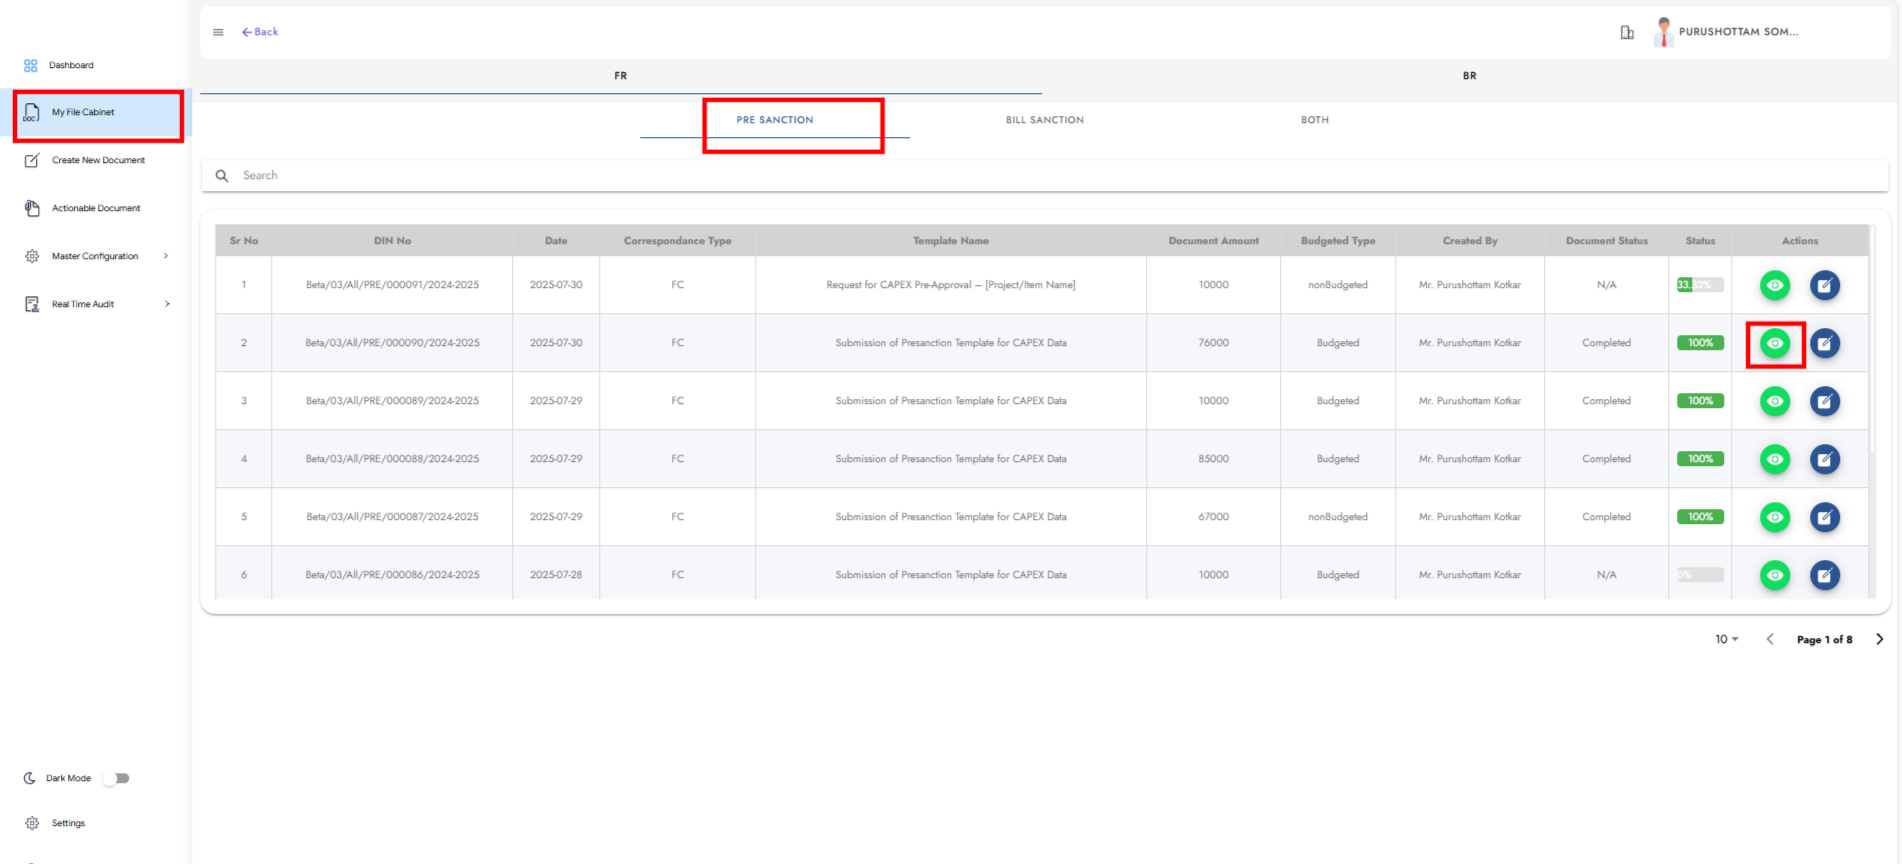
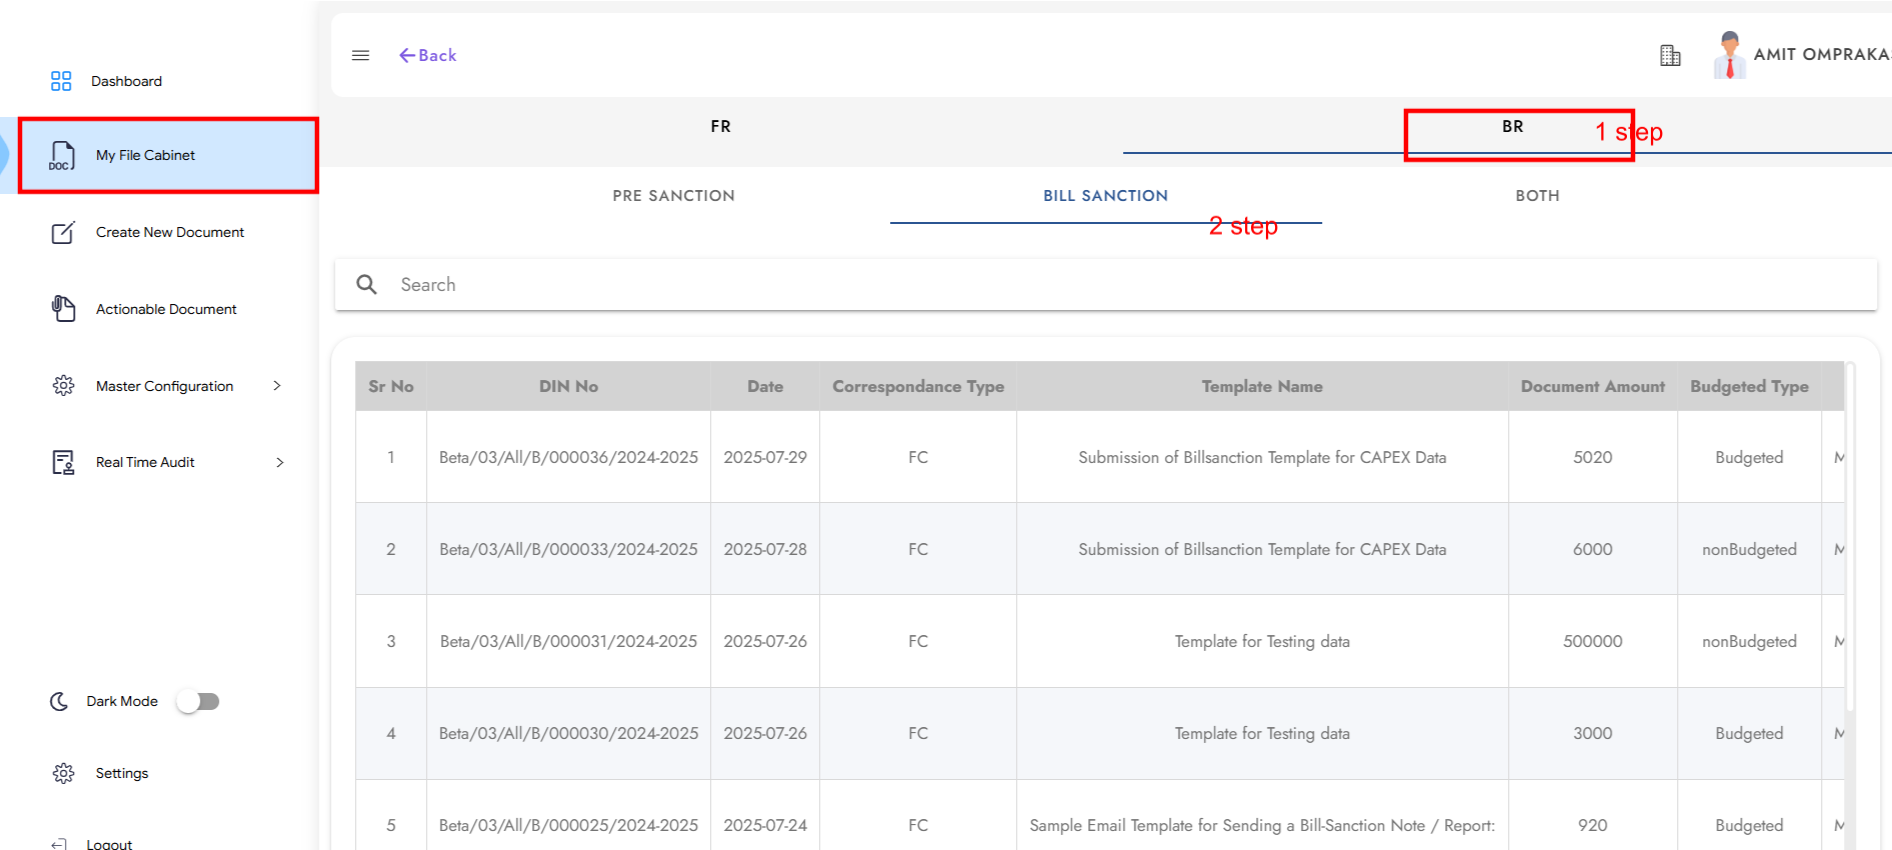
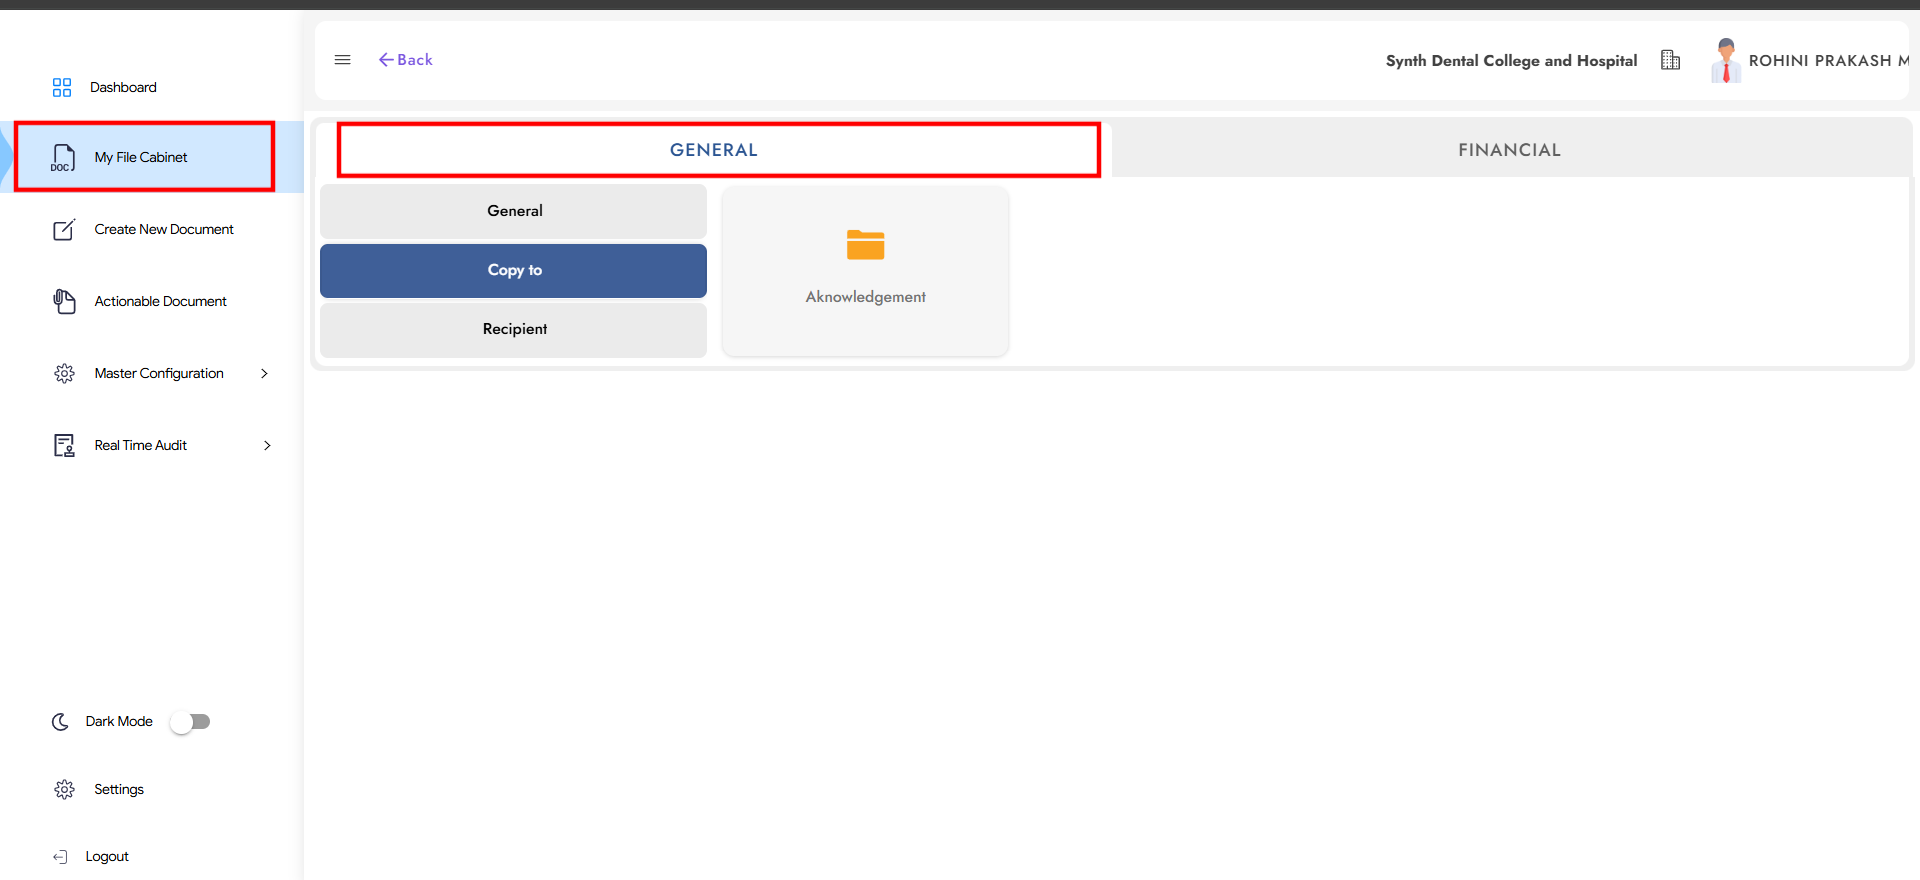
Step 15: My File Cabinet
- Click My File Cabinet
- Navigate to Financial/General section
- Select Pre-Sanction / Bill Sanction / General File
- Select FR / BR
- Click View Document to open details
Financial Document View:
General Document View:
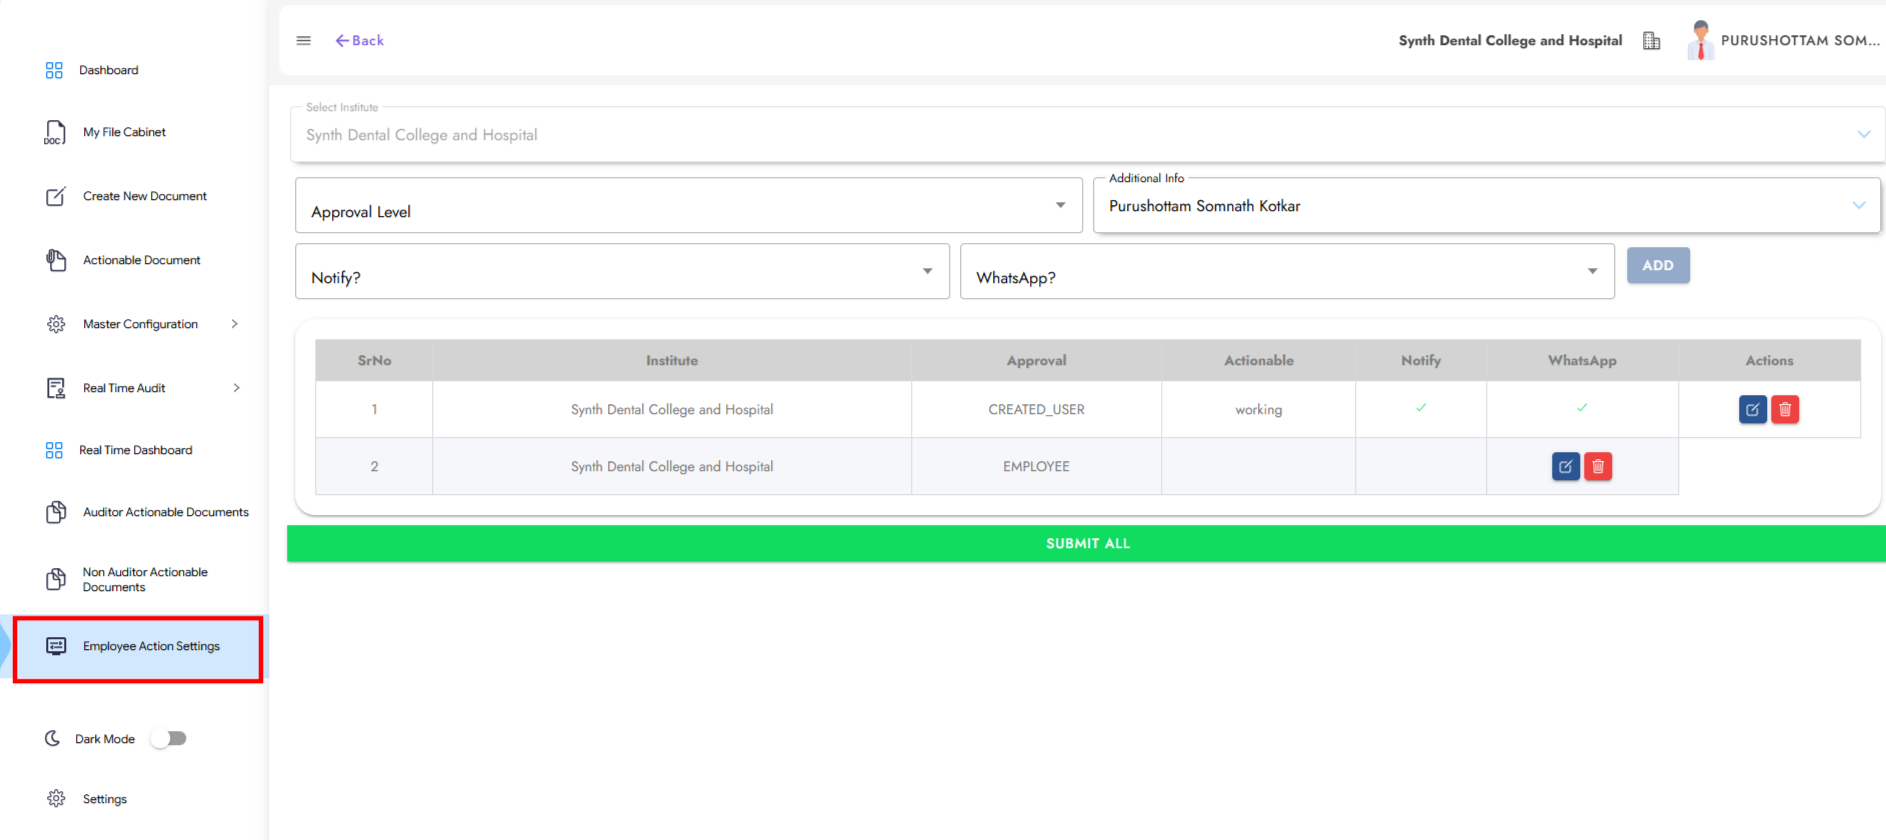
Step 16: Real-Time Audit
16.1: Master Setting – Employee Action Settings
Assign employees who are authorized to certify and hold audit documents.
16.2: Master Setting – Set the Auditor
Assign the auditor for financial and general documents.
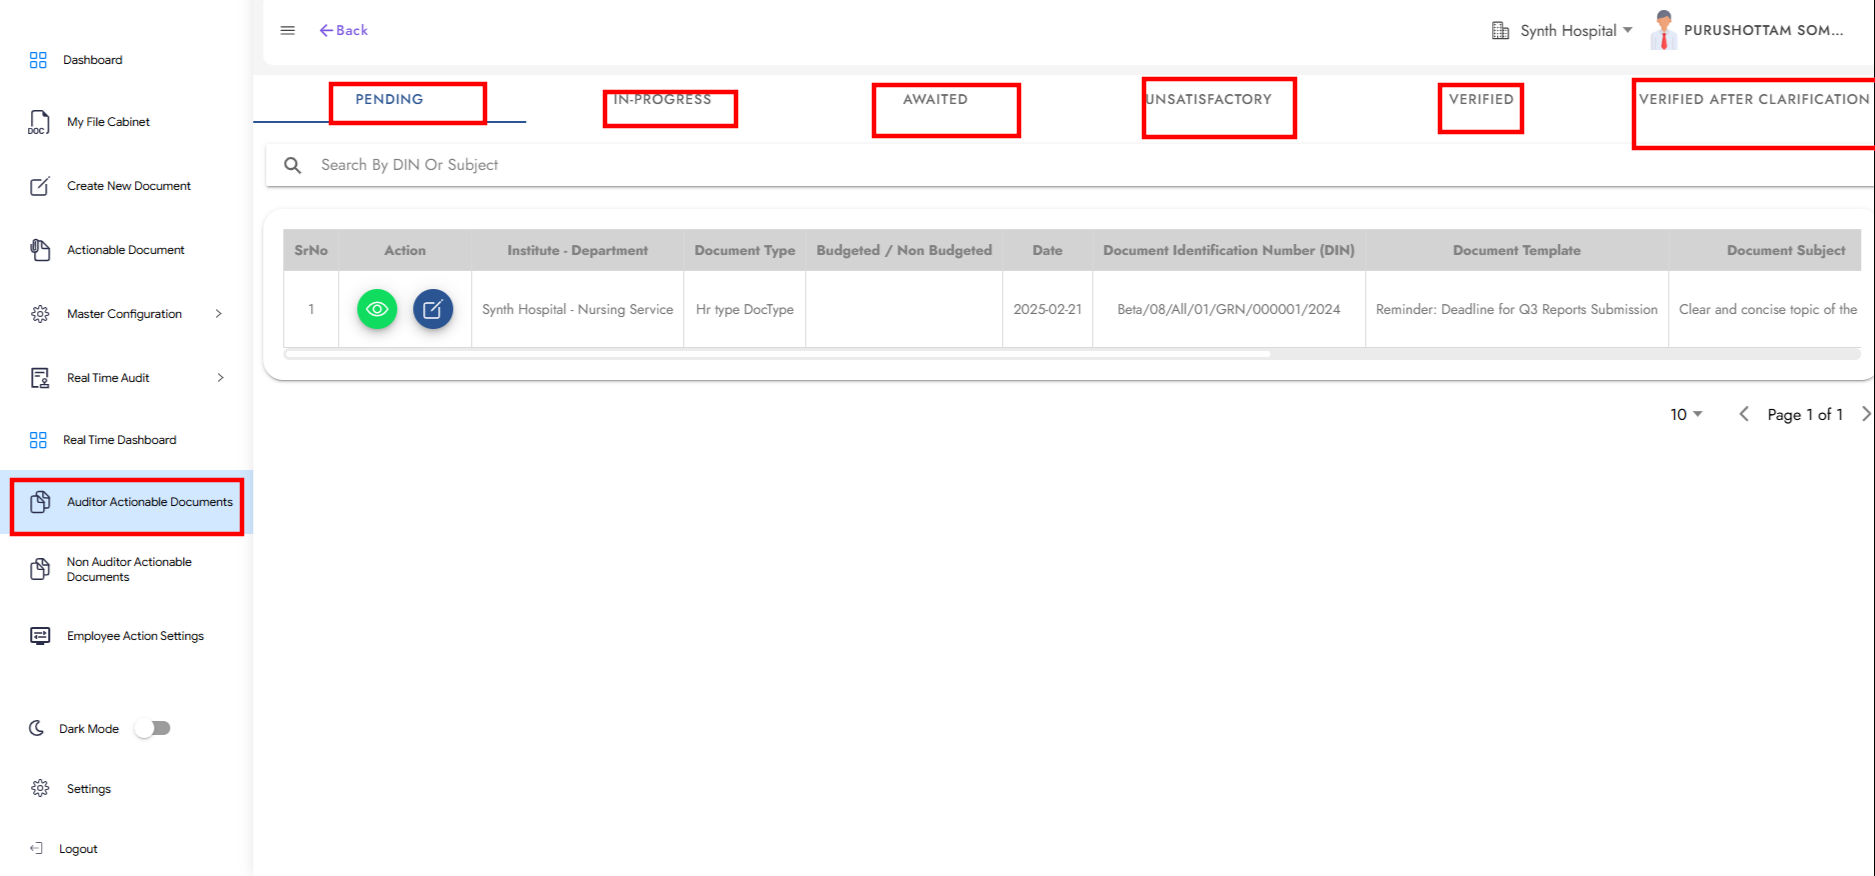
Step 17: Auditor Actionable Documents
Click on Auditor Actionable Documents to view and categorize based on status:
- Pending – Not started yet
- In-Progress – Under review
- Awaited – On hold
- Unsatisfactory – Needs revision
- Verified – Approved
- Verified After Clarification – Approved after updates
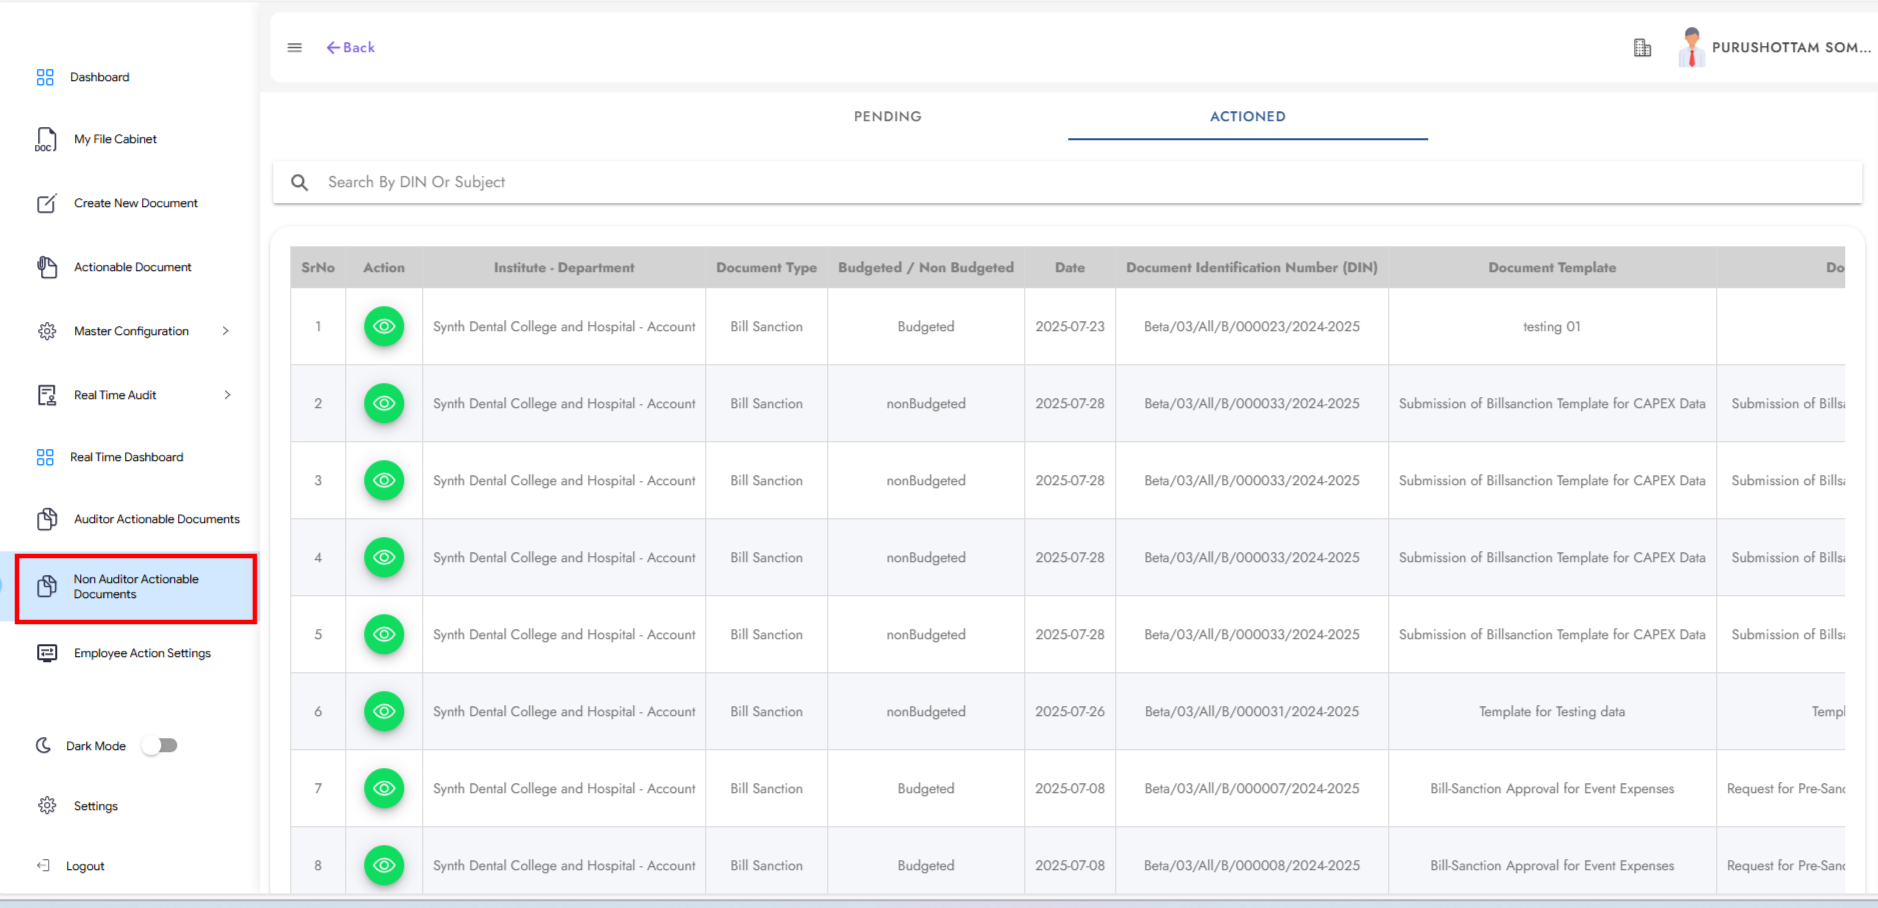
Step 18: Non-Auditor Actionable Documents
Click on Non-Auditor Actionable Documents to review and perform actions on non-audit-related documents.