Recruitment Module
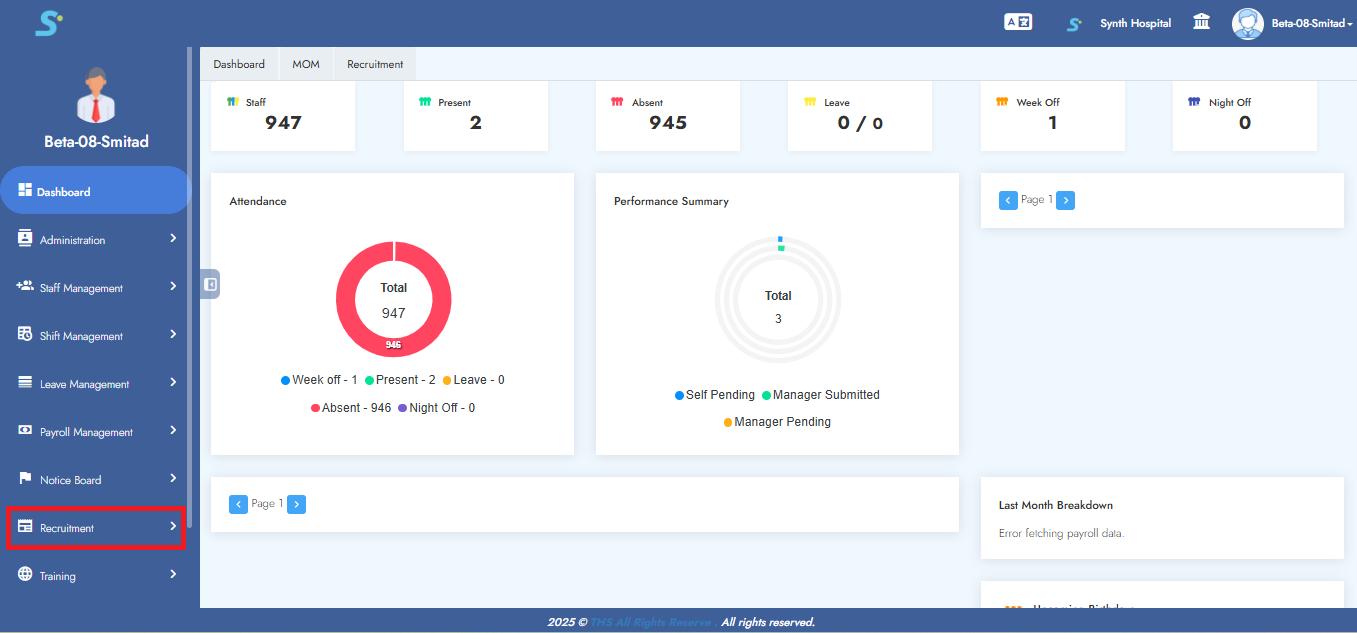
Step 1: Go to the Recruitment Module
Click on the Recruitment section in the side menu.
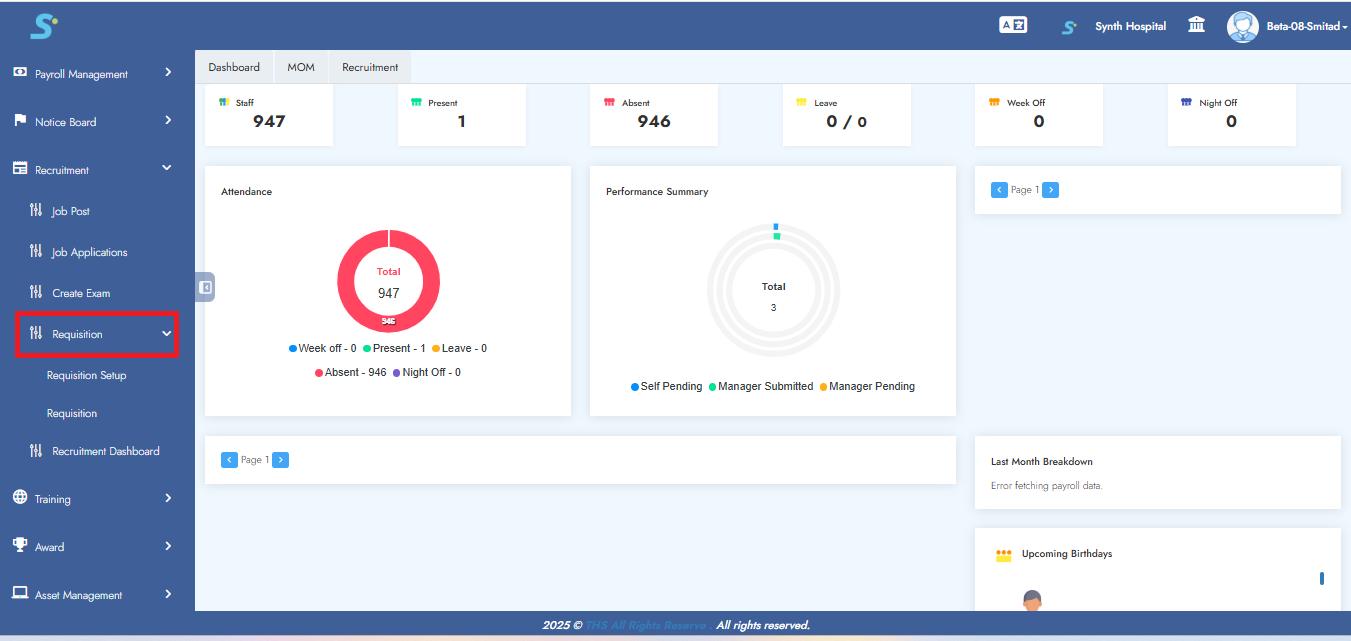
Step 2: Click on Sub-module Requisition
Click on the Requisition sub-menu item as shown.
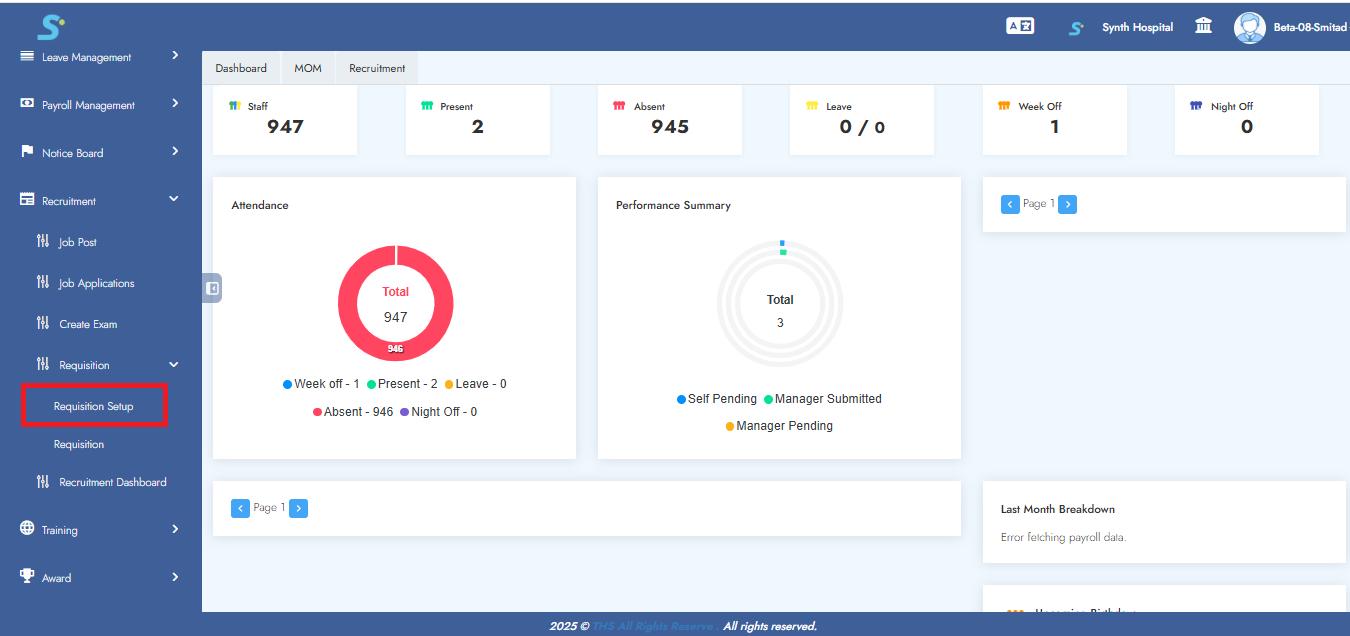
Step 3: Requisition Setup Module
Go to the Requisition Setup as shown in the image.
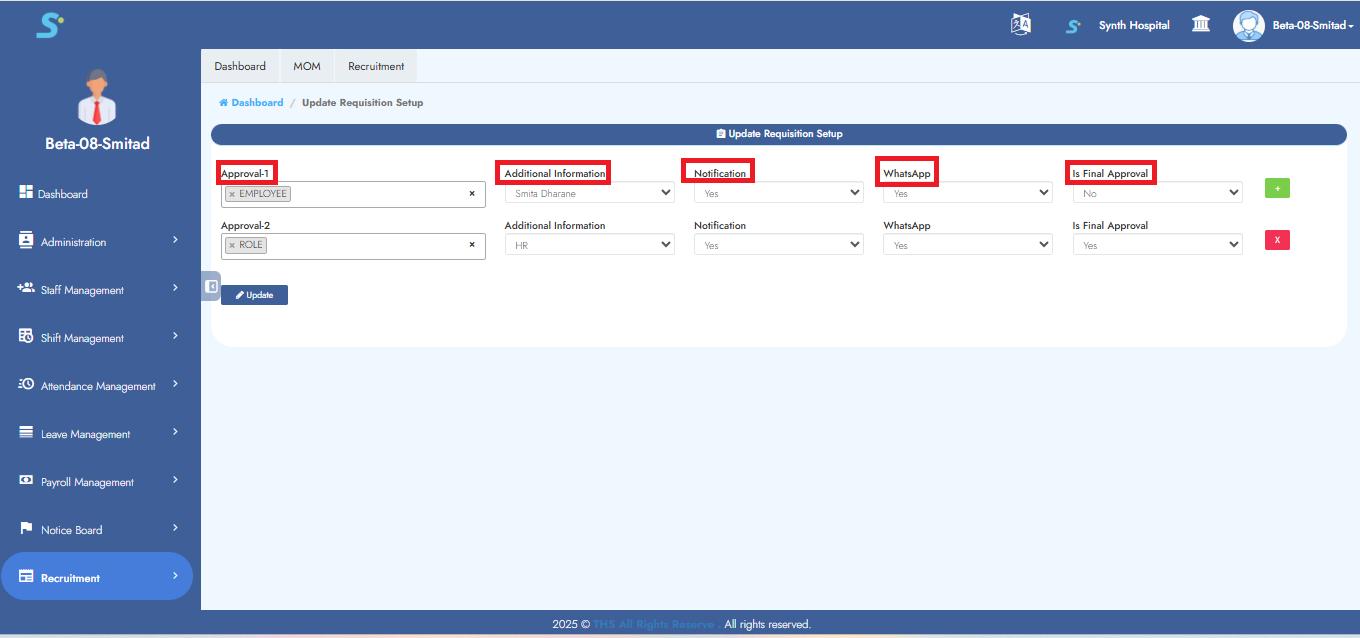
Step 4: Configure Requisition Setup
In the Requisition Setup section, select the following options:
- Approval-1
- Additional Information
- Notification (Yes/No)
- WhatsApp (Yes/No)
- Is Final Approval (Yes/No)
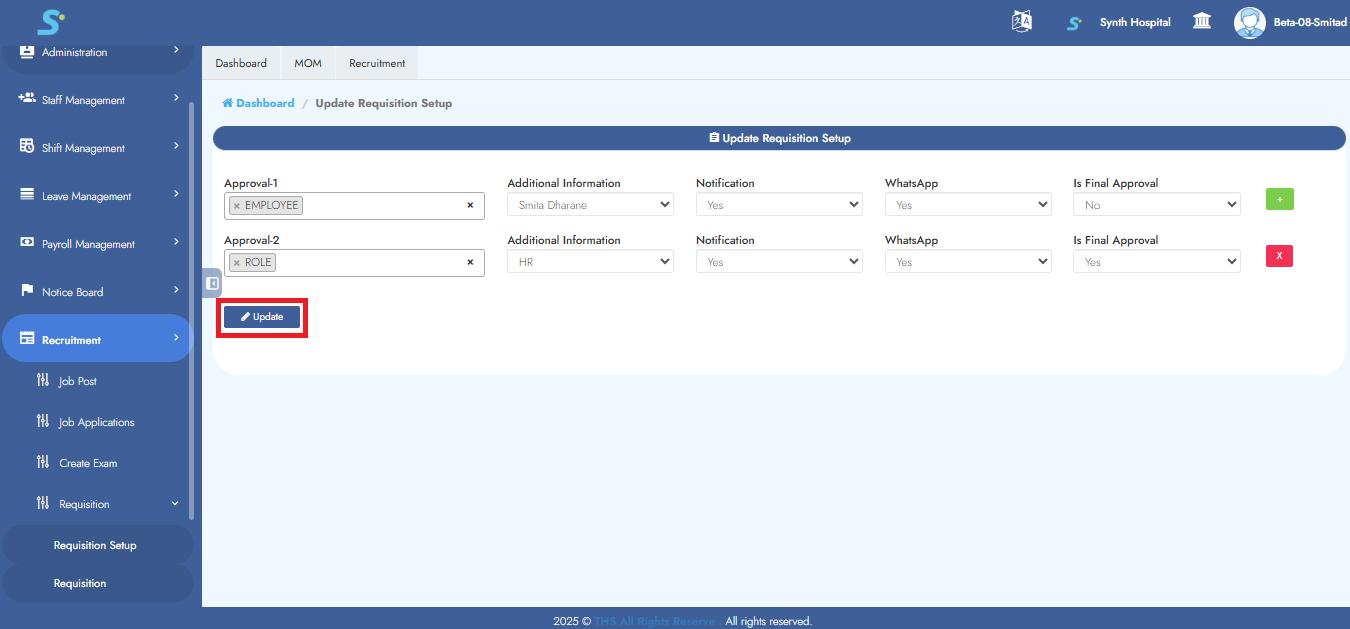
Then, click the Update button as shown in the image.
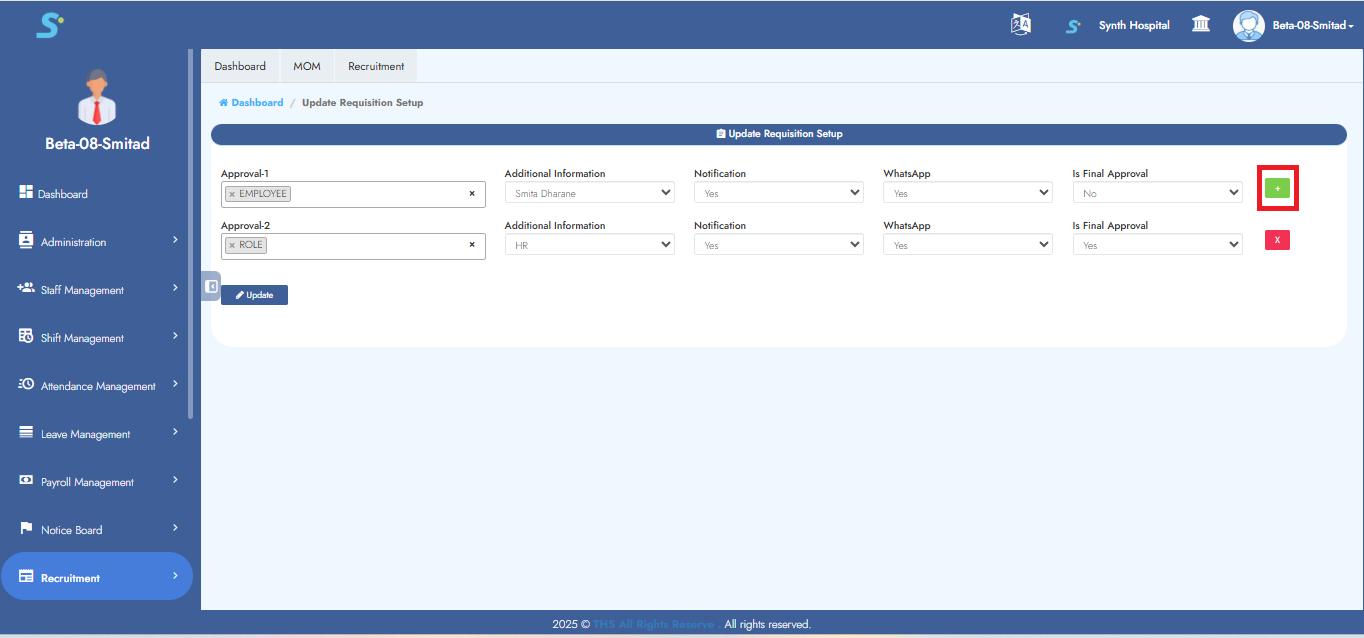
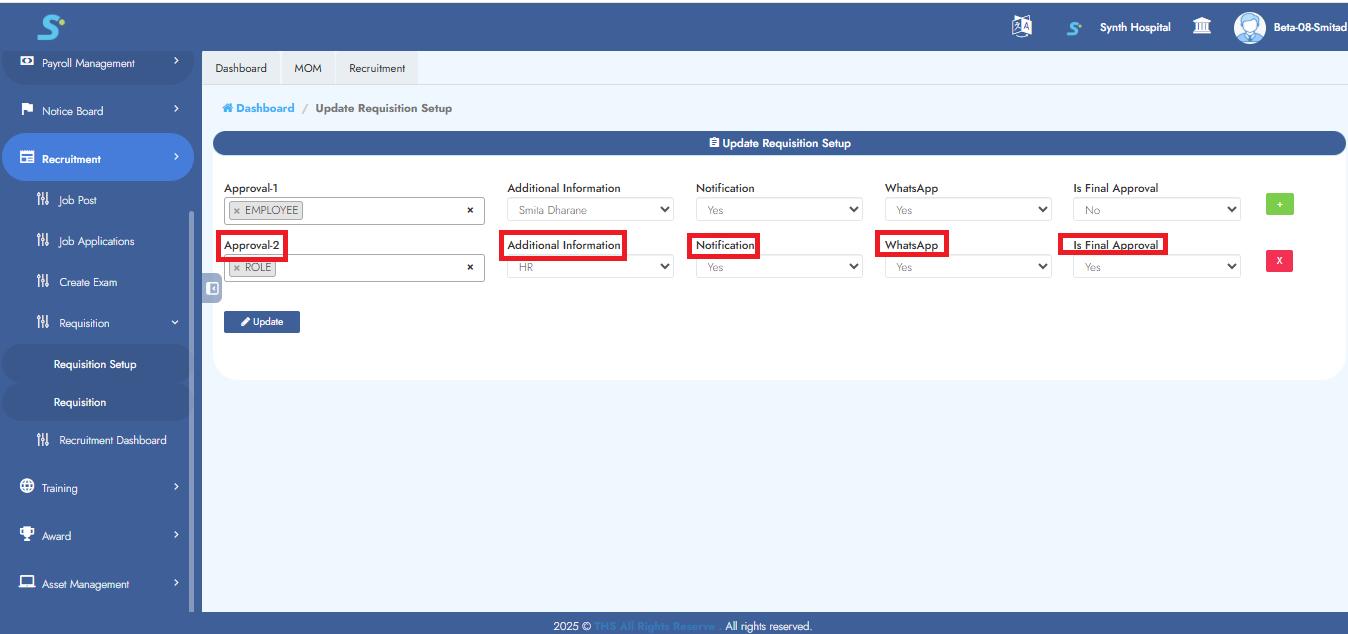
Step 5: Steps to configure a multi approval process
To add additional approval levels, simply click the 'Add' button as shown in the image below. This will initiate the process of adding more approval levels to the requisition workflow, allowing for a more structured approval process.
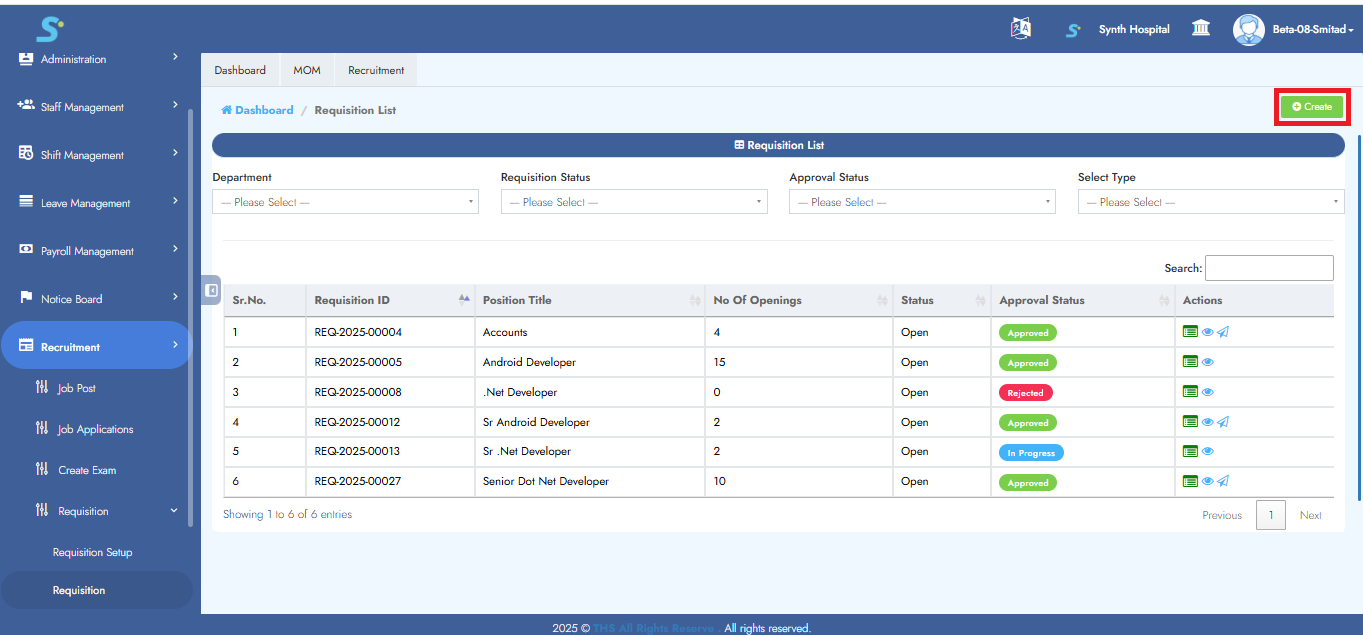
Step 6: Create Requisition
Click the Create button, as shown in the image, to initiate a new requisition.
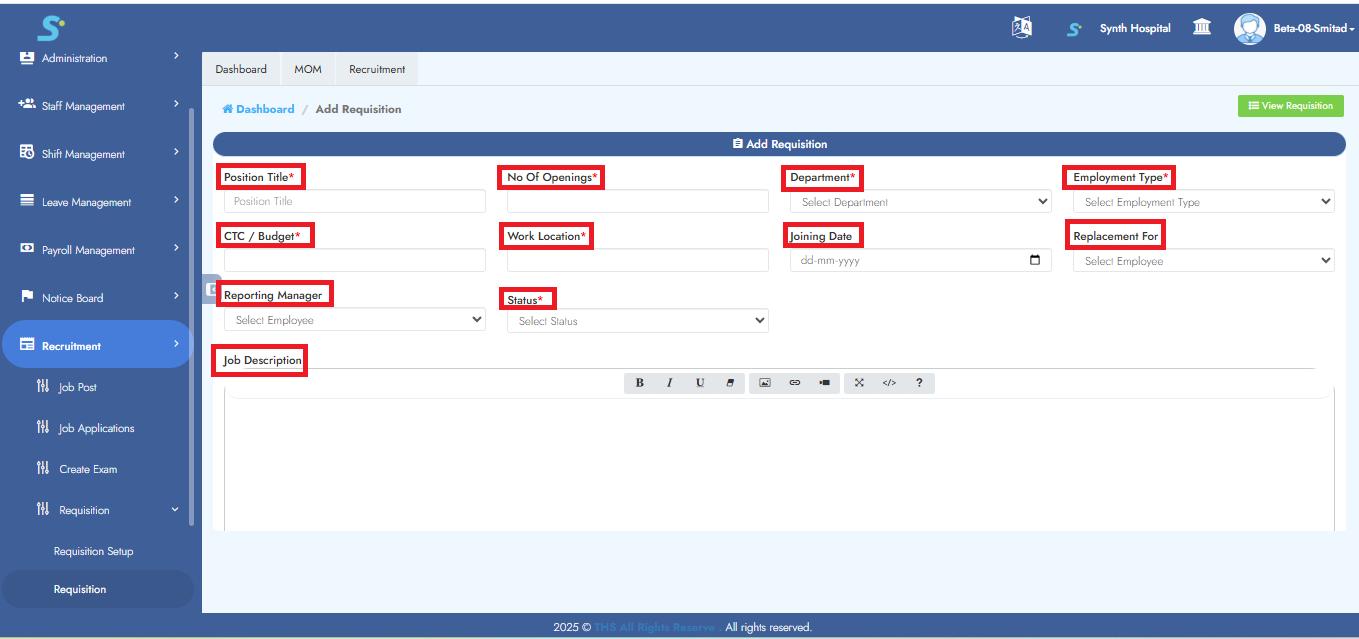
Step 7: Fill in Requisition Details
Provide the following details to create a requisition:
- Position Title
- Number of Openings
- Department
- Employment Type
- CTC/Budget
- Work Location
You may also include optional fields such as:
- Expected Joining Date
- Replacement For
- Reporting Manager
- Status
Refer to the image for visual guidance.
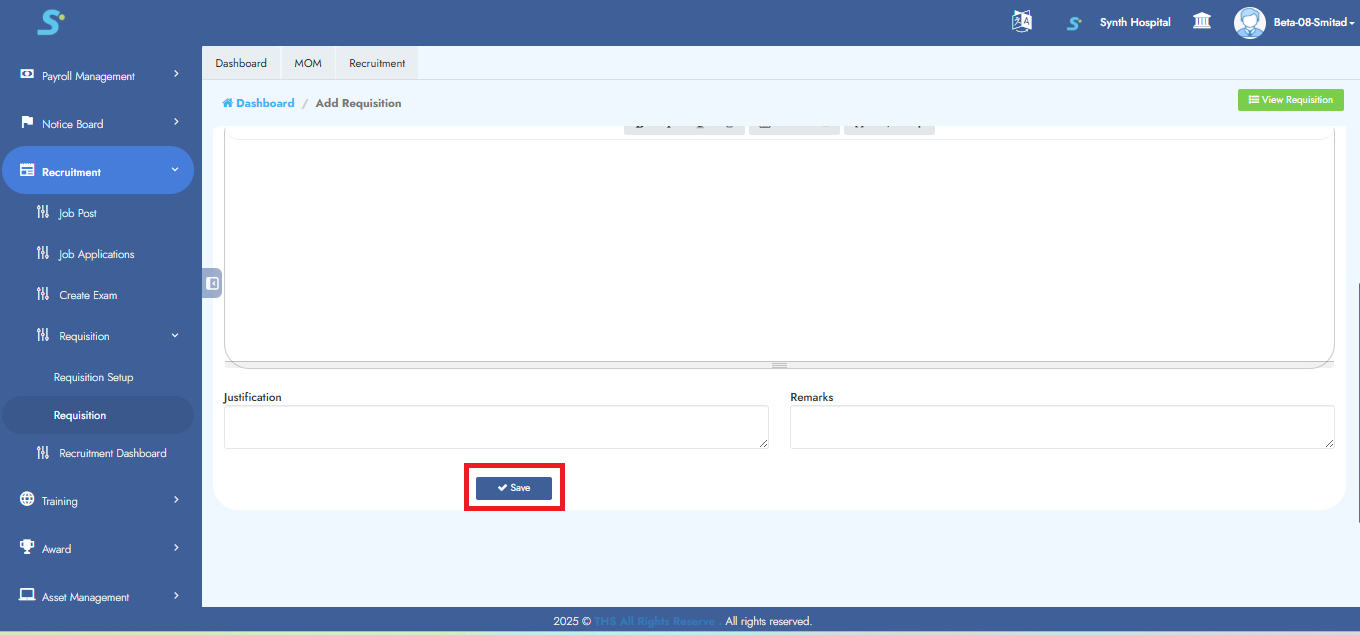
Step 8: Add Justification and Remarks
Additionally, enter the Justification and Remarks (optional), as shown in the image.
Step 9: Save the Requisition
After entering the details, click the Save button. A confirmation message will appear indicating successful record saving.
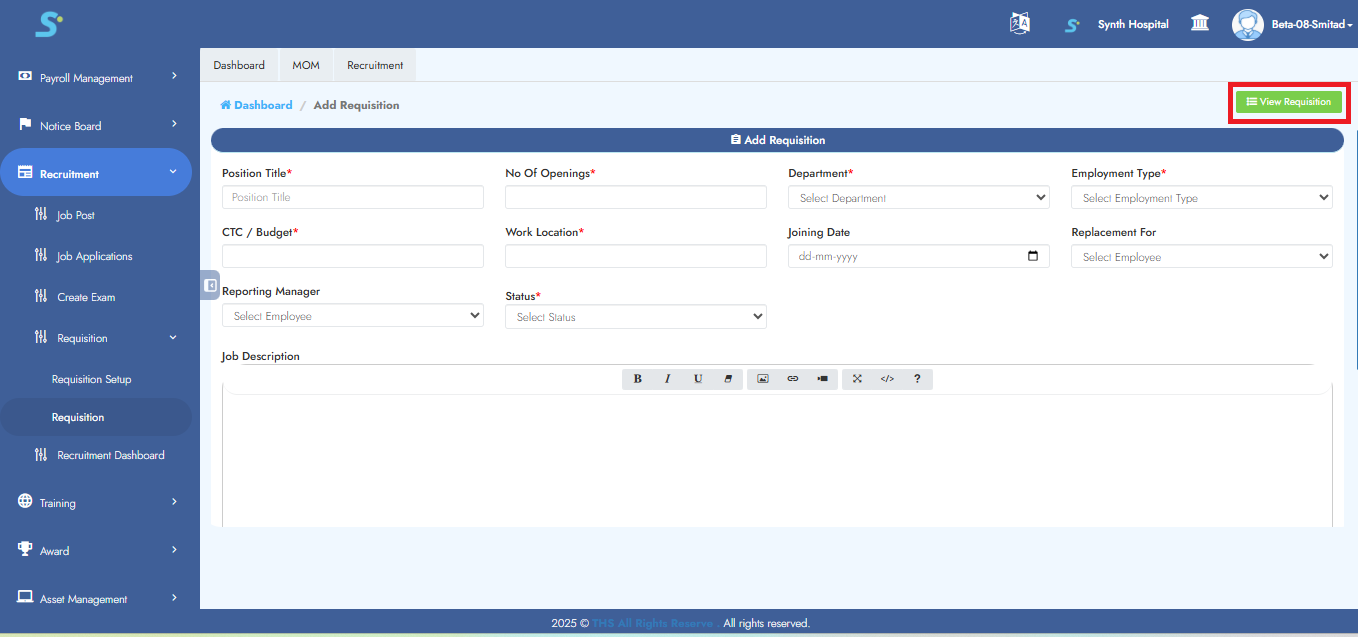
Step 10: View Created Requisitions
To access the created requisitions, click the View Requisition button, as illustrated in the image.
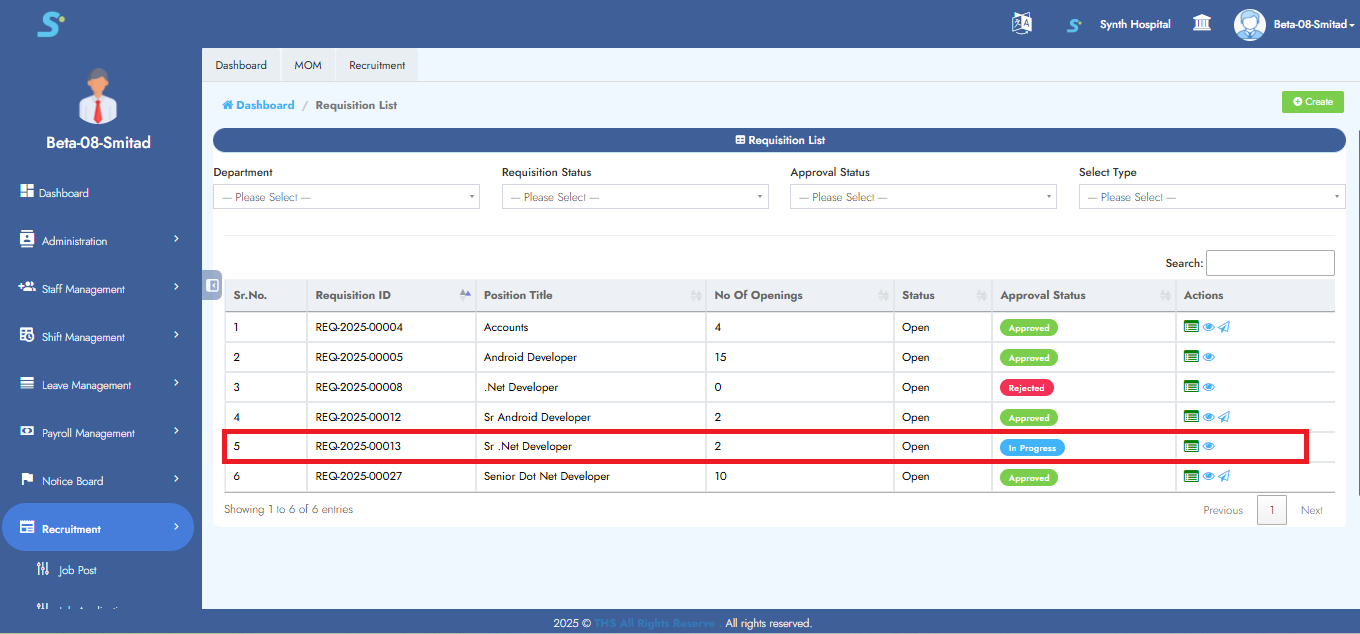
Step 11: Requisition Status – In Progress
If approval workflows are configured, the requisition status will appear as In Progress, as shown in the image.
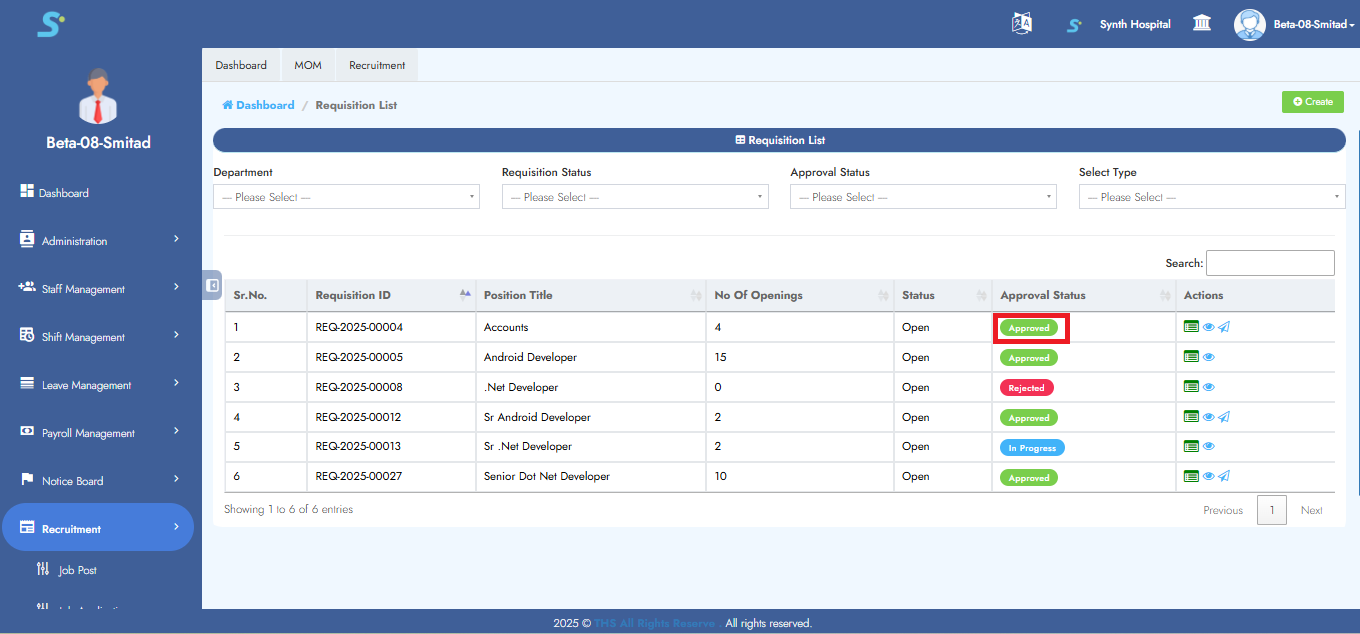
Step 12: Requisition Status – Approved
Once all required approvals are completed, the status will update to Approved. If any approval is still pending, the status remains In Progress until all approvals are finalized.
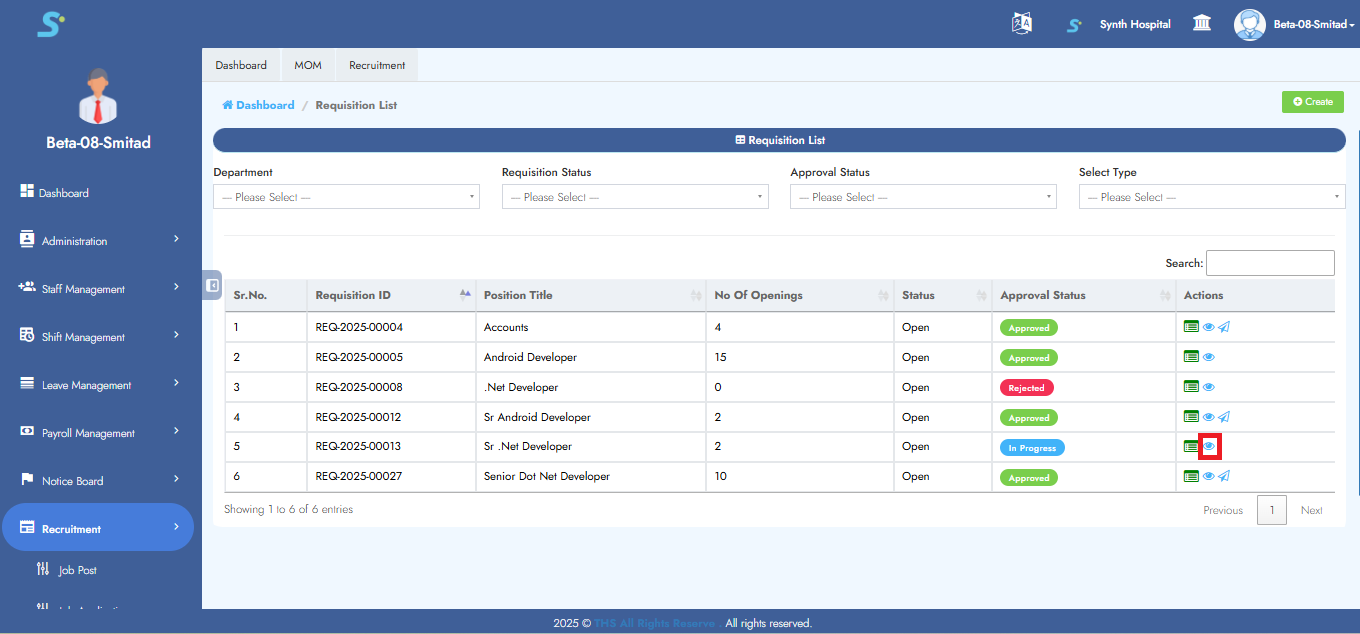
Step 13: View Requisition Details
To view requisition details, click the Eye icon, as depicted in the image.
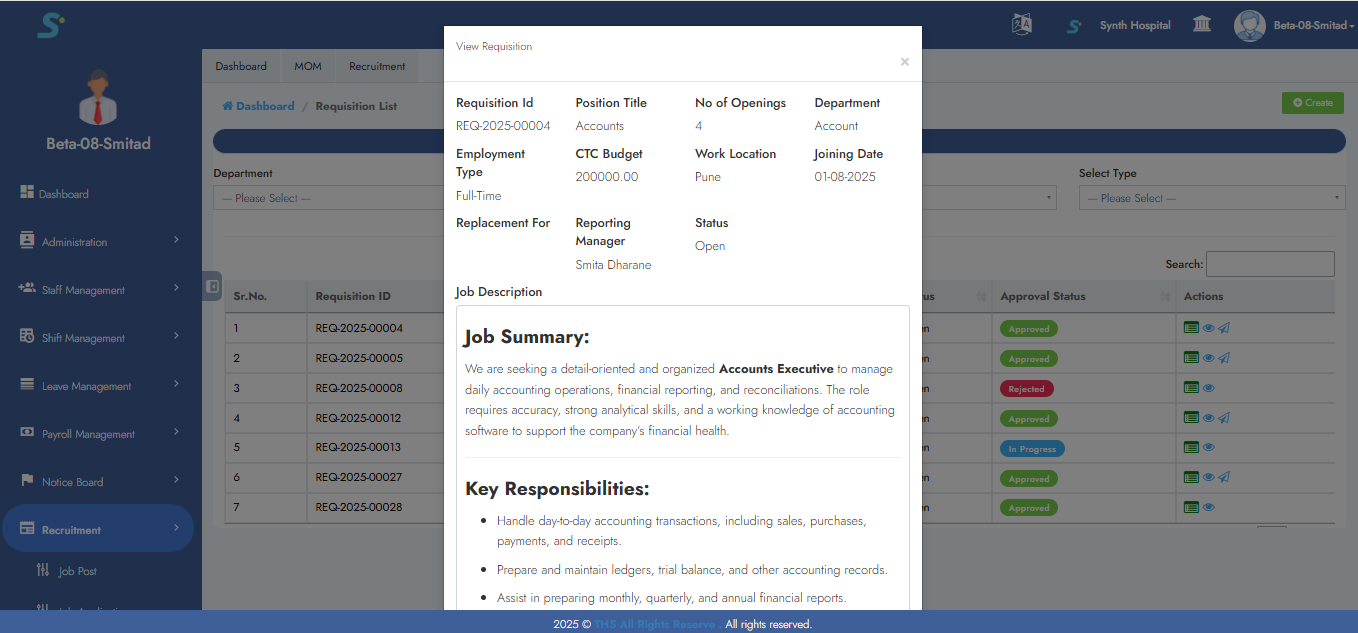
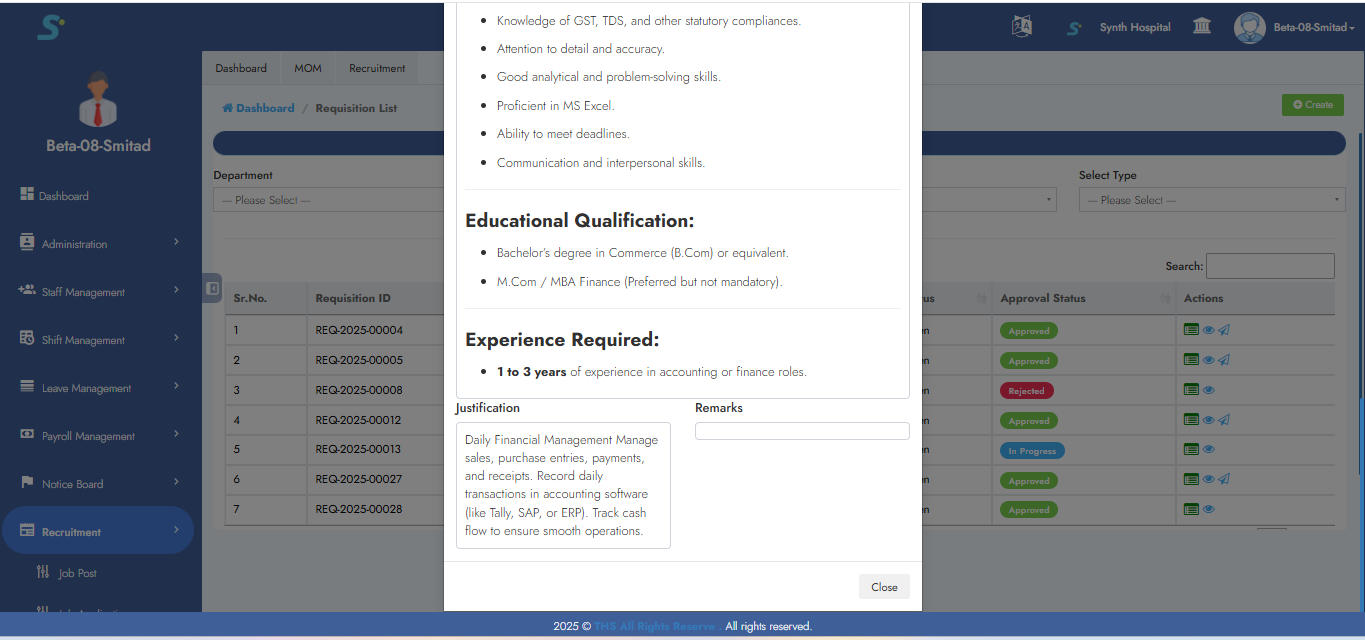
Step 14: Display of Requisition Details
The requisition details will be displayed as shown in the image.
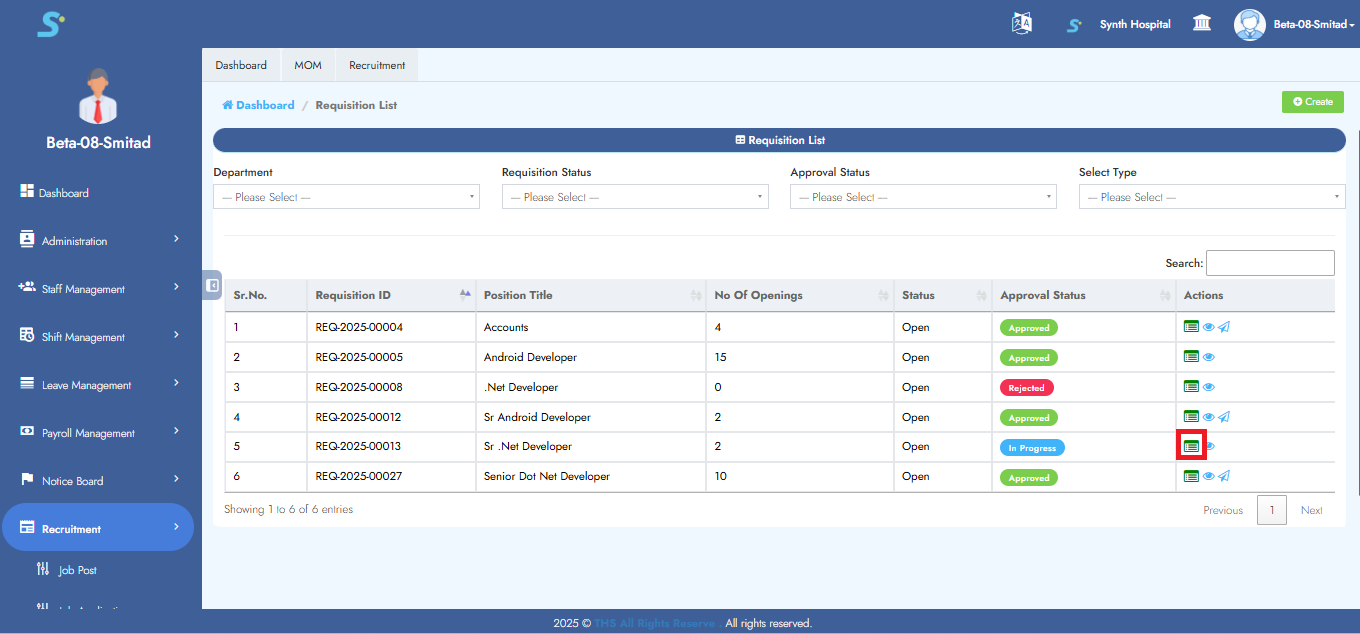
Step 15: View Approval Status
Click the designated Approval Status button, as shown in the image.
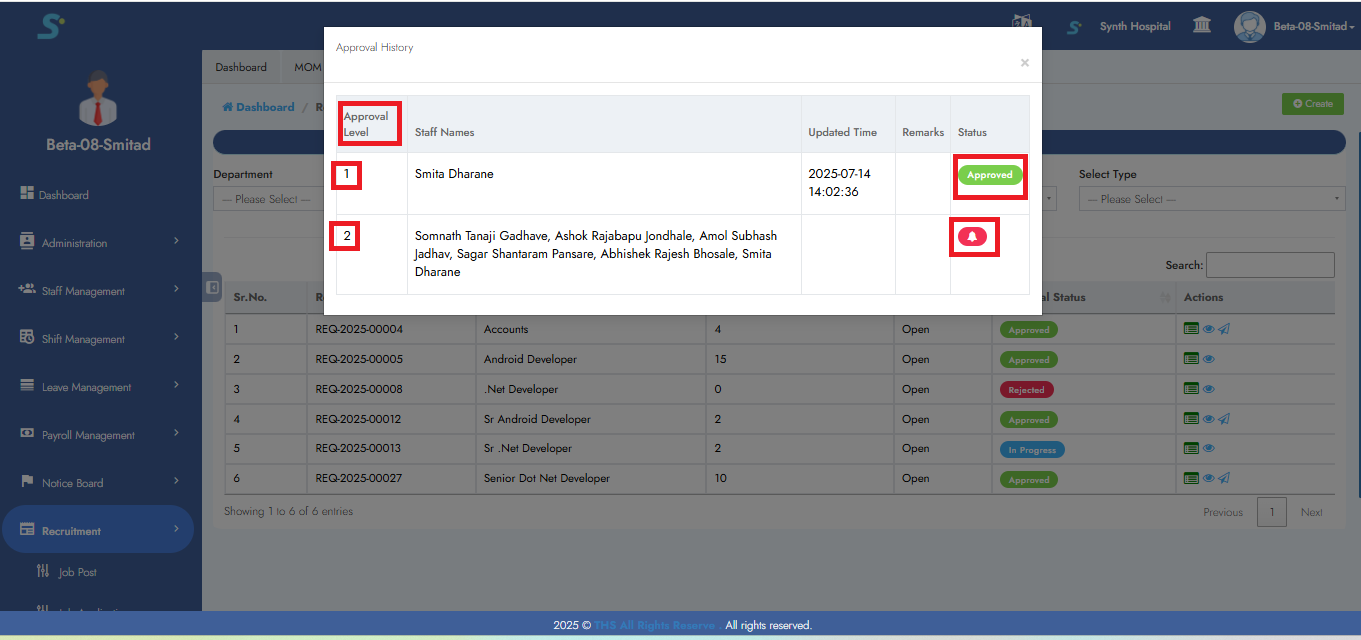
Step 16: Approval Workflow View
You will see the approval levels, names of approvers, Updated Time, remarks, and current status of the requisition, as shown in the image.
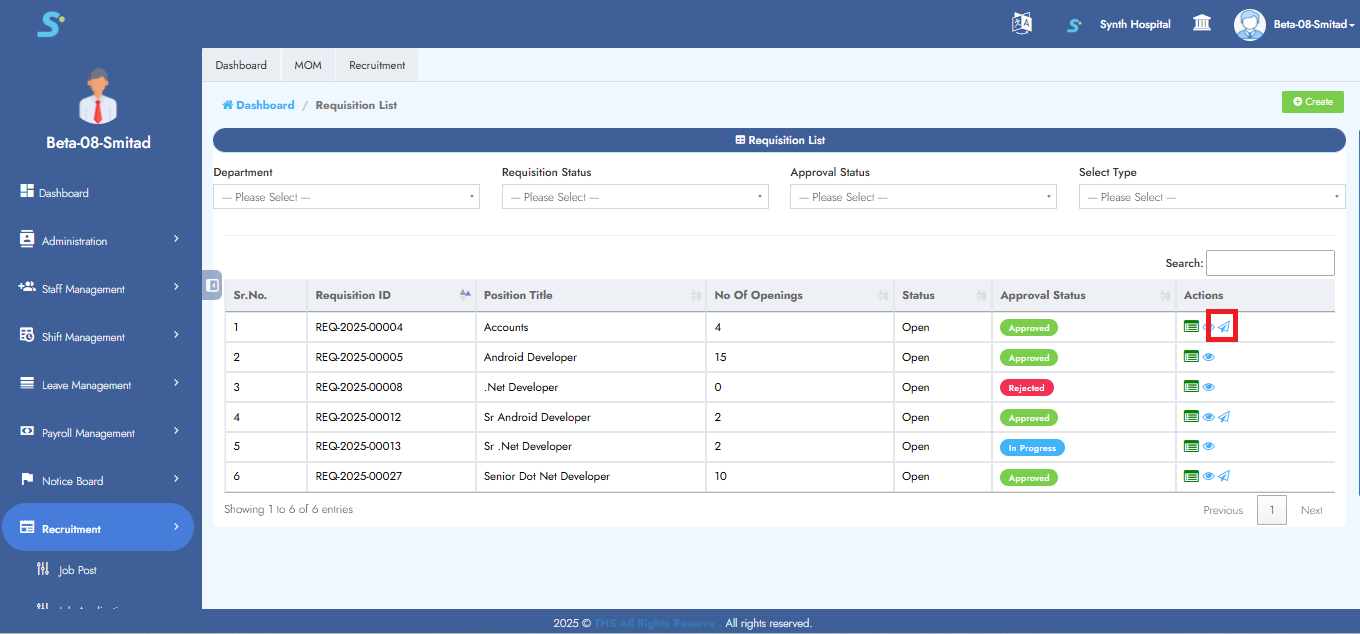
Step 17: Create New Job Post
After approval, the Create New Job Post button will be enabled, as shown in the image.
Step 18: Redirect to Job Posting
Clicking the Create New Job Post button redirects you to the Job Posting page. Relevant requisition data will be auto-populated.
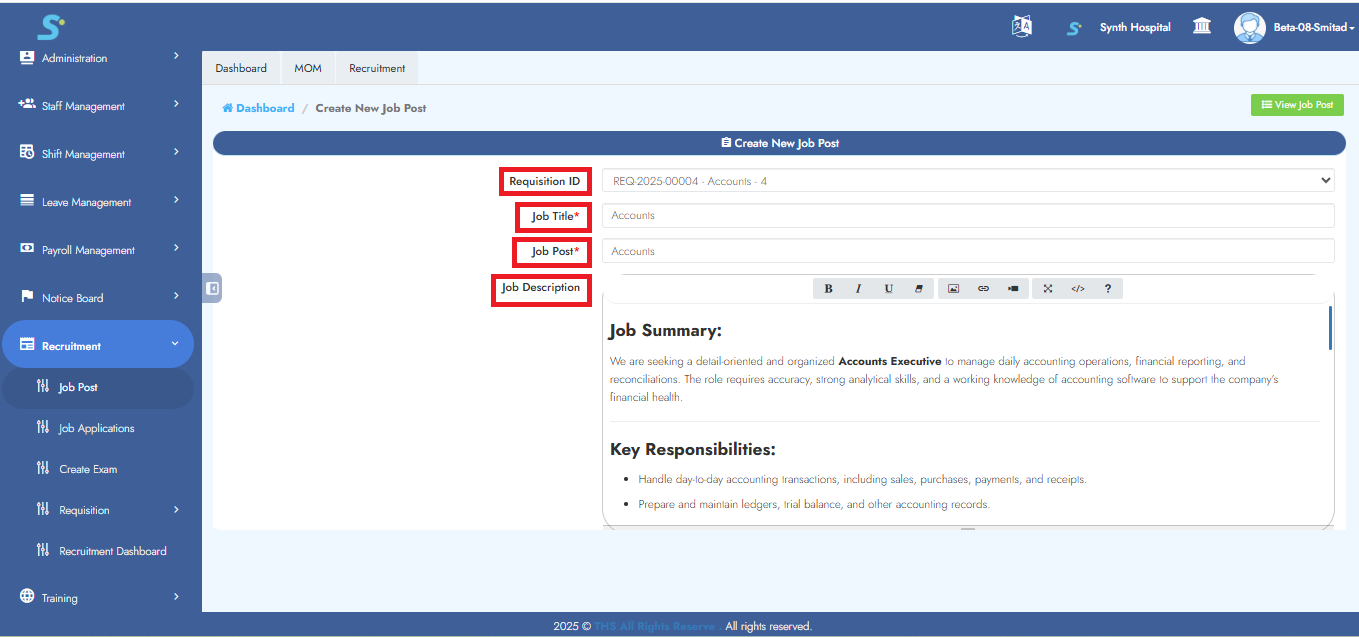
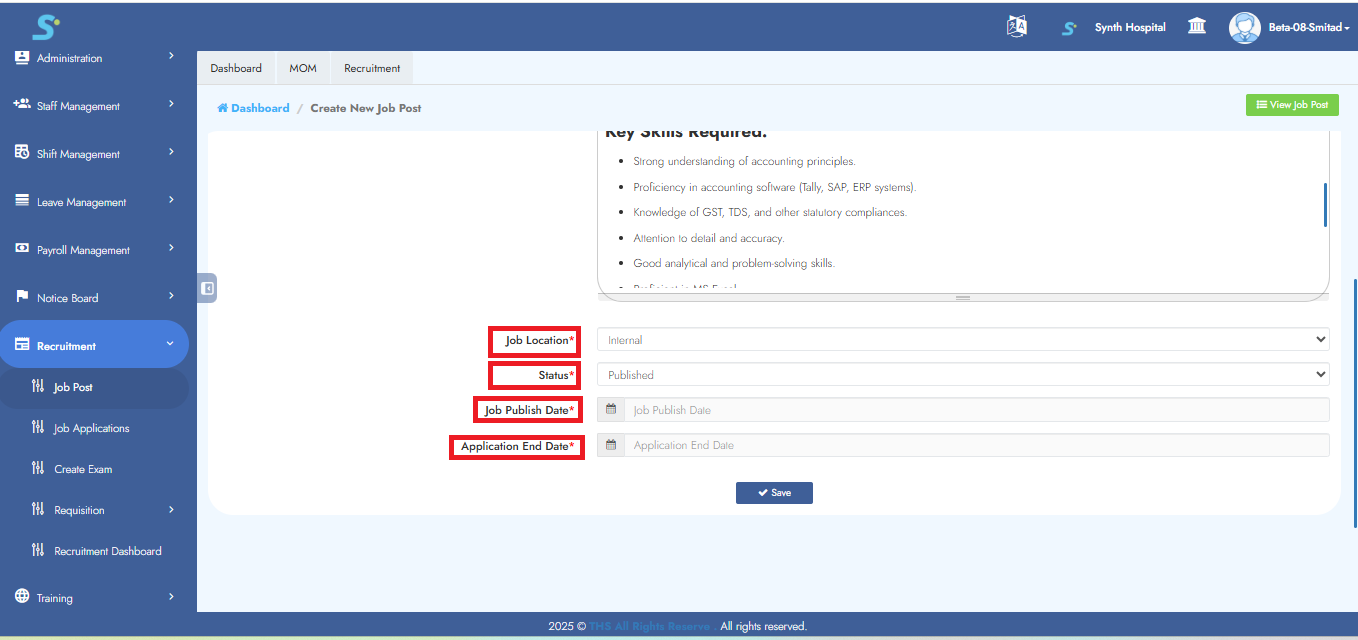
Step 19: Enter Job Posting Details
Fill in the following fields, as displayed in the image:
- Job Location
- Status
- Job Publish Date
- Application End Date
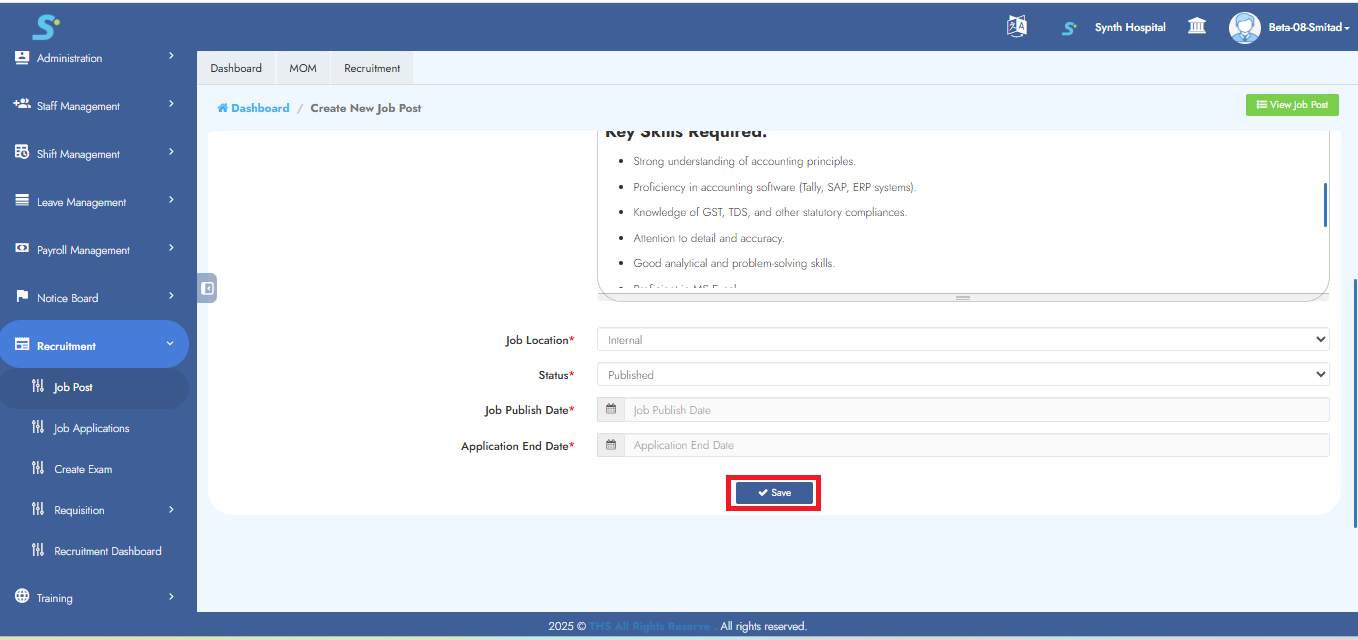
Step 20: Save Job Posting
Click the Save button. A confirmation message will appear indicating successful saving of the job post.
Step 21: View Created Job Post
After saving, the job post will appear under the Job Post sub-module. Click View Notice to see it.

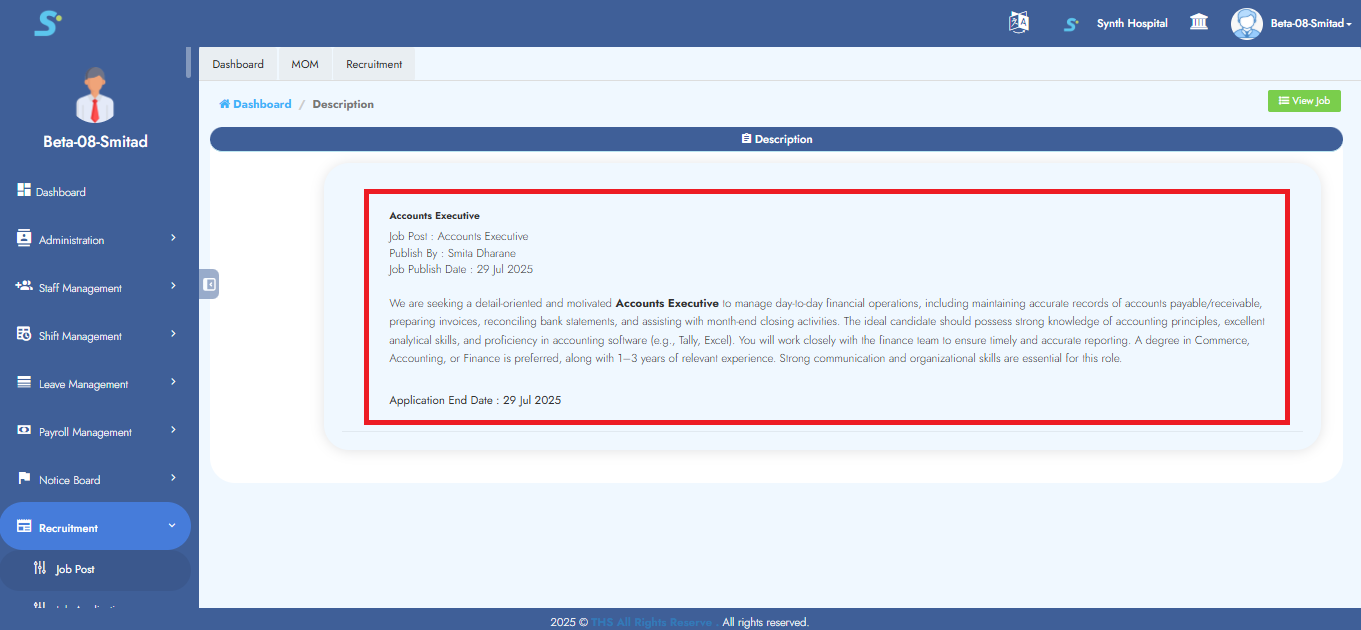
Step 22: Job Post Display
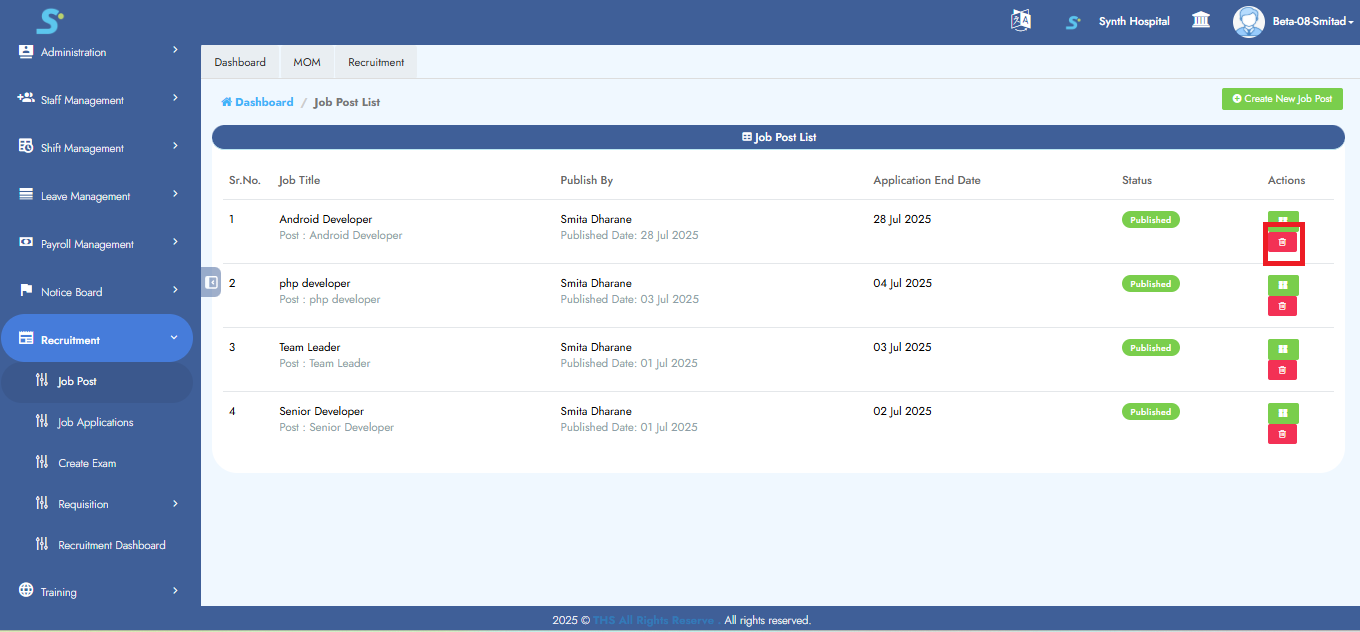
The job post screen will display, as shown in the image.
Step 23: Delete Job Post
To delete the job post, click the Delete button, as shown in the image.
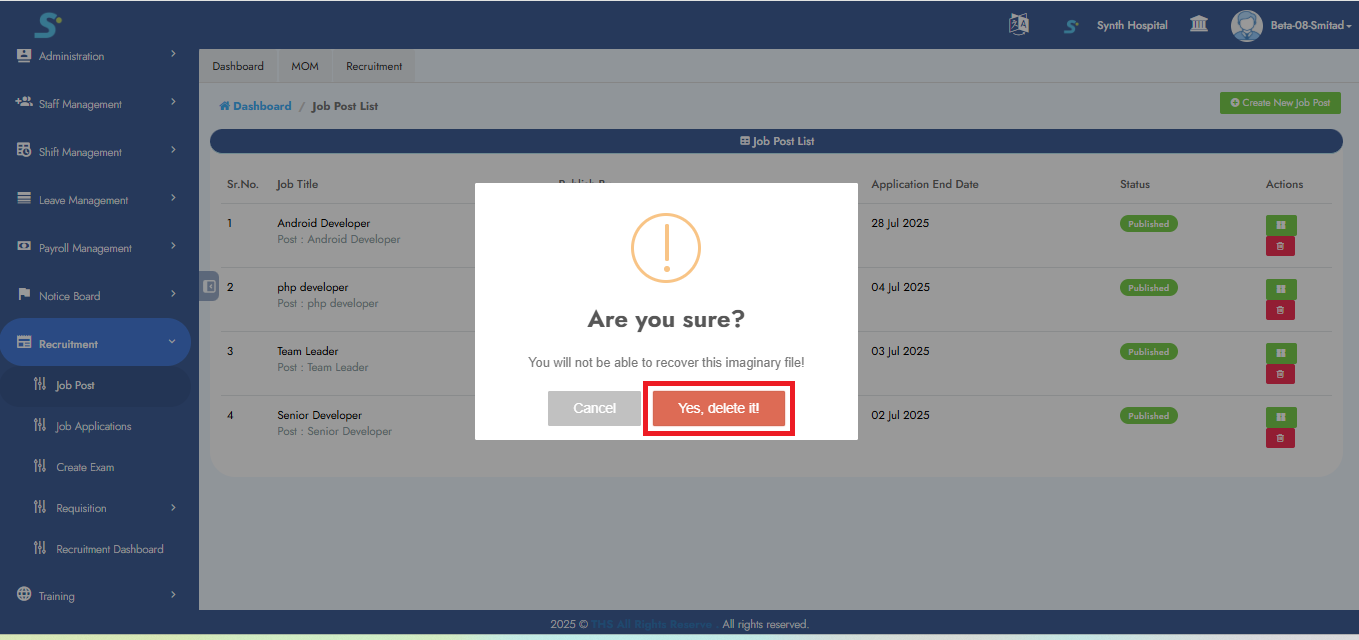
Step 24: Confirm Deletion
A confirmation popup will appear. Click Yes, Delete it to confirm.
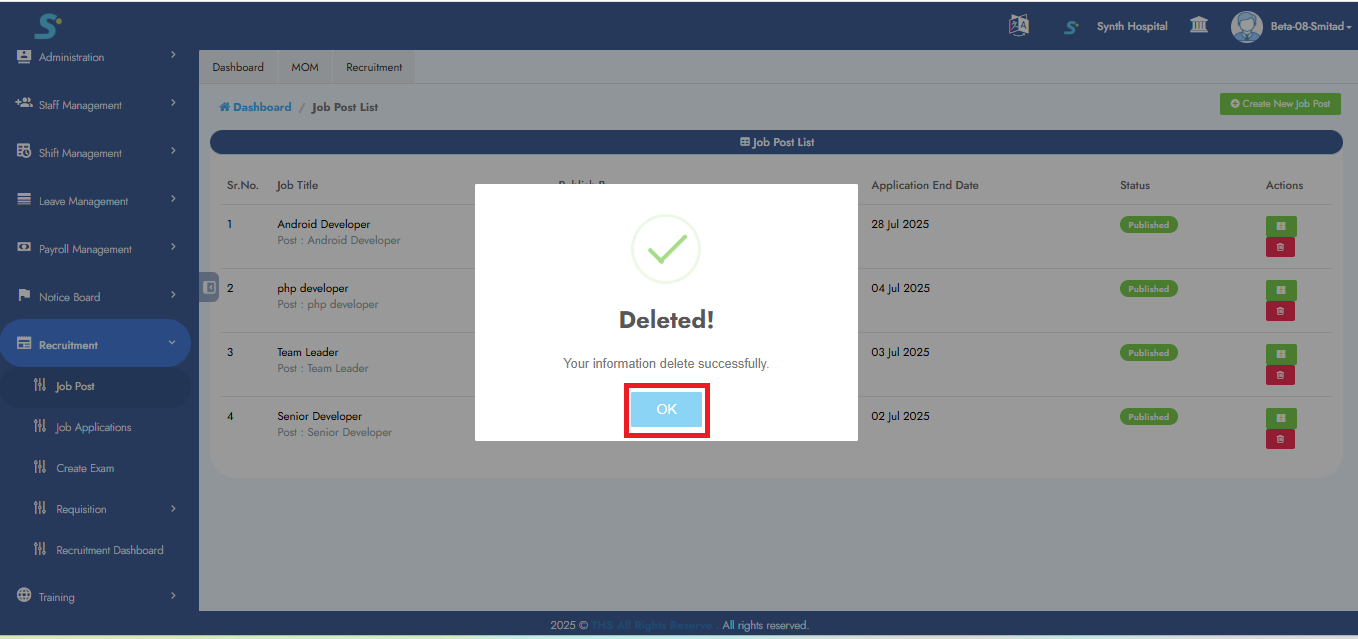
Step 25: Deletion Success
Another popup will appear. Click OK to confirm final deletion. The record will then be deleted successfully.
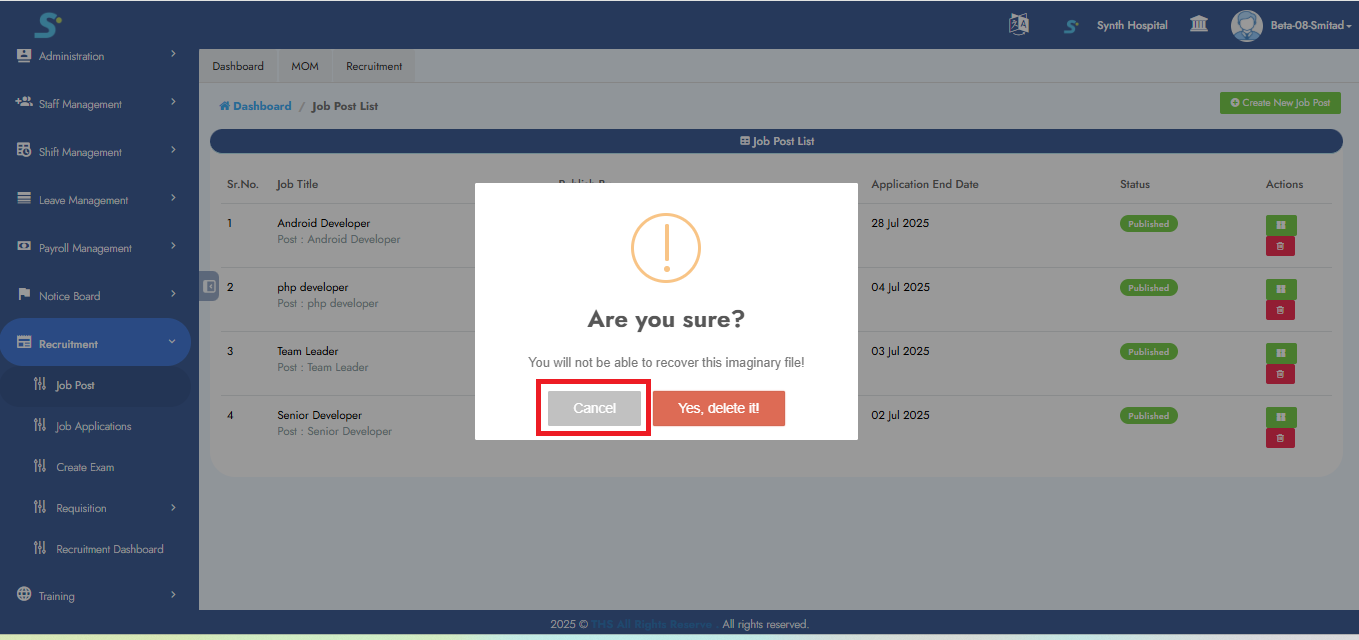
Step 26: Cancel Deletion
If you click Cancel, the deletion process will be aborted and the record will remain unchanged.
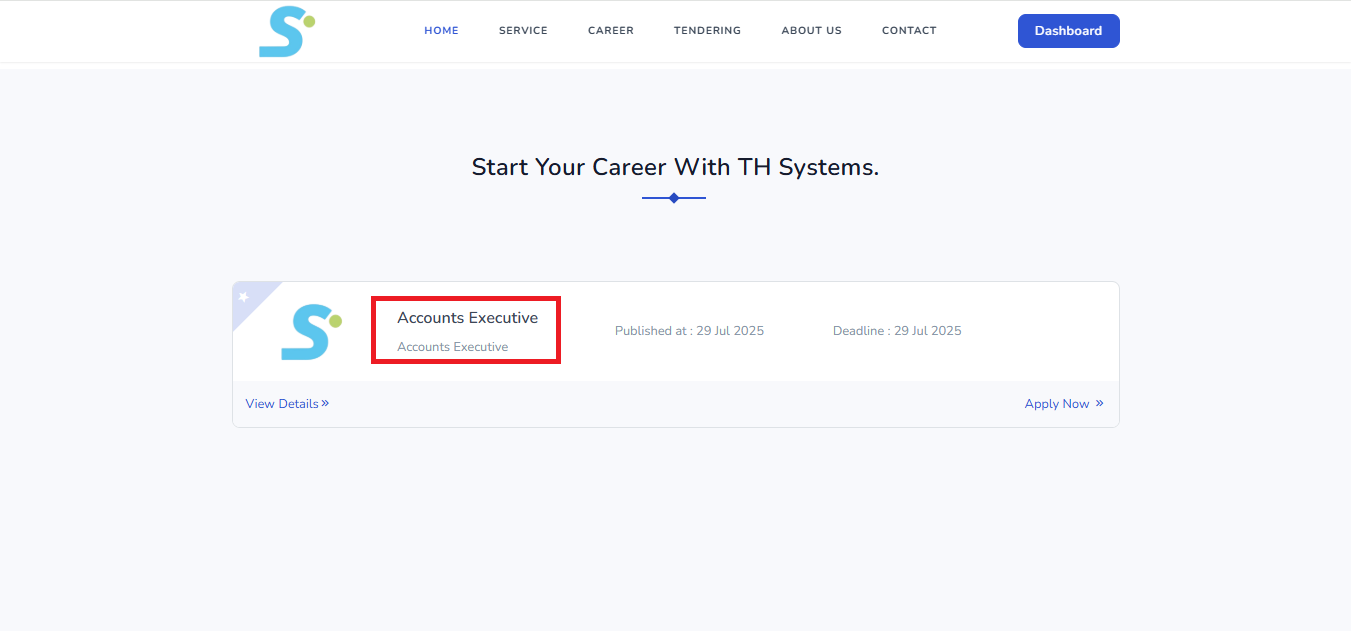
Step 27: Job Post Visibility on Home Screen
Once job posts are published, they will appear on the Synth home screen under the section titled "Start your career with [Your Institute/Hospital Name]", as shown in the image.

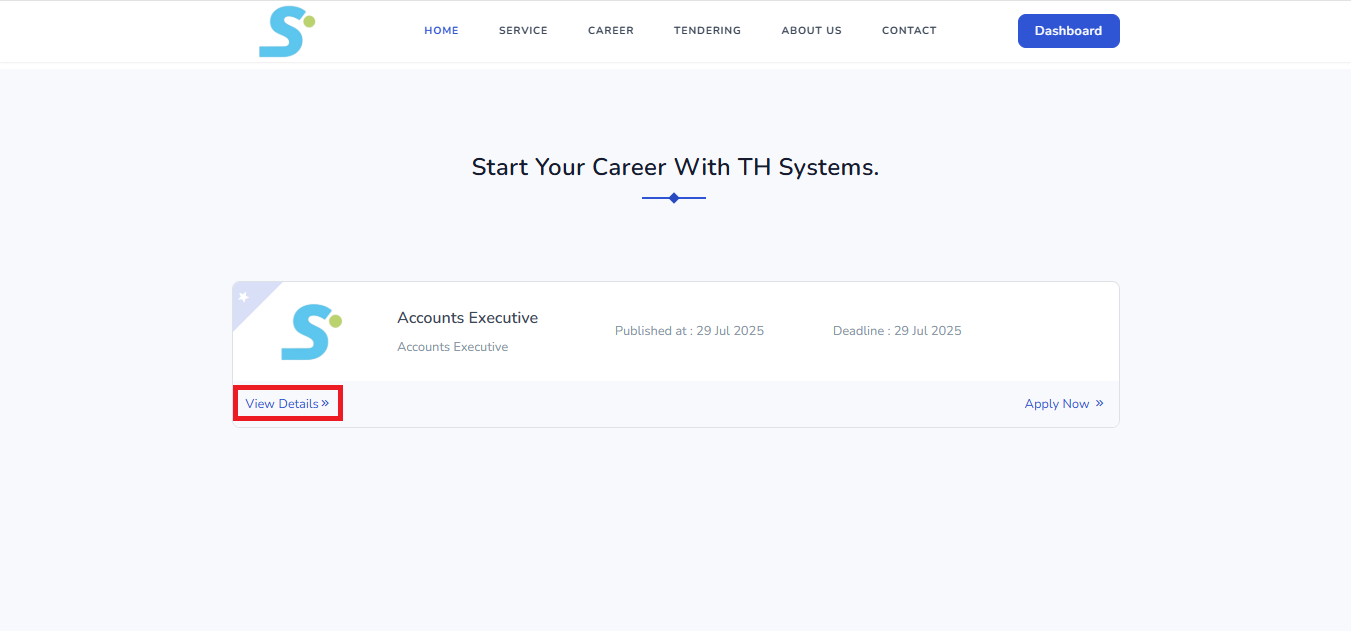
Step 28: Viewing Job Post Details
Click the View Details button to open the job post. The following screen will be displayed.
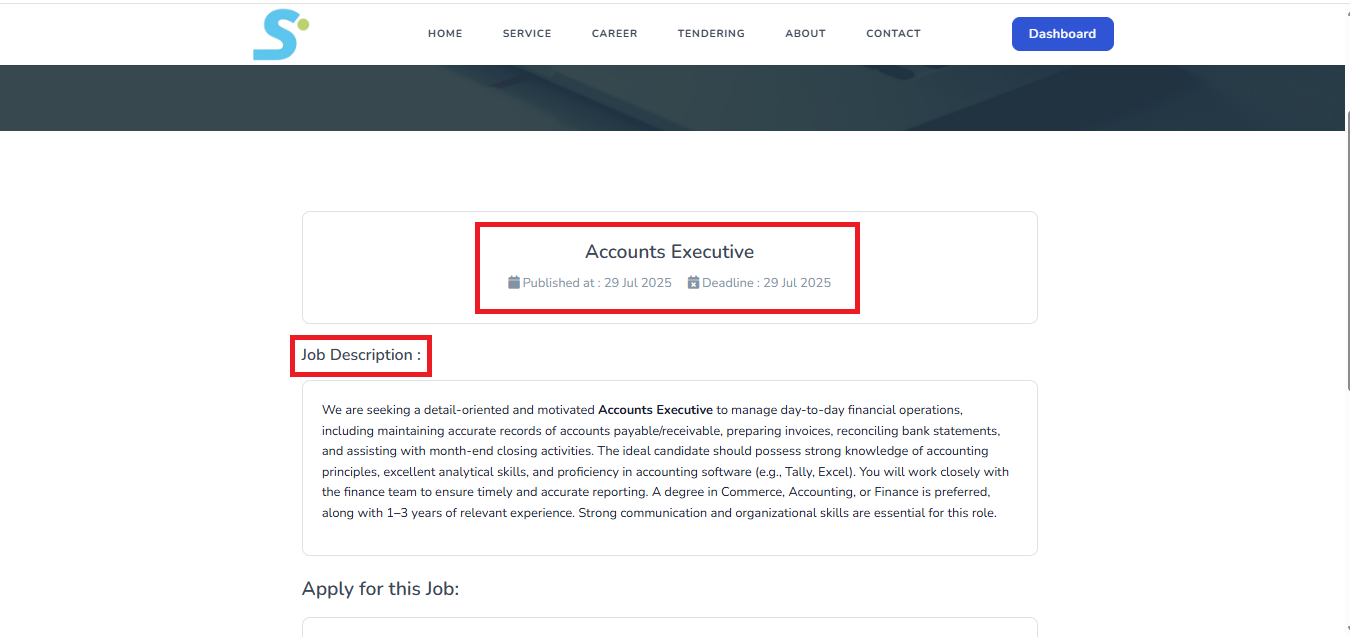
Step 29: Detailed Job Post View
The complete job post details will be shown on the screen, as illustrated in the image.
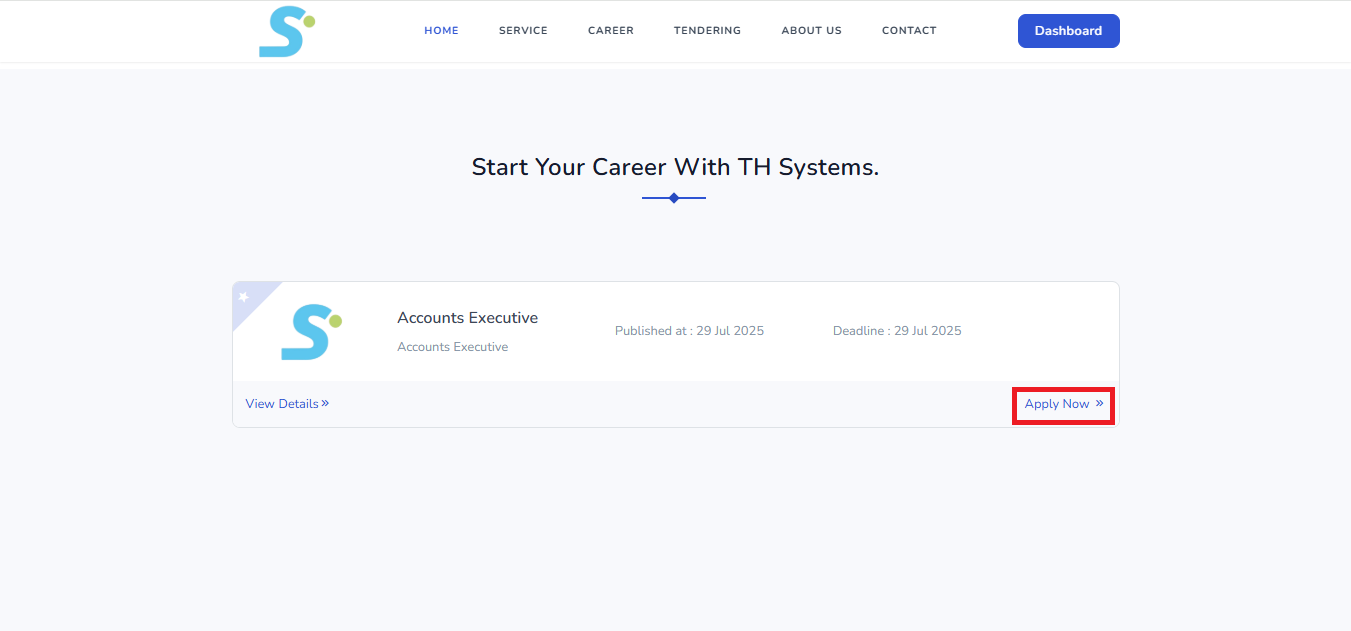
Step 30: Submitting Your Job Application
To apply for the job, click the Apply Now button, as shown in the image.
Step 31: Navigating to Application Section
After clicking Apply Now, you will be redirected to the View Details page. The Apply for this Job button will appear at the bottom of the page.
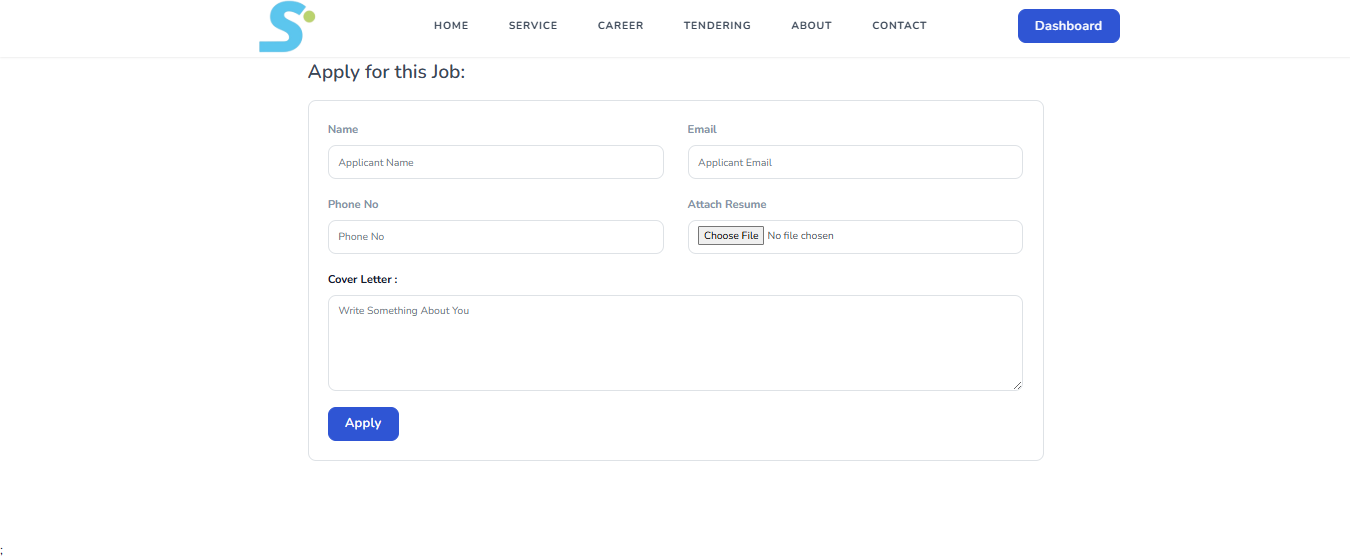
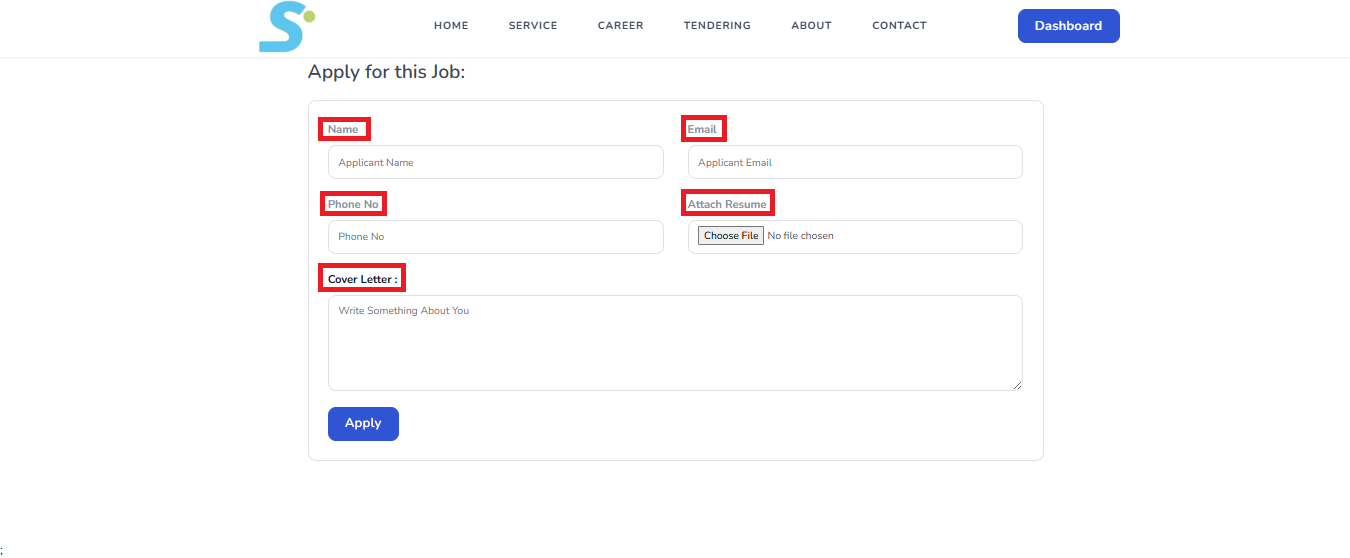
Step 32: Filling Out the Application Form
Fill in all required fields in the application form, as displayed in the image.
Note: All fields are mandatory.
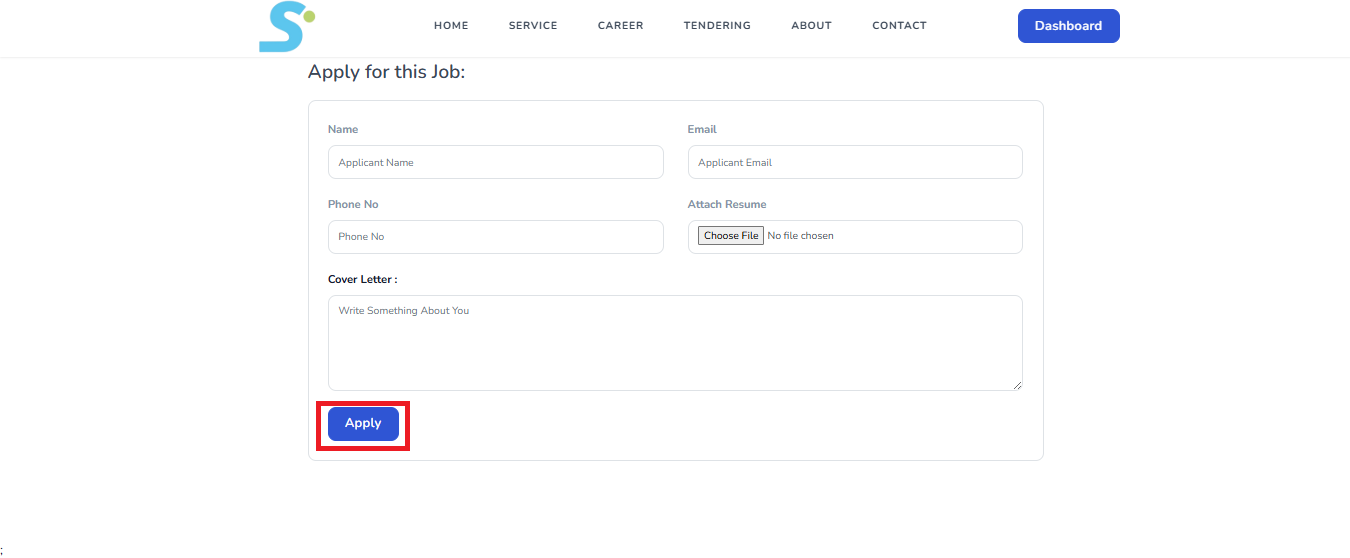
Step 33: Submitting the Application
After completing the form, click the Apply button to submit your application, as shown in the image.
Step 34: Successful Submission Notification
After submission, a confirmation message "Application Successful" will appear at the top of the View Details page.

Step 35: Job Applications Tracking
Once your job application is submitted successfully, it will automatically be listed under the Job Applications section, as shown in the image.
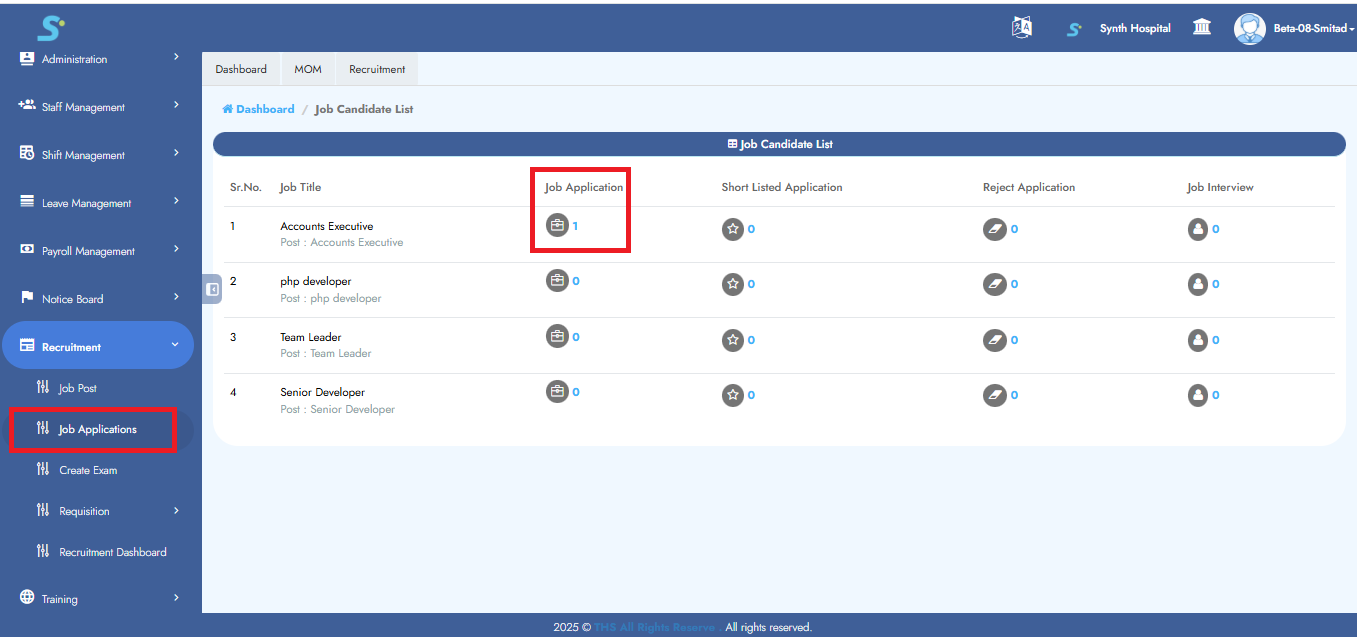
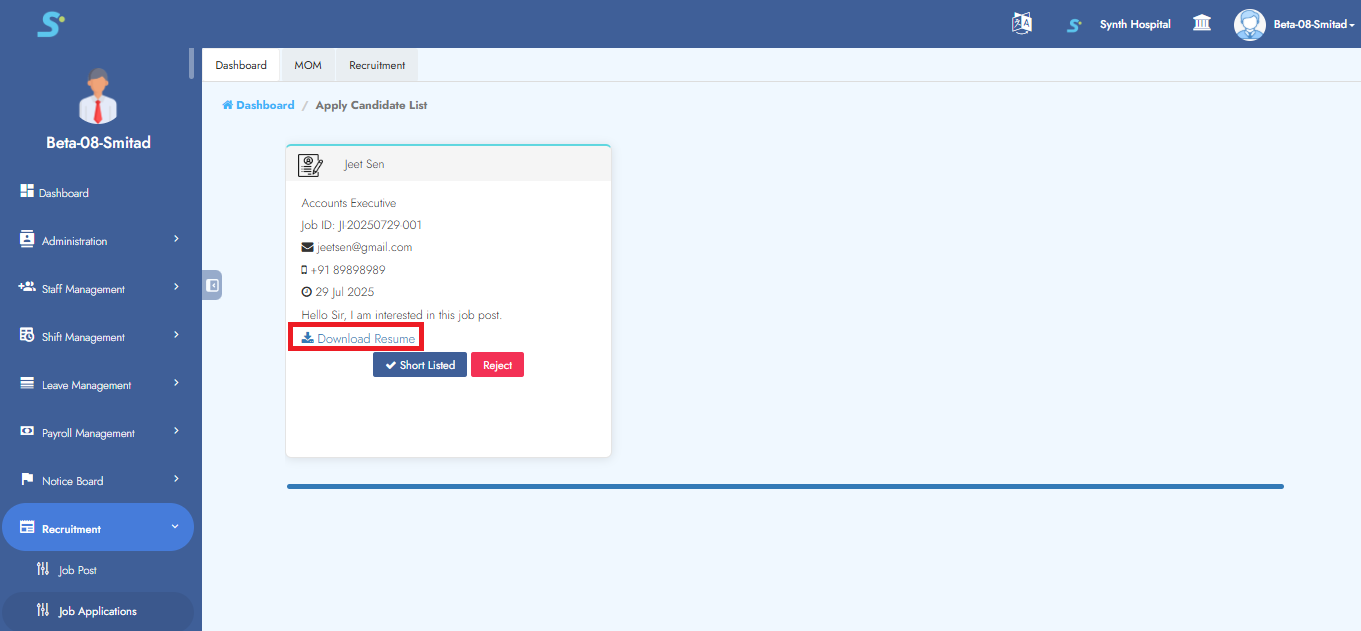
Step 36: Accessing Candidate Applications
Clicking the Number of Job Applications button will navigate you to a screen displaying all candidate submissions, as shown in the image.
Resumes can be downloaded by selecting the Download Resume button.
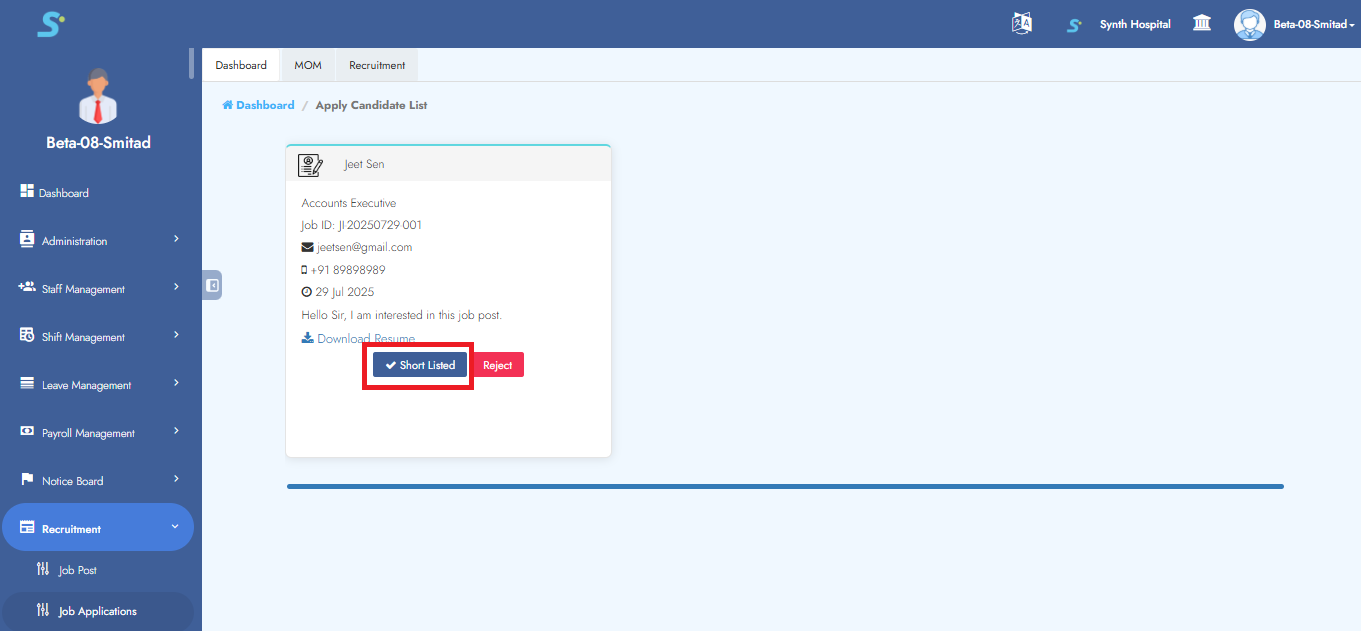
Step 37: Candidate Shortlist Process
To shortlist a candidate, simply click on the Shortlisted button, as shown in the image.
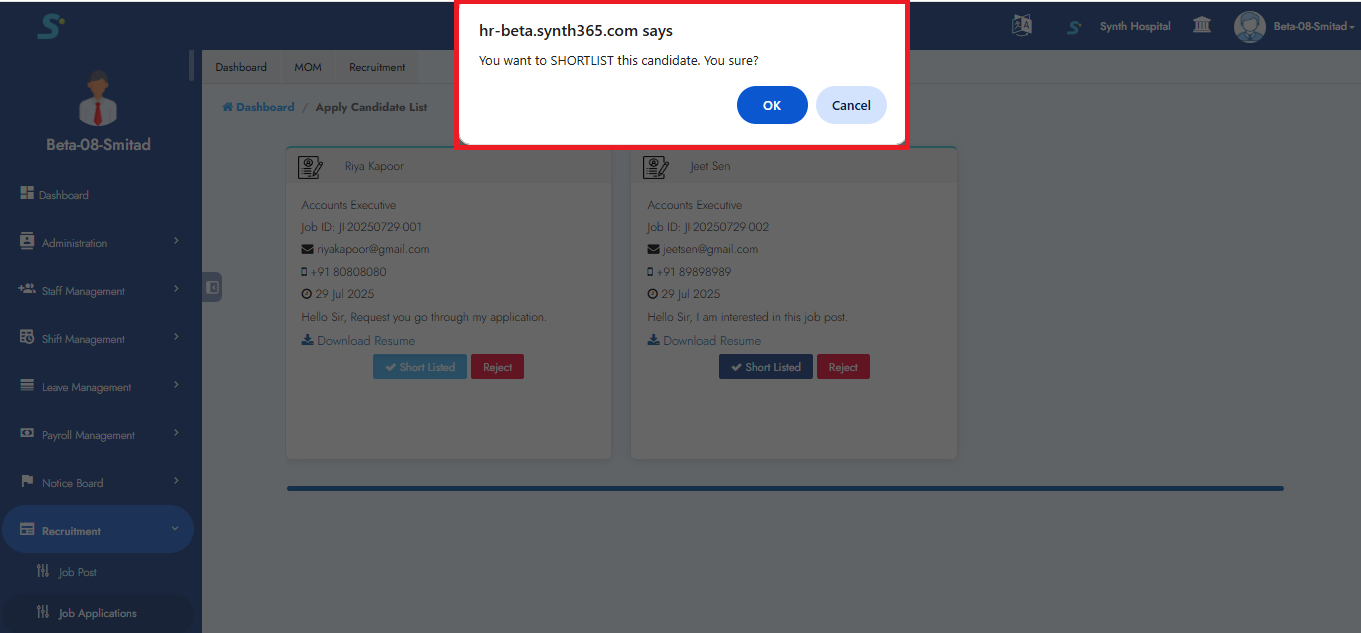
Step 38: Candidate Shortlist Pop-Up
After clicking the Shortlisted button, a pop-up window will be displayed for confirmation, as illustrated in the image.
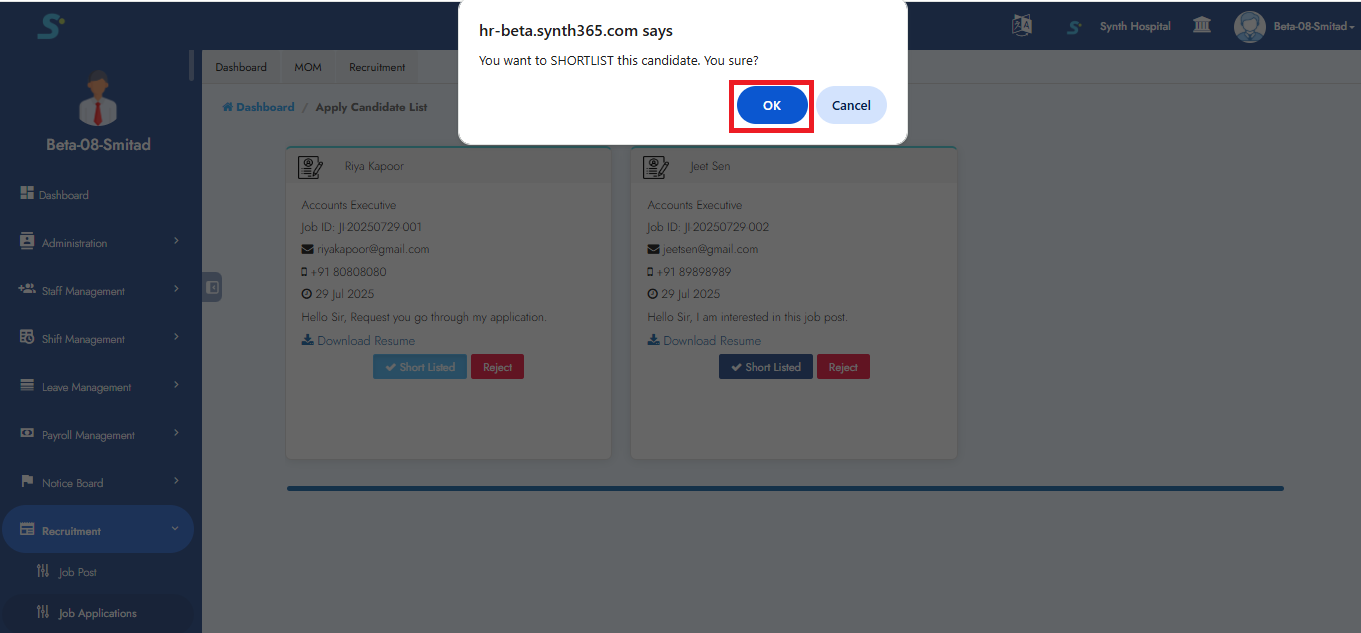
Step 39: Confirming Candidate Shortlisting
To confirm the shortlisting, click the OK button as shown in the image.
If you choose Cancel, the candidate will not be added to the shortlisted candidates list.
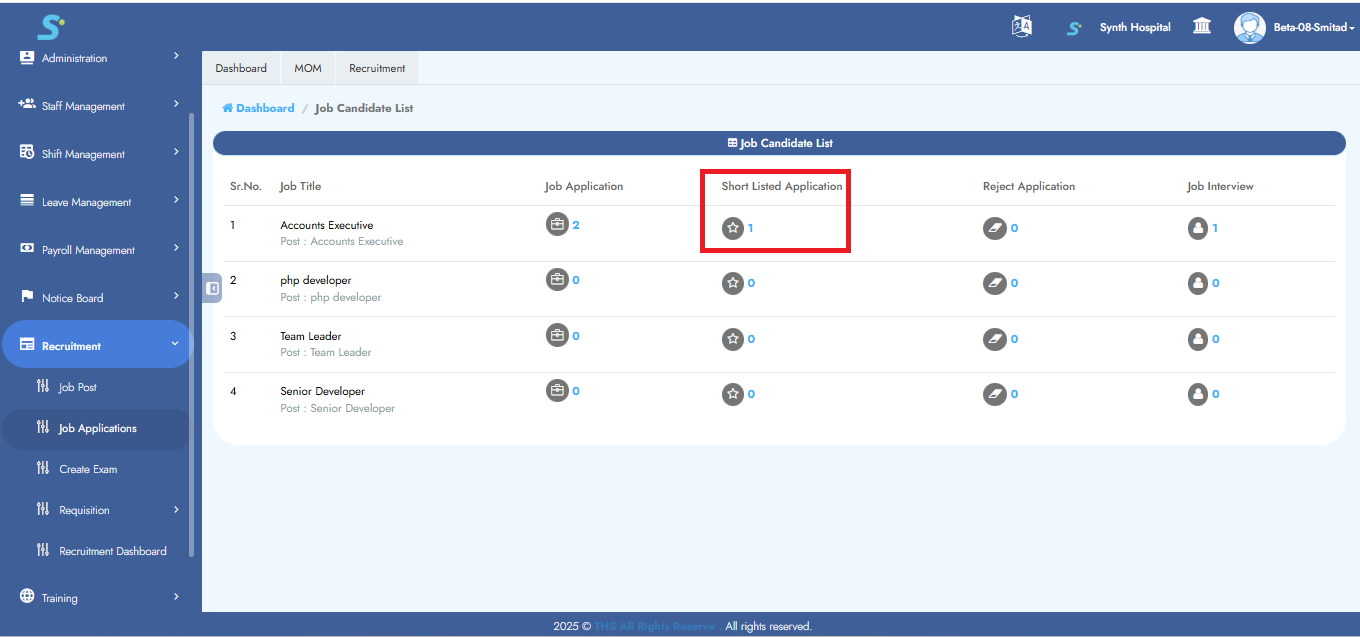
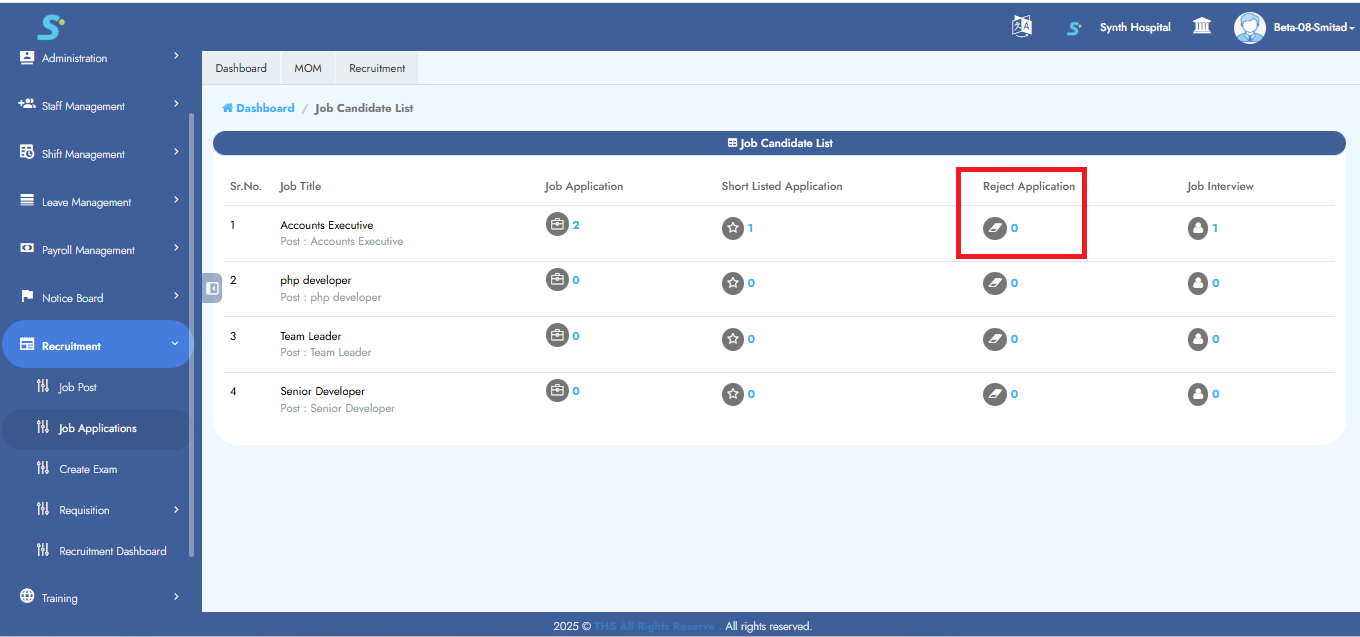
Step 40: View Shortlisted Candidates
Shortlisted applications will be added to Short-Listed candidates on the Job candidate list, as shown in the image.
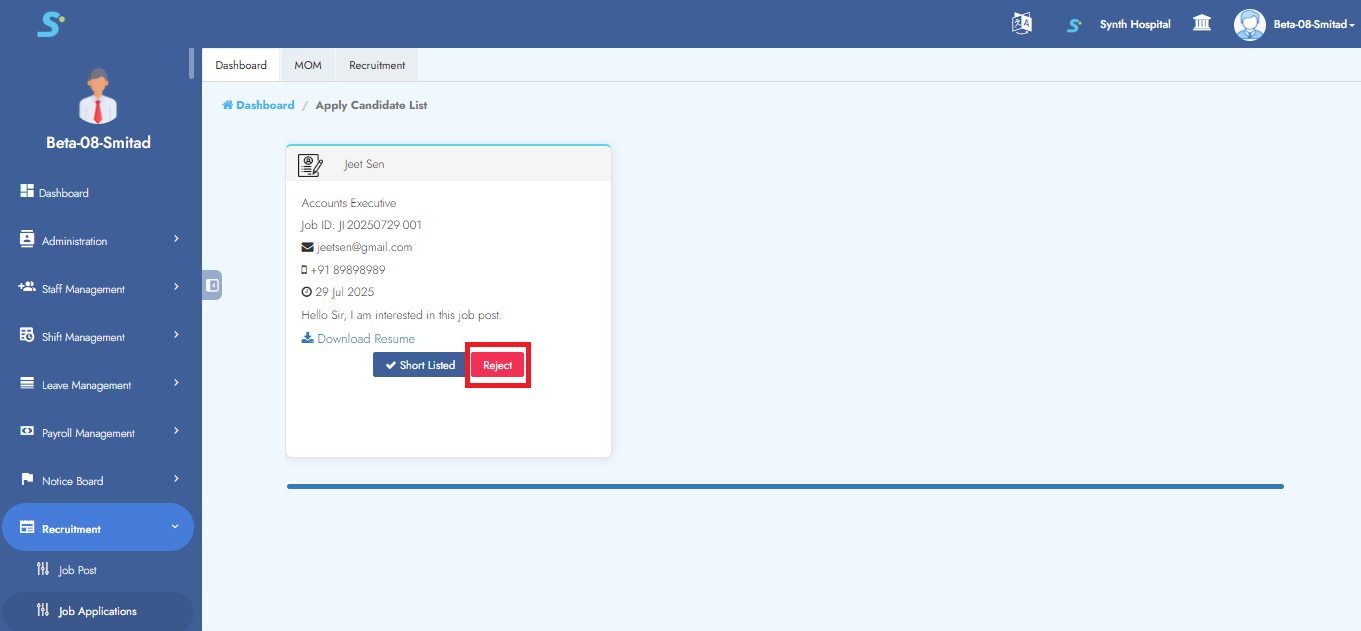
Step 41: Marking Applications as Rejected
To reject a candidate, click on the Reject button available next to their application, as shown in the image.
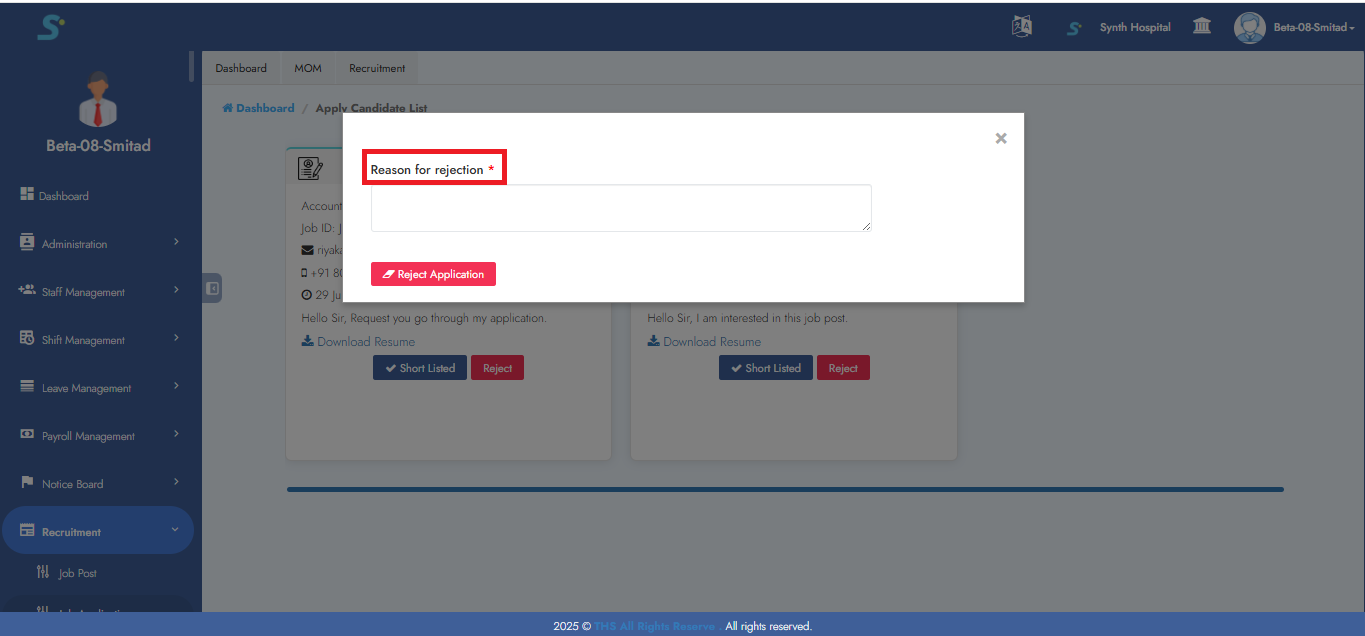
Step 42: Entering Rejection Reason
When you click on Rejected Applications, a pop-up window will appear prompting you to enter the reason for rejection.
Note: Providing a rejection reason is mandatory.
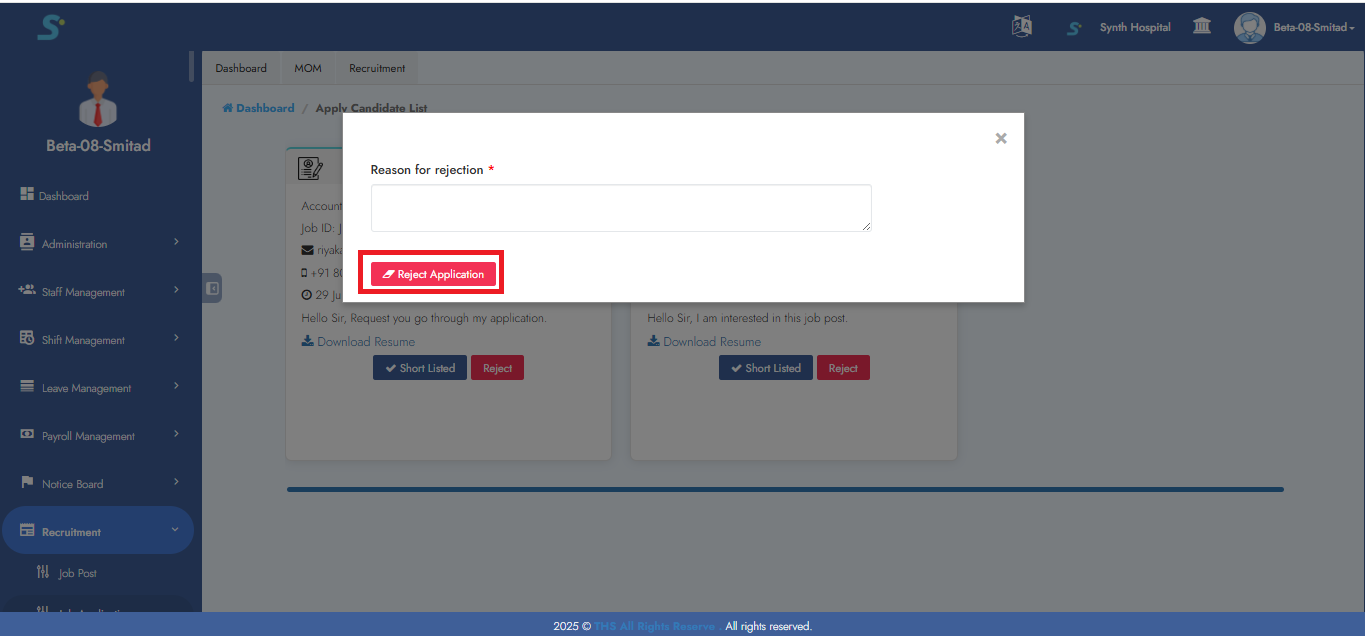
Step 43: Rejecting the Application
After entering the rejection reason, click the Reject Application button as shown in the image.
The candidate will then be added to the Rejected Candidates section in the job candidate list.
Step 44: View Rejected Candidates
Rejected applications will be added to Rejected candidates on the Job candidate list, as shown in the image.
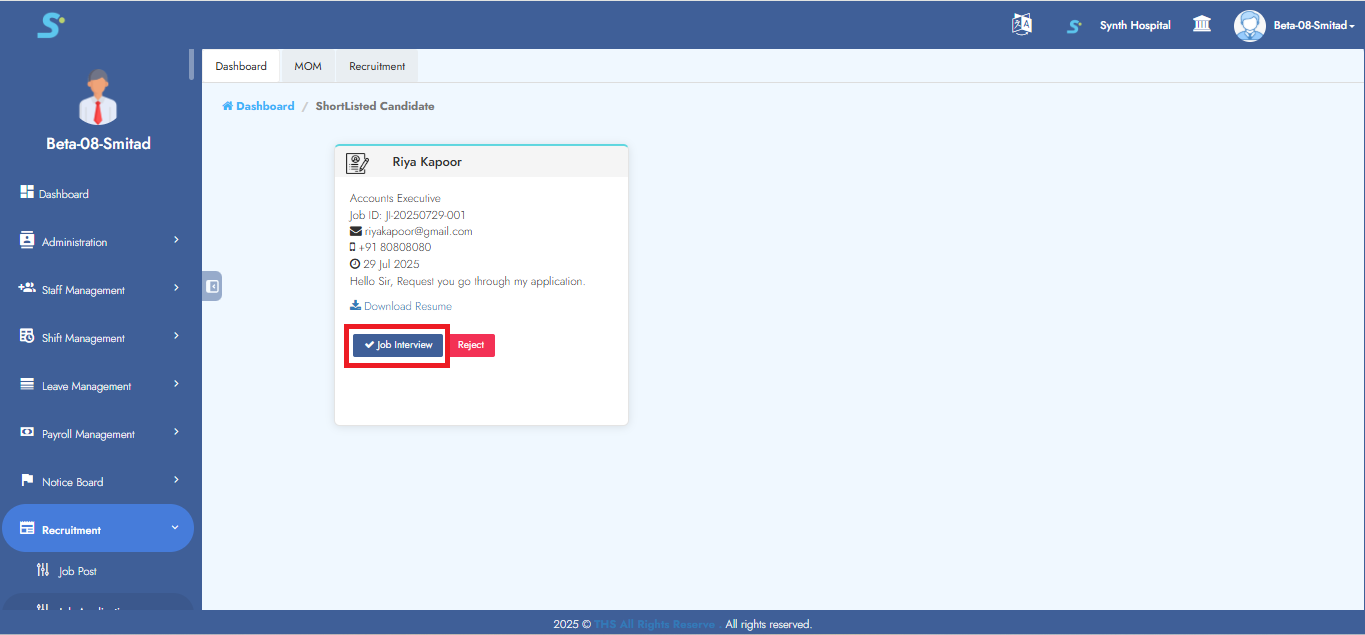
Step 45: Initiating the Interview Process
Click on the Shortlisted Applications tab to view the list of shortlisted candidates.
To proceed with scheduling interviews, click the Job Interview button, as shown in the image.
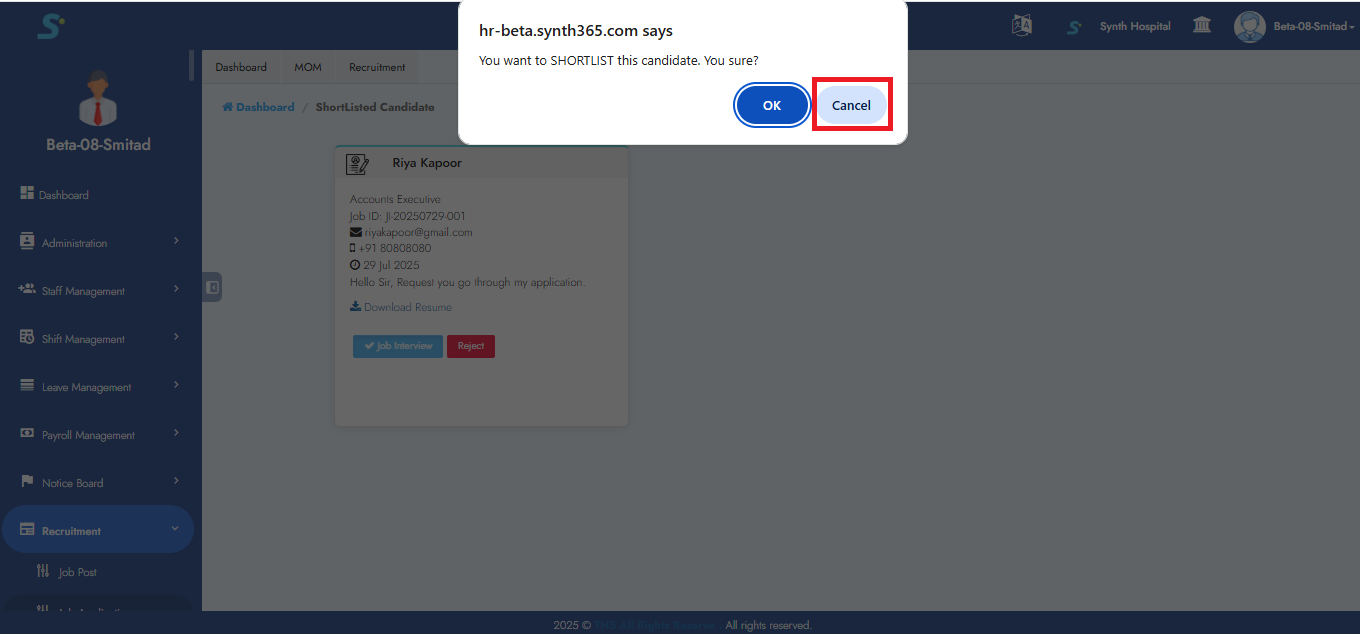
Step 46: Canceling Interview Action
Once the window appears, as illustrated in the image, you may click the Cancel button if you choose not to call the candidate for an interview.
Step 47: Confirming Interview Invitation
Once the window appears, as illustrated in the image, click the OK button to confirm and schedule the candidate for an interview.
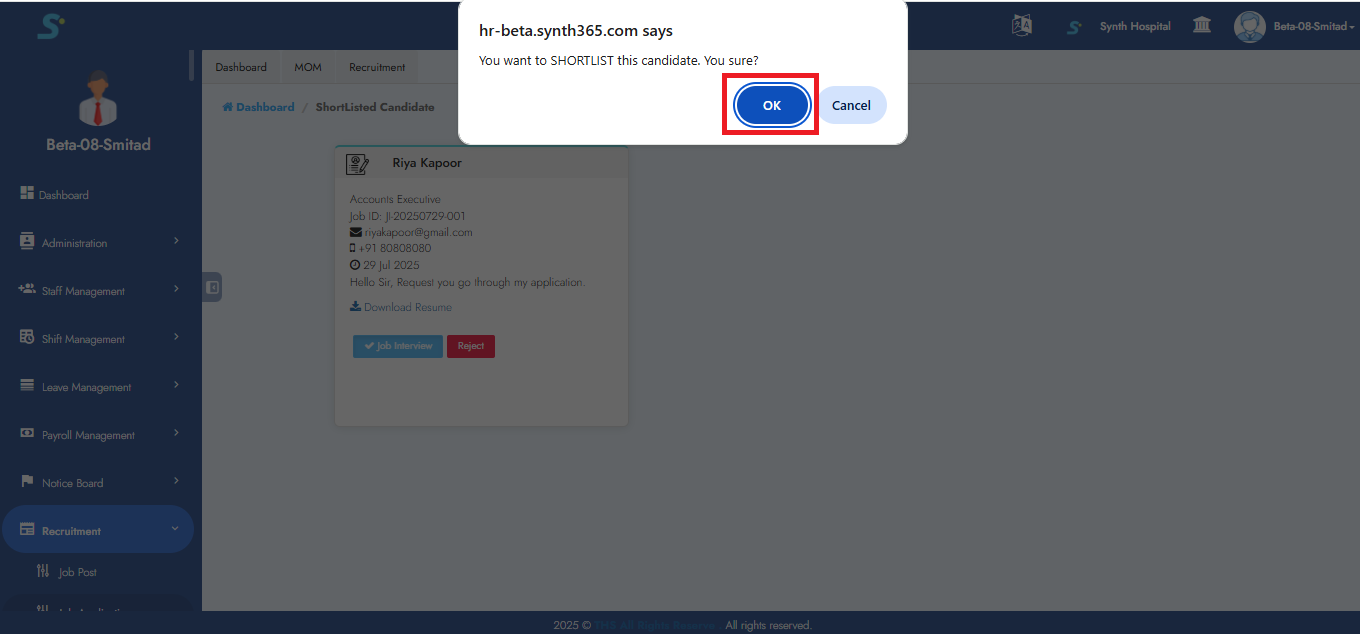
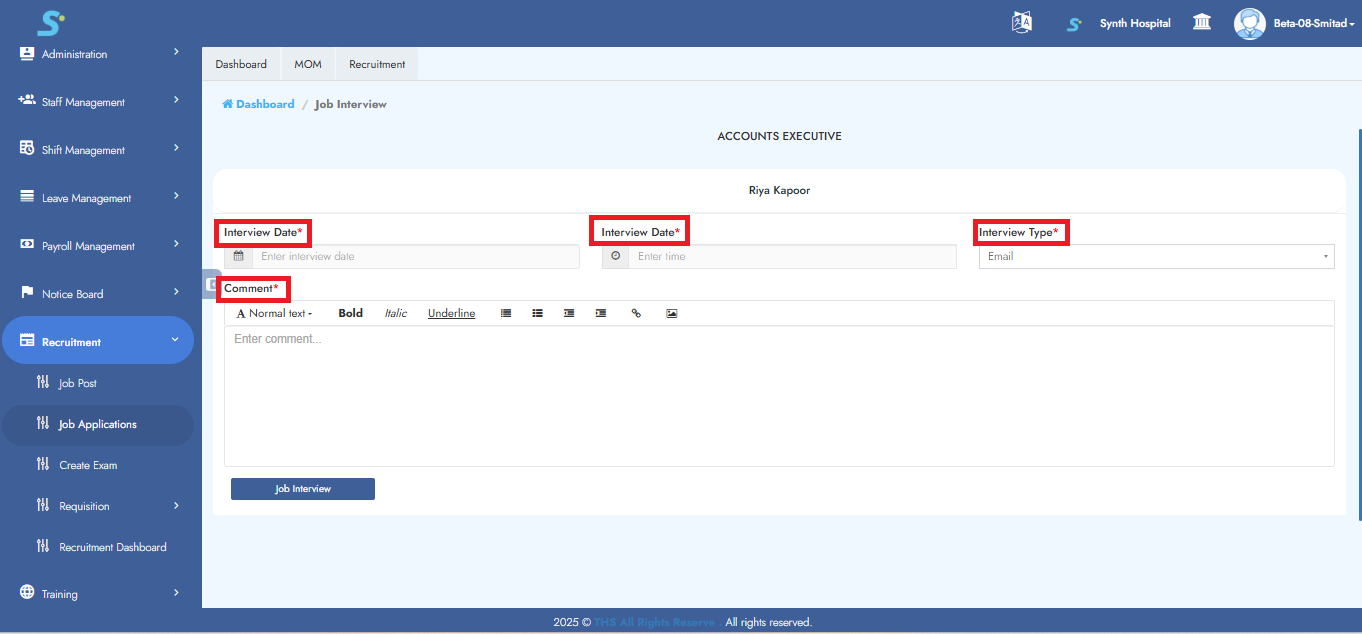
Step 48: Interview Scheduling Form
When you click the OK button, you will be redirected to the Job Interview page, as shown in the image.
On this page, enter the required details including:
- Interview Date
- Interview Time
- Interview Type
- Comment
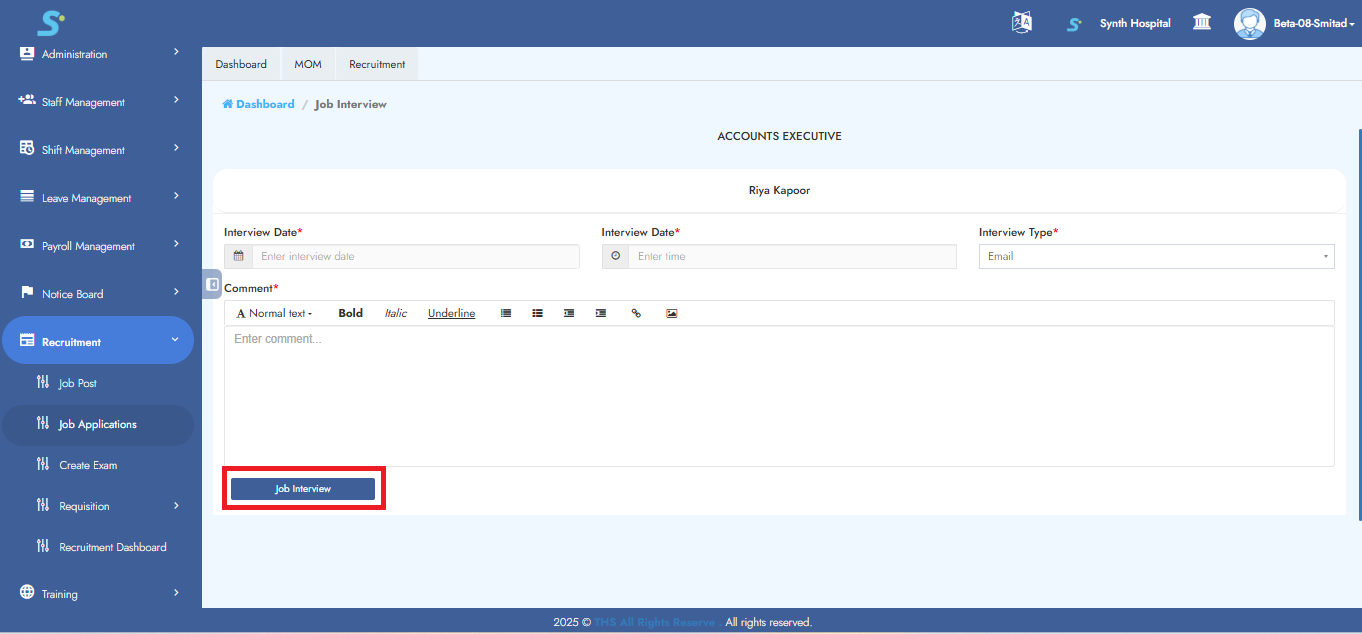
Step 49: Navigating to Job Interview
Now click on the Job Interview button as shown in the image.
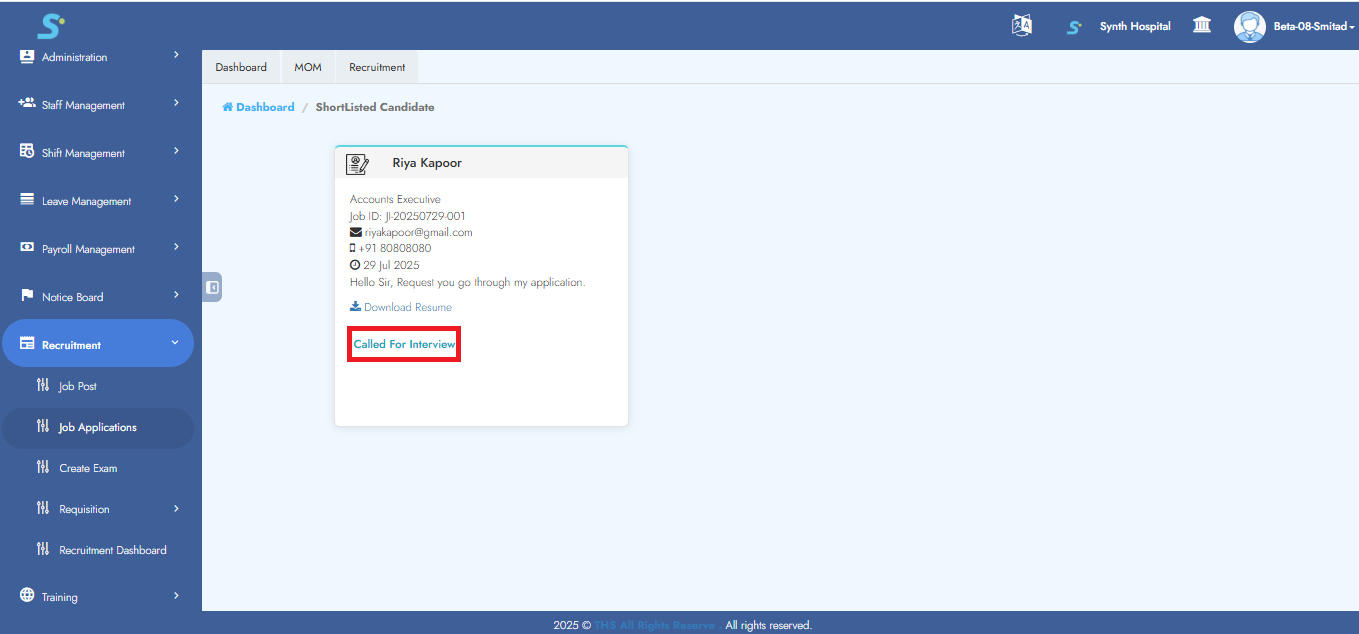
Step 50: Status Update After Interview Call
Once clicked, it redirects to the page Shortlisted Candidate, and the status will change to Called for Interview, as shown in the image.
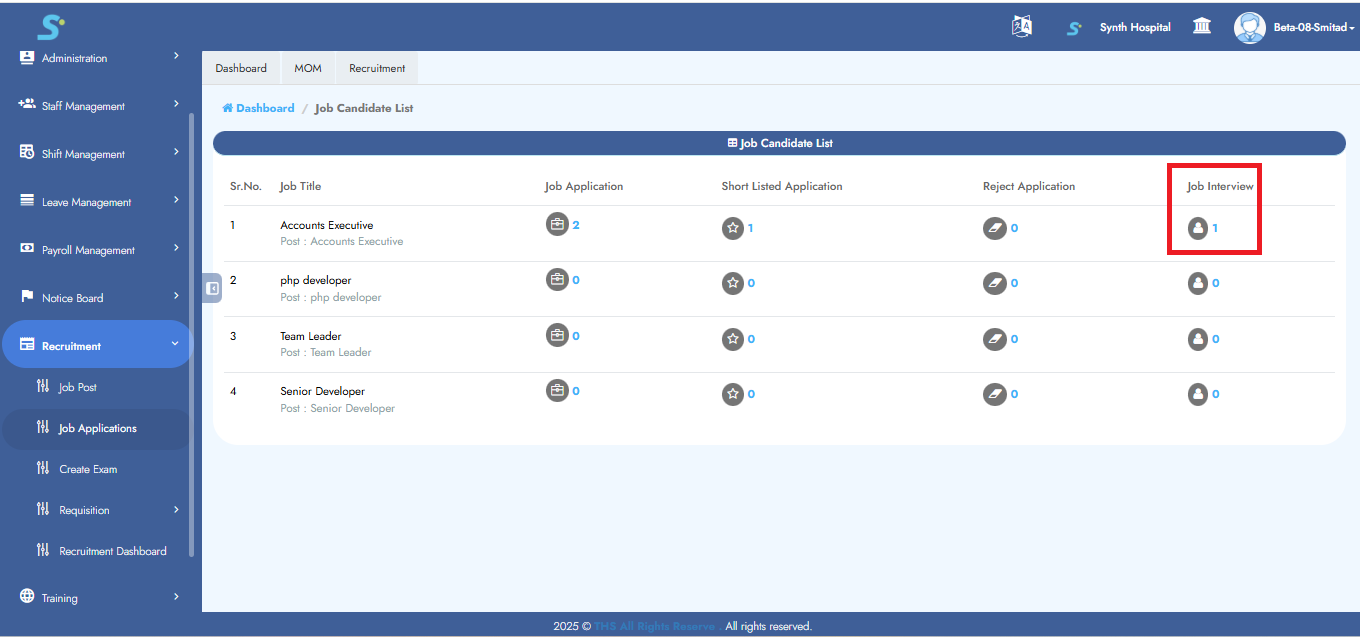
Step 51: Interview Status in Candidate List
Called for Interview candidates will be added to Job Interview on the Job candidate list, as shown in the image.