Staff Transfer User Manual | HRMS
Step-by-step guide for Transfer Approval Setup, Transfer Request Creation, Approvals, Final Transfer and Acceptance.
Quick Process Flow
| Step | Menu / Screen | User Action |
|---|---|---|
| 1 | Staff Management → Transfer Setup → Transfer IN | Create receiving institute approval flow |
| 2 | Staff Management → Transfer Setup → Transfer OUT | Create current/source institute approval flow |
| 3 | Staff Management → Staff Transfer | Open transfer list and click Create |
| 4 | Create Transfer → Select Employee | Select staff and click Filter to load current data |
| 5 | Create Transfer → New Details | Fill new institute details and click Create Request |
| 6 | Staff Management → Transfer Request List | Approve or reject requests assigned to logged-in approver |
| 7 | Approval Level Status | Verify current and new institute approval status |
| 8 | Final Transfer / Accept Final Transfer | Complete final transfer and final acceptance |
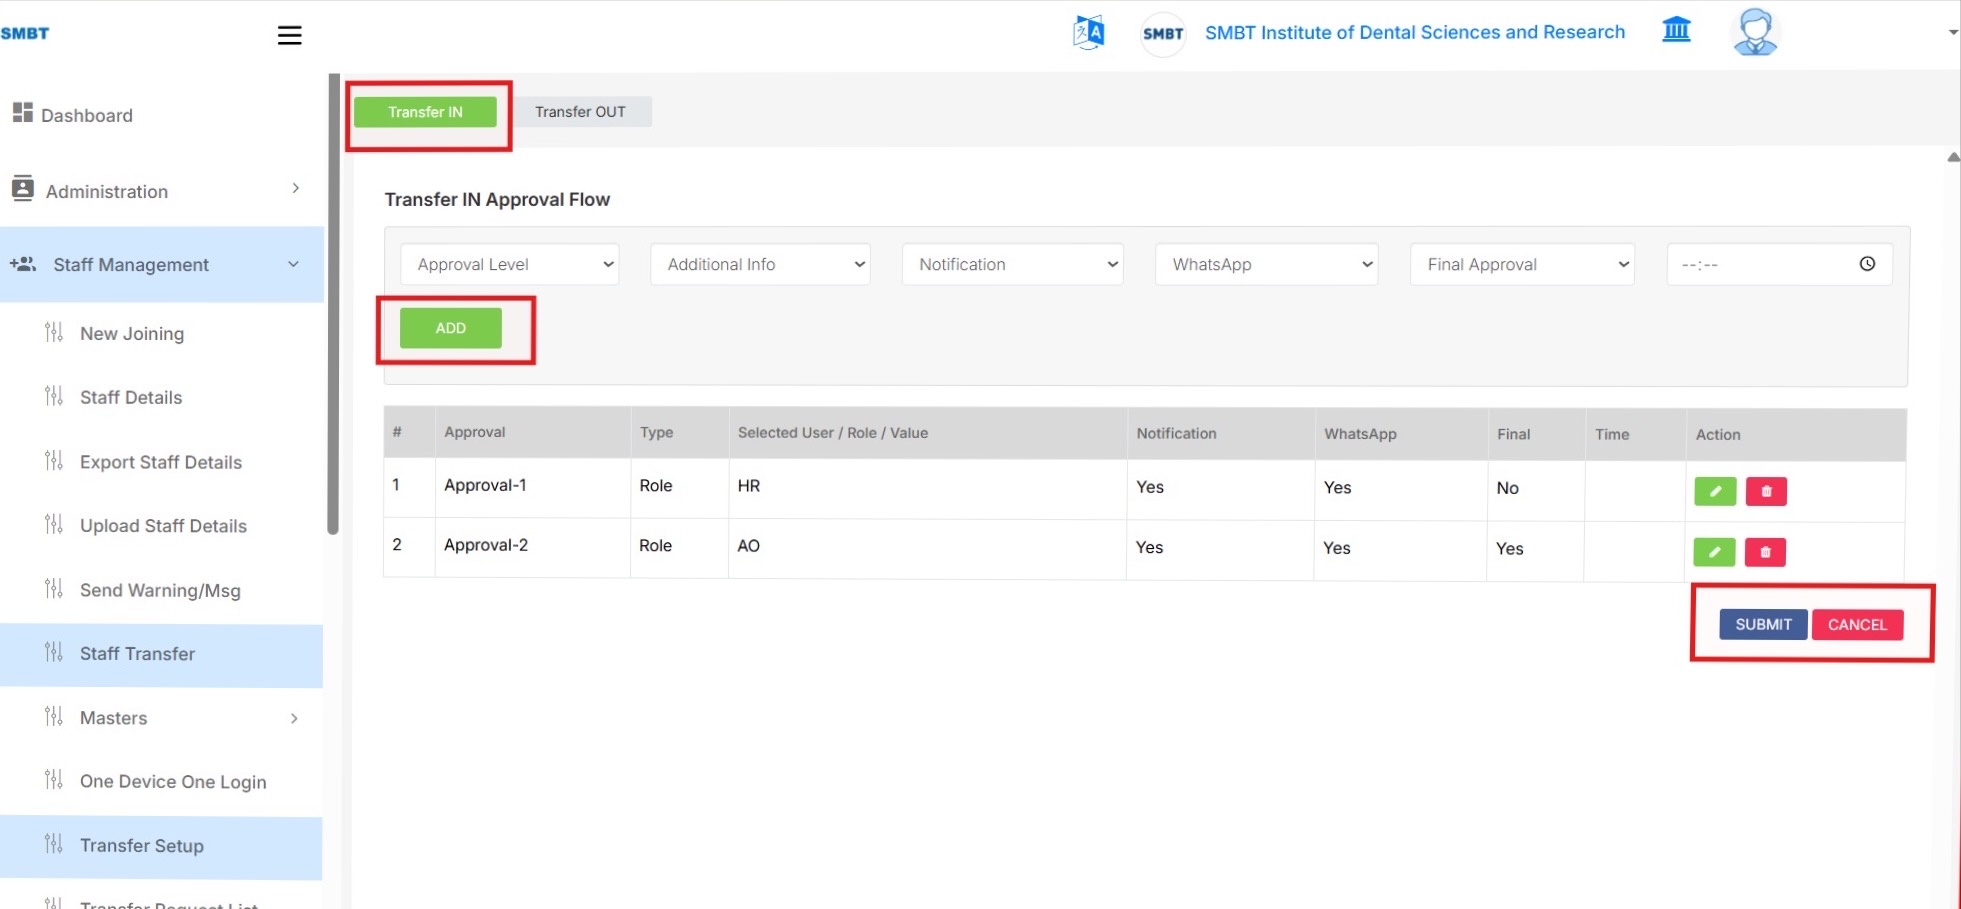
Step 1 - Configure Transfer IN Approval Setup
- Go to Staff Management and click Transfer Setup.
- Select the Transfer IN tab.
- Choose:
- Approval Level
- Additional Info
- Notification
- WhatsApp Notification
- Final Approval
- Time Duration (Optional)
- Click ADD to insert the approval level into the list.
- Add all required approval levels for the receiving/new institute.
- Set Final Approval = Yes only for the last approval level.
- Click SUBMIT to save the Transfer IN approval setup.
Screen Reference
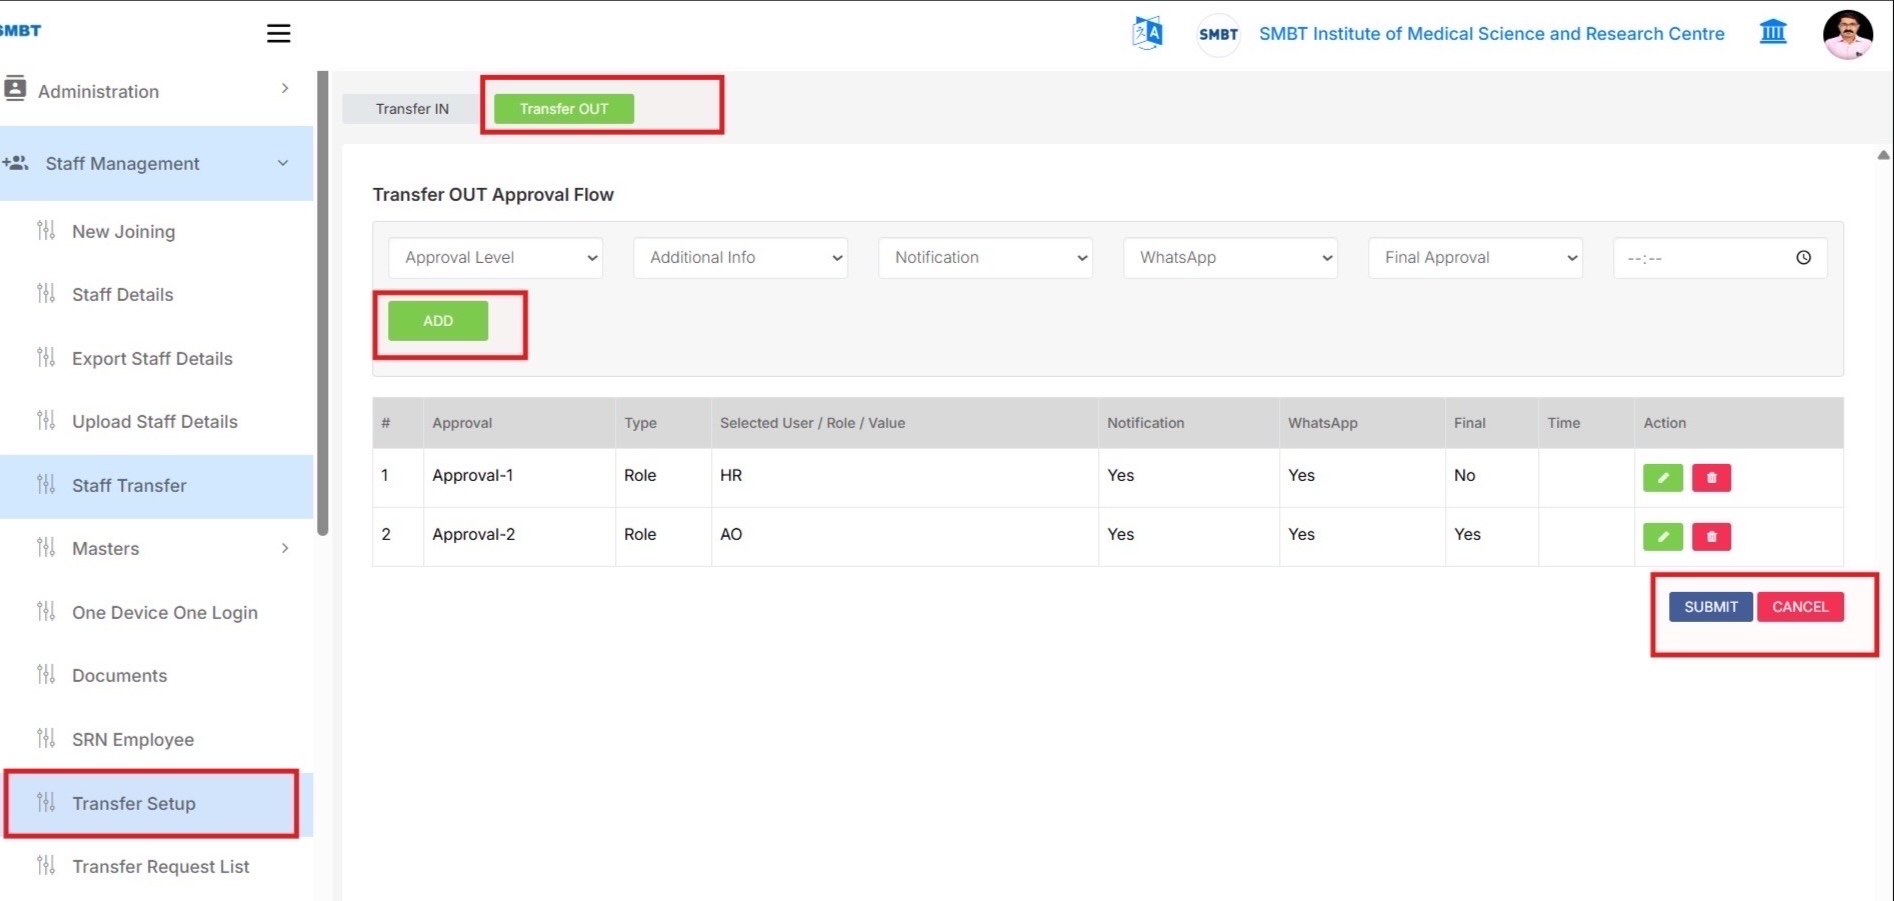
Step 2 - Configure Transfer OUT Approval Setup
- On the same Transfer Setup screen, select the Transfer OUT tab.
- Add approval levels for the current/source institute in the same way.
- Click ADD after selecting each approval level.
- Set Final Approval = Yes only for the last approval level.
- Click SUBMIT to save the Transfer OUT approval setup.
Note:
The screen layout is the same as Transfer IN. Select the Transfer OUT tab before adding Transfer OUT approvers.
Screen Reference
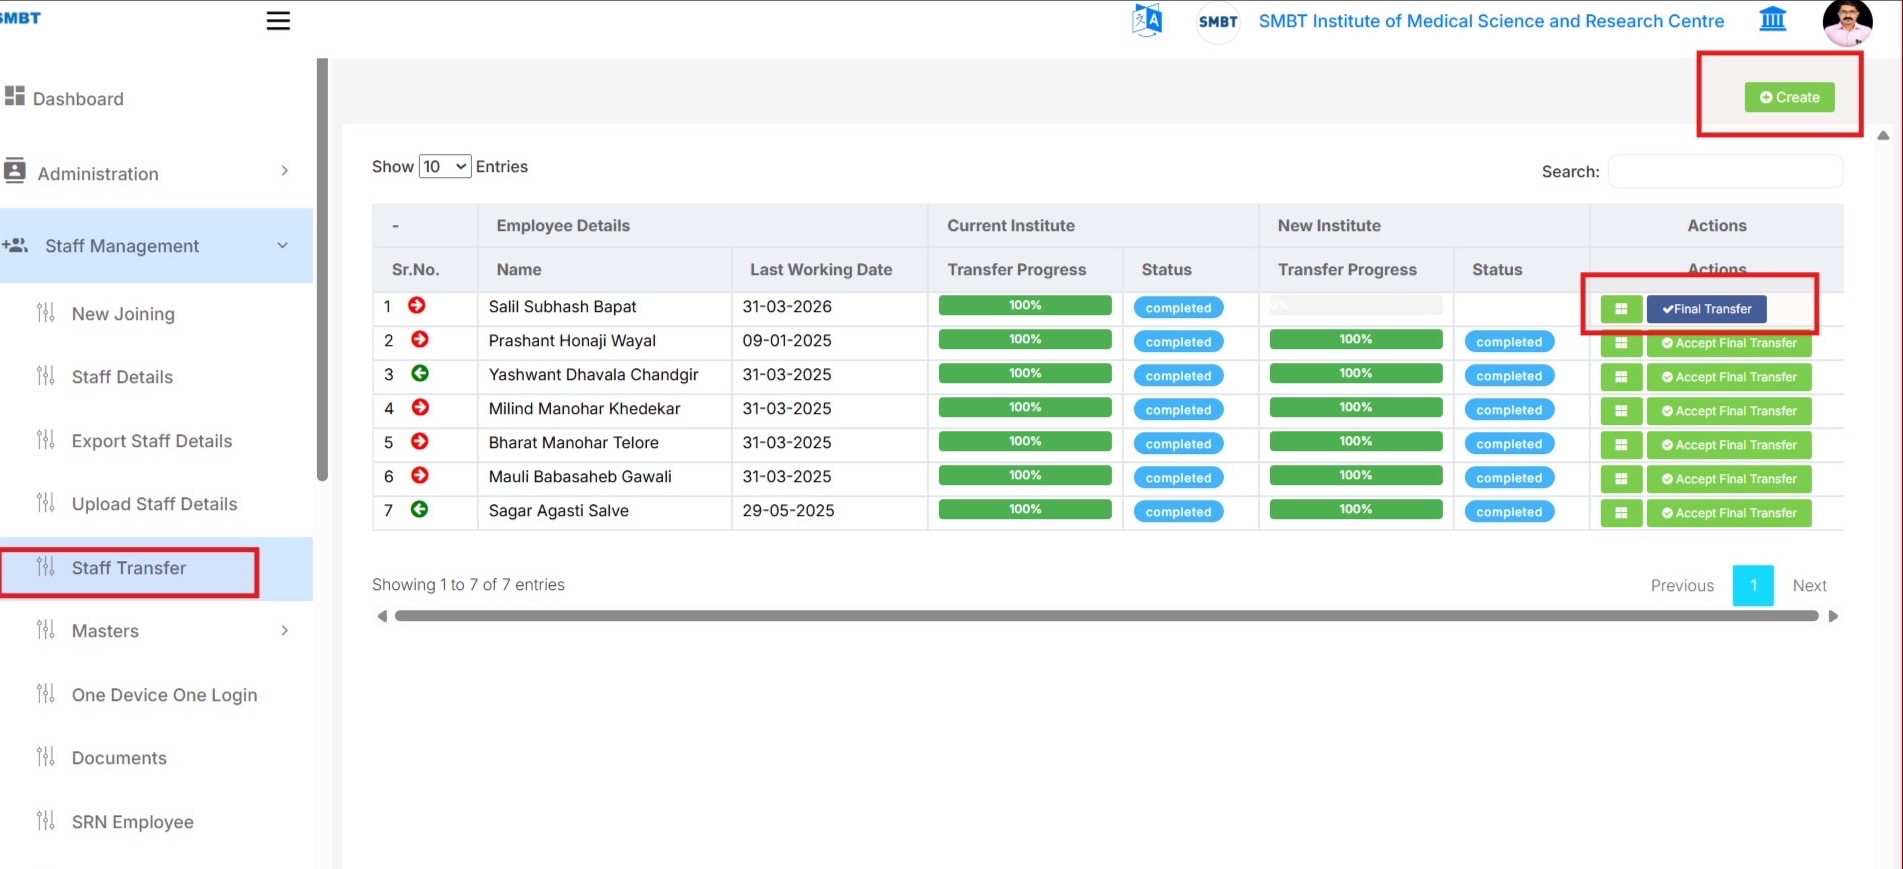
Step 3 - Open Staff Transfer List and Click Create
- Go to Staff Management and click Staff Transfer.
- The staff transfer list displays:
- Employee transfer records
- Current institute progress
- New institute progress
- Click Create from the top-right side to create a new transfer request.
- Use action buttons to:
- View details
- Perform Final Transfer
- Accept Final Transfer
Screen Reference
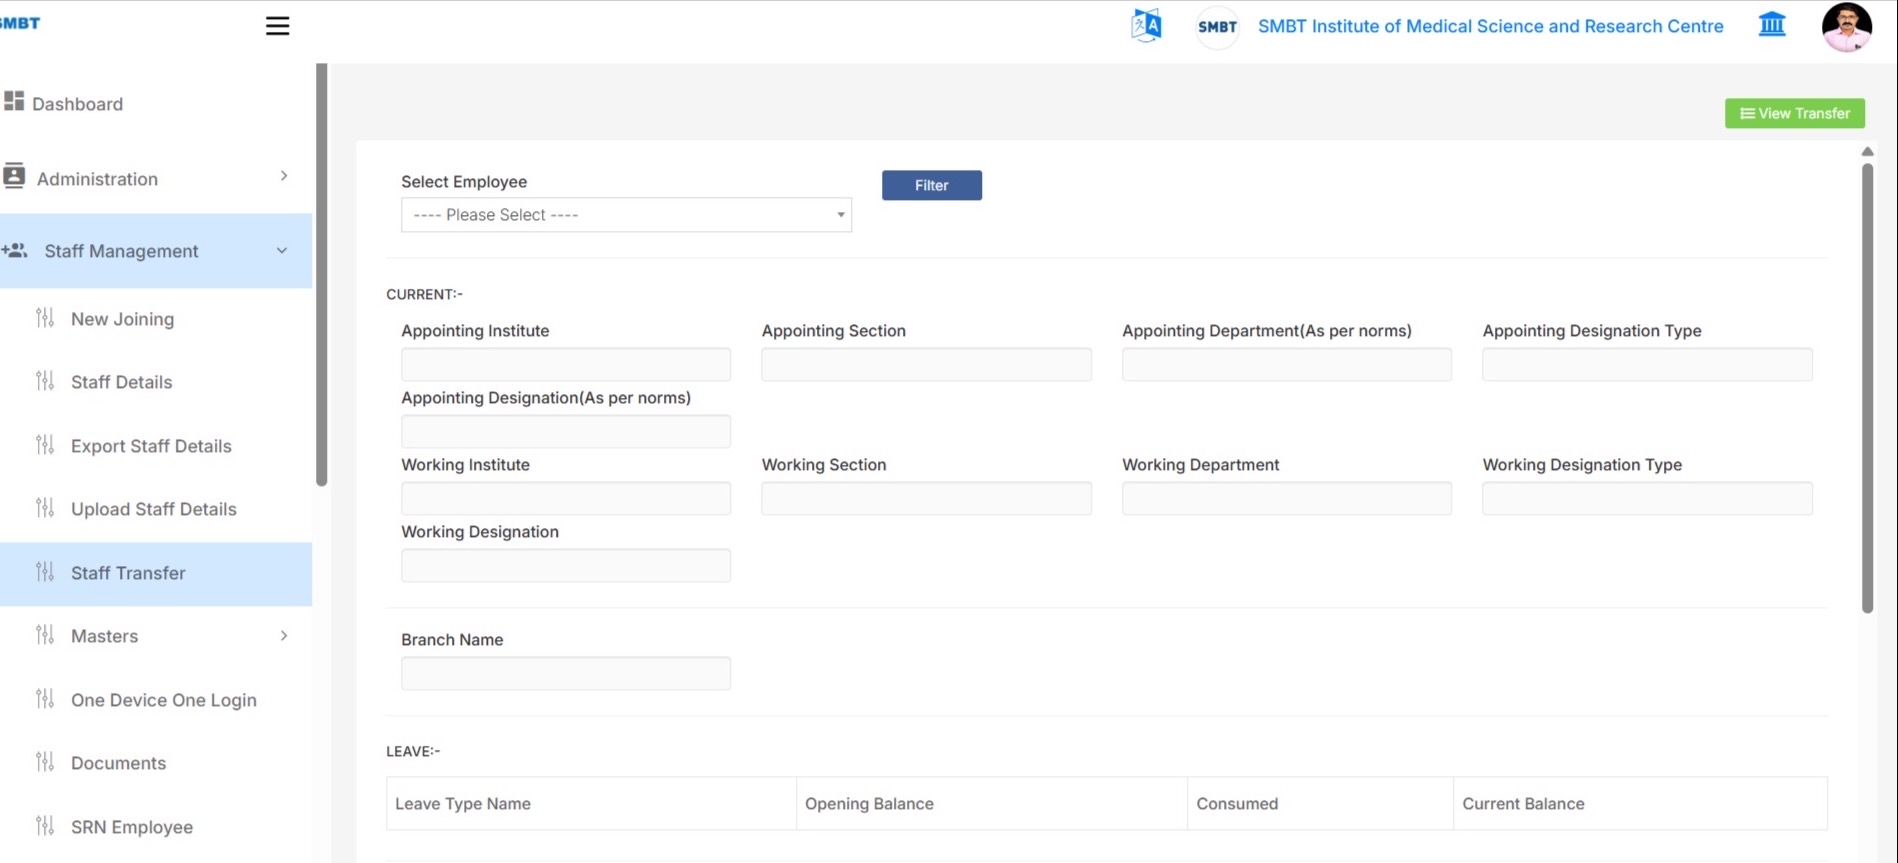
Step 4 - Select Employee and Load Current Details
- On the transfer create screen, select the employee from the Select Employee dropdown.
- Click Filter to load employee details.
The system loads: - Current appointing institute - Working institute - Department - Designation - Branch - Leave details - Salary details
- Verify current employee details before entering new transfer details.
Screen Reference
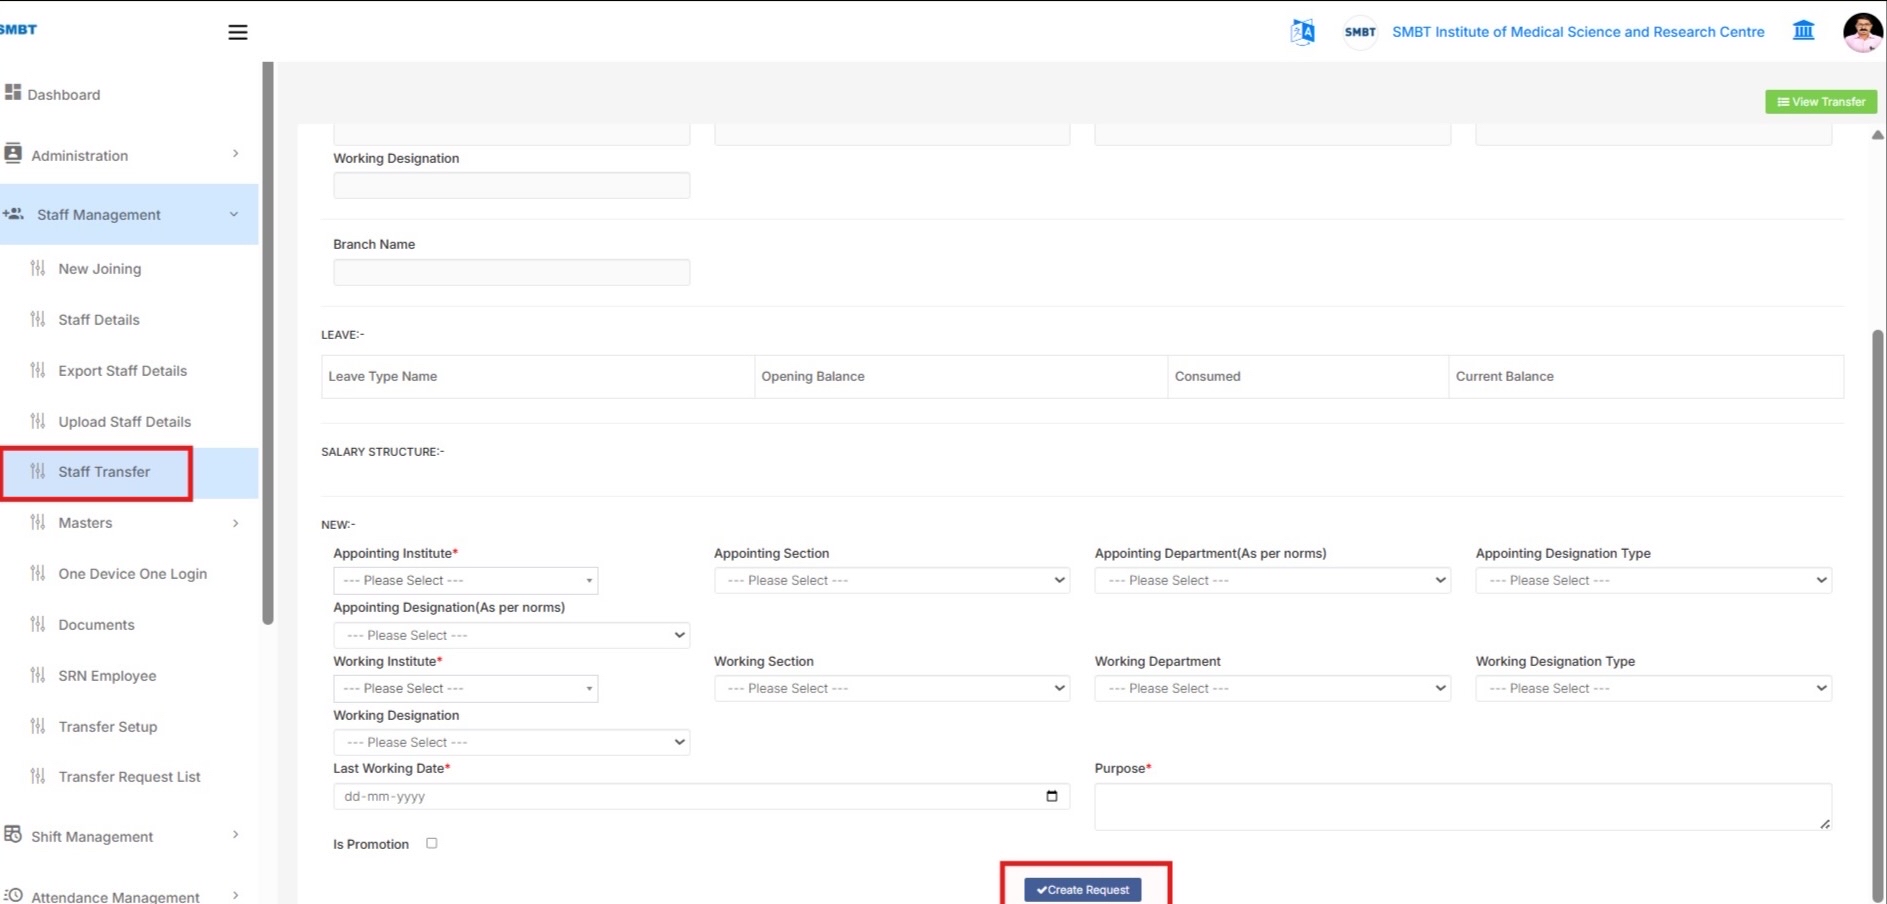
Step 5 - Fill New Transfer Details and Create Request
In the NEW section:
- Select:
- Appointing Institute
- Working Institute
- Section
- Department
- Designation Type
-
Designation
-
Enter:
- Last Working Date
-
Purpose of transfer
-
Select Is Promotion only if transfer includes promotion.
-
Click Create Request.
This initiates the Transfer OUT approval flow.
Screen Reference
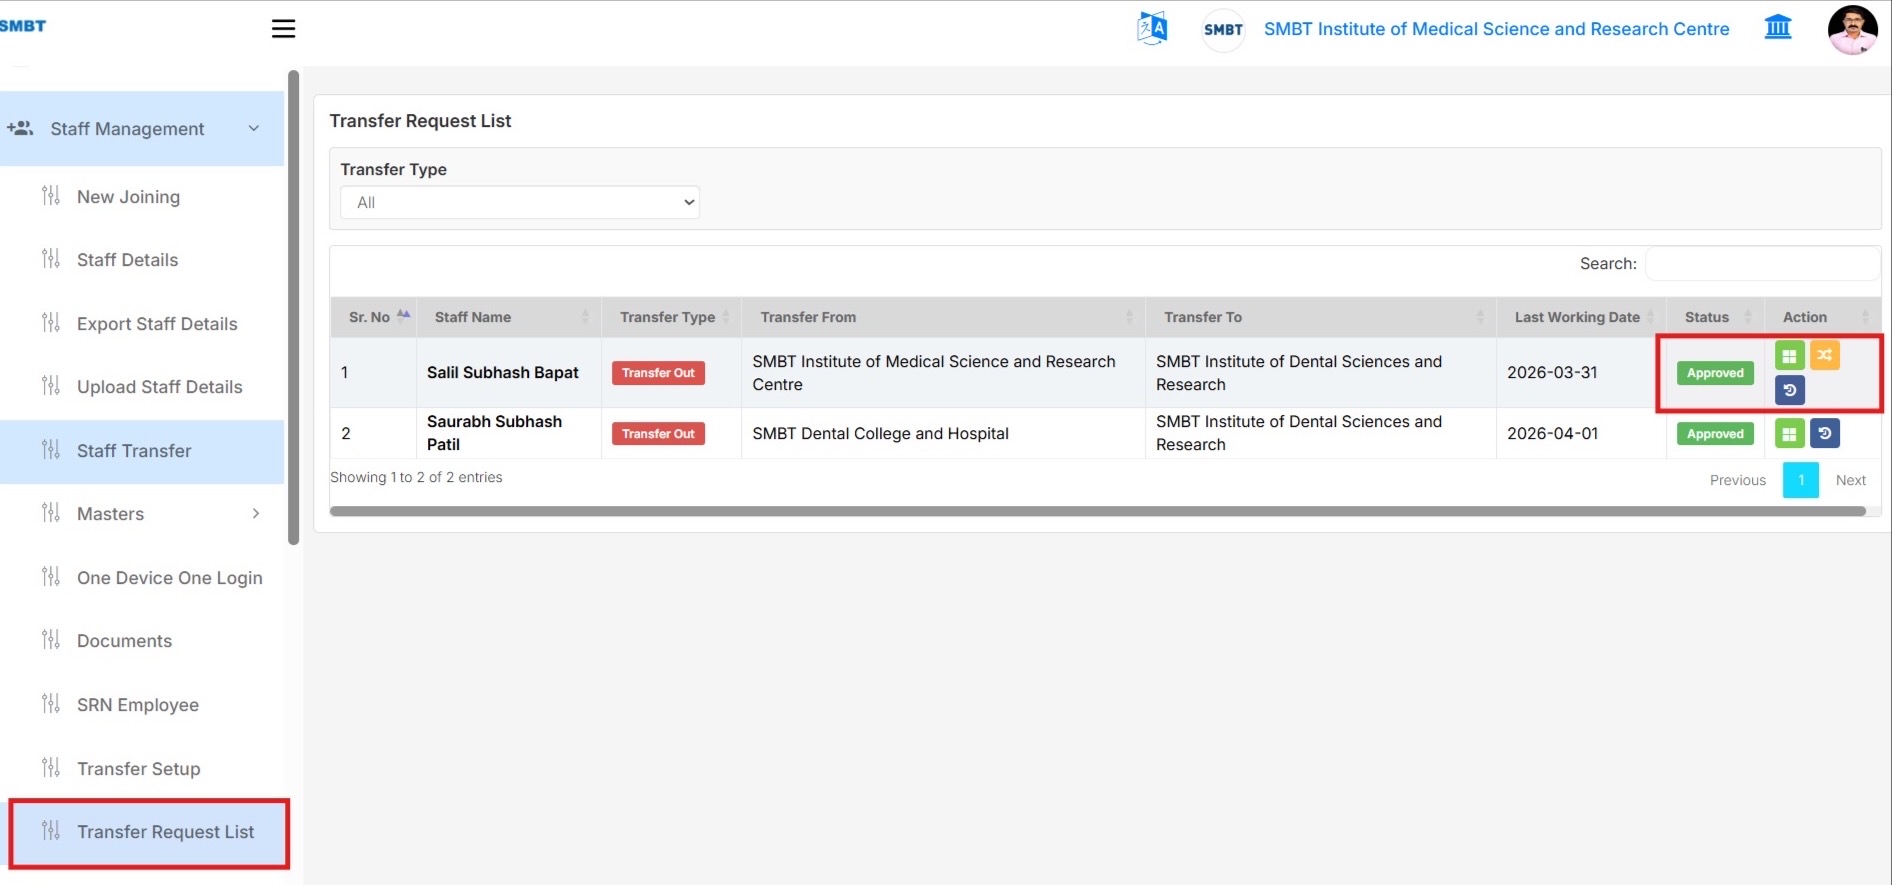
Step 6 - Approve or Reject from Transfer Request List
- Go to Staff Management and click Transfer Request List.
- Only approval-related requests assigned to the logged-in approver are displayed.
- Use Transfer Type filter to view:
- All
- Transfer IN
-
Transfer OUT
-
Click View to open transfer request details.
- Click:
- Approve
- Reject
for pending requests assigned to the logged-in user.
- Approved requests remain visible with updated status.
Screen Reference
Step 7 - Verify Approval Level Status
- Open transfer request details to check approval flow history.
Current Institute Approval Level Status
Shows Transfer OUT approval progress.
New Institute Approval Level Status
Shows Transfer IN approval progress.
The table displays: - Approver Name - Institute - Department - Designation - Status - Date & Time - Remarks
Step 8 - Final Transfer and Accept Final Transfer
- After Transfer OUT approval is completed:
-
Final Transfer action becomes available.
-
Click Final Transfer to initiate Transfer IN approval flow for the new institute.
-
After Transfer IN approval is completed:
-
Accept Final Transfer action becomes available.
-
Click Accept Final Transfer to complete the transfer and archive the request.
-
Transfer status will display:
- Completed
- Accepted
Screen Reference

Important Notes
- Transfer IN and Transfer OUT approval setups must be configured before creating transfer requests.
- Transfer OUT approval is handled by the current/source institute.
- Transfer IN approval is handled by the new/receiving institute.
- Final Transfer should be performed only after Transfer OUT approval completion.
- Accept Final Transfer should be performed only after Transfer IN approval completion.
- Transfer Request List shows requests based on logged-in approval employee mapping.
Summary
The Staff Transfer Module helps users to:
- Configure approval workflows
- Create transfer requests
- Approve or reject transfers
- Track approval progress
- Perform Final Transfer
- Accept completed transfers